P. 8
© 2004 Sportcraft, Ltd.
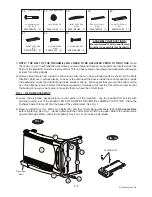
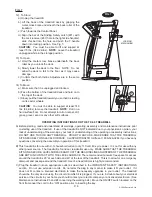
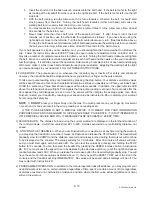
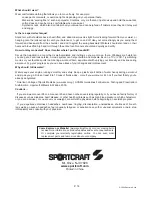
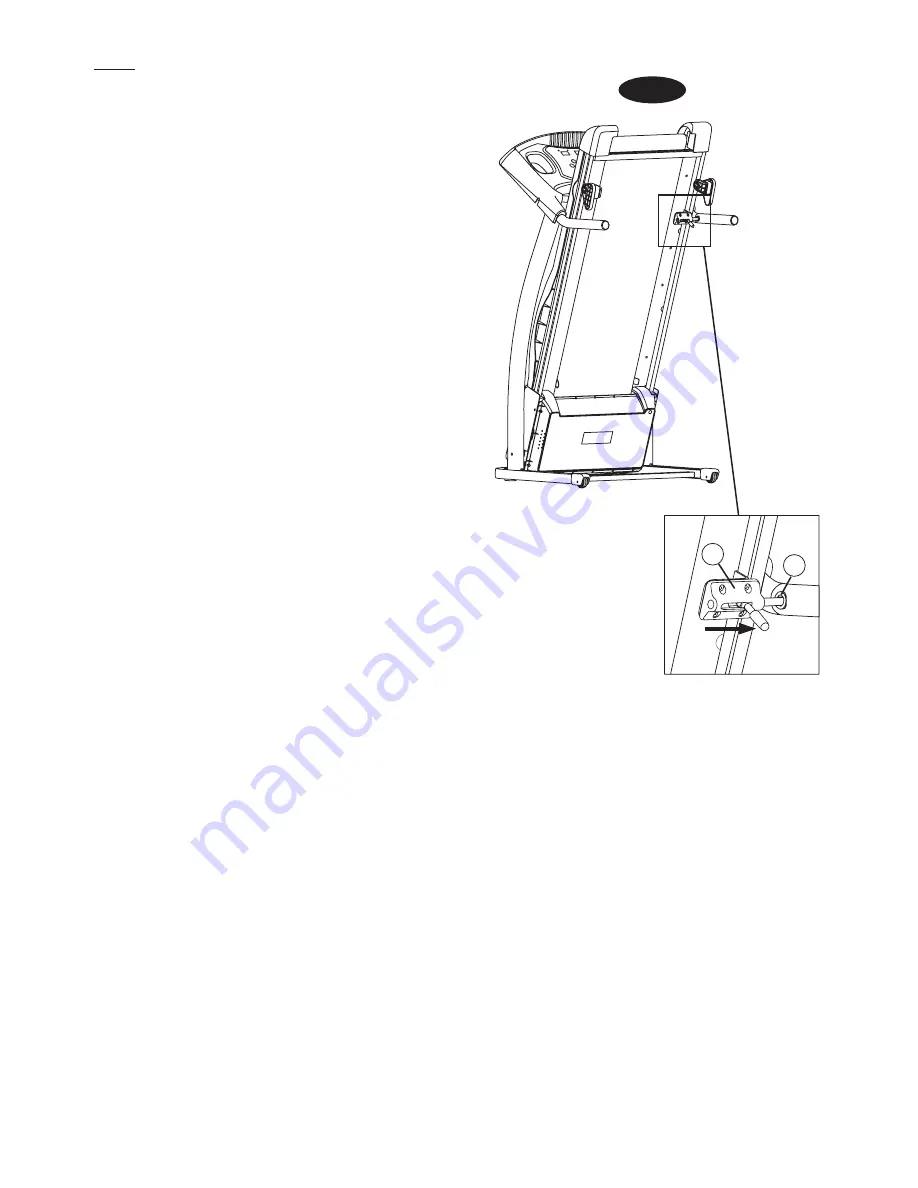
FIG. 7
21
37
FIG. 7
12) To Store:
a) Unplug the treadmill.
b) Lift the back of the treadmill deck by gripping the
metal cross brace underneath the back roller of the
treadmill.
c) Push towards the Control Panel.
d) Align the bar of the Sliding Safety Latch (#21) with
the Lock receiver (#37) hole in the right side handrail;
slide this bar into the hole and push the T handle
down into locking position. See Fig. 7.
CAUTION
: You must be able to lift and support at
least 75 lbs. (34.02 kilos).
NOTE
: Leave the treadmill
unplugged while in the storage position.
13) To Open:
a) Hold the metal cross brace underneath the back
roller as you unlock the deck.
b) Slowly lower the deck to the floor. NOTE: Do not
allow the deck to fall to the floor as it may cause
damage.
c) Confirm that both Incline Adjusters are in the same
po
sition.
14) To Move:
a) Make sure that it is unplugged and locked.
b) Face the bottom of the treadmill deck and hold on to
the top of the deck.
c) Slowly pull the treadmill toward you so that it is resting
on its castor wheels.
CAUTION
: You must be able to support at least 140
lbs. (64 kilos) to move the treadmill.
NOTE
: Roll on a
hard surface floor. Do not attempt to roll on carpet, dirt,
grass, gravel, sand or any other soft surfaces.
LOCKING
MECHANISM
OPERATING INSTRUCTIONS FOR THE TX 4.9 TREADMILL
A) Before starting, read and understand all warnings, operating, assembly and maintenance instructions prior
to starting use of the treadmill. If use of the treadmill is NOT indicated due to your physician’s opinion, your
lack of understanding of the warnings, your lack of understanding of the operating or assembly instructions,
DO NOT USE THIS OR ANY TREADMILL. PRIOR TO ANY USE, MAKE SURE THAT THE TREADMILL
SITS SECURELY ON A LEVEL SURFACE. Call SPORTCRAFT® toll free at 1 800-526-0244 if you have any
questions concerning the assembly or operation of this treadmill.
B) This treadmill is for use with U.S. household current only, 110 volt, 60-cycle power. It is not for use with any
other power source. The treadmill is for indoor, residential use only. MAKE SURE THAT THE TREADMILL
SITS ON A SECURE, LEVEL SURFACE AND THAT THE REAR INCLINE ADJUSTERS OF THE TREADMILL
ARE BOTH IN CONTACT WITH THE LEVEL SURFACE. The recommended minmum free space for access
around the treadmill is 20” at each side and 40” at the rear of the treadmill. This is to allow for an emergency
dismount and passage around the treadmill. Use of a treadmill mat is highly recommended.
C) Plug the treadmill into an appropriate outlet as described in the IMPORTANT SAFETY INSTRUCTIONS
section. Do not use extension cords. Do not alter the plug in any manner to make it fit your outlet. If it
does not fit, contact a licensed electrician to make the necessary upgrades in your outlet. The treadmill
should be the only device using the circuit into which it is plugged. If you are in doubt about your electrical
service or the circuits in your home you should contact your electric company or a licensed electrician. (See
Maintenance Instructions #3 and #4 concerning the walking belt.) Move the ON/OFF switch located on the
front frame near the cord to the “ON” position prior to inserting the key.


