background image

30

Game Workout

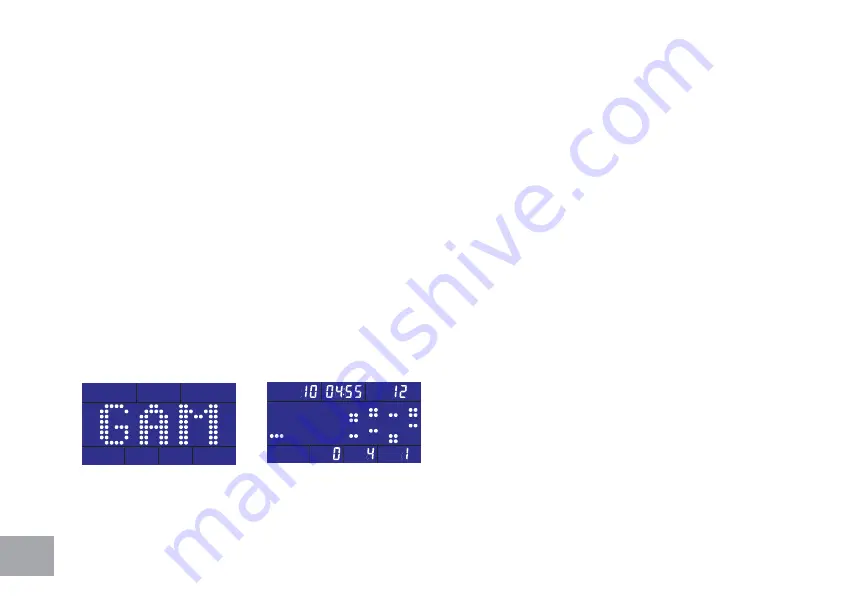
To choose GAME workout mode (Fig. 11-1)

Pressing 

Start/Stop

 button and begins the 

GAME

 workout mode (

11-2

).

The goal of the Game Workout Mode is the manuveur your user dots through an obstacle field by 
rowing faster or slower to raise/lower the use dot sprite.

Three dots at left side represents the user position and the image shift one profile left per second and 

continue to scroll.

The position of the user will not shift. However, the faster the user rows, the higher the user’s position. 

When there is no input, the position of the user goes down to the lowest. The height of the user’s 

position is equivalent to the speed the user strokes.

The time for the game workout starts counting down from 5 minutes and ends when time is up.

Fig 11-1

Fig 11-2

Содержание XRW600

Страница 1: ...XRW600 Rower OWNER S MANUAL...

Страница 2: ......

Страница 3: ...W600 ASSEMBLY INSTRUCTIONS 14 CONSOLE OPERATION 19 PROGRAMMABLE FEATURES 34 USING HEART RATE TRANSMITTER 37 GENERAL MAINTENANCE 38 MANUFACTURER S LIMITED WARRANTY Thank you for purchasing our product...

Страница 4: ...u purchased this Rower is your administrator for all Spirit Fitness warranty and service needs Their responsibility is to provide you with the technical knowledge and service personnel to make your ex...

Страница 5: ...ces Do not operate where aerosol spray products are being used or where oxygen is being administered Sparks from the motor may ignite a highly gaseous environment Never drop or insert any object into...

Страница 6: ...ould have a dedicated 15 amp circuit breaker Grounding Instructions This product must be grounded If the Rower should malfunction or breakdown grounding provides a path of least resistance for electri...

Страница 7: ...such as watching television reading etc These distractions may cause you to lose balance which may result in serious injury Do not use excessive pressure on console control keys They are precision se...

Страница 8: ...Locate the hardware package Remove the tools first Remove the hardware for each step as needed to avoid confusion The numbers in the instructions that are in paren thesis are the item number from the...

Страница 9: ...9 LEVELERS FOOT PEDALS LEVELERS FRONT STABILIZER REAR STABILIZER ALUMINUM RAIL MAIN FRAME SEAT CONSOLE...

Страница 10: ...ESCRIPTION QTY 109 FLAT WASHER 3 8 X19X1 5T 3 120 BOLT 3 8 X3 4 3 1 Gather HARDWARE FOR STEP 1 2 Use the WRENCH 130 to tighten 3 BUTTON HEAD SOCKET BOLTS 120 together with 3 FLAT WASHERS 109 to secure...

Страница 11: ...PART TYPE DESCRIPTION QTY 101 BOLT M6X10mm 4 1 Gather HARDWARE FOR STEP 2 2 Use ALLEN WRENCH 126 to tighten 4 BUTTON HEAD SOCKET BOLTS 101 through the ALUMINUM TRACK 51 then secure the ALUMINUM TRACK...

Страница 12: ...6 SPLIT WASHER 8X1 5T 6 123 BOLT M8X15mm 6 1 Gather HARDWARE FOR STEP 3 2 Attach the other end of the ALUMINUM TRACK 51 to FOLDING END ASSEM BLY 6 of the Main Frame 1 and use ALLEN WRENCH 130 to tight...

Страница 13: ...er HARDWARE FOR STEP 4 2 Use Combination M5 ALLEN WRENCH PHILLIPS HEAD SCREW DRIVER 127 to tighten 6 BUTTON HEAD SOCKET BOLT 129 and 6 FLAT WASHERS 121 to install then LEFT AND RIGHT PEDALS 4 5 on the...

Страница 14: ...14 XRW600 CONSOLE OPERATION Large Blue LED Matrix Window T en innovative programs offer a variety of work outs Easy T ouch Control Buttons Built in Heart Rate Receiver...

Страница 15: ...tivated or no rowing activity lasts for 1 minute it turns off automatically Window Functions Stroke min S M value shows the equivalent strokes per minute Time It shows the time Range of time 00 00 99...

Страница 16: ...e is based on built in estimates of the average user and may not reflect accuracy To have a more accurate basis of caloric burn please contact your physician and they can assist you Watts The Watts wi...

Страница 17: ...500M TIME and repeat again by pressing MODE button it goes back with SCAN function recyclable Key button Function Any valid key button pressed will generate a beep sound When in power off mode pressi...

Страница 18: ...p key button enters Manual workout mode To confirm the value the window is showing when setting the parameter under each target workout mode and to start the workout mode Press to end the current work...

Страница 19: ...ng MODE button to switch and select a workout mode with the workout sequence shown as below MANUAL DISTANCE TIME CALORIES 20 10 INTERVAL 10 20 INTERVAL CUSTOM INTERVAL Fat Burn Cardio Strength Game Th...

Страница 20: ...DE button to cancel scanning with wave pattern only Pressing MODE again switches the image to show 500M TIME Pressing UP or DOWN button and adjusts the resistance level which is shown at bottom right...

Страница 21: ...the workout Under the workout mode pressing UP or DOWN key button adjusts the resistance level When the distance is counted down to 0 the workout completes and the buzzer sounds with a long beep If r...

Страница 22: ...el Time window counts down from the setting time value and shows the remaining time of the workout When time is counted down to 0 00 the workout completes and the buzzer sounds with a long beep If row...

Страница 23: ...ODE again switches the image to show 500M TIME Calorie window counts down from the setting target calorie value and shows the remaining calorie of the workout Under the workout mode pressing UP or DOW...

Страница 24: ...e at the center of LCD shows time count down of current workout and wave Fig 5 2 or rest time count down and mark Fig 5 3 Under the workout mode pressing UP or DOWN key button adjusts the resistance l...

Страница 25: ...e at the center of LCD shows time count down of current workout and wave Fig 6 2 or rest time count down and mark Fig 6 3 Under the workout mode pressing UP or DOWN key button adjusts the resistance l...

Страница 26: ...rm the setting and start the workout mode The value at right side of the matrix window flashes for setting the rest time Use UP DOWN buttons to adjust and set the workout time The default time is 10 s...

Страница 27: ...rowing continues the time count down repeats Fat Burn To choose Fat Burn workout mode Fig 8 1 Pressing Start Stop button and begins the workout mode or setting the workout time Use UP DOWN buttons to...

Страница 28: ...buzzer sounds with a long beep If rowing continues the time count down repeats Cardio Workout To choose cardio workout mode Fig 9 1 Pressing Start Stop button and begins the workout mode or setting t...

Страница 29: ...ut mode Fig 10 1 Pressing Start Stop button and begins the workout mode or setting the workout time Use UP DOWN buttons to adjust the time The increment of adjustment is 5 minute 99 00 maximum Press S...

Страница 30: ...ts at left side represents the user position and the image shift one profile left per second and continue to scroll The position of the user will not shift However the faster the user rows the higher...

Страница 31: ...press the Release Lever 12 2 Lift and fold the AluminumTrack until it locks into place 3 To fold Rear Stabilizer turn Knob 47 counterclockwise until loosened Pull Knob to release and fold Rear Stabil...

Страница 32: ...rt Rate This can be accomplished by using the following formula 220 minus your age This will give you the Maximum Heart Rate MHR for someone of your age To determine the effective heart rate range for...

Страница 33: ...ining heart rate for either cardiovascular fitness or weight loss is represented by two different lines that cut diagonally through the chart A definition of the lines goal is in the bottom left hand...

Страница 34: ...on of Effort 6 Minimal 7Very very light 8Very very light 9Very light 10Very light 11 Fairly light 12 Comfortable 13 Somewhat hard 14 Somewhat hard 15 Hard 16 Hard 17Very hard 18Very hard 19Very very h...

Страница 35: ...fore your work out Some users because of body chemistry have a more difficult time in achieving a strong steady signal at the beginning After warming up this problem lessens 6 Your workout must be wit...

Страница 36: ...ms 4 Perimeter fence for a pet 5 Some people have problems with the transmitter picking up a signal from their skin If you have problems try wearing the transmitter upside down Normally the transmitte...

Страница 37: ...d to be tightened as much as possible It may be necessary to use a larger wrench than the one provided if you cannot tighten the bolts sufficiently I cannot stress this point enough 90 of calls to the...

Страница 38: ...cessible for servicing including any item that was not part of the Rower at the time it was shipped from the factory 5 Damages to the Rower finish during shipping installation or following installatio...

Страница 39: ...question as to where to obtain service contact our service department at 870 935 1107 4 Spirit Fitness obligation under this warranty is limited to repairing or replacing at Spirit Fitness option the...

Страница 40: ...800 258 4555 spiritservice spiritfitness com www spiritfitness com Spirit Fitness 3000 Nestle Road Jonesboro AR 72401 XRW600 Owners Manual 2018 All Rights Reserved Revision 5 08 22 2018...

Отзывы: