background image

» spinner® pace owner’s manual

7

WARNING!  

save


these


instructions


THE FLYWHEEL MOMENTUM OF THE BIKE WILL KEEP THE PEDALS TURNING EVEN 
AFTER THE USER STOPS PEDALING OR IN THE EVENT THE USER’S FEET SLIP OFF 
THE PEDALS. DO NOT DISMOUNT THE BIKE OR ATTEMPT TO REMOVE YOUR FEET 
FROM THE PEDALS UNTIL BOTH THE PEDALS AND THE FLYWHEEL HAVE STOPPED 
COMPLETELY. FAILURE TO COMPLY MAY LEAD TO LOSS OF CONTROL AND SERIOUS 
PERSONAL INJURY.

4

4) 

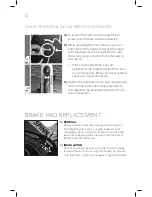
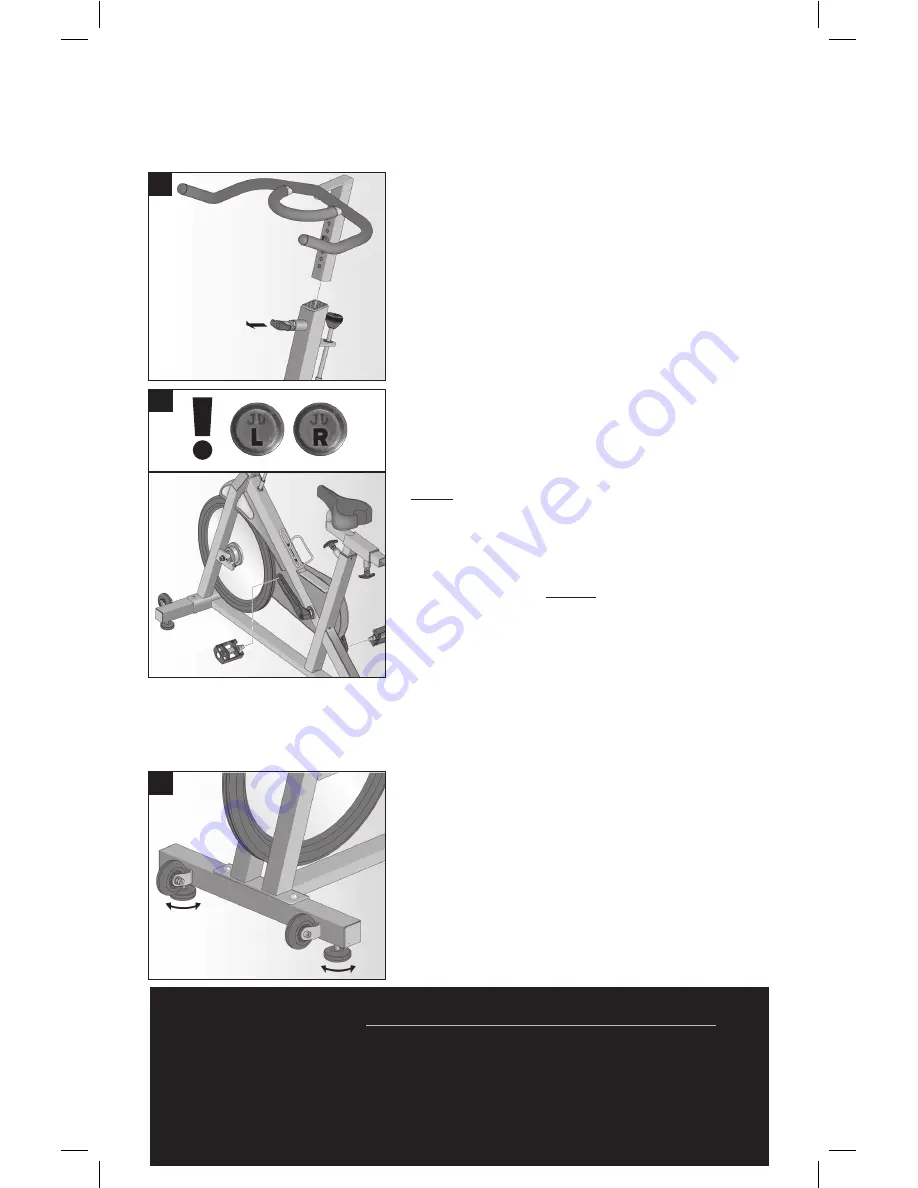
INstALL tHE HANdLEBARs

Unscrew, pull out and hold the handlebar pop-
pin. Slide the handlebar post all the way into 
the handlebar tube. Release the handlebar 
pop-pin. Adjust the handlebars to make sure 
pop-pin is engaged. Tighten the handlebar 
pop-pin securely.


5) 

INstALL tHE PEdALs

Turn the resistance knob all the way to
the right until crank arms are immobilized.
Remove pedal packaging.  

note:

 Pedals are always tightened by turning the

spindle toward the front of the bike. Be sure to
install the pedals on the correct side of the bike.
The pedal spindles are marked “L” (LEFT) and
“R” (RIGHT) to aid in assembly. Left and right are
referenced from a seated position on the bike. 

Install the LEFT PEDAL on the LEFT CRANK.
Use the multi-wrench supplied and turn

counterclockwise

 to tighten. Install the

RIGHT PEDAL on the RIGHT CRANK. Use the
multi-wrench supplied and turn 

clockwise


to tighten. Remember, pedals are always 
tightened by turning the spindle toward the 
front of the bike.
Be sure both pedals are tightened securely.

6) LEVEL tHE BIKE

Move the bike to the location where it will be 
used. Your Spinner® Pace requires 4’ x 6’ of 
floor space for proper operation. Rock the bike 
gently to check for wobble. If needed, use 
the leveling adjusters under the front and rear 
stabilizer bars to steady the bike.  

6

5

Содержание spinner pace

Страница 1: ...Owner s manual spinner pace...

Страница 2: ...Troubleshooting 10 Lubricating the Chain 11 Chain Tension Adjustment 12 Brake Pad Replacement 13 Warranty 2009 11 16 0013797 Copyright 2011 Mad Dogg Athletics Inc All rights reserved Spin Spinner Spin...

Страница 3: ...h the help of the Spinning program The Spinner bike with accompanying DVDs gives you everything you need to join them Ready to get started These guidelines will give you the insight you need to change...

Страница 4: ...bike Do not insert any object hands or feet into any openings or expose hands arms or feet to the drive mechanism or any other potentially moving parts of the bike The body weight for individuals rid...

Страница 5: ...ons at a slow pace before attempting to increase your pedaling speed Focus on form posture and smooth transitions between movements Do not use the bike without proper footwear Never operate the bike w...

Страница 6: ...sistance A weighted flywheel to create a non impact workout and facilitate a fluid pedal stroke Your Spinner bike uses a direct drive fixed flywheel system that does not allow you to coast To stop dec...

Страница 7: ...your adjustment be sure to retighten the nuts before riding your bike PREVENTING RUST After each use raise handlebar and seat posts to the highest settings to expose moisture Using an absorbent cloth...

Страница 8: ...pin Slide the seat slider all the way into the seat tube Release the seat slider pop pin Adjust the seat slider to make sure the pop pin is engaged Tighten the seat slider pop pin securely Bike frame...

Страница 9: ...il crank arms are immobilized Remove pedal packaging note Pedals are always tightened by turning the spindle toward the front of the bike Be sure to install the pedals on the correct side of the bike...

Страница 10: ...de to Ride or www spinning com Pedal at a moderate pace and test for proper and smooth resistance changes while varying the amount of turns on the resistance knob To move the bike after testing is com...

Страница 11: ...shorts can make your ride more comfortable Rough dry feeling when increasing resistance Put a few drops of oil underneath the resistance knob and let it run down to the resistance shaft thread barrel...

Страница 12: ...refully and slowly by hand approximately a quarter turn Then stop it tighten the brake again and spray lube onto the next portion of the chain Repeat the above steps a total of six times to lubricate...

Страница 13: ...eel adjustment cover from the chain guard see photos on page 10 2 Using the multi wrench loosen the axle nuts on the right fig 1 and left fig 2 sides of the flywheel Using the multi wrench loosen the...

Страница 14: ...n 6 Tighten the adjustment lock nuts and the axle nuts on both sides alternating from side to side Replace the flywheel adjustment cover before operation CHAiN TENSION ADJUSTMENT CONTINUED BRAKE PAD R...

Страница 15: ...ted under any existing insurance policies the claimant may have Limitations and Exclusions THIS LIMITED WARRANTY DOES NOT APPLY TO COSMETIC DAMAGE IMPERFECTIONS THAT ARE WITHIN DESIGN SPECIFICATION S...

Страница 16: ...IN 7746 www spinning com 2009 11 16 0013797 Copyright 2011 Mad Dogg Athletics Inc All rights reserved Spin Spinner Spinning the Spinning logo Peak Pilates Resist A Ball and Bodyblade are registered tr...

Отзывы: