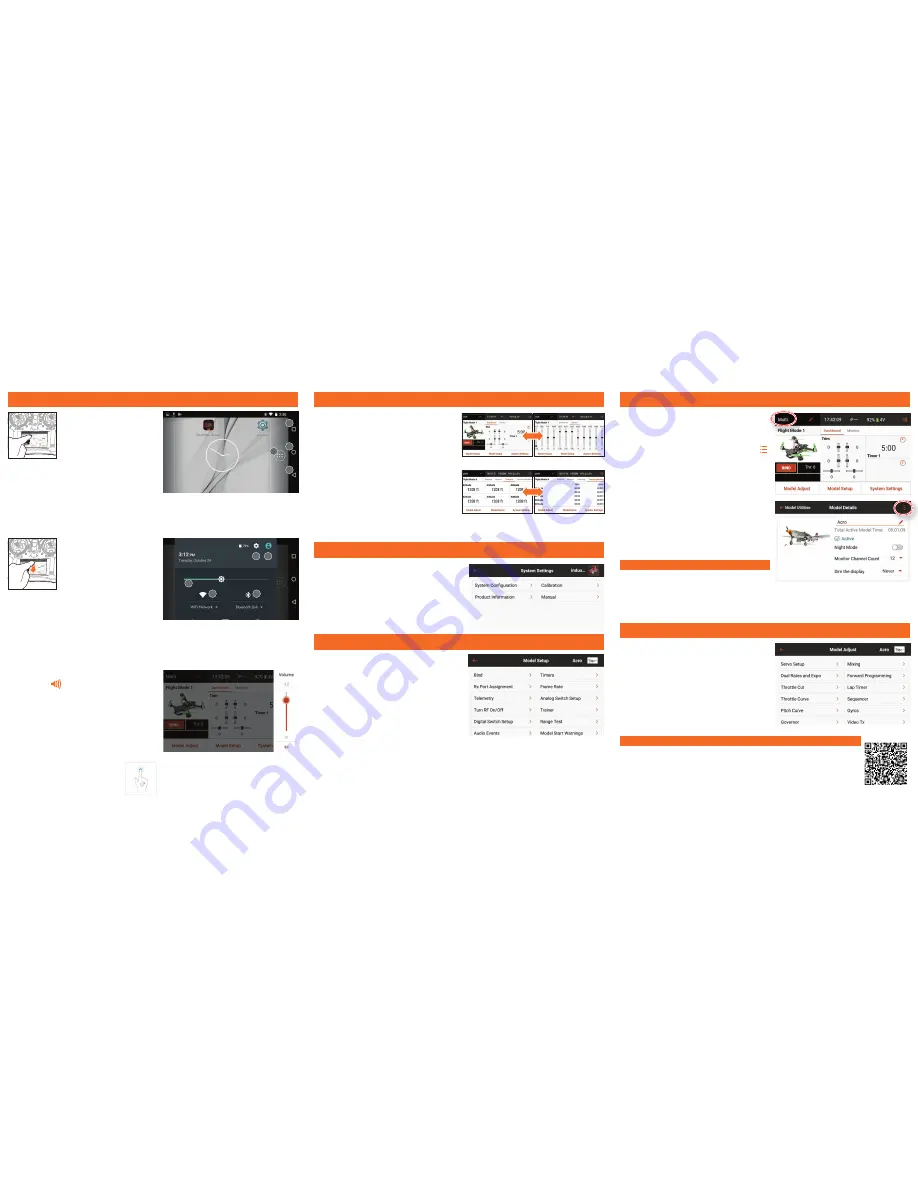
naVigaTion
naVigaTion
modeL seTuP
sYsTem seTTings
creaTing a new modeL
modeL adJusT
The iX12 transmitter is built on top
of the Android operating system and
features a large color touch screen
display.
To navigate around the iX12 use your
finger to tap, swipe and drag icons and
menus found on the display.
• Settings
• User info
• Brightness
• Wi-Fi
• Bluetooth
notification screen
1.
Swipe down from the top of the
screen once to exit full screen mode
and bring the home screen navigation
icons to the front.
2.
Swipe down a second time to roll
down the Notification Screen for quick
access to:
Volume control
Press the Volume
icon in the top right corner of any of
the main screens to change the iX12 volume levels.
Long Press for oK
When you see this icon, press and hold
for approximately 2 seconds to accept the
selection.
1.
Create a new model by pressing the icon at the top left of
the dashboard to access the Model Utilities screen. If RF
is on, the system will open a dialog box to confirm RF will
be turned off to enter this menu.
2.
Press on the expand icon at the top right corner of the
Model Utilities
screen. A drop down menu containing
Add a New Model, Import Models, Export Models
and
Sort Model List
will appear.
3.
Press
Add a New Model
to create a new model and
you will be prompted to create a model from
Default
or
from a
Template
. If Default model is selected, you will be
prompted to select the type for a default model, then click
CREATE
in the dialogue box that appears.
4.
You will then be prompted to confirm your selection. The
model will then be created and will be the active model.
5.
Press the Bind button to bind your model to the
transmitter.
home screen
1.
APP DRAWER:
Contains applications loaded onto the iX12.
2.
BACK:
Return to previous screen.
3.
HoME:
Return to the home screen
4.
ovERvIEW:
Allows switching between any of the running
applications.
Tips
• For more information on operating the iX12 transmitter, the full manual can be accessed from
within System Settings.
• For more information on using the Android OS, scan the QR code.
• Login to Google Play Store for updates to the Spektrum AirWare™ app.
Tip
By pressing on the new model, you are taken to the
Model Details
page where you can access these features:
1.
Tap on the Back Arrow at the top left of the Model Setup
screen to return to the Dashboard.
2.
To setup a model, tap on Model Adjust on the main
Dashboard screen.
3.
A few settings that can be edited in Model Adjust* are:
• Reset Model Timer
• Duplicate Model
• Reset Model
• Edit Model Type
• Delete Model
• User Name
• Inactivity Alarms
• Calibrate
• Language
• Serial Number
• Low transmitter Battery
Alarm
• Flight Mode
• RX Port Assignment
• Warnings
• Frame Rate
• Trainer
• Channel Input
• Flight Mode Setup
• Trim Setup
• Preflight Setup
• Bind
• Telemetry
• Audio Events
• Servo Setup
• Dual Rates/ Expo
• Throttle Cut
• Mixing
• Flap System
*Only available if Telemetry is active.
The Spektrum Airware™ software, which launches
automatically when powering on the transmitter, has 4
main screens that can be quickly accessed by swiping left
or right on the color touch screen display.
• Dashboard:
The main screen displaying Trims, and
Timers as well the model name and image.
• Monitor:
Graphical representation of all control inputs.
• Telemetry Dashboard*:
Displays telemetry information
for each sensor. User selects which items to display on
this page from the Telemetry setup menu. Additional
telemetry pages are available when activated in the
telemetry setup menu.
• Telemetry Min/Max*:
Logs the minimum and maximum
values collected from each telemetry sensor.
From any of the main screens, tap on System Settings to
access System Configuration, Calibration, Manual, and
Product Information to make changes to:
From any of the main screens, tap on Model Setup to make
changes to:
Dashboard
Telemetry
Monitor
Telemetry Min/Max
• Landscape
• Location
• Cast Screen
not shown
1
3
4
2
1
2
3
4
5


