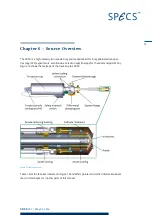


47
XR 50
V3.1 | May 02, 2016
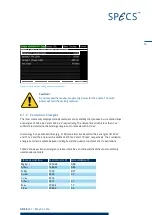
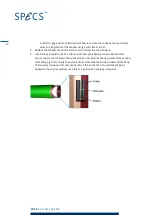
Caution!
We recommend that you do not exceed a bakeout temperature of 120°C in
order to avoid damage to the O-ring.
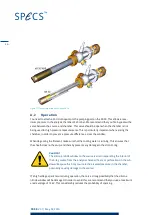
A.3
Replacing the Window
If the window on the front of the source breaks, it is no longer possible to operate the source at
elevated chamber pressures. In such a case, you need to fit a new window, as supplied by
SPECS.
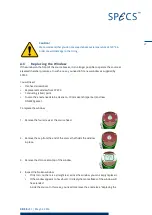
You will need:
Flat-head screwdriver.
Replacement window from SPECS.
Conducting (silver) paint.
In case the anode needs to be cleaned—10 mm wrench (spanner) and new
DN40CF gasket.
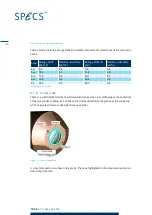
To replace the window:
1. Remove the four screws at the source head.
2. Remove the cap from the end of the source that holds the window
in place.
3. Remove the Viton seal on top of the window,
4. Inspect the broken window:
If it is torn, i.e. there is a straight tear across the window, you can simply replace it.
If the window appears to have burst, it is likely that some flakes of the window will
have landed
inside the source. In this case, you need to remove the anode (see "Replacing the
Содержание XR 50
Страница 1: ...XR 50 XR 50 NAP X Ray Source User Manual V3 1 May 02 2016...
Страница 6: ...XR 50 V3 1 May 02 2016 This page intentionally left vi...
Страница 20: ...XR 50 V3 1 May 02 2016 This page intentionally left 14...
Страница 30: ...XR 50 V3 1 May 02 2016 This page intentionally left 24...
Страница 38: ...XR 50 V3 1 May 02 2016 This page intentionally left 32...
Страница 46: ...XR 50 V3 1 May 02 2016 This page intentionally left 40...
Страница 58: ......


