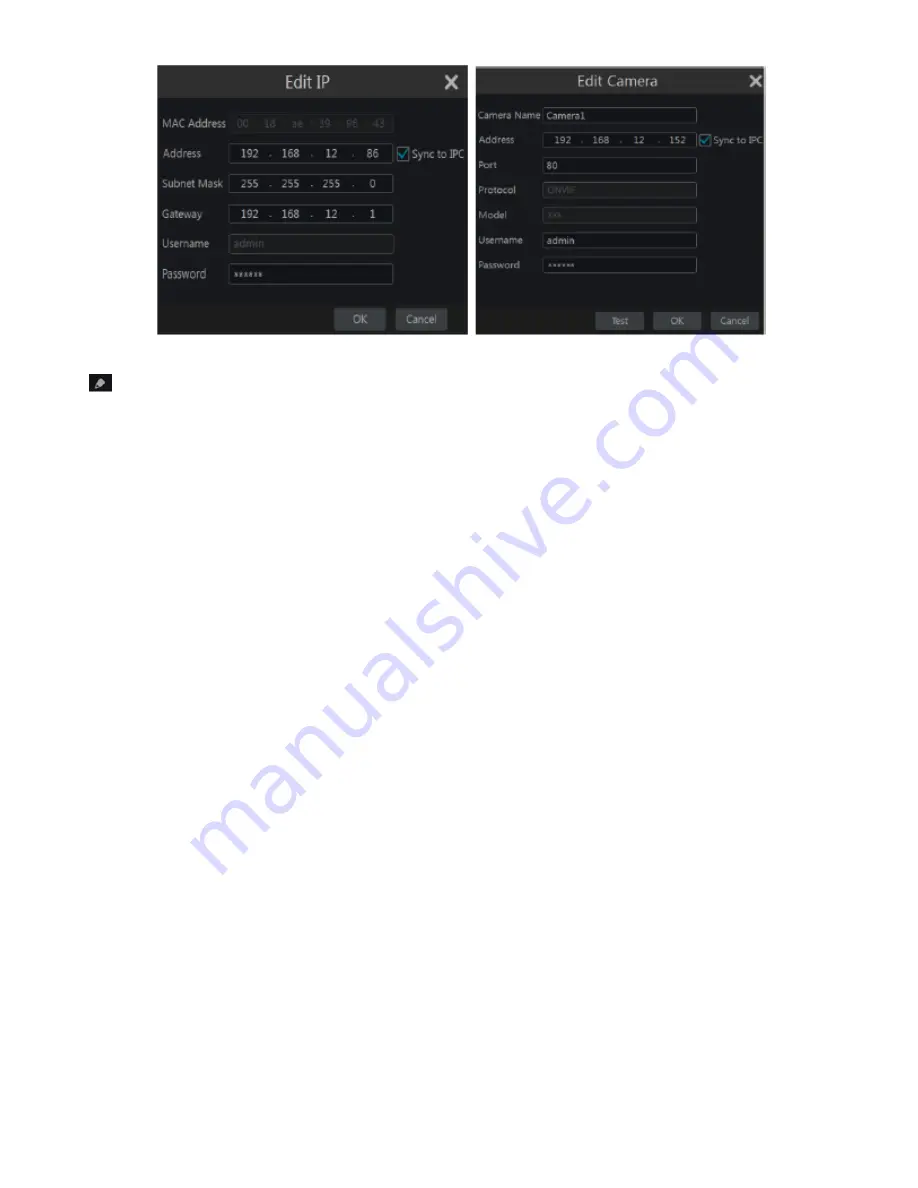
Speco H24HRN Скачать руководство пользователя страница 10


Click

to edit the added camera as shown on the above right. Input the new camera name, IP address, port, username 

and the password of the camera. You can click “Test” to test the effectiveness of the input information. Click “OK” to 
save the settings. You can change the IP camera name only when the added camera is online. Click “Next” to continue. 
 

4.6


Disk Settings 

Disk Settings. You can view the disk number, disk capacity of the DVR and serial number, Read/Write status of the disk. 
Click “Formatting” to format the disk. Click “Next” to continue.  
 

4.7


Record Settings 

Record Settings. Two record modes are available: auto and manual.  
 
Auto Mode: Select one auto mode in the interface as shown below and then click “Next” button to save the settings. 
Click “Advanced” to self-define record mode.


Содержание H24HRN

Страница 1: ...HRN 24Channel Quick Start Guide H24HRN Version 1 0 Features and specifications are subject to change please check www specotech com for firmware updates...

Страница 2: ...of the installation and operations here should conform to your local electric safety rules 1 Contents 1 1 Check Unit and Accessories After unpacking the unit please check for any visible damage Then c...

Страница 3: ...ame is admin The password strength indicator can be used as a reference Re enter the password to confirm Remember this password 2 2 Enter answers for two security questions You can select which securi...

Страница 4: ...3 Figure 2 1...

Страница 5: ...m Information Basic go to About this machine and click on view You will then be able to see the firmware version number and build date Now go to www specotech com then click on Support then Recorder S...

Страница 6: ...m may automatically restart during upgrading Please wait for a while and do not power off the DVR during upgrading After firmware is updated the unit will restart You can now remove the USB disk from...

Страница 7: ...e 4 1 4 2 EZ Network Setup Next set the network of the DVR Go to Start Settings Network TCP IP Input IP address subnet mask gateway etc If using DHCP please enable DHCP in both the DVR and the router...

Страница 8: ...al and then click to modify the port until the UPnP status turns to Valid UPnP Refer to the following picture You can view the external IP address of the DVR Input the external IP address plus port in...

Страница 9: ...lick to delete the added camera Click Delete All to delete all the added cameras See Figure 4 2 Figure 4 2 Click to edit an IP camera as shown on the below left Input the new IP address subnet mask ga...

Страница 10: ...hen the added camera is online Click Next to continue 4 6 Disk Settings Disk Settings You can view the disk number disk capacity of the DVR and serial number Read Write status of the disk Click Format...

Страница 11: ...5 4 8 QR Code for Remote App Viewing QR Code Enable the NAT function in the interface or set it in the network configuration after exiting the wizard please refer to manual for details You can scan th...

Страница 12: ...o go to the interface for NAT configuration and check Enable Click Apply to save the settings and make note of the QR code number under the QR code Via Internet Explorer go to connect specotech cloud...

Страница 13: ...ayback time On panel on the right will show you re the channel number and their recorded data coded by color The bar that runs across them represents the playback time being viewed You can move this b...

Страница 14: ...image box to play the record in the small playback box on the left side of the interface the box which has image inside indicates that the record data exist Refer to the picture below Drag the color b...

Отзывы: