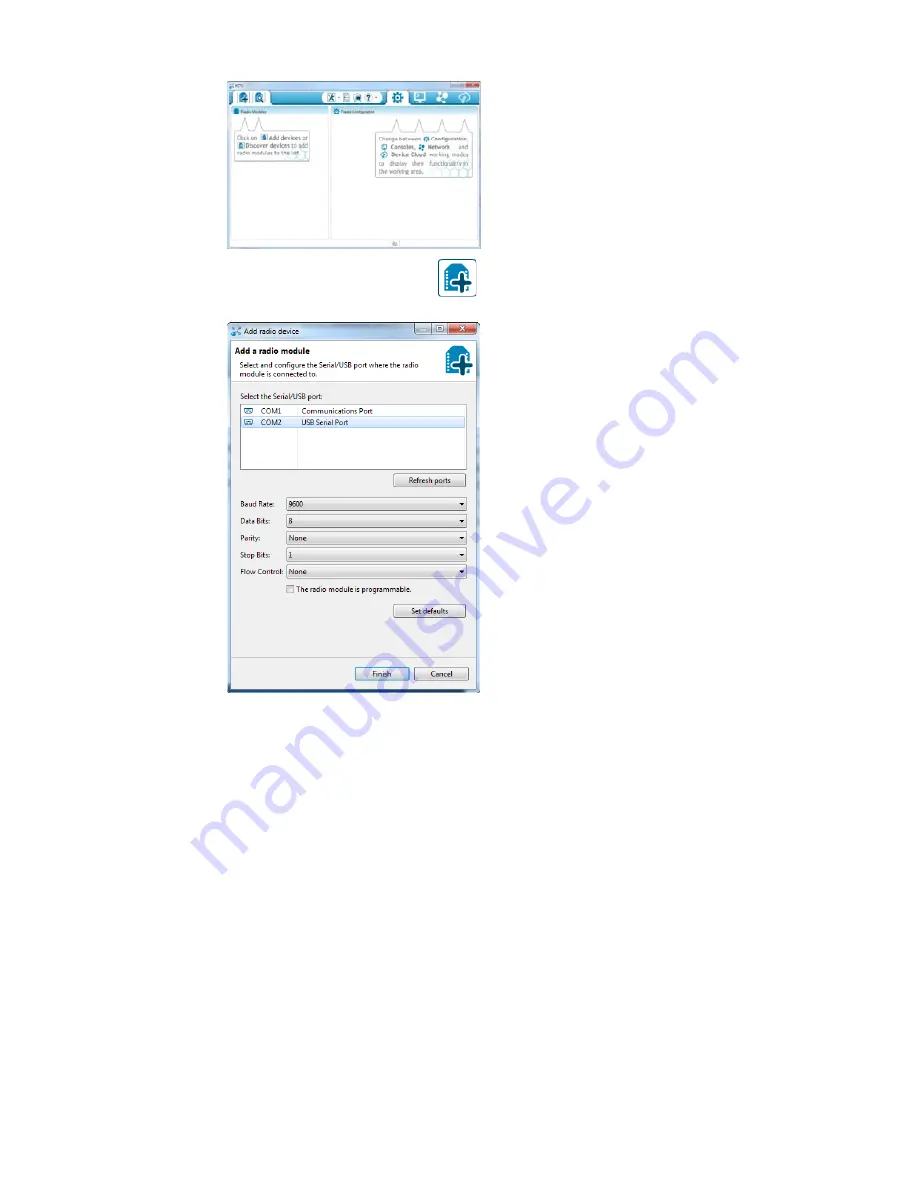
To add your XBee(s),
click the “Add device” icon
–
– in the
upper-left part of the window. That will prompt this screen to show up:
Select your communication port
. If you’re lucky (or just don’t have a lot of
stuff connected to your computer) you may only have one option here.
Otherwise Windows users should look for the entry that says “USB Serial
Port” and Mac users should look for something like “usbserial-XXXXXXXX”.
(If you’re using a USB board, that is. If you’re using a Serial Explorer, pick
the “Communications Port” option.)
This window also allows you to specify more specific serial characteristics
like baud rate, data bits, and stop bits. Assuming this is the first time you’ve
used your XBee, you can
leave those settings alone
. So make sure those
values look just as they do in the image above and
click Finish
.
A “Discovering radio modules…” window will briefly scroll by, after which
you should be presented with the original window, but with an addition to
the “Radio Modules” section on the left. (If X-CTU failed to find a module,
check out our troubleshooting page.)
Click that new module
, and wait a few seconds as X-CTU reads the
configuration settings of your XBee. You should then be presented with the
entire configuration of your XBee.
Page 6 of 16


