background image

BIOS Setup Utility 

SY-P4I875P DRAGON 2


55 

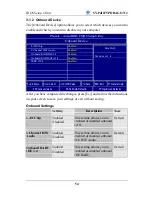
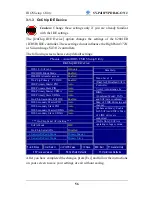
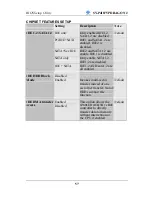
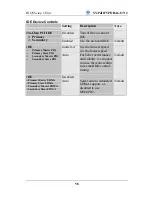
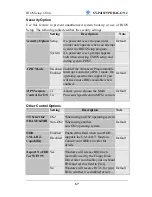
Onboard Settings (Continue) 


Setting 

Description 

Note 

Enabled 

Default 

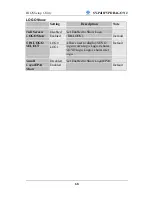
Onboard RAID 
SATA 3,4


Disabled 

This setting allows you to 
enabled or disabled onboard 
SATA (Silicon Image 
Sil3112). 

Note:

 That if onboard IDE 

RAID is disabled, this setting 
is also disabled. 


Enabled 

Default 

IEEE 1394 

Disabled 

This setting allows you to 
enabled or disabled onboard 
IEEE1394. 


Содержание SY-P4I875P DRAGON 2 V1.0

Страница 1: ...g out Failure to do so will damage your motherboard and memory module 5 An ATX12V power supply Power supply for Pentium 4 system is required for the system to operate normally Preferably 350 watts for minimal loading or 400 watts for fully loaded system 6 If you have any problem getting your system to work please follow the troubleshooting tips in your user manual 7 On some motherboards the actual...

Страница 2: ...SY P4I875P DRAGON 2 Motherboard mPGA Socket 478 Processor supported Intel 875P AGP PCI 533 800 MHz Front Side Bus supported ATX Form Factor User s Manual ...

Страница 3: ...s of third parties and not to infringe upon or to cause others to infringe upon such rights Disclaimer Please be advised that some SOYO motherboards are designed with overclocking features and may allow users to run the components beyond manufacturer s recommended specifications Overclocking beyond manufacturer s specifications is not recommended nor endorsed by SOYO Inc and will void your manufac...

Страница 4: ...TIONS 14 2 2 INSTALLATION GUIDE 15 Step 1 Install the CPU 15 Step 2 Install Memory Module 18 Step 3 Installation of Expansion Cards 19 Step 4 Connect cables case wire and power supply 22 A IDE Device Installation HDD CD ROM 22 B Floppy Drive Installation 25 C Front Panel Connections 26 D Back Panel Connections 29 E Other Connections 31 F ATX12V Power Supply 39 G Center Bass Select Connector JP30 4...

Страница 5: ...ERVISOR PASSWORD 87 3 12 USER PASSWORD 88 CHAPTER 4 DRIVERS INSTALLATION 90 CHAPTER 5 INTEL USB 2 0 DRIVER INSTALLATION 98 CHAPTER 6 HIGHPOINT HPT 372 DRIVER INSTALLATION 100 CHAPTER 7 SILICON IMAGE SERIAL ATA DRIVER INSTALLATION 107 CHAPTER 8 ICH5R SATA1 SATA2 SETUP INFORMATION 113 APPENDIX A HIGHPOINT HPT 372 115 APPENDIX B SILICON IMAGE 3112 122 APPENDIX C FLASHING BIOS ROM 125 APPENDIX D TROUB...

Страница 6: ... the Intel 875P Chipset technology This Motherboard is fully compatible with industry standards and adds many technical enhancements 1 2 UNPACKING THE MOTHERBOARD When unpacking the Motherboard check for the following items The SY P4I875P DRAGON 2 Intel 875P AGP PCI Motherboard The Quick Start Guide The Installation CD ROM SOYO Bonus Pack CD ROM Three IDE Device ATA 100 Flat Cable One Floppy Disk ...

Страница 7: ...l it Like most electronic equipment your Motherboard may be damaged by electrostatic discharge To avoid permanent damage to components ground yourself while working by using a grounding strap Otherwise ground yourself frequently by touching the unpainted portion of the computer chassis to drain the static charges Handle the Motherboard carefully holding it by the edges You are now ready to start t...

Страница 8: ...ory The SY P4I875P DRAGON 2 supports PC2700 and PC3200 DDR non registered and ECC memory modules SOYO COMBO Setup menu to fully configure your memory settings AGP 1x AGP master 4x 8x slot 1 5v only PCI 5x 32 bit bus master PCI slots Super I O ITE IT8712F A Super I O controller supporting Floppy disk controller Parallel port SPP EPP and ECP compliant 2x 16550A compatible RS232 serial ports IrDA com...

Страница 9: ...hannel PCI Hardware Audio Network Onboard Intel 10 100 MBps 100Base T and 1000BASE T Gigabit Ethernet controller supporting Wake On Lan WOL IEEE1394 Onboard VIA VT6306 IEEE1394 Firewire controller with 1x rear IO panel connector and 2x motherboard connectors BIOS Power Failure resume function to allow the system to turn on or off after a power failure which is indispensable for server systems Wake...

Страница 10: ...ealer immediately 1 5 ELECTROSTATIC DISCHARGE PRECAUTIONS Make sure to ground yourself before handling the Motherboard or other system components Electrostatic discharge can easily damage the components Note that you must take special precautions when handling the Motherboard in dry or air conditioned environment To protect your equipment from electrostatic discharge take the following precautions...

Страница 11: ...Motherboard Description SY P4I875P DRAGON 2 6 1 6 SY P4I875P DRAGON 2 MOTHERBOARD LAYOUT Back Panel SY P4I875P DRAGON 2 Platform ...

Страница 12: ...Motherboard Description SY P4I875P DRAGON 2 7 1 7 SY P4I875P DRAGON 2 MOTHERBOARD COMPONENTS ...

Страница 13: ...tures support for an 800 MHz Front Side Bus FSB and implements Intel Performance Acceleration Technology PAT with dual channel DDR400 memory configurations to get incredible performance from the memory interface Optimized to support the Intel Pentium 4 Processor with Hyper Threading Technology the 875P chipset adds intelligence to help manage and prioritize multiple threads received from the micro...

Страница 14: ...face The device s LPC interface complies with Intel LPC Interface Specification Rev 1 0 The IT8712F A meets the Microsoft PC98 PC99 System Design Guide requirements and is ACPI LANDesk compliant K Serial Infrared IrDA device header This header allows you to connect an IrDA receiver to the motherboard You can find the lay out in the 1 Standard Infrared SIRCON paragraph on page 32 L Smart Card Reade...

Страница 15: ... UDMA 133 hard disks and can work as normal IDE port or in a RAID 0 0 1 or 1 configuration ATAPI devices are not supported by this chip S Front Panel connectors J25 This header allows you to connect the switches and LEDs on your front panel Please check the C Front Panel Connections chapter on page 26 for more details and lay outs T 5V Stand By Indicator LED The ATX 12V power supply will always su...

Страница 16: ... For details on the lay out please check the 5 Universal Serial Bus USB1 USB2 USB3 USB4 USB20_1 USB20_2 paragraph on page 31 Z Chassis Cooling Fan CHAFAN1 connector This connector is to connect your chassis fan to your motherboard This motherboard supports up to 3 chassis fans It allows you to monitor the speed of CHAFAN1 in CMOS setup or by using the SOYO Hardware Monitor software Please check th...

Страница 17: ...Center Bass Select Connector JP30 paragraph on page 41 for more details AG AUX IN connector This connector allows you to attach a second CDROM analog audio out output to your mainboard Please check the 5 AUX IN AUXIN paragraph on page 36 for more details AH CMedia CMI 8738 PCI 6 Channel hardware audio chip The CMI 8738 chip is a 2 4 6 Channel PCI hardware audio chip which uses the HRTF 3D position...

Страница 18: ...sed platforms It supports a single interface fully compliant with the IEEE 802 3 802 3u 802 3 standard The IEEE 802 3 standard for 1000BASE TX defines networking over two pairs of Category 5 unshielded twisted pair cable AL AGP DET LED This LED lights up when an AGP 3 3v card is inserted in the system If this LED lights up your system will not work since AGP 3 3v cards are not supported AM Back pa...

Страница 19: ... all the following hardware equipment to complete the installation successfully 1 Socket mPGA478 processor with CPU cooling fan CPUs with a VCORE higher than 1 6 volts are not supported 2 DDR memory module s 3 A computer case with an adequate power supply unit 350W for a minimally loaded system or 400W for a fully loaded system 4 Monitor 5 Keyboard 6 Pointing Device mouse 7 Disk Drives HDD CD ROM ...

Страница 20: ...cards Step4 Connect cables case wires and power supply Step5 Power on and enter BIOS setup Step6 Install supporting software tools See Chapter 4 for more info Warning Turn off the power to the Motherboard system chassis and peripheral devices before performing any work on the Motherboard or system BEGIN THE INSTALLATION Step 1 Install the CPU CPU Mount Procedure To mount the Pentium 4 Socket mPGA4...

Страница 21: ...Hardware Installation SY P4I875P DRAGON 2 16 2 Align the blunt edge of the CPU with the matching pinhole distinctive edge on the socket 3 Seat the processor in the socket completely and without forcing ...

Страница 22: ...em stability The fan prevents overheating therefore prolonging the life of your CPU CPU Fan Installation Your Socket 478 processor kit comes with a cooling fan Mount the fan on the processor according to the instructions provided by the manufacturer The fan is a key component that will ensure system stability The fan prevents overheating therefore prolonging the life of your CPU Note Remember to c...

Страница 23: ... and specifications have to be installed The largest memory capacity possible is 4GB On this motherboard DRAM speed can be set independent from the CPU front side bus speed Note that when installing 4GB of memory your total memory will be less than 4GB The reason for this is that the BIOS PCI and AGP cards claim part of your CPUs address space Memory Configuration Table If you want to use the Dual...

Страница 24: ...C3200 or PC2700 When using a 800 MHz FSB CPU and PC2700 DDR DIMMs the memory frequency runs at 320 MHz instead of 333 MHz due to chipset limitations Step 3 Installation of Expansion Cards The motherboard has 1 AGP slot and 5 PCI slots 1 Read the related expansion card s instruction document before inserting the expansion card into the computer 2 Press the expansion card firmly into the expansion s...

Страница 25: ...y support 1 5V AGP cards 4X 8X cards If 3 3V AGP card is used the system will not power on and the AGPDET LED will lit When AGPDET LED is lit it means a 3 3V AGP card is being used If you use a 3 3V AGP card the system will not power on and the AGPDET LED will lit AGPDET LED ...

Страница 26: ...able shows which PCI IRQs are used by which onboard device A B C D E F G AGP HighPoint 372N IDE RAID CMedia 8738 PCI Audio VIA VT6306 IEEE1394 Intel 82547EI 10 100 1G Ethernet PCI Slot 1 PCI Slot 2 PCI Slot 3 PCI Slot 4 PCI Slot 5 Silicon Image Sil3112 SATA RAID Intel 82801ER ICH5R USB 2 0 ...

Страница 27: ... device connectors 2 secondary IDE device connectors IDE2 IDE4 and 4 tertiary serial ATA ports IDE1 and IDE2 can support up to four high speed Ultra DMA 33 66 100 HDD or CD ROM IDE3 and IDE4 can support up to 4 high speed Ultra DMA 33 66 100 133 HDD SATA1 4 can support up to 4 ATA 150 SATA hard disks IDE 2 IDE 1 Pin 1 Secondary IDE Primary IDE IDE 3 IDE 4 SATA2 SATA1 SATA4 SATA3 ...

Страница 28: ...RAID or standard SATA function This Motherboard can support up to 12 HDDs Note IDE2 and SATA2 are not bootable SATA1 SATA3 SATA4 and IDE1 IDE3 and IDE4 are bootable Note1 SATA1 and SATA2 can only support RAID 0 Note2 RAID 0 function of ICH5R can only work under Windows XP other operating system is not supported Note Only Windows XP can use SATA1 SATA2 IDE1 and IDE2 at the same time All other opera...

Страница 29: ...ndary IDE2 IDE4 directionally keyed IDE connector on the Motherboard The ATA66 100 cable is backward compatible with ATA33 HDDs Serial ATA connectors You can also plug the serial ATA cable into the serial ATA connector of the motherboard The other end of the SATA cable goes into your SATA device 1 1 39 39 40 pin ATA 66 100 Flat Cable 80 Conductor Serial AT A Serial ATA Cable Serial ATA Connector 1...

Страница 30: ... 720KB 1 2MB 1 44MB floppy commonly used in Japan Connect one side of the 34 pin flat cable to the floppy drive and plug the other end to the floppy drive connector in the Motherboard The end of the cable that goes into the motherboard is not twisted The twisted end of the cable goes into the floppy drive This Motherboard can support only one floppy drive FDC Pin 1 Floppy Drive Connector 1 1 33 33...

Страница 31: ... Plug the computer case s front panel devices to the corresponding headers on the Motherboard 1 Power LED Please install according to the following pin assignment pin 1 3 are for Power LED Speaker Reset PWRBT Power LED HDD LED ACPI LED Power LED Pin Assignment GND NC VCC ...

Страница 32: ...C speaker cable from the case to the Speaker header on the Motherboard 4 ACPI LED Connecting the 2 pin ACPI LED cable to the corresponding ACPI LED header will cause the LED to light whenever the system is in ACPI mode The manufacturer has permanently set this Motherboard in ACPI mode because of PC99 specification requirements _ ACPI LED Pin Assignment 2 5V_DDR Control Pin Reset Pin Assignment Pow...

Страница 33: ...se the LED to light when an IDE1 or IDE2 HDD CD ROM device is active 6 ATX Power On Off Switch Attach the 2 pin momentary type switch to the PWRBT header for turning On or Off your ATX power supply Note that 5VSB will always have power so the 5V standby LED will always be lit HDD LED Pin Assignment _ LED Anode LED Cathode PWRBT Pin Assignment Power On Off GND 1 ...

Страница 34: ...nter modem USB can be plugged directly into the Motherboard back panel Only after you have fixed and locked the Motherboard to the computer case can you start connecting the external peripheral devices When connecting an external device use the following figure to locate and identify which back panel connector to plug the device to ...

Страница 35: ...t is used to connect the printer or other parallel devices Plug the parallel device cable into the 25 pin female connector located at the rear panel of the Motherboard 3 PS 2 Keyboard Plug the keyboard jack directly into the 6 pin female PS 2 keyboard connector located at the rear panel of the Motherboard 4 PS 2 Mouse Similarly plug the mouse jack directly into the 6 pin female PS 2 mouse connecto...

Страница 36: ...om your dealer The lay out of USB20_1 USB20_2 connector is as follows USB20_1 and USB20_2 support USB2 0 devices 6 Onboard Game port audio Audio Speakers connections When using 2 channel speaker connect the speaker cable to Line out If you re using 4 channel speaker connect the front L R speakers to Line out and rear L R speakers to Line in Make sure that the audio software is set for 4 channel sp...

Страница 37: ...red SIRCON Plug the 5 pin infrared device cable to the SIRCON header This will enable the infrared transfer function This Motherboard meets both the ASKIR and HPSIR specifications Please install according to the following pin assignment Standard Infrared SIRCON Connector SIRCON Pin Assignment 1 2 3 4 5 VCC IRRX GND IRTX ...

Страница 38: ...er you have seated the CPU properly on the processor attach the 3 pin fan cable to the CPUFAN connector on the Motherboard To avoid damage to the system install according to the following pin assignment NC 12V GND 1 3 2 SENSOR 12V GND 1 3 2 CPUFAN2 CPUFAN1 CPU Cooling Fan CPUFAN1 CPUFAN2 CPUFAN Pin Assignment ...

Страница 39: ...rom the chassis fan to the CHAFAN 3 pin connector Install according to the following pin assignment Note CPU cooling fan must be installed to prevent the CPU from overheating and ensure system stability Chassis cooling fan is optional depending on whether there is cooling fan in your chassis CHAFAN2 CHAFAN1 CHAFAN3 Chassis Cooling Fan CHAFAN1 CHAFAN2 CHAFAN3 CHAFAN Pin Assignment 12V NC GND 3 1 2 ...

Страница 40: ...rking group standard and has the following lay out 4 CD Line in CDIN This Motherboard provides one CD Line in connector Please connect the 4 pin audio cable from your CD ROM or DVD ROM drive to CDIN Please install according to the following pin assignment Left Right GND GND 1 2 3 4 CDIN CD Line in Pin Assignment ...

Страница 41: ...m your second CD ROM or DVD ROM drive to AUX IN Please install according to the following pin assignment 6 MIC LED Connector J30 You can connect the Line out MIC in LAN LED to the front panel of your PC case If this option is available in your PC case This connector has the following pin assignment 2 Left Right GND GND 1 2 3 4 AUXIN Pin Assignment ...

Страница 42: ...dia sound solution for more information on the AUDIO function Note Some 5 1 speakers have different center base assignment Please use the C media Multi Channel Audio demo software to check if sounds coming from the center base speaker are correct Adjust JP30 accordingly if not Center Bass Rear L R Digital SPDIF in Coaxial SPDIF in Digital SPDIF out Coaxial SPDIF out 7 ...

Страница 43: ...ied with the operating system for commonly used Firewire devices FW1 and FW2 are available You can connect them to a 1394 bracket or Σ BOX to use them The layout out of the FW1 and FW2 Firewire connector is as follows FW1 Pin Assignment FW2 Pin Assignment 1 2 3 5 PWR0 B0PC GND A0PC 1 2 3 5 PWR1 B1PC GND A1PC 6 10 7 8 9 CGND PWR0 B0MC CGND A0MC 6 10 7 8 9 CGND PWR1 B1MC CGND A1MC ...

Страница 44: ... supplies cannot be used We recommend a power supply of at least 350W or 400W under full loading Steps 1 Connect the 20 pin connector to the ATX power connector See FIG 1 2 Connect the 4 pin connector to the 12V power connector See FIG 2 Note 1 The presence of the 12V power connector indicates that a power supply is ATX12V the absence of the 12V power connector indicates that a supply is ATX ATX P...

Страница 45: ...V Standby lead 5VSB Note 3 The minimum recommended wattage is 400W for a fully loaded system or 350W for a minimally loaded system the system might become unstable if power supply is not enough Note 4 The 4 pin ATX 12V must be connected to the motherboard Without this connector the system cannot boot Please install the ATX 12V power according to the following pin assignment Pay special care to the...

Страница 46: ...mper block should be set to depends on your speakers If during usage you find that your center and base channels are swapped set this jumper to the other position Center Bass select Normal Reverse Default JP30 Setting Short pin 1 3 2 4 Short pin 3 5 4 6 Center Bass Select Connector JP30 Pin Assignment 6 5 4 3 2 1 Bass Bass out Center Center Center out Bass ...

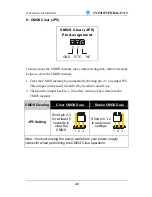
Страница 47: ...an be easily identified by its white colored cap 2 Then put the jumper back to 1 2 to allow writing of new data into the CMOS memory CMOS Clearing Clear CMOS Data Retain CMOS Data JP5 Setting Short pin 2 3 for at least 5 seconds to clear the CMOS Short pin 1 2 to retain new settings Note You must unplug the power cable from your power supply connector when performing the CMOS Clear operation CMOS ...

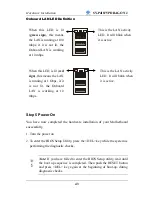
Страница 48: ...Setup utility wait until the boot up sequence is completed Then push the RESET button and press DEL key again at the beginning of boot up during diagnostic checks When this LED is lit green sign this means the LAN is running at 100 mbps if it is not lit the Onboard LAN is working at 10 mbps This is the LAN activity LED It will blink when it is active When this LED is lit red sign this means the LA...

Страница 49: ...it Without Saving Esc Quit Select Item F10 Save Exit Setup Change CPU s Clock Voltage 2 3 QUICK BIOS SETUP This Motherboard does not use any hardware jumpers to set the CPU frequency Instead CPU settings are software configurable with the BIOS SOYO COMBO FEATURE The SOYO COMBO FEATURE combines the main parameters that you need to configure all in one menu for a quick setup of the BIOS After the ha...

Страница 50: ...ULTS menu and type Y at the prompt to load the BIOS optimal setup Step 3 Select SOYO COMBO FEATURE Set the CPU Frequency Select field to Manual to be able to change the CPU frequency 1 MHz stepping Step 4 Select SAVE EXIT SETUP Press Enter to save the new configuration to the CMOS memory and continue the boot sequence You are now ready to configure your system with the BIOS setup program Go to Cha...

Страница 51: ...l Safe Defaults Advanced BIOS Features Load Optimized Defaults Advanced Chipset Features Set Supervisor Password Integrated Peripherals Set User Password Power Management Setup Save Exit Setup PnP PCI Configurations Exit Without Saving Esc Quit Select Item F10 Save Exit Setup Change CPU s Clock Voltage Selecting items Use the arrow keys to move between items and select fields From the Main Menu pr...

Страница 52: ...e the values that the user started the current session with F6 Load Fail Safe Defaults Loads all items with the most conservative values F7 Load Optimized Defaults Loads all options with the optimize values F10 Save Saves your changes and reboots the system Esc Exit Return to the previous menu Enter Select Will display a overlapping window with all options for the current item PU PD Value Using th...

Страница 53: ...ity This option saves all your changes and causes the system to reboot Type Y to save the changes and exit or N to return to the Main Menu and keep current values EXIT WITHOUT SAVING Selecting the EXIT WITHOUT SAVING option allows you to abandon all changes and exit setup Type Y to abandon changes and exit or N to return to the Main Menu and keep current values R O M P C I I S A B I O S C M O S S ...

Страница 54: ...etup Utility SOYO COMBO Feature System Performance Normal CPU Clock Ratio 13X Item Help CPU Frequency Select Auto Menu Level x Frequency 1MHz Stepping 100MHz Async AGP PCI CLK Disabled DRAM CPU Ratio Auto DRAM Frequency 333 MHz Quick Power On Self Test Enabled C I H 4 WAY Protection Disabled CPU Vcore Select Default DDR Voltage Select Default AGP Voltage Select Default Advanced DRAM Control Press ...

Страница 55: ...nual and use the CPU Freq by 1 MHz stepping manual to overclock the CPU Don t forget to set the correct CPU to PCI divider Default Frequency 1MHz Stepping 100 511 Press Page Up Page Down key to overclock the CPU Front Side Bus in 1MHz increment or Press Enter key then type the desired CPU Front Side Bus Disabled Default 66 33 MHz 73 36 MHz Async AGP PCI CLK 80 40 MHz Allows you to set your AGP PCI...

Страница 56: ...o flash your BIOS set this option to disabled Write protecting your BIOS protects you against some viruses Default Voltage Select Setting Description Note Default Default 1 600 1 550 1 500 1 450 1 400 1 350 CPU Vcore Select 1 300 This function allows you to adjust the CPU voltage Default Default 2 9V 2 8V DDR Voltage Select 2 7V This function allows you to adjust the DDR voltage Default Default 1 ...

Страница 57: ... 4 x DRAM RAS Precharge 4 Refresh Mode Select Auto Menu Level Move Enter Select PU PD Value F10 Save ESC Exit F1 General Help F5 Previous Values F6 Fail Safe Defaults F7 Optimized Defaults After you have completed the changes press Esc and follow the instructions on your screen to save your settings or exit without saving CHIPSET FEATURES SETUP Setting Description Note By SPD Default DRAM Timing S...

Страница 58: ...AM RAS to CAS Delay 4 This item allows you to control DRAM RAS to CAS delay time Default 2 3 DRAM RAS Precharge 4 This item allow you to control DRAM RAS percharge time Default 7 8 us 15 6 us 64 us Refresh Mode Select Auto This item allows you to set the interval between consecutive refresh cycles Default ...

Страница 59: ...t PU PD Value F10 Save ESC Exit F1 General Help F5 Previous Values F6 Fail Safe Defaults F7 Optimized Defaults After you have completed the changes press Esc and follow the instructions on your screen to save your settings or exit without saving Onboard Settings Setting Description Note Enabled Default LAN Chip Disabled This setting allows you to enabled or disabled onboard LAN Enabled Default 6 C...

Страница 60: ...abled Default Onboard RAID SATA 3 4 Disabled This setting allows you to enabled or disabled onboard SATA Silicon Image Sil3112 Note That if onboard IDE RAID is disabled this setting is also disabled Enabled Default IEEE 1394 Disabled This setting allows you to enabled or disabled onboard IEEE1394 ...

Страница 61: ...rimary Slave UDMA Auto On Chip Secondary PCI IDE Enabled IDE Secondary Master PIO Auto IDE Secondary Slave PIO Auto IDE Secondary Master UDMA Auto IDE Secondary Slave UDMA Auto On Chip Serial ATA Setting SATA Mode IDE On Chip Serial ATA Disabled x Serial ATA Port0 Mode Primary Master x Serial ATA Port1 Mode Primary Slave Menu Level Disabled Disabled SATA Controller Auto Auto arrange by BIOS Combin...

Страница 62: ...DE1 is disabled SATA only Only enable SATA1 2 IDE1 2 are disabled IDE 1 2 SATA 1 2 IDE SATA IDE1 2 AND sata1 2 are all enabled Disabled IDE HDD Block Mode Enabled Invokes multi sector transfer instead of one sector per transfer Not all HDDs support this function Default Enabled Default IDE DMA transfer access Disabled This option allows the 82801ER ICH5R s IDE controller to directly transfer data ...

Страница 63: ...e slowest speed 4 is the fastest speed IDE Primary Master PIO Primary Slave PIO Secondary Master PIO Secondary Slave PIO Auto For better performance and stability we suggest you use the Auto setting to set the HDD control timing Default Disabled IDE Primary Master UDMA Primary Slave UDMA Secondary Master UDMA Secondary Slave UDMA Auto Select auto to autodetect UDMA support or disabled to use DMA P...

Страница 64: ... Second Boot Device HDD 0 Item Help Third Boot Device LS120 Boot Other Device Enabled Other Device Boot Order IDE3 IDE4 SCSI Menu Level Allows the system to skip certain tests while booting This will decrease the time needed to boot the system Move Enter Select PU PD Value F10 Save ESC Exit F1 General Help F5 Previous Values F6 Fail Safe Defaults F7 Optimized Defaults After you have completed the ...

Страница 65: ...d etc For booting from the HighPoint 372N or Silicon Image Sil3112 controller set this option to SCSI Disabled Boot Other Device Enabled Selects if the system should try to find any other bootable devices if the first second and third boot device cannot be booted from Default IDE3 IDE4 SCSI Default SCSI IDE3 IDE4 Other Device Boot Order SATA3 SATA4 SCSI Selects whether your system should first try...

Страница 66: ...ed Video EGA VGA Halt On All Errors Base Memory 640K Extended Memory 326656K Total Memory 327680K Menu Level Change the day month year and century Move Enter Select PU PD Value F10 Save ESC Exit F1 General Help F5 Previous Values F6 Fail Safe Defaults F7 Optimized Defaults This screen allows you to modify the basic CMOS settings After you have completed the changes press Esc key to return to the M...

Страница 67: ...to BIOS detects hard disk mode automatically Default CHS Normal IDE hard disk 528MB LBA Enhanced IDE hard disk 528MB Access Mode Large Large IDE hard disk for certain hard disks Note If you have any questions on your hard disk type or mode ask your hard disk provider or previous user for details Floppy Drives Setting Description Note 360KB 5 25 in 1 2MB 5 25 in 720KB 3 5 in 1 44MB 3 5 in Default 2...

Страница 68: ...40 CGA 80 Video MONO Monochrome Select the video mode supported by your VGA Card and memory ALL Errors Default No Errors All But Keyboard All But Diskette Halt On All But Disk Key When the BIOS detects system errors this function will stop the system Select which type of error will cause the system halt ...

Страница 69: ...MPS Version Control For OS 1 1 OS Select For DRAM 64MB Non OS2 HDD S M A R T Capability Disabled Report No FDD For WIN 95 No Full Screen LOGO Show Enabled EPA LOGO SELECT LOGO 0 Small Logo EPA Show Enabled Menu Level Allows you to choose the VIRUS warning feature for IDE Hard Disk boot sector protection If this function is enabled and someone attempt to write data into this area BIOS will show a w...

Страница 70: ...led Because the CPU is faster than memory the CPU after has to wait to complete memory access By enabling L2 caching you will let the CPU write or read first from a very fast internal memory the CPU cache before accessing main memory thereby increasing the speed of your system The CPU will automatically update main memories from the cache Default Enabled Default CPU L2 Cache ECC Checking Disabled ...

Страница 71: ...ion Note Disabled Keystrokes repeat at a rate determined by the keyboard Default Typematic Rate Setting Enabled When enabled the typematic rate and typematic delay can be selected The following Typematic Rate and Typematic Delay fields are active only if Typematic Rate Setting is set to Enabled Typematic Rate 6 Char sec 8 Char sec 10 Char sec 12 Char sec 15 Char sec 20 Char sec 24 Char sec 30 Char...

Страница 72: ...tems that support it you will have more IRQs available when enabled Default 1 1 Default MPS Version Control for OS 1 4 Allows you to choose the Multi Processor Specification MPS version Other Control Options Setting Description Note OS2 When using an OS2 operating system OS Select for DRAM 64MB Non OS2 When using another non OS2 operating system Default Enabled HDD S M A R T Capability Disabled En...

Страница 73: ... Disabled Full Screen LOGO Show Enabled Set Enabled to Show Logo DRAGON Default LOG0 Default EPA LOGO SELECT LOG1 Allows user to display SOYO logo or own logo Logo 0 shows SOYO logo Logo 1 shows user logo Disabled Small Logo EPA Show Enabled Set Enabled to Show Logo EPA Default ...

Страница 74: ...m BIOS Cacheable Disabled Item Help Video BIOS Cacheable Disabled Delay Prior to Thermal 16 Min AGP Aperture Size MB 64 Init Display First AGP DRAM Data Integrity Mode Non ECC Menu Level Move Enter Select PU PD Value F10 Save ESC Exit F1 General Help F5 Previous Values F6 Fail Safe Defaults F7 Optimized Defaults After you have completed the changes press Esc and follow the instructions on your scr...

Страница 75: ... to 16 minutes the system will start decreasing the performance 16 minutes before reaching max thermal temp 256M 128M 64M Default AGP Aperture Size MB 32M Select the size of Accelerated Graphics Port AGP aperture The aperture is a portion of the system memory address range dedicated for graphics memory address space for when your VGA card runs out of memory Host cycles that hit the aperture range ...

Страница 76: ...ng screen shows setup default settings Phoenix Award BIOS CMOS Setup Utility Integrated Peripherals Onboard USB Device Press Enter SuperIO Device Press Enter Item Help Menu Level Move Enter Select PU PD Value F10 Save ESC Exit F1 General Help F5 Previous Values F6 Fail Safe Defaults F7 Optimized Defaults The following tables describe each field in the INTEGRATED PERIPHERALS Menu and provide instru...

Страница 77: ...ues F6 Fail Safe Defaults F7 Optimized Defaults After you have completed the changes press Esc and follow the instructions on your screen to save your settings or exit without saving Keyboard Controls Setting Description Note Disabled USB Controller Enabled Select Enabled if you want to use your onboard Universal Serial Bus USB controller and you have USB peripherals Default Disabled USB 2 0 Contr...

Страница 78: ...Password Enter Item Help x Hot Key Power ON Ctrl F1 Onboard FDC Controller Enabled Onboard Serial Port 1 3F8 IRQ4 Onboard Serial Port 2 2F8 IRQ3 UART Mode Select Normal x UR2 Duplex Mode Half Onboard Parallel Port 378 IRQ7 Parallel Port Mode SPP x ECP Mode Use DMA 3 PWRON After PWR Fail OFF Menu Level Move Enter Select PU PD Value F10 Save ESC Exit F1 General Help F5 Previous Values F6 Fail Safe D...

Страница 79: ...board If POWER ON Function is set to Password KBPowerON Password Enter your password Set the password that will wake up your system If POWER ON Function is set to Hot Key HotKeyPower ON Ctrl F1 F1 2 Choose the key combination that will wake up the system Ctrl F1 to Ctrl F12 Onboard FDC controller Setting Description Note Disabled Turn off the on board floppy controller Onboard FDC controller Enabl...

Страница 80: ...alf Default UR2 Duplex Mode Full Choose Half or Duplex to set UR2 in half duplex mode or full duplex mode respectively Refer to your IR device specifications to select the suitable mode Onboard Parallel Ports Setting Description Note Disabled 378 IRQ7 Default 3BC IRQ7 Onboard Parallel Port 278 IRQ5 Choose the printer I O address SPP Default EPP ECP Parallel Port Mode ECP EPP The mode depends on yo...

Страница 81: ...er comes back after a power failure Off The system will remain off when power comes back after a power failure Default PWRON After PWR Fail Former Sts The system will return to the state it was in before the power failure when power returns i e If the system was on it will switch on again if it was off it will remain off ...

Страница 82: ...er Down Disabled Soft Off by PWR BTTN Instant Off Wake Up by PCI card Disabled Power On by Ring Disabled x USB KB Wake Up From S3 Disabled Resume by Alarm Disabled x Date of Month Alarm 0 x Time hh mm ss Alarm 0 0 0 Reload Global Timer Events Primary IDE 0 Disabled Primary IDE 1 Disabled Secondary IDE 0 Disabled Secondary IDE1 Disabled FDD COM LPT Port Disabled PCI PIRQ A D Disabled Menu Level Mov...

Страница 83: ...r 1 Hour 15 Min Power Management Max Saving 1 Min 1 Min 1 Min 1 Min V H Sync Blank Blank screen Video Off Method DPMS Selects the method by which the monitor is blanked Default Yes Default Video Off In Suspend No If the CPU goes into suspend mode should the monitor also be turned off Stop Grant The system can wake up through external events Default Suspend Type PwrOn Suspend The system can only wa...

Страница 84: ...e system power 4 seconds after pushing the power button Disabled Default Wake Up by PCI card Enabled If enabled any PCI card using the PINE signal will wake the system up Disabled Default Power On by Ring Enabled The system will self power on when the modem is ringing Disabled Default USB KB Wake Up From S3 Enabled When Enabled this feature allows the USB KB to wake the system up from the S3 suspe...

Страница 85: ...m remains alert for anything which occurs to a device which is configured as Enabled Disabled Default FDD COM LPT Port Enabled In effect the system remains alert for anything which occurs to a device which is configured as Enabled Disabled Default PCI PIRQ A D Enabled The system monitors these elements for activity The system will resume if IRQ activity is detected ...

Страница 86: ...signment Auto INT Pin 6 Assignment Auto INT Pin 7 Assignment Auto INT Pin 8 Assignment Auto Menu Level Default is Disabled Select Enabled to reset Extended System Configuration Data ESCD when you exit Setup if you have installed a new add on and the system reconfiguration has caused such a serious conflict that the OS cannot boot Move Enter Select PU PD Value F10 Save ESC Exit F1 General Help F5 P...

Страница 87: ...es Controlled By Auto ESCD The Plug and Play BIOS auto manages PCI ISA PnP card IRQ assignment automatically Default If Resources Controlled By is set to Manual PCI device Choose IRQ assigned to PCI ISA PnP card Default IRQ assigned to Reserved Reserved IRQ for Legacy cards Under this item the user can assign an IRQ to a PCI slot However there under some conditions the IRQ will not be assigned as ...

Страница 88: ... may reassign another interrupt to a PCI slot after BIOS passes control to the OS especially if you use Windows 95 98 NT XP or 2k Enabled BIOS will assign IRQ for VGA USB port Default Assign IRQ For VGA USB Disabled BIOS won t assign IRQ for VGA USB port 5 Your OS may reassign another interrupt to a PCI slot after BIOS passes control to the OS especially if you use Windows 95 98 NT 2k or XP INT Pi...

Страница 89: ...CHAFAN1 Speed 0 RPM Menu Level Move Enter Select PU PD Value F10 Save ESC Exit F1 General Help F5 Previous Values F6 Fail Safe Defaults F7 Optimized Defaults CPU Device Monitoring Setting Description Note CPU Vcore 3 3V 5V 12V DRAM Voltage AGP Voltage V Show the current voltage status CPU Temperature C F Show the current status of the CPU temperature CHA Temperature C F Show the current status of ...

Страница 90: ...alth Status Standard CMOS Features Load Fail Safe Defaults Advanced BIOS Features Load Optimized Defaults Advanced Chipset Features Set Supervisor Password Integrated Peripherals Set User Password Power Management Setup Save Exit Setup PnP PCI Configurations Exit Without Saving Esc Quit Select Item F10 Save Exit Setup Change CPU s Clock Voltage Type Y to use the Setup Defaults followed by Enter or...

Страница 91: ...ized Defaults Advanced Chipset Features Set Supervisor Password Integrated Peripherals Set User Password Power Management Setup Save Exit Setup PnP PCI Configurations Exit Without Saving Esc Quit Select Item F10 Save Exit Setup Change CPU s Clock Voltage Type Y to use the Setup Defaults followed by Enter or otherwise N to return to the Main Menu and keep current values Warning If you run into any ...

Страница 92: ... The password is required every time the system is booted This means only a person who knows the password can use this computer b Setup The password is required only when you attempt to enter the BIOS Setup program 2 Choose SUPERVISOR PASSWORD from the Main Menu and press Enter The following prompt appear Warning If you forget or lose the password the only way to access the system is to set jumper...

Страница 93: ...at for the SUPERVISOR PASSWORD Refer to section 3 11 ROM PCI ISA BIOS CMOS SETUP UTILITY AWARD SOFTWARE INC STANDARD CMOS SETUP BIOS FEATURES SETUP CHIPSET FEATURES SETUP POWER MANAGEMENT SETUP PNP PCI CONFIGURATION LOAD SETUP DEFAULTS LOAD BIOS DEFAULTS INTEGRATED PERIPHERALS SUPERVISOR PASSWORD USER PASSWORD IDE HDD AUTO DETECTION SAVE EXIT SETUP EXIT WITHOUT SAVING Esc F10 Quit Save Exit Setup ...

Страница 94: ...out going into the BIOS setup To enable boot Menu press ESC after memory and option ROM like the HighPoint 372N BIOS initialization the user will see a device menu in which he or she can choose from which device they wish to boot Boot Menu Select a Boot First device Floppy LS120 IDE1 SATA1 CDROM ZIP100 Other Device ...

Страница 95: ... your new motherboard in PDF format b The driver software needed for installation c Adatabase in HTML format with information on SOYO motherboards and other products Step 1 Insert the SOYO CD into the CD ROM drive If you use Windows NT 2000 or XP the SOYO CD will not detect your motherboard type In that case the following dialog will pop up please choose your motherboard and press OK Now the SOYO ...

Страница 96: ...to read a PDF file the appropriate Acrobat Reader software must be installed on your system Note The Start Up program automatically detects if the Acrobat Reader utility is already present on your system and otherwise prompts you on whether or not you want to install it You must install the Acrobat Reader utility to be able to read the user s manual file Follow the instructions on your screen duri...

Страница 97: ...5P chipset properly To update the necessary inf files that will help Windows recognize the 875P chipset please run this utility Intel Application Accelerator RAID Edition for Win XP This installs the ICH5R RAID driver in your system for XP only driver revision Intel Chipset Software Installation Utility for Win 98SE ME 2000 XP Intel Application Accelerator RAID Edition for Win XP Intel 10 100 1G L...

Страница 98: ... not for any of the other IDE controllers HighPoint IDE Raid Utility for Win 98SE ME 2000 XP The RAID Administrator utility is used to monitor or perform maintenance on a RAID Administrator Mirror RAID 1 or Stripe RAID 0 Visual messages are available to warn of possible problems with the disk array or controller Note that this utility only changes RAID settings for IDE3 and IDE4 the HighPoint RAID...

Страница 99: ...re a restart of your system before they become active Step 3 Check the Latest Releases Click the Check the latest Releases button to go the SOYO Website to automatically find the latest BIOS manual and driver releases for your motherboard This button will only work if your computer is connected to the internet through a network or modem connection Make sure that your internet connection is up befo...

Страница 100: ...Drivers installation SY P4I875P DRAGON 2 95 After Windows XP installation your device manager should look like this ...

Страница 101: ...lation SY P4I875P DRAGON 2 96 After driver installation your Windows XP device manager should look like this Note To install the USB 2 0 driver please update to Windows XP service pack 1 check chapter 5 for more info ...

Страница 102: ...SY P4I875P DRAGON 2 97 Drivers directory list in the CD driver C Media Audio Driver Intel Inf Driver Intel Lan Driver HPT 372 RAID driver Intel USB2 0 Driver For Windows 98 me 2k Sil3112 driver H W monitor ICH5R RAID Driver ...

Страница 103: ... Service Pack1 Include USB2 0 Driver After installing service pack1 please do the following 1 Go into the device manager 2 Remove 3 Restart your system Next time Windows XP starts up a new USB 2 0 controller will be found For Windows 2000 1 Click Windows Start then move the mouse to stay on Settings 2 Click Control Panel 3 Double Click System 4 Click Hardware tab 5 Click Device Manager 6 Right Cli...

Страница 104: ...earch for a suitable driver for my device 11 Click Next 12 Choose Specify a location under Optional search locations 13 Click Next 14 Click Browse to specify the file path where the driver is e g SOYO Dragon CD USB2 0 INTEL 2k EHCI Package 15 Click Next 16 Click Finish ...

Страница 105: ...the CMOS setup SOYO COMBO Feature Onboard Device and set the Onboard RAID IDE 3 4 to Enable 3 Go to the CMOS setup SOYO COMBO Feature and set the First Boot Device to Other Device 4 Set the Other Device Boot Order to IDE3 IDE4 SCSI 5 Press Ctrl H when the HighPoint BIOS summary screen appear 6 Create a disk array check appendix A for create instructions 7 Install the HP372 driver see driver instal...

Страница 106: ...If Windows can not find new hardware the driver can be installed through the following steps Windows XP 1 Right click on My Computer select Properties This will start up the System Properties 2 Select Hardware Device Manager 3 You will see 2 RAID Controller entries under unknown device one of them is the Highpoint RAID controller and the other is the Silicon Image RAID controller 4 Right click RAI...

Страница 107: ...ind 4 available drivers Choose the driver with location f raid hpt372 win_xp hpt3xx inf If F is your CD ROM 7 During installation Win XP will prompt you the driver has not passed windows logo testing to verify it s compatibility with Windows XP click Continue Anyway 8 Follow the system prompt to finish the installation and restart the computer ...

Страница 108: ...ct DragonCD D Raid hpt372 Win_2000 folder click OK 8 Follow the system prompt to finish the installation and restart the computer Windows ME 1 Insert SOYO CD into CDROM 2 Click Start Settings Control Panel System Device Manager 3 You will see a PCI RAID Controller under Unknown Devices 4 Double click PCI RAID Controller Reinstall Driver Next and then update driver 5 Choose Specify the location of ...

Страница 109: ... Controller under Unknown Devices 4 Double click PCI RAID Controller Reinstall Driver Next and then update driver 5 Choose Search for better driver than the one your driver is using now Recommanded click Next 6 Choose Specify a location click Browse 7 Select DragonCD D Raid hpt372 Win98_ME folder click OK 8 Follow the system prompt to finish the installation and restart the computer ...

Страница 110: ...t Highpoint HPT3xx ATA RAID Controller Win XP to continue 7 Win XP will prompt you that a message that the driver is newer than the default driver press S use the driver on floppy to continue 8 The follow on interface will list the devices to be installed in which Highpoint HPT3xx ATA RAID Controller Win XP item should be included If users want to install other devices press S at this time Press E...

Страница 111: ... Controller Win2000 to continue 7 Win 2000 will prompt you that a message that the driver is newer than the default driver press S use the driver on floppy to continue 8 The follow on interface will list the devices to be installed in which Highpoint HPT3xx ATA RAID Controller Win2000 item should be included If users want to install other devices press S at this time Press ENTER to continue Window...

Страница 112: ...Go to the CMOS setup SOYO COMBO Feature Onboard Device and set the Onboard RAID SATA 3 4 to Enable 2 Go to the CMOS setup SOYO COMBO Feature and set the First Boot Device to Other Device 3 Set the Other Device Boot Order to SATA3 SATA4 SCSI 4 Press Ctrl S or F4 when the Silicon Image BIOS summary screen appear 5 Create RAID set check appendix A for more info on creating RAID set To boot from the S...

Страница 113: ...ystem If Windows can not find new hardware the driver can be installed through the following steps Windows XP 1 Click Start Setup Control Panel Switch to classic View system hardware device manager 2 You will see a RAID Controller under unknown device 3 Right click RAID controller and then update driver ...

Страница 114: ...ws XP just click continue anyway 6 Follow the system prompt to finish the installation and restart the computer Windows 2000 1 Insert SOYO CD into CDROM 2 Click Start Settings Control Panel system device manager 3 You will see a RAID Controller under unknown device 4 Double click RAID Controller Reinstall Driver click Next 5 Choose Search for suitable driver for my device Recommanded click Next 6 ...

Страница 115: ...a location click Browse 7 Select DragonCD D Raid hpt372 Win98_ME folder click OK 8 Follow the system prompt to finish the installation and restart the computer Windows 9x 1 Insert SOYO CD into CDROM 2 Click Start Settings Control Panel system device manager 3 You will see a PCI RAID Controller under unknown device 4 Double click PCI RAID Controller Reinstall Driver Next and then update driver 5 Ch...

Страница 116: ...e Press F6 if you need to install a third party SCSI or RAID driver Appear below 5 Press S key to specify additional devices when the Windows XP Setup window appears 6 Insert the floppy disk of driver then press Enter to continue 7 In the follow on window of device type please select Silicon Image Sil 3x12 SATARaid controller for windows XP to continue 8 Win XP will prompt you that a message that ...

Страница 117: ...l a third party SCSI or RAID driver Appear 5 Press S key to specify additional devices when the Windows 2000 Setup window appears 6 Insert the floppy disk of driver then press Enter to continue 7 In the follow on window of device type please select Silicon Image Sil 3x12 SATARaid controller for Windows NT and 2000 to continue 8 Win 2K will prompt you that a message that the driver is newer than th...

Страница 118: ... 3 The start installing Windows operating system no drivers is needed To use SATA1 and SATA2 as RAID 0 function please do the following steps 1 Go to the CMOS setup Soyo combo Feature onchip device and set the IDE1 2 SATA1 2 to SATA only or IDE SATA depending on your system configuration 2 Set SATA Mode to RAID0 3 Press Ctrl I when the ICH5RBIOS summary screen appears 4 Create a disk array 5 Insta...

Страница 119: ...ify additional devices when the Windows XP Setup window appears 6 Insert the floppy disk of driver then press Enter to continue 7 In the follow on window of device type please select Intel 82801ER SATA RAID Controller to continue installation 8 The follow on interface will list the devices to be installed in which Intel 82801ER SATA RAID Controller item should be included If users want to install ...

Страница 120: ...115 APPENDIX A HighPoint HPT 372 ...

Страница 121: ... Allowed maximum 4 disks connection to every controller Does not support ATAPI devices Hot swapping failed hard disk in mirror array Support independent use of hard disk Support hot spare disk Support Operating Systems DOS Windows 3 x Windows 98 Me Windows NT4 0 Windows 2000 Windows XP Windows based software for RAID management compatible with BIOS Disk error alarm mechanism Event log for easy tro...

Страница 122: ...y using 1 HPT372 BIOS Utility Configuration Need to use this utility if you plan to install an operating system on IDE3 4 2 Highpoint ATA RAID Management software Recommend using this software if you already have an existing operating system in IDE1 2 ...

Страница 123: ...and Help It displays the illustrating information of the current selection and the available operation prompts Channel Status It displays the status information of all devices in connection When it is active users can select the device to be operated I Create RAID The following steps shall be taken to create RAID in BIOS 1 Use the arrow key to select 1 Create RAID 2 Press Enter to confirm and go t...

Страница 124: ...r must select four single disks All data on these disks will be destroyed after creation of RAID 0 1 3 Different warning messages appear according to different RAID levels II Delete RAID The following steps shall be taken to delete RAID 1 In the menu zone select 2 Delete RAID press Enter to confirm this operation and go to next 2 In the validated channel status use the arrow key to select the disk...

Страница 125: ...isk The following steps shall be taken to add the spare disk 1 In the menu select 4 Add Spare Disk and press Enter to confirm 2 In menu select 1 Select Mirror Array None and press Enter to confirm 3 In the validated channel status select the mirror array and press Enter to confirm 4 In the menu select 2 Select Spare Drive None and press Enter to confirm 5 In the validated channel status select the...

Страница 126: ...o confirm VII Set Boot Disk The following steps shall be taken to set the boot disk 1 In the menu select 7 Set Boot Disk item press Enter to confirm 2 In the validated channel status zone use the arrow key to select the boot device and press Enter to confirm Note 1 The Set Boot Disk item appears on condition that no hard disk is connected to IDE on motherboard 2 After the boot disk is set its stat...

Страница 127: ...122 APPENDIX B Silicon Image 3112 ...

Страница 128: ...lve Conflicts Below this will be listed the drives currently installed on the system Creating RAID Sets Because SATARaid supports two drives creating RAID Sets is a simple procedure 1 Select Create RAID Set 2 Choose either a Striped or Mirrored RAID Set 3 Select if you want the utility to Auto Configure the RAID Set or if you want to manually configure the RAID Set For Striped Sets you can change ...

Страница 129: ...it and then a second disk is added for redundancy The data on the source drive can be copied to the destination drive so the disks are identical and all subsequent data will be written to both drives as a Mirrored set If however the source disk does not have data already stored on it there is no need for Disk Copy ...

Страница 130: ...125 APPENDIX C Flashing BIOS ROM ...

Страница 131: ...rsion follow the following steps 1 Download the BIOS for your motherboard from our website 2 Copy the BIOS BIN file onto a clean formatted floppydisk 3 Insert the floppydisk into your system 4 Restart your system until you see the Dragon Logo Press TAB immediately You should see the following ...

Страница 132: ...127 5 Press ALT F2 to start up AWDFLASH You should see the following screen ...

Страница 133: ...128 6 AWARD flash will now automatically flash your BIOS and reset when it is done ...

Страница 134: ...129 APPENDIX D Troubleshooting ...

Страница 135: ...pply The minimum should be 350 watts for a minimally loaded system or 400 watt for a fully loaded system 5 Remove the M B from the case and test the system The M B might be shorted to the case The system powers up no video no beeping sound heard but the CPU fan is turning 1 Clear the CMOS RAM JP5 connector see the manual for more info on how to clear the CMOS 2 Check all the jumper settings on the...

Страница 136: ...e VGAcard Make sure theAGP card is 1 5v not 3 3v The system turns on for some seconds then shut down by itself 1 Check if the CPU fan is connected to the CPUFAN1 connector 2 The CPU might be overheating Check the CPU FAN if it is defective or see if the CPU fan is in contact with the CPU 3 Clear the CMOS ram JP5 connector see the manual for more info on how to clear the CMOS 4 Make sure the power ...

Страница 137: ...f your battery is empty the error will occur more frequently You will need to replace the battery in this case If the problem persists re flash the BIOS If all fails your BIOS chip is failing and needs to be replaced 3 Change the CMOS battery 4 Re flash BIOS 5 The BIOS chip might be failing StabilityIssues My system intermittently locks up very unstable 1 Check the CPU Temp it might be overheating...

Страница 138: ...mainboard is shorting out against the case 11 Check if your memory module timings set in CMOS setup are supported by your memory module My system intermittently locks up during Windows installation 1 Go to BIOS and load the optimized defaults 2 Check our website for any BIOS updates 3 If it still has the problem remove all other add on cards except CPU and CPU Fan Memory Video card Hard disk See i...

Страница 139: ...vision How can I flash the BIOS You can 1 Download the BIOS from our support website 2 Make a bootable floppy disk with out any memory manager loaded i e himem emm386 etc 3 Copy the BIOS file and awdflash utility to the diskette 4 Type awdflash biosname bin sn py 5 Then reboot Or 1 Download the BIOS from our support website 2 Copy the BIOS to an empty floppy disk no other files on the disk 3 Press...

Страница 140: ... screen has no display but I can hear the hard disk operating Check the VGAcard manufacturer for a driver update and VGABIOS update make sure the VGAcard supports the Suspend to Ram function AudioIssue How can I disable the on boardAudio Go to the SOYO Combo Feature menu in the BIOS setup then set the onboard audio to disable I cannot get the sound working on my system 1 Check if the speaker wire ...

Страница 141: ... check if the line in and or microphone are enabled 2 Check if the Microphone line in device is ok 3 If you use the 4 channel option and you are connection your PC not via the SPDIF card line in will be disabled Line in works normally when using the SPDIF card for speaker connections in 4 channel mode Added PCI Audio Card does not work on this motherboard 1 Go to SOYO COMBO Setup and Disable onboa...

Страница 142: ...ppy drivers have their own jumper to make the same twist as the twist on the cable Make sure this jumper is set not to twist the cable while the floppy drive is connected to the twisted end of the cable RAIDissue Windowsdoesnotdetecttheon boardRAID 1 Enable the on board RAID function in the BIOS 2 Install the RAID driver see chapter 6 for more info CanIusemyCD ROMorotherIDEdevice exceptHDD onIDE3 ...

Страница 143: ...nteringWindowssystem MakesuretheraidoptionintheBIOSisenabled LANIssues I have problem installing Novell NetWare v 50 Disable theAPIC option in the BIOS For updated FAQs please check http www soyo com tw faq htm or http www soyousa com faqs html ...

Страница 144: ...139 APPENDIX E Contact Information ...

Страница 145: ...ulivein TAIWAN SOYOCOMPUTERINC No 21 Wu Kung 5 Rd Hsing Chuang City TaipeiHsien Taiwan R O C TEL 886 2 22903300 FAX 886 2 22983322 http www soyo com Email info mail soyo com tw USA SOYOINC 41484ChristyStreet Fremont CA94538 USA TEL 1 510 226 7696 FAX 1 510 226 9218 http www soyousa com http www soyousa com kb Email support soyousa com GM SOYODeutschlandGmbH SAATTechnologyGmbH Gewerbepark8a 26209Ha...

Отзывы: