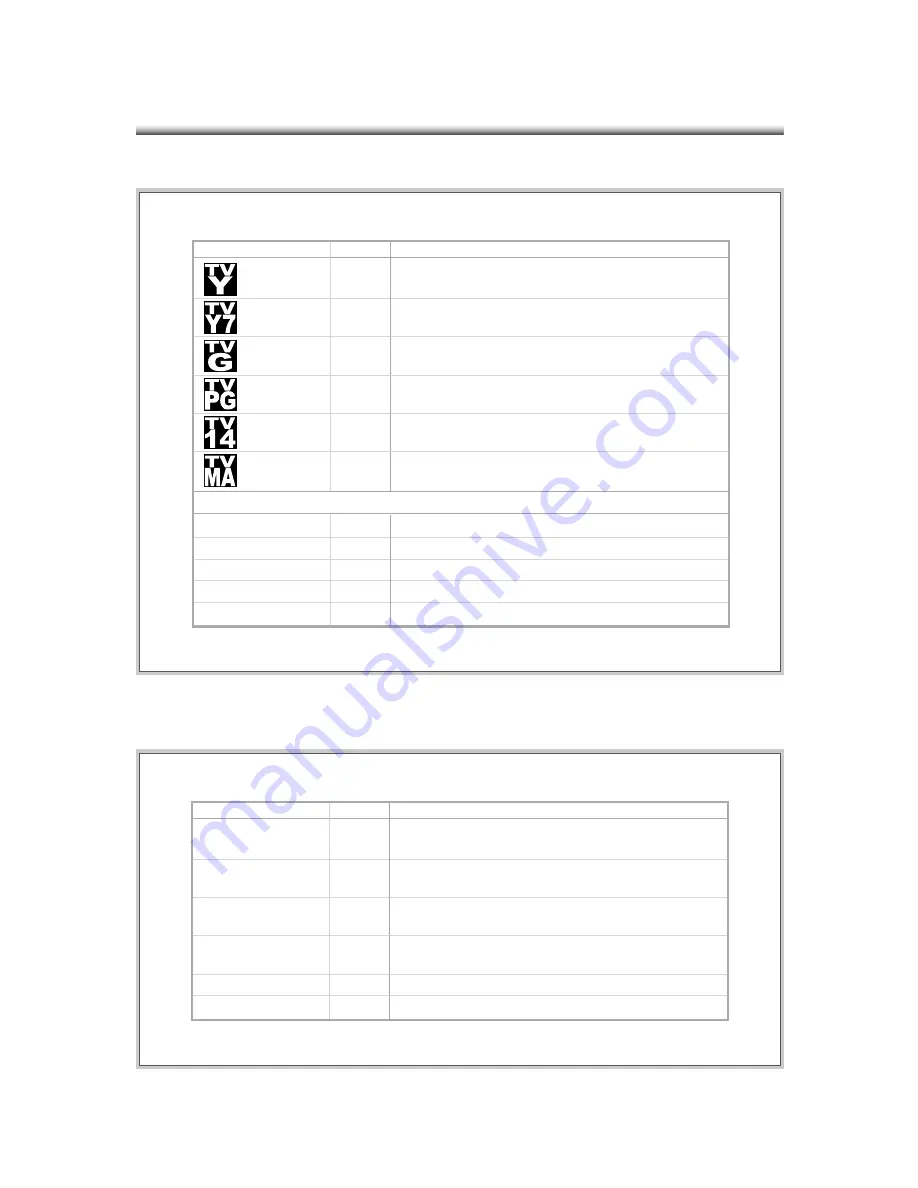
background image

39

Symbol/Icon

Description

Television shows with Y ratings are usually designed for children;
these are suitable for all ages.

TV_Y

Menu Text

Television shows with Y7 ratings are designed for older children;
these are suitable for ages 7 and up.

TV_Y7

Television shows with G ratings are designed to be family-friendly.

TV_G

Television shows with PG ratings are designed to be family-friendly,
and they aim for older children.

TV_PG

Television shows with 14 ratings are designed for viewers ages 14 and
older.

TV_14

Television shows with MA ratings are designed for adult viewers
only.

TV_MA

Content Descriptions

Fantasy Violence

FV

Violence

V

Sexual Situations

S

Language

L

Suggestive dialogs

D

Symbol/Icon

Description

Movies with G ratings are suitable for all ages.

G

Menu Text

Movies with PG ratings may have some unsuitable materials for
children.

PG

Movies with PG-13 ratings may have some materials unsuitable for
children under 13.

PG-13

Movies with R ratings require anyone under 17 to be accompanied by
an adult guardian.

R

Movies with NC-17 ratings prohibit anyone 17 and under to be admitted.

NC-17

G
(General Audiences)
PG
(Parental Guidance Suggested)
PG-13
(Parents Strongly Cautioned)
R
(Restricted)
NC-17

Movies with X ratings prohibit anyone 17 and under to be admitted (NC-17).

X

X

TV Rating Descriptions

MPAA Movie Rating Descriptions

Содержание Dymond DYLT032A

Страница 1: ...Box CommonlyUsedForHDTVs SatelliteTVsetc 17 Connecting the Component Video 19 Connecting the S video orComposite Video 20 Connecting the PC 21 Controlling the HDMI 22 Setting Up Your Television Changi...

Страница 2: ...tents Due to continuing system improvements these changes will be incorporated in newer editions Copyright Copyright 2005 This document contains proprietary information protected by copyright All righ...

Страница 3: ...ipment off and on the user is encouraged to try to correct the interference by one or more of the following measures Reorient or relocate the receiving antenna Increase the separation between the equi...

Страница 4: ...e safety purpose of the polarized or ground ing type plug A polarized plug has two blades with one wider than the other A grounding type plug has two blades and a third grounding prong The wide blade...

Страница 5: ...gerous voltage or other hazards Refer all servicing to a quali ed service personnel 18 Damage Requiring Service Unplug this product from the wall outlet and refer servicing to quali ed service personn...

Страница 6: ...ed Caution To prevent re shock hazard or interference only use the recommended accessories To prevent electric shock do not use the plug with an extension cord receptacle or other outlet unless the bl...

Страница 7: ...or mois ture Turn off the product if liquid is acciden tally spilled into the TV Contact your lo cal dealer for assistance Make sure the power cord from the AC outlet is unplugged and disconnect from...

Страница 8: ...sol clean ers Do not expose the TV to heat sources such as radiators heaters stoves and other heat generating products includ ing audio ampli ers Do not place heavy items or belongings on the top of t...

Страница 9: ...on to the following when handling the screen Do not use glue or adhesive tape on the screen Do not write on the screen Do not allow the screen to come in contact with any hard objects Do not allow con...

Страница 10: ...10 Supplied Accessories The following items come along with your LCD TV Remote control Two AAA batteries Power Cord User Manual USER M ANUAL...

Страница 11: ...andby Orange Power save mode POWER 3 Press this button to turn the TV on or off CH 4 Press to change channel In the OSD menu these keys serve as navigation keys VOL 5 Press to adjust the volume In the...

Страница 12: ...2 Insert two AAA batteries Use the and marks to guide you The marks on your batteries corre spond to the marks on the compartment The marks on your battery correspond to the marks on the compartment...

Страница 13: ...Adjusting keys in Source and Setup menu when in PIP mode Press this key to turn off the sound Press the MUTE button again or press VOL VOL to enable sound MULTI PICTURE 14 Switches among PIP Picture I...

Страница 14: ...igital media player HDTV Set top Box Progressive HD DVD Player Both component 1 and component 2 support both High Definition programs 720p 1080i and standard definition programs 480i 480p PC RGB input...

Страница 15: ...e cable to the ANT input in the rear of the LCD TV Coaxiel Cable not supplied LCD TV REAR Y 120V Y P C P C P C P C COMPONENT AV 1 POWER PC L R L SPDIF HDMI SVC PC R V S1 L R AV 2 V S2 L R OUT V L R L...

Страница 16: ...ilable chan nels for you For more information on the TV menu refer to Page 31 32 CHANNEL MTS ADD ERASE SKIP TO ADJUST MENU TO RETURN CATV 1 MAIN START ADDED ON TV TV CATV AUTO PROGRAM 6 Press the MENU...

Страница 17: ...to connect the AUDIO L R output jacks of your digital set top box to the AUDIO L R input jacks in the rear of the LCD TV If you use the HDMI cable you don t need to connect the audio cable between the...

Страница 18: ...gives the best performance for HD programs 2 If your digital set top box doesn t provide HDMI jacks use the component cables for better picture quality or S video cable for standard picture quality 5...

Страница 19: ...r DVD player to the blue Pb Cb jack on the rear of the LCD TV 4 Use the AUDIO Cable to connect the AUDIO L R output jacks of your DVD Player with the AUDIO L R input jacks in the rear of the LCD TV Co...

Страница 20: ...video jack on the back of your VCR to the yellow composite video input jack on the rear of your LCD TV under AV 2 Input 4 Connect the red R and white L audio jacks on the back of your VCR to the secon...

Страница 21: ...he LCD TV 3 Press the Source button on the remote control to select PC 4 You may con gure your PC s VGA resolution to optimized resolution on the LCD TV The recommended resolution of the LCD TV is 102...

Страница 22: ...LCD TV 2 Press the SOURCE button on either the remote control or the TV controls Select HDMI Changing the source refer to Page 23 Connecting the HDMI SOURCE TV AV1 S1 AV2 S2 PC HDMI COMPONENT 1 COMPON...

Страница 23: ...emote control or TV controls 2 Scroll using or on the remote control or CH on TV con trols 3 Select your choice by using OK on the remote control or VOL on TV controls Changing the Source SOURCE TV AV...

Страница 24: ...o change the se lected settings 6 Press MENU to exit the OSD menu Accessing the OSD On Screen Display Menu MODE COLOR BRIGHTNESS CONTRAST TINT SHARPNESS ALL RESET TO NAVIGATE OK TO SELECT MENU TO EXIT...

Страница 25: ...BRIGHTNESS COLOR TINT SHARPNESS NR CLOSED CAPTION ALL RESET VIDEO AUDIO OPTIONS V CHIP TV SCREEN TREBLE BASS BALANCE SOUND MODE SPEAKER ALL RESET DISPLAY MODE H SIZE H POSITION V POSITION FINE TUNE DE...

Страница 26: ...e screen Example 1 Use or to CUSTOM 2 Press to contrast and press OK or to select 3 Press to adjust the contrast VIDEO COLOR BRIGHTNESS TINT SHARPNESS TO ADJUST MENU TO RETURN NR CLOSED CAPTION STANDA...

Страница 27: ...tom Mode only ALL RESET 0 100 Color adjusts the intensity of color custom mode must be on COLOR 25 25 Tint adjusts the natural aspect of a color custom mode must be on TINT 0 100 Sharpness adjusts the...

Страница 28: ...ion lets the user turn off or on your TV speakers SPEAKER ON OFF All reset will revert the treble bass and balance back to default ALL RESET MONO STEREO This option lets the user choose between mono a...

Страница 29: ...DISPLAY MODE 0 100 Adjusts the horizontal size PC source only H SIZE 0 100 Adjusts the horizontal position PC source only H POSITION 0 100 Adjusts the vertical position PC source only V POSITION 0 63...

Страница 30: ...mage only by its sides by stretching horizontally The center por tion of the image is undistorted In most cases widescreen videos such as DVD movies widescreen modes will have black spots on the top a...

Страница 31: ...V AUTO PROGRAM MTS ADD ERASE SKIP CATV 1 MAIN START ADDED ON TV TO ADJUST MENU TO RETURN CHANNEL 2 When you are on the channel you wish to add erase scroll down to the ADD ERASE 3 If you wish to add t...

Страница 32: ...n allows the user to use the channel up and down buttons and not encounter invalid or dead channels SKIP MAIN SAP Second Audio Program MTS is the option that allows the user to change the sound option...

Страница 33: ...he user may chose the color of the Blue Screen BLUE SCREEN ON OFF When this option is turned on if the user is in idle for more than five minutes on a dead or invalid the TV will turn off automaticall...

Страница 34: ...is 000000 six zeros in order to change this sim ply scroll down to change pass word more information on Page 35 V CHIP MOVIE RATING LIMIT TV RATING LIMIT UNRATED PROGRAM CHANGE PASSWORD ON EDIT VIEW...

Страница 35: ...iewer to view or block unrated programs UNRATED PROGRAM Edit refer to Page 38 This allows the user to change the V Chip menu password CHANGE PASSWORD Edit refer to Page 36 This allows the user to bloc...

Страница 36: ...MIT and another screen will appear 2 Press or to scroll to the selec tion you want to edit 3 Press or to edit the selection that is highlighted 4 V means that the selection can be viewed B means that...

Страница 37: ...LIMIT and another screen will appear 2 Press or to scroll to the selec tion you want to edit 3 Press or to edit the selection that is highlighted 4 V means that the selection can be viewed B means th...

Страница 38: ...ANGE PASS WORD and another screen will appear 2 Enter the old password where indicated OLD PASSWORD Default password is 000000 six zeros 3 Press to scroll to NEW PASS WORD and enter your new six digit...

Страница 39: ...iewers only TV_MA Content Descriptions Fantasy Violence FV Violence V Sexual Situations S Language L Suggestive dialogs D Symbol Icon Description Movies with G ratings are suitable for all ages G Menu...

Страница 40: ...e the ACTIVE WINDOW on your remote control to navigate between which window you wish to adjust channels volumes OSD video settings and etc 4 To adjust the position of the PIP simply press MENU on your...

Страница 41: ...abnormal or improper There is no picture or sound 1 Check the brightness and contrast level setting from the OSD video menu 2 Check the Backlight setting in the OSD options menu 1 Check the brightnes...

Страница 42: ...ke sure there is no device near by the LCD TV generating interference 3 Turn the TV off for 10 seconds and turn it on again Remote control does not work 1 Make sure the volume level is not set to tne...

Страница 43: ...ub 1 Built in speaker 10W 2 HDMI in HDMI 1 Multi picture Screen Size adjustment Video Features Color Temperature Progressive Scan 3 2 pull down Yes Wide Screen Panoramic 4 3 Video 16 9 Zoom Cool Natur...

Страница 44: ...GA output for maximum optimization Source Vertical Frequency Hz Horizontal Frequency Khz Resolution 640 x 480 60 HDMI input PC input 480i 60 480p 60 576p 50 480i 60 Component Y PbCb PrCr 640 x 350 37...

Страница 45: ...window remote control the key to switch from controlling the main picture to picture in pic ture Auto Power Off options menu when this option is on the TV will automatically turn off after 5 idle minu...

Страница 46: ...tal Display LED general Light Emitting Diode a form of a light bulb Letterbox general this is the video setting that is usually used by widescreen videos in DVDs It includes black spots on the bottom...

Страница 47: ...omponent input Position options menu adjusts the position of the picture in picture screen Pr Cr inputs and outputs part of the component input Prog TV controls program Recall remote control goes back...

Страница 48: ...ness higher color and higher sharpness VCR general Videocassette Recorder VGA general Video Graphics Array VOL remote control TV control Volume Warm options menu gives a red tint Widescreen screen men...

Отзывы: