background image

2

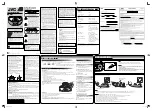
CONTROLS

3

2

1

1) Plak-up Holder
2) Speed Selector
3) Spindle Adapter
4) LCD Display
5) CD Skip Backward button
6) Power button
7) Power Standby button
8) Remote Sensor
9) Extra Bass Selector
10) Phones Jack
11) CD Mode button
12) Tuner/Band Selector
13) Tape Selector
14) Deck 1 Control

 RECORD (recode) button - DECK A

only

 PLAY (playback) button

REW (rewind) button
 F.FWD (fast forward) button
 STOP/EJECT (stop/eject) button

 PAUSE button

15) CD Door
16) CD Skip Forward button
17) Standby LED Indicator
18) Volume Up button
19) Volume Down button
20) Tuning button
21) CD PLAY/PAUSE button
22) Dubbing Speed Selector
23) Dis

c

 Changer button

24) FM Mode Selector
25) Phono Selector
26) CD Selector
27) CD STOP button
28) Deck 2 Control button
29) CD Door Open/Close button
30) Disc Selector
31) FM Wire Antenna
32) Speaker Jacks
33) Beat Cut Switch
34) AM Antenna
35) AC Power Cord

37) Remote Control Handset

36) 75 OHM Antenna

37

6

8
7

11

9

10

12
13

21

24

22

25
26

23

20

16

17
18

19

30

4

5

29

28

27

15

14

33

34
36
31

32

35

Содержание MCD 5020-1

Страница 1: ...BEDIENUNGSANLEITUNG Modell MCD 5020 1 Bitte vor Inbetriebnahme sorgfälltig durchlesen ...

Страница 2: ...MCD 5020 1 INSTRUCTION MANUAL Stereo Radio Double Cassette Recorder with 3 CD Changer and Turntable ...

Страница 3: ...amaged Are cassette heads dirty If so clean as directed in MAINTENANCE section of this manual Record button cannot be pressed in Cassette erase protection tab is removed Use another cassette or apply adhesive tape over tab hole Poor Recording Are cassette heads dirty If so clean as directed in MAINTENANCE section of this manual Check tape type Use only Normal Type A cassette tape Tape speed is err...

Страница 4: ...p eject button PAUSE button 15 CD Door 16 CD Skip Forward button 17 Standby LED Indicator 18 Volume Up button 19 Volume Down button 20 Tuning button 21 CD PLAY PAUSE button 22 Dubbing Speed Selector 23 Disc Changer button 24 FM Mode Selector 25 Phono Selector 26 CD Selector 27 CD STOP button 28 Deck 2 Control button 29 CD Door Open Close button 30 Disc Selector 31 FM Wire Antenna 32 Speaker Jacks ...

Страница 5: ...ND BY Switches the unit between Power ON and Stand By modes The Power indicator LED on the unit will remain lit in the Stand By mode 2 CD Open Close button 3 Disc Change button 4 Disc Selector 5 CD Remain button 6 CD Random Memory Down button 7 CD Intro button 8 Memory Up CD Repeat button 9 Time button 10 Sleep button 11 Memory Clock Adjust button 12 CD Mode button 13 Function Select buttons 14 SK...

Страница 6: ... 3 Set the BAND selector as desired 4 Tune in the desired station using the Tuning UP DOWN or SCAN UP button If the FM ST band was chosen the FM STEREO indicator will light to indicate stereo received To listen in Mono or to improve noisy weak signal stereo broadcasts set the FM Mode selector switch to the MONO position The STEREO indicator will go off and FM Mono is now received 5 Adjust the VOLU...

Страница 7: ...ve the cassette Turn the cassette around and reinsert it as previously described Recommended Cassette Tapes In order to obtain optimum performance with the built in cassette tape deck it is essential to use only high quality cassette tapes The bias and equalization of your tape deck is adjusted to yield excellent results if used with brand name tapes Use C 30 C 60 and C 90 cassettes only We do not...

Страница 8: ...FUNCTION selector to TAPE 3 Insert pre recorded cassettes to DECK A and DECK B compartments 4 Press the PAUSE button and PLAY button of DECK B 5 Press the PAUSE button and PLAY button of DECK A 6 Release the PAUSE button of DECK B DECK B will start playing When DECK B reaches the end of the tape DECK B will automatically stop and then DECK A will start playing automatically 7 Adjust the VOLUME EXT...

Страница 9: ...ase the HIGH SPEED SWITCH since this will vary the speed of the program and ruin the recording Power Switch After using the unit turn off the power by releasing the POWER switch Cleaning the unit To keep the unit clean simply wipe with a soft clean cloth moistened with plain lukewarm water Cleaning the Heads To ensure the continued high performance of your unit periodically clean the heads and pin...

Страница 10: ...ls such as record sprays antislatic sprays benzine or thinners to clean compact discs These chemicals can irreparably damage the disc s surface Discs should be returned to their cases after use This avoids serious scratches that could cause the Laser pickup to skip Do not expose discs to direct sunlight high humidity or high temperatures for extended periods Long exposure to high temperatures can ...

Страница 11: ...utton to select the Disc Press the OPEN CLOSE button to close the disc compartment After the disc number total number of tracks and playing time is displayed press the PLAY PAUSE button to start play The first track will begin to play and the CD will then play all tracks on all discs when more than one CD is loaded At the end of the disc the unit will switch to STOP mode Important Information This...

Страница 12: ...possible to enter programs during disc play Press the STOP button first then follow the instructions below PROGRAMMING THE TRACK FROM 1 DISC 1 Select the desired disc 2 Press the MEMORY button The following information will be displayed on the CD Display 3 Select the desired track using the Forward and Reverse SKIP SEARCH buttons 4 P 5 6 ress the MEMORY button The first program selection is now st...

Страница 13: ...first programmed track To Clear The Program Memory If the disc is playing press the STOP button Press the STOP button again until the MEMORY Indicator does not appear The program memory will also be cleared if the disc compartment is opened if the function is changed or if the power is switched off 11 ...

Страница 14: ...ER ON OFF MEMORY CLK ADJ KEY REMOTE CONTROL 1 Press MODE once LCD will appear the clock time Then press MEMORY clk adj 00 00 will appear flashing press SKIP or SKIP to adjust time When done press MODE once to confirm 2 Now TIMER ON will appear flashing on LCD Press MEMORY CLK ADJ SKIP to set the TIMER ON function When done press MODE once to confirm Set unit to STAND BY mode Unit will be ON at the...

Страница 15: ...es to delete this function RANDOM BY REMOTE CONTROL 1 Under STOP mode press RANDOM once LCD will display RANDOM 2 Press PLAY to play a song based on random selection 3 Press RANDOM twice to delete this function THE FUNCTIONS OF DISC 2 DISC 3 DISC CH KEYS BY REMOTE CONTROL 1 If press DISC 1 or DISC 2 or DISC 3 the bottom right hand corner of LCD will display DISC 1 This means the unit is playing 1 ...

Страница 16: ... will skip back to the beginning of that track To make it skip back to the previous track press the Reverse SKIP SEARCH button twice Repeatedly pressing the Reverse SKIP SEARCH button makes the CD player skip back through the disc track by track Once the beginning of the first track is reached the CD played will not go back any further Notes The Forward and Reverse SKIP SEARCH buttons can be used ...

Отзывы: