background image

11

XGS 5500/6500

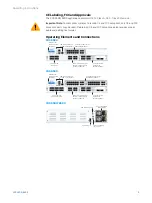
Operating Instructions

Rack Mounting Considerations


Ì

Ambient operating temperature:

 If installed in a closed or multi-unit rack assembly, 

the ambient operating temperature of the rack environment may be greater than the 
ambient temperature of the room. Therefore, you should install the equipment in an 
environment compatible with the manufacturer’s maximum rated ambient temperature.


Ì

Reduced airflow:

 Equipment should be mounted into a 

rack with sufficient airflow to allow cooling.


Ì

Mechanical loading:

 Equipment should be mounted into a rack so that a 

hazardous condition does not arise due to uneven mechanical loading.


Ì

Circuit overloading:

 Consideration should be given to the connection of the equipment 

to the power supply circuitry and the effect that any possible overloading of circuits 
might have on overcurrent protection and power supply wiring. Appropriate consideration 
of equipment nameplate ratings should be used when addressing this concern.


Ì

Reliable ground:

 Reliable grounding must be maintained at all times. To ensure 

this, the rack itself should be grounded. Grounding screws for the appliance 
are on the rear of the chassis. Chassis Grounding is required. Particular 
attention should be given to power supply connections other than the direct 
connections to the branch circuit (i.e., the use of power strips, etc.).

Rack Mounting Instructions

To mount the appliance to the rack you need the delivered rack-mount kits. There are a 
variety of rack units on the market, which may mean the assembly procedure will differ 
slightly. You should also refer to the installation instructions that came with the rack unit 
you are using.

Because of their dimension and weight the XGS 5500/6500 models are delivered with a 
special rail kit.

Important note:

 Make sure you use the screws supplied with the rack-mount brackets. 

Using the wrong screws could damage the hardware appliance and would invalidate your 
warranty. Please observe the mounting instructions for your rack.

1. 

Attach the rack-mount brackets to the appliance:


Ì

Place the appliance on a hard flat surface with the front panel facing you.


Ì

Attach the rack–mount brackets to the left and right side 
of the appliance with the supplied screws.


Ì

Make sure the brackets are properly attached to the appliance.

Содержание XGS 5500

Страница 1: ...Operating Instructions XGS 5500 6500...

Страница 2: ...ls The following symbol and its meaning appears in the Hardware Quick Start Guide Safety Instructions and in these Operating Instructions Caution and Important Note If these notes are not correctly ob...

Страница 3: ...l module COM Micro USB RJ45 2 x USB 3 0 MGMT port 2 x expansion bay shown with optional modules F1 F4 F5 F8 fiber ports LAN 1 8 8 x GbE copper fixed Incl 2 bypass pairs ports 1 2 and 3 4 Multi functio...

Страница 4: ...nnect a USB 2 0 or 3 0 compatible device to this port e g USB thumb drive UPS 3G 4G dongles MGMT RJ45 10 100 1000 Mbps We recommend using this dedicated port to connect your Admin PC Module Slots Type...

Страница 5: ...C to 70 C 20 C to 70 C Operational Storage Humidity 10 to 90 non condensing 10 to 90 non condensing Operational Storage Altitude 2000 5791 m 2000 5791 m MTBF hours Telcordia SR 332 Issue 3 135099 135...

Страница 6: ...do not function correctly Speed Right LED Blue On If SFP connector is operating at 10 000 Mbps Amber On If SFP connector is operating at 1 000 Mbps Off Either the LED is not working or the SFP connec...

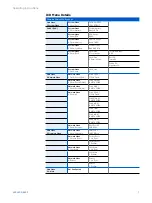
Страница 7: ...0 Main Menu 2 Network Menu Network Menu 1 Show Port A1 LAN Port A1 LAN 172 16 16 16 Network Menu 2 Show Port A2 WAN Port A2 WAN IP NOT ASSIGN Network Menu 3 Show Port A3 NA Port A3 NA IP NOT ASSIGN N...

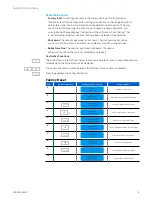
Страница 8: ...ill shut down the system completely and reboot Control Key Functions The current menu is left When the key is pressed a couple of times the modifications are discarded and the initial state will be di...

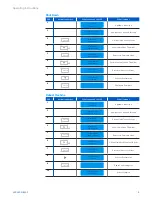
Страница 9: ...key to continue 8 Factory Reset 1 Confirm Asks for Confirmation 9 ENTER Shutdown Complete Reboot Machine S NO Action Item press What you see on the LCD What it means 1 SOPHOS Protection Appliance is...

Страница 10: ...tabilizers should be attached to the rack In multiple rack installations the racks should be coupled together Always make sure the rack is stable before extending a component from the rack You should...

Страница 11: ...mes To ensure this the rack itself should be grounded Grounding screws for the appliance are on the rear of the chassis Chassis Grounding is required Particular attention should be given to power supp...

Страница 12: ...ith a RAID 1 system with two Solid State Drive A RAID system redundant array of independent disks connects several physical Solid State Drive to one particularly performing logical drive RAID 1 enhanc...

Страница 13: ...power units which are not suited for the system Exchanging a power supply unit 1 Remove the cord taking care to release the cord from the cord retention device 2 Move the green lever of the power supp...

Страница 14: ...he module Please read the operation manual to the module Serial Console You can connect a serial console to either the RJ45 or micro USB COM port to access the CLI Only one port can be used at any tim...

Страница 15: ...9409 9100 Email sales sophos com au Asia Sales Tel 65 62244168 Email salesasia sophos com Copyright 2021 Sophos Ltd All rights reserved Registered in England and Wales No 2096520 The Pentagon Abingdon...

Отзывы: