– 17 –
XS1
RM-Y1010
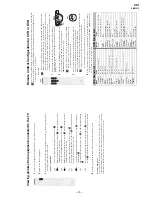
Viewing pictures from equipment connected to the TV
1
Con
nect y
our equipment
to
the designate
d
TV
socket, as
ind
icated on
page
38.
2
Switch on
the con
nected
equipment.
3
To watch the
picture fr
om
the connected equi
p
m
ent, press
the
button repeatedly
until
the
correct
input symbol appears
on the screen.
Symb
ol In
pu
t Sign
als
1
•
Au
dio / video
input signal through
th
e Scart
connecto
r
I
1
•
RGB inp
u
t signal thr
ough the
Scar
t connector
I
. This symbol appears on
ly if
an RGB
source has been
connected.
2
•
Au
dio / video
input signal through
th
e Scart
connecto
r
J
.
2
•
RGB inp
u
t signal thr
ough the
Scar
t connector
J
. This symbol appears on
ly if
an RGB
source has been
connected.
3
•
A
u
dio/v
ideo input
signal through
the Scart connector
K
.
3
•
S Vid
eo Input signal through
the Scart connecto
r
K
. This sy
mbol
appears only
if an S Video
sour
ce has been connected.
4
•
Compon
ent in
put
signal through
the Y
,
P
B
/C
B
, P
R
/C
R
jacks
H
and
audio input
signal through
G
.
5
•
Vid
eo input
sig
nal th
rough the
phon
o
socket
B
an
d
Audio
input signal throu
gh
C
.
5
•
S Video
In
put signal
through the
sid
e S Video
input jack
A
and Audio signal
through
C
. Th
is symbol appears only
if
an S Video
sou
rce has
been connected.
4
Pr
ess the
button on
the remote
contro
l to retu
rn
to
the normal TV picture.
For Mono Equipmen
t
Connect the phono plug to the
L/G/S/I
socket
o
n
the side of the
TV
and
select
5
or
5
input sign
al
using
the instruction
s
abo
ve. Next
, refer
to
th
e
“Sound Adjustment
” section of this
manual and
set
“Dual Soun
d
” option to
“A
” on
the sound me
nu
screen
(see page
2
0
).
S
S
S
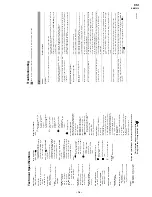
Remote Control Configuration for VCR or DVD
In it
’s d
efault co
ndition
this
remote control will
operate th
e
basic fun
ctions of
this
Sony TV,
So
ny DVDs and
most Sony V
C
Rs
.
To control VCRs
and
DVDs
of other manufacturers
(and s
o
me Sony V
C
R
models
),
the
remote
contr
o
l needs to be
configu
red.
To do
this:
•
B
efore you star
t,
look up the 3 digit co
de for you
r brand of
DVD or VCR from the list below.
On tho
se
brands
that
have
more than on
e code, enter the first code
n
u
mber.
•
Sony
will endeavour
to u
pdate the
softwar
e according to market changes. Therefore, please
re
fe
r
to
t
h
e cod
e tab
le inc
lude
d wi
th the
re
mot
e con
trol for la
te
st
c
ode set
.
•
A small label
is provided insi
de
the battery door to allow
you
to
record
your brand
codes.
1
Press and hold
the
T
button on
the remote
contr
o
l for
approx
imately 6
seconds until
the green DVD an
d
VCR lig
ht of
the Media Selector
starts
flashing (see
fig. 1)
.
2
While the
VCR and
DVD
lights are
flashing, enter all three digits
of
the
code
for your brand
o
f
VCR or DVD (see the list below)
u
sing
the
number buttons
on the
remote con
trol (see
fi
g.
2).
I
f you
r selected code
is
entere
d
correctly, th
e
green VCR
or
DVD
light
(according
to
yo
ur selecti
on)
wi
ll be li
t mom
ent
ari
ly (see fig
.
3
), othe
rwise re
pea
t all
t
h
e abov
e st
eps.
3
T
u
rn o
n
you
r VCR
or
D
VD
and
check
th
at
the main f
u
nctions (
p
lay
back,
sto
p,
re
wind
,
fa
st fo
rw
ard and
ch
annel selection for
both VCR
an
d
D
VDs
as well as
Menu
and cursors b
u
ttons only
for
D
VDs) w
o
rk
.
•
If
your device
is not workin
g
or
some
of th
e f
unctions do
not
work please check th
at
you
entered
th
e correct
code or try the
n
ext co
de listed against the
br
and.
•
Not all brand
s are
covere
d an
d
not
all mo
dels of every
b
rand may be covered
.
4
Always
remember to
press
the
T
or
t
button until th
e
gr
een light iluminat
es
according
to
the
equip
m
ent you want
to operate with this
remo
te control:
VCR
, TV
or
DVD
. Refer to
pages
42 -
4
3 on
how
to
operate the
AUX
mo
de.
VCR Brand List
DVD Brand List
Bran
d Co
de
Bran
d
C
od
e
S
ONY (VHS)
301,
302, 303,
308, 309,
362
S
ONY (BET
A)
303,
307, 310
S
ONY (DV)
304,
305, 306
AI
WA
325
, 33
1,
3
5
1
AKAI
326
, 32
9,
3
3
0
DAE
WOO
342
, 34
3
G
R
UNDI
G
358,
355,
360,
361,
320,
351,
366
HI
T
A
CHI
327
, 33
3,
3
3
4
JVC
314
, 31
5,
3
2
2
, 34
4,
3
5
2
, 35
3,
3
54,
34
8,
3
4
9
LG
332
, 33
8
LOEW
E
358
, 35
5,
3
6
0
, 36
1,
3
2
0
, 35
1
MATSUI
356
, 35
7
ORI
ON
328
P
ANASO
NIC
321,
323
PHI
LI
PS
311
, 31
2,
3
1
3
, 31
6,
3
1
7
, 31
8,
3
58,
35
9,
363
, 36
4
SAM
SUNG
339
, 34
0,
3
4
1
, 34
5
S
ANYO
335,
336
S
HARP
324
THOMSON
319
, 35
0,
3
6
5
TOSHIBA
337
SONY
001
, 02
9,
030
, 03
6,
0
3
7
, 03
8,
0
3
9
, 04
0,
041
, 04
2,
043
, 04
4,
0
5
3
, 05
4,
0
5
5
AI
WA
021
A
KAI
032
DE
NON
018
, 02
7,
020
, 00
2
GR
UNDIG
009
, 02
8,
023
, 02
4,
0
1
6
, 00
3
HI
T
A
CHI
025
, 02
6,
015
, 00
4,
0
3
5
JVC
006
, 01
7
K
E
NWOOD
008
LG
015
, 01
4,
034
LOE
WE
009
, 02
8,
023
, 02
4,
0
1
6
, 00
3
MATSUI
013
, 01
6
O
NKYO
022,
033
PANASONI
C
018
, 02
7,
020
, 00
2,
0
4
5
, 04
6,
0
4
7
PHI
LI
PS
009
, 02
8,
023
, 02
4,
0
1
6
, 00
3,
0
3
1
PIONEE
R
004
, 05
0,
051
, 05
2
SAM
SUNG
011
, 01
4
SA
NYO
007
SHARP
019
, 02
7
THOMSON
012
TOSHIBA
003
, 04
8,
049
YAM
AHA
018
, 02
7,
020
, 00
2
13
46
7
9
fig. 1
6 sec.
VCR
TV
D
VD
AU
X
MODE
VCR
TV
D
VD
AU
X
MODE
fig. 3
fig. 2
Содержание Wega KE-P37XS1
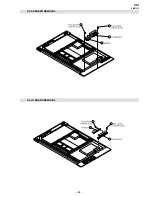
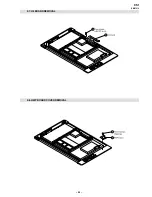
Страница 22: ... 22 XS1 RM Y1010 2 3 SPEAKER REMOVAL 2 4 H1 BOARD REMOVAL 1 2 3 4 1 3 2 4 ...
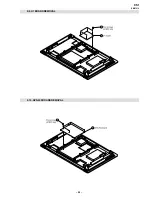
Страница 23: ... 23 XS1 RM Y1010 2 5 H2 BOARD REMOVAL 2 6 H3 BOARD REMOVAL 4 1 3 2 2 1 ...
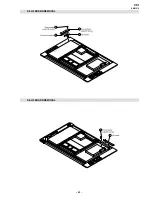
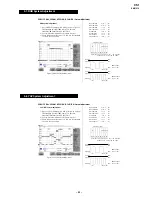
Страница 24: ... 24 XS1 RM Y1010 2 7 H4 BOARD REMOVAL 2 8 HMP BOARD COVER REMOVAL 2 1 2 1 ...
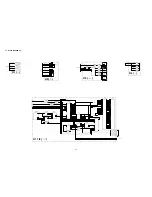
Страница 25: ... 25 XS1 RM Y1010 2 9 U1 BOARD REMOVAL 2 10 APS 202 BOARD REMOVAL 2 1 2 1 ...


