1-31
VPL-PS10/PX10/PX15
12
(GB)
Setting Up the Projector
Setting the date and clock
The clock is displayed on the task bar of the Network
Projector window. To set the date and time, follow the
steps below.
1
From the Start menu of the Network Projector
window, click Control Panel.
2
Double-click the Date/Time icon.
3
Set the date and time.
Assigning an application software to the
FUNCTION key on the Remote
Commander (for VPL-PX15 and VPL-FX50)
If you assigned an application to the FUNCTION 1 or
2 key on the supplied Remote Commander, a touch of
the key enables you to start that application. The
screen keyboard is assigned to the FUNCTION 3 key
at the factory, and you cannot reassign or cancel that
assignment.
For detailed information about the screen keyboard, see
page 29 (GB).
1
From the Start menu of the Network Projector
window, click Control Panel.
2
Double-click the Launch Keys icon.
The Launch Keys Settings dialog box appears.
3
Click Browse for the key (1 or 2) to which you
want to assign an application software, then click
the application you want from the application list.
4
Repeat step
3
if you want to assign an application
to the other key.
5
Click the OK button.
Setting Up from a Computer
Notes
• Connect a single computer you are using for setups to
the projector if the IP address of the projector is not
changed from the factory-preset one.
• If the browser of your computer is set to “Access the
Internet using a proxy server,” enter the IP address of
the projector in the box “Access the Internet without
using a proxy server” when you have access to the
projector from your computer.
• The computer may not accept the password for the
projector, depending on the version of the browser. In
this case, restart the browser.
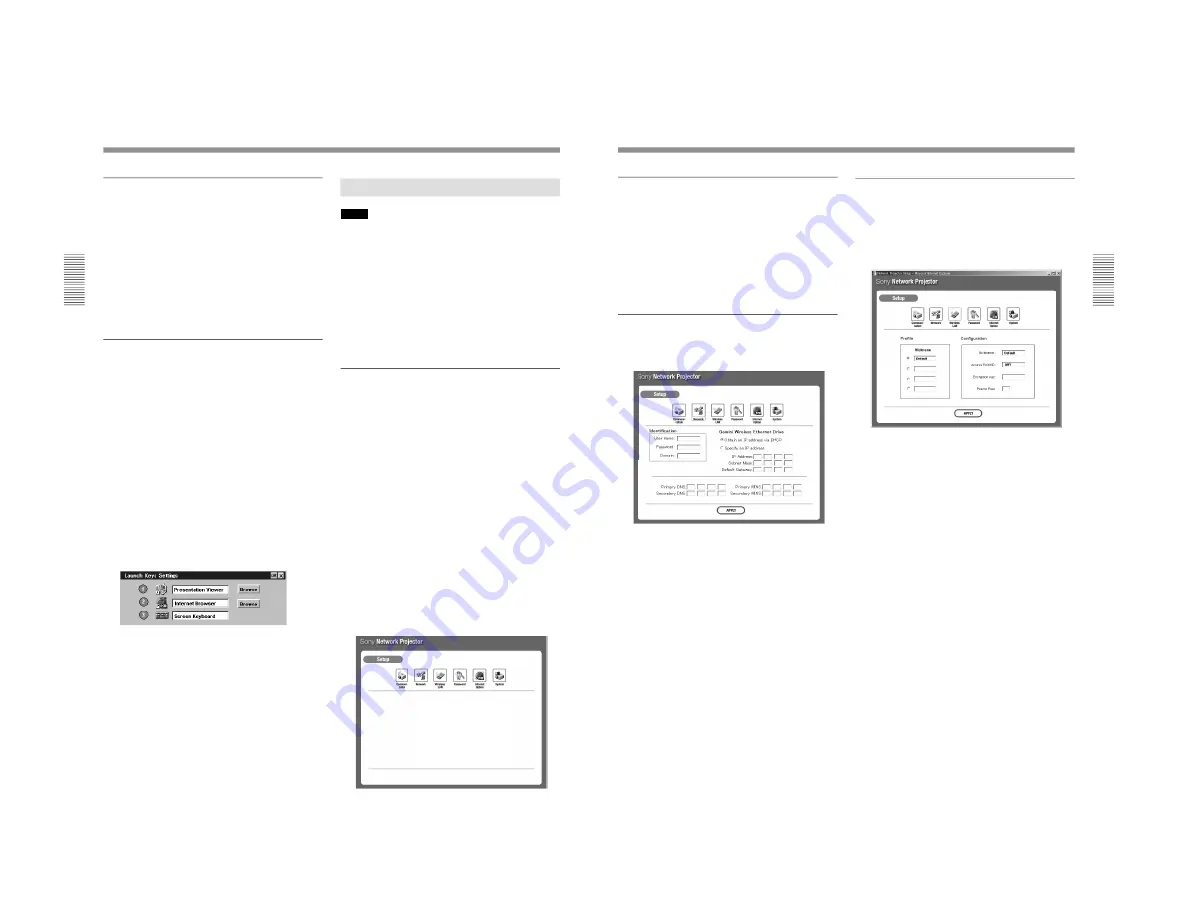
Opening the setup window
1
Start the computer’s browser software (Internet
Explorer 4.0 or later versions, or Netscape
Navigator 4.5x or 4.7x version).
2
Type “http://xxx.xxx.xxx.xxx (for the IP address of
the projector)/setup”.
If the IP address is not changed from the factory-
preset one, type “http://192.168.0.1/setup” (when
using a LAN PC card) or “http://192.168.0.2/
setup” (when using the ETHER connector).
If the number of the IP address starts from 0 (zero),
enter the number without 0.
Example: 192.168.000.001
c
192.168.0.1
The Password dialog box appears.
3
Enter the Name and Password for Administrator.
If the Password setting is not changed from the
factory-preset one, enter “root” in the Name text
box.
The Setup window appears.
13
(GB)
Setting the password
1
Click the Password icon in the Setup window.
The password setting dialog box appears.
Setup procedure is the same as that operated by the
projector.
For details, see “Setting the password” on page 8 (GB).
2
Click the APPLY button.
Setting up the network configuration
1
Click the Network icon in the Setup window.
The Network configuration window appears.
In this window you can set the items described in
steps
4
to
7
in “Setting up the network
configuration” on page 9 (GB).
For details, see “Setting up the network configuration”
on page 9 (GB).
2
Click the APPLY button.
The window for restart appears.
3
Click the RESTART button.
If the projector is turned on and the Network
Projector window is open, the projector’s screen is
turned off for about 10 seconds, then the projector
restarts.
The network setting does not take effect until you
restart the projector.
Setting up the wireless LAN environment
1
Click the Wireless LAN icon in the Setup window.
The dialog box for setting the Nickname, Access
Point ID, Encryption Key and Peer to Peer appears.
Setup procedure is the same as that operated by the
projector.
For details, see “Setting up a wireless LAN
environment–Using a wireless LAN access point/Peer to
Peer (Ad-hoc) mode” on pages 10 (GB) and 11 (GB).
2
Click the APPLY button.
Содержание VPLL-CT10
Страница 8: ......
Страница 32: ...1 24 VPL PS10 PX10 PX15 88 JP ...
Страница 52: ...1 44 VPL PS10 PX10 PX15 Sony Corporation Printed in Japan ...
Страница 100: ......
Страница 104: ......
Страница 150: ......
Страница 194: ......
Страница 196: ...Sony Corporation B P Company 9 870 304 02 English 01GS16 1 Printed in Japan 2001 6 ...


