background image

Viewing Pictures 

After organizing your pictures in the 

My Pictures

 or 

Shared Pictures

 folders, you can use Media Center to view them. 

1.

Press the 

My Pictures

 button on the remote control or keyboard. 

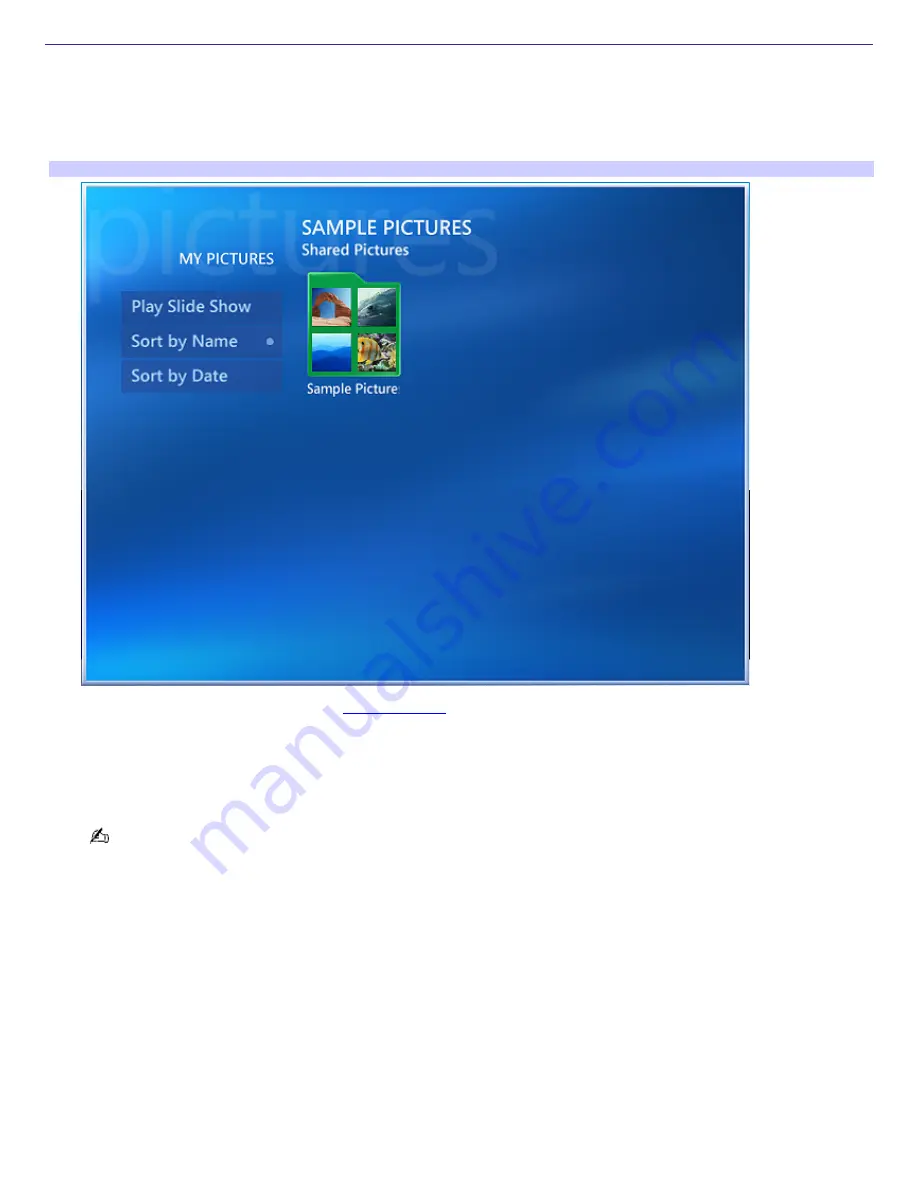
The 

My Pictures 

window appears, displaying your pictures as thumbnails and folder icons. 

  Media Center — My Pictures 

You are prompted to add pictures. See 

Adding pictures

 for more information about this task. 

2.

Use the arrow buttons on the remote control to select a folder and to move through the contents to locate a
picture. Press 

OK

 to display the picture. 

The selected picture opens in full screen mode. Press 

OK

 again to enlarge the picture's view. 


 You can scroll through your picture files and folders using the mouse to click on the directional arrows in the

media playback controls, 

Page  82

Содержание VAIO VGCRB40

Страница 1: ...computer s hardware specifications and preinstalled software information You are prompted to register your computer the first time you turn on the computer Follow the on screen instructions to complete the registration process If you are not able to register your computer during the first session you can register your computer online at the Sony VAIO PC Registration Web site Go to http www sony co...

Страница 2: ... of the Sony VAIO computer Your new high performance multimedia computer combines state of the art computer functionality with the latest audio video and information technology features Unpacking Your Computer Planning an Ergonomic Work Space Page 2 ...

Страница 3: ... VAIO Computer Welcome Provides information about supplied accessories and your computer s hardware configuration Online Documentation VAIO Computer User Guide Contains features and specifications of your computer It also includes information on the Microsoft Windows XP Media Center Edition operating system1 the software programs included with your computer and solving common problems To access th...

Страница 4: ...AIO Control Center To access this software information 1 Click Start in the Windows taskbar click All Programs then click VAIO Control Center 2 From the VAIO Control Center menu click the Categories tab then click the System Information folder 3 Click Software Information Hard Disk Drive Recovery Your computer is equipped with the VAIO Recovery Wizard utility program that recovers your computer s ...

Страница 5: ...rest your hands on the table Position the mouse at the same level as the keyboard Hold the mouse with a relaxed hand and use your whole arm to move it Take breaks during sessions with your computer Excessive use of the mouse or a joystick may strain muscles or tendons Furniture and posture Sit in a chair with good back support and armrests Adjust the level of the chair so your feet are flat on the...

Страница 6: ... equipped with all of these hardware features or accessories The location of the controls ports and jacks may vary from the illustrations shown in this section To view the specific connection capabilities for your computer see the online Specifications sheet About the Front Panel About the Back Panel About the Keyboard About the Remote Control About the i LINK Port Page 6 ...

Страница 7: ...trols ports and jacks may vary from the illustrations shown in this section Front panel 1 Optical drive 1 See the online specifications sheet for optical drive information 2 Optical drive 2 See the online specifications sheet for optical drive information 3 SmartMedia SM xD Picture Card memory card reader Reads and writes data from and to SmartMedia or xD Picture Card media 4 CompactFlash and Micr...

Страница 8: ... reader Reads and writes data from and to Memory Stick Memory Stick Pro and Memory Stick Duo media 12 Secure Digital SD MultiMediaCard MMC memory card reader Reads and writes data from and to a Secure Digital SD or MultiMediaCard MMC 13 Hard disk drive access indicator Light is amber while the hard disk drive is reading and writing data 14 Power button The power button turns the computer on off 15...

Страница 9: ...for information on operating conditions and proper connection Before connecting compatible i LINK devices to your computer such as an optical or hard disk drive confirm their operating system compatibility and required operating conditions To open the front panel cover The front of your computer has a panel that covers memory card readers USB and i LINK ports Do not force the panel cover open or h...

Страница 10: ...acks on your computer may vary from those shown in this illustration based on the computer model purchased See your computer s specification sheet for details on hardware configuration Back panel 1 AC Input port Connection for the supplied power cord 2 Mouse port Connection for a PS 2 mouse 3 Keyboard port Connection for a PS 2 keyboard 4 Printer port Connection for a parallel device such as a pri...

Страница 11: ...l low speed USB devices 8 Composite audio R In jack2 Connection for an audio cable optional Composite audio L In jack2 Connection for an audio cable optional Composite video In jack2 Connection for a video cable optional S video In jack2 Connection for an S video cable optional 9 Modem line jack3 Connection for an RJ 11 telephone cable optional 10 i LINK 6 pin S400 port IEEE 1394 Connection and po...

Страница 12: ...s not available on all models Do not connect both the DV I D and V GA cables from a single monitor to the computer at the same time Doing so may cause display malfunctions with some applications 2 These audio video connections are not available on all models 3 A n optional 1 to 2 jack adapter device splitter is required to connect both a telephone and modem line to your computer 4 This S video jac...

Страница 13: ...ey again to deactivate the numeric keypad Directional Arrows The Up Down Left and Right arrow keys move the pointer on the screen Applications The Applications key displays a shortcut menu in certain software applications Pressing this key is equivalent to clicking the right mouse button Windows The key with the Microsoft Windows logo displays the Start menu Pressing this key is equivalent to clic...

Страница 14: ...mputer s online specifications sheet Remote control The Media Center remote control can start and stop video recording and playback select channels and set viewing preferences This section describes the basic functions of your remote control Remote Control 1 MY MUSIC button Press to view and listen to your music playlists 2 MY TV button Press to view the My TV menu 3 STOP button Press to stop medi...

Страница 15: ...one DVD chapter and seven seconds of TV or video REW button Press to move media backward at three speeds RECORD button Press to begin recording PLAY button Press to begin media playback 4 BACK button Press to return to the previous window 5 VOL button Press to increase or decrease the volume 6 RECORDED TV button Press to view previously recorded TV programs In My TV window 7 GUIDE button Press to ...

Страница 16: ...r Media Center features 14 Directional arrow buttons Press the Up Down Left and Right arrow buttons to move the pointer on the screen OK button Press OK to select the desired action or window option If watching full screen TV press OK to return to the previous channel Press OK again to switch between channels 15 CH PG Channel Page button Press to change or page up down channels no number input req...

Страница 17: ...wn 4 Align the battery cover to the remote control 5 Press down until the cover clicks into place Inserting batteries into the remote control If your remote control does not operate properly you may need to replace the batteries When your remote control is not being used for extended periods of time remove the batteries to avoid possible damage from battery leakage 1 Your computer may not be equip...

Страница 18: ...pin connector The total power supplied by the 6 pin i LINK port does not exceed 6 watts Connecting an i LINK IEEE 1394 device 1 Use the symbol to locate the i LINK port on your compatible i LINK device and on your computer Plug the i LINK cable connector into this port 2 Plug the other end of the cable into the corresponding 4 or 6 pin i LINK port on your computer See the instructions supplied wit...

Страница 19: ...ures described in the section See the online Specifications sheet for your computer s hardware configuration Connecting a Display Monitor Connecting the Speakers Connecting the Keyboard and Mouse Connecting the Telephone and Modem Connecting the Power Cords Turning On Your Computer Page 19 ...

Страница 20: ...the Sony Online Support Web site at http www sony com pcsupport for details about your computer s hardware configuration 1 Plug the display s cable into the appropriate monitor port 2 If necessary plug the display s cable into the rear of the display To connect a display Install your equipment so that you can easily reach the power outlet in the event of an emergency Page 20 ...

Страница 21: ...nel speakers supplied 1 Plug the cable attached to the back of the right speaker into the Headphones jack located on the back panel of your computer 2 Insert the plug end of the AC adapter into a grounded AC wall outlet or power strip To connect the computer and speakers 1 Your supplied speakers may vary in appearance from the illustration shown here See your computer s online specifications sheet...

Страница 22: ...nd mouse For details on the accessories supplied with your computer see the online Specifications sheet 1 Plug the keyboard cable into the keyboard port on the back of the computer 2 Plug the mouse cable into the mouse port on the back of the computer To connect the keyboard and mouse Page 22 ...

Страница 23: ...e telephone s cable into one of the jacks on an optional 1 to 2 jack adapter device splitter 3 Insert one end of a second telephone cable optional into the other jack on the splitter device 4 Insert the plug end of the splitter device into the wall jack 5 Plug the second telephone cable into the modem line jack located on the back panel of the computer To connect the telephone and modem Your compu...

Страница 24: ...ecting the Power Cords 1 Plug the power cord into the back of the computer 2 Plug both the display and computer power cords into a grounded AC wall outlet or a power strip To connect the power cords Page 24 ...

Страница 25: ...computer has Microsoft Windows XP Media Center Edition installed set up the cables and connections required to use these features before you turn on the computer See the section Setting Up Media Center 1 Press the power button on the computer to turn on the power 2 Press the power button on the display to turn on the power 3 Press the power button on the right speaker to turn on the power To turn ...

Страница 26: ...and music playback This section describes how to set up your TV set top box and other equipment Setting Up TV Connections Connecting the Remote Sensor and Remote Sensor Controls Connecting Other Devices Registering Your Computer Turning Off Your Computer 1 Your computer may not be equipped with Microsoft Windows XP Media C enter Edition operating system or Media C enter hardware features See your ...

Страница 27: ...home Your computer s hardware configuration may vary from the illustrations shown in this section See the online Specifications sheet for details about your computer s hardware configuration Your VAIO computer is supplied with certain video cables Depending on your in home cable access you may require extra cables adapters or connection equipment that are optional for your computer Page 27 ...

Страница 28: ...cable optional to your cable service access Connect the other end to the single connection side of a splitter adapter 2 Connect the TV coaxial cable optional to the double connection side of the splitter adapter Connect the other end to the VHF UHF port on the back panel of your computer 3 Connect a third TV coaxial cable optional to the double connection side of the splitter adapter Connect the o...

Страница 29: ...cable optional to your antenna outlet Connect the other end to a VHF UHF RF combiner transformer optional 2 Connect the TV coaxial cable optional from the combiner transformer to the VHF UHF port on the back panel of your computer Option 2 1 Connect both ends of the antenna s twin lead cable to the screw type grips on the combiner transformer 2 Connect the TV coaxial cable optional from the combin...

Страница 30: ...d of the splitter adapter Connect the other end to the VHF UHF port on the rear of your TV monitor or display To connect in set top box mode Option 1 Option 2 1 Connect one end of the TV coaxial cable optional to your cable service access Connect the other end to the In jack on the back panel of your set top box 2 Connect a second TV coaxial cable optional to the Out jack on your set top box Conne...

Страница 31: ...You can connect your computer to a set top box using an S video cable optional and an audio cable optional instead of a stereo A V dubbing cable optional See Connecting Other Devices Page 31 ...

Страница 32: ...tes with the Media Center remote control enabling you to change channels and to perform other functions If you are using a cable or satellite set top box you can attach the remote sensor control which enables you to control the set top box using the Media Center remote control Page 32 ...

Страница 33: ...ct the remote sensor unit to a USB port located on either the front or back panel of your computer 2 Position the remote sensor to enable unobstructed communication with your remote control Connecting the remote sensor back panel Page 33 ...

Страница 34: ...or control 2 Remove the adhesive tape cover located on the bottom of the remote sensor control 3 Press the remote sensor control onto the set top box near the infrared port without covering the port If the remote sensor control covers the infrared port on the set top box you cannot use the remote control supplied with the set top box Attaching the remote sensor control cable to a cable or satellit...

Страница 35: ...he back panel of your computer 2 Connect the other ends of the dual audio cable to your VCR or camcorder Connecting a device with an S video cable 1 Connect an S video cable optional directly into the S video jack on the back panel of your computer 2 Connect the other end of the S video cable into the appropriate port on your compatible VCR or camcorder Connecting a device with a stereo A V dubbin...

Страница 36: ...lay located on either the side or back of your TV monitor display 3 Connect the single jack end of an audio cable optional to the Headphones jack located on the back panel of your computer Connect the double jack end of the audio cable to the Audio In L R on your TV monitor or display The Audio In jacks may be located on the side or rear of your TV monitor display Connecting a TV monitor or displa...

Страница 37: ...investment See the Limited Warranty Card for more details You are prompted to register your computer the first time you turn on the computer Follow the on screen instructions to complete the registration process If you are not able to register your computer during the first session you can register your computer online at the Sony VAIO PC Registration Web site Go to http www sony com vaioregistrat...

Страница 38: ...mputer dialog box appears 2 Select the Turn Off option Respond to any prompts about saving your documents 3 Wait for your computer to turn off automatically the power indicator light turns off 4 Turn off any peripheral devices connected to your computer About the Power button If your computer stops responding press and hold the Power button for more than six seconds to force your system to shut do...

Страница 39: ...Readers This section provides basic information about using your computer s installed memory card readers About Your Memory Card Readers Inserting a Memory Card Removing a Memory Card About Memory Stick Media Sharing Memory Cards Page 39 ...

Страница 40: ...mory card readers that are compatible with many popular types of memory cards You can use your computer s memory card readers to transfer data between digital cameras camcorders music players and other audio video devices Memory card readers and compatible media Page 40 ...

Страница 41: ...s may be located on the side panel See your computer s specification sheet for details about your computer s memory card reader configuration Opening a front panel cover 1 Locate the appropriate reader for the memory card you want to use 2 Insert the memory card into the reader in the direction of the arrow on the media Do not force the card into the reader If the memory card does not go into the ...

Страница 42: ...me damaged To remove a Memory Stick media Secure Digital SD MultiMediaCard SmartMedia or xD Picture Card media 1 Press1 the extended part of the memory card causing it to extend out from the reader s slot 2 When the card extends carefully remove it To remove a CompactFlash media2 1 Firmly grasp the extended part of the memory card 2 Pull to remove from the reader 1 For V GC RB series models carefu...

Страница 43: ...1 3 smaller in size Compatibility between software programs and Memory Stick media formats may vary At this time Sony suggests using only MagicGate Memory Stick media to store and transfer any data created with SonicStage software Visit the Sony online support Web site at http www sony com pcsupport regularly for the latest information on Memory Stick media Memory Stick media do not support AVI fi...

Страница 44: ...rly Format the memory card by using it in the device first See the information supplied with the device for details how to format the memory card If your device does not recognize memory card that has been formatted by your computer follow these steps 1 Save the card s contents to your hard disk drive 2 Reformat the memory card using the device not your computer Page 44 ...

Страница 45: ... the functionality of your VAIO computer This section describes how to perform basic upgrades and maintenance on your system Overview About Opening the Computer About Add on Card Installation About Installing Memory About the Lithium Battery About Hard Disk Drive Installation Page 45 ...

Страница 46: ...ral equipment Otherwise damage may occur to the integrated circuits Your computer may not be equipped with all of the hardware features mentioned in this section The interior hardware configuration of your computer may vary from the illustrations depending on the computer purchased You may need to temporarily remove add on cards or other components that may be near the slot cover you plan to remov...

Страница 47: ...devices 3 Position the system unit with the back panel facing towards you 4 Unscrew the side cover release screws located on the edge of the back panel and set them aside Removing the release screws 5 When the screws are removed the side cover is released Grasp the raised handle on the back edge of the side cover pulling the cover towards the back of the unit Removing the cover Page 47 ...

Страница 48: ...e internal parts of the system unit cool down before you attempt to remove the cover Replacing the cover 1 Hold the side cover against the side of the computer with the side cover extending about 2 inches past the back of the computer 2 Slide the side cover forward onto the unit until it is evenly aligned and stays in place 3 Replace the release screws Replacing the cover Page 48 ...

Страница 49: ... Installing an add on card 1 Shut down your computer and turn off all peripheral devices such as your printer 2 Unplug your computer and any peripheral devices 3 Remove the side cover See Removing the side cover 4 Locate an available expansion slot Remove the slot cover s screw and then remove the slot cover When removing a slot cover be careful not to damage components on the system board or add ...

Страница 50: ...rnal cables that the card requires See the instructions supplied with the add on card 7 Replace the side cover See Replacing the cover 8 Reconnect the power cord and all peripheral devices 9 Turn on the computer Page 50 ...

Страница 51: ...your local retailer Observe the proper safety precautions when you add or remove the memory in your computer See Before upgrading your computer Removing a memory module 1 Shut down your computer and turn off all peripheral devices such as your printer 2 Unplug your computer and any peripheral devices 3 Remove the side cover See Removing the side cover 4 Gently place the unit on its side If necessa...

Страница 52: ...rom its anti static package handling it by the the edges 6 Locate the notch on the bottom edge of the module to align it over the open memory slot 7 Firmly insert the bottom edge of the memory module into the slot 8 Press down evenly against the module s upper corners The latches snap into position holding the module in place To avoid damaging a memory module slot move the end latches slightly out...

Страница 53: ... the new battery with the plus side facing up Replacing a lithium battery 7 Replace the cover See Replacing the cover The values stored in the CMOS memory are now reset to the factory default values Run the Setup utility to reset the date time passwords and other changes you may have made to the BIOS settings If you do not wish to customize your BIOS settings do not run the Setup utility Dispose o...

Страница 54: ...ecover your computer s operating system and preinstalled software programs For more information about the VAIO Recovery Wizard utility program 1 Click Start from the Windows taskbar click Control Panel then click Performance and Maintenance 2 From the Performance and Maintenance window click VAIO Recovery Wizard Your computer must have an active Internet connection to access the Sony online suppor...

Страница 55: ...8 Slide the new drive into the drive holder aligning the holes on each side of the drive to the holes in the drive holder 9 Secure the drive to the drive holder with screws Attaching the drive screws Your new hard disk drive is supplied with the necessary screws Do not overtighten these screws when securing the new drive to the drive holder 10 Realign the drive holder with the tracks on the inside...

Страница 56: ... The Computer Management window appears 4 Under the file directory go to Storage and then select Disk Management 5 Right click on the newly installed unformatted hard disk Disk label identified with red marking From the shortcut menu select Initialize Disk 6 Click on the Unallocated area of the disk and then right click to display a shortcut menu 7 Select New Partition The New Partition wizard app...

Страница 57: ...ows XP Media Center Edition Media Center bring all of your entertainment sources TV VCR music pictures and DVD player together in a single location Bringing Excitement to Home Entertainment Getting Started with Media Center Using the Media Center Setup Wizard Changing Views Page 57 ...

Страница 58: ...content directly from a digital video device Burn music files to recordable CD media The Microsoft Windows XP Media Center Edition operating system combines the multimedia features of a personal computer with the convenience of a home entertainment center Media Center enables you to view organize store and browse your photos video movie libraries music playlists and recorded TV programs while runn...

Страница 59: ... Setting Up Media Center Establish an active Internet connection Connect your computer to the TV signal source Insert two AA batteries into the Media Center remote control Plug the remote sensor unit into a USB port on your computer and place it in a location that enables direct communication with the remote control Connect the remote sensor control between your cable or satellite set top box and ...

Страница 60: ...ct menu options Press the OK button to activate your selection The remote control must be used within 26 feet 8 meters of the front of remote sensor unit To use the keyboard 1 Press the desired Media Center button located at the top of the Media Center keyboard 2 Use the directional arrows on the keyboard to navigate and select menu options Press Enter to activate your selection To use the mouse 1...

Страница 61: ...ious window 3 Media Center Help Starts the Media Center Help guide 4 Minimize Minimizes the Media Center window and places the Media Center icon on the taskbar 5 Maximize Enlarges the view to full screen mode 6 Close Window Closes Media Center 7 Play DVD Plays a DVD movie Online Spotlight Displays links to online media and information services Page 61 ...

Страница 62: ...ne movie rental download service More Programs not shown Displays additional programs and features that are available through Media Center Settings not shown Changes your Media Center preferences including parental controls recording and slideshow settings 8 Media Playback Controls Plays records rewinds replays and stops selected media 9 Shut Down Displays system options Turning off Media Center s...

Страница 63: ...Plays the selected media Press Pause to pause playback Press Pause again to resume playback 3 Stop Stops playback of selected media 4 Record Records TV programs music and video content storing them on your computer s hard disk drive 5 Rewind Moves backwards in TV programs and selected media 6 Fast Forward Moves ahead in TV programs and selected media 7 Mute Turns the sound off Press again to resto...

Страница 64: ...he VAIO Control Center Establish a working Internet connection to enable the download of your local television program guide Provide your Zip code or Postal Code Provide the name of your TV programming provider or the name of your subscription package if using cable or satellite service Identify the brand name for your set top box if your TV service requires one To get assistance with the Media Ce...

Страница 65: ...mplete them later in the Settings window in Media Center See the section About General Settings Media Center Setup Wizard The default required setup enables Media Center to check your hardware networking and Internet connections The optional advanced setup enables you to make choices on how Media Center features appear and perform Media Center software maximizes the benefits of using the Internet ...

Страница 66: ...can view the desktop without closing the Media Center software program 1 Select the Minimize button with your remote control or mouse to display the desktop 2 To return to Media Center press on the Windows taskbar Page 66 ...

Страница 67: ...Enlarging the view to full screen 1 Move the pointer over the current view to display the Maximize icon 2 Click the Maximize icon The current view fills the entire screen Page 67 ...

Страница 68: ...Shrinking the view 1 Move the pointer over the current view to display the Restore Down icon 2 Click the Restore Down icon The current view decreases in size Page 68 ...

Страница 69: ...Switching from full screen mode to inset view Click on the remote control while the DVD or TV program is playing to view the movie in an inset window Page 69 ...

Страница 70: ...igate to the inset window 2 Select the inset window and then press OK The full screen mode appears Selected items such as folders files or menu options are outlined with a green border Click OK on the remote control press Enter on the keyboard or click the mouse to activate your selection Page 70 ...

Страница 71: ...Media Center Play DVD Media Center enables you to play your DVDs from your computer and control the playback from your favorite chair Playing a DVD Controlling DVD Playback Page 71 ...

Страница 72: ...play DVDs and control playback using the remote control to fast forward rewind stop or pause playback If you play your DVD using another software program some of the remote control button functions are not available Page 72 ...

Страница 73: ...ton on the remote control or by clicking Media Center from the Start menu 2 Insert the DVD into the optical drive After a few seconds the movie s introduction and root menu appears 3 Use the remote control to select Play Movie The movie playback begins Page 73 ...

Страница 74: ... Press the Stop button on the remote control to stop playing the movie The Stopped menu appears Stopped Menu 2 Press the arrow buttons on the remote control to select an option from the Stopped menu and then press OK Page 74 ...

Страница 75: ...Controlling DVD Playback You can use certain buttons on your remote control to control DVD playback You can also use your Media Center keyboard to control DVD playback functions Page 75 ...

Страница 76: ...al drive STOP Stops DVD playback and displays the Stopped menu REW Rewind Reverses DVD playback FF Fast Forward Advances DVD playback PAUSE Pauses DVD playback Press again to resume playback REPLAY Returns to the beginning of the DVD chapter To return to the beginning press and hold the REPLAY button SKIP Advances to next DVD chapter To advance to the end press and hold the SKIP button Page 76 ...

Страница 77: ...er User Guide for information on using the shortcut keys at the top of your Media Center keyboard For other playback commands use these keyboard shortcuts Key DVD Action CTRL Shift M Go to DVD menu CTRL Shift P Play CTRL Shift S Stop The Stopped menu appears CTRL B Replay CTRL F Skip forward F8 Mute Press again to restore sound F9 Volume down F10 Volume up Page 77 ...

Страница 78: ...nimated slide show with music You can also display your pictures on your TV or share them across your home network The Media Center remote control makes your digital memories available with the click of a button About My Pictures Viewing Pictures Playing Pictures in a Slide Show About PictureGear Studio Software Page 78 ...

Страница 79: ... Change the picture order in the slide show and adjust the transition time Sort your pictures by file name or date Use the remote control to view or scroll through the pictures that are stored in the My Pictures or Shared Pictures folders You can also use your keyboard and mouse to view your pictures Each Windows user account has a My Pictures folder that is available only when that user is logged...

Страница 80: ... My Pictures folder 1 Click Start on the Windows taskbar and then click My Pictures The My Pictures window appears displaying picture files in the right panel 2 You can add delete rename and organize your pictures into individual folders within the My Pictures folder The individual folders can be viewed as a slide show with Media Center software To open the Shared Pictures folder 1 Click Start on ...

Страница 81: ...o not appear in a slide show even if the folder or file icons are visible in Media Center My Pictures can support these file formats File Extension File Type jpg jpeg Joint Photographic Experts Group tif tiff Tagged Image File Format gif Graphics Interchange Format bmp Bitmap wmf Windows MetaFile png Portable Network Graphics Page 81 ...

Страница 82: ...enter My Pictures You are prompted to add pictures See Adding pictures for more information about this task 2 Use the arrow buttons on the remote control to select a folder and to move through the contents to locate a picture Press OK to display the picture The selected picture opens in full screen mode Press OK again to enlarge the picture s view You can scroll through your picture files and fold...

Страница 83: ...ures You can rearrange your pictures by name or by date 1 Press My Pictures on the remote control or keyboard The My Pictures window appears 2 Select one of the options Sort by name or Sort by date Click OK Page 83 ...

Страница 84: ...c window Adding pictures 1 Use your remote control to select Yes and then click Next A Picture Discovery window appears 2 Select the Add folders option and click Next You can delete pictures with the Remove folders option Use the remote control to clear the check marks by the pictures you wish to permanently delete from your computer s hard disk drive 3 Select one or both file location options and...

Страница 85: ...4 Select the location s that contain the pictures you wish to add and click Finish Media Center returns to the My Pictures window displaying the added pictures and folders Page 85 ...

Страница 86: ... arrow buttons to select Play slide show The slide show begins to play You can also use the arrow buttons on the remote control to manually advance the slide show pictures If you do not select a specific folder for your slide show Media Center plays the pictures in the first folder listed in My Pictures If you have pictures that are not stored in folders Media Center includes these files in the sl...

Страница 87: ...ic From the Album Details windows you can set up several songs or albums to play Add to Queue or for the songs to shuffle or repeat playback during your slide show If the song does not begin playing immediately press Play on the remote control 4 Press My Pictures on the remote control or keyboard and then select the picture folder for your slide show Press OK 5 Select Play slide show Press OK Medi...

Страница 88: ... to select Settings Press OK The Settings window appears 3 Select Pictures and press OK Media Center Settings 4 Press the arrow buttons on the remote control to select and change Slide show display options Song playback options Transition options Background color 5 Select Save and then press OK on the remote control to accept these settings and return to the Settings window 6 Press the My Pictures...

Страница 89: ...gn personalized photo albums or binders to share with family and friends Your imported image files can be viewed with Media Center as individual pictures or in a slide show You can also share your pictures using VAIO Media software with the other computers on your home network Your personalized photo albums binders and other customized picture creations can only be viewed or edited with PictureGea...

Страница 90: ...udio software 1 Click Start on the Windows taskbar and point to All Programs 2 Point to PictureGear Studio and click PictureGear Studio The PictureGear Studio main window appears PictureGear Studio Software Main Menu Page 90 ...

Страница 91: ...o set as a default response for future occurrences Windows XP identification window To continue using PictureGear Studio software without selecting an action you can close this window using one of the following methods Click Cancel to close the window Select Take no action you may need to scroll and then click OK The window closes To import photos 1 Use a USB or i LINK cable to connect a digital c...

Страница 92: ...s The editing window displays an enlarged version of the selected picture on the right and thumbnail versions on the left 6 Use the following buttons to adjust your picture Save Move the picture to a new folder Delete Remove the picture from the photo collection Rotate Change the picture s position Trim Crop the picture or capture a specific area To undo your adjustments click Undo 7 Click Finish ...

Страница 93: ...Help 1 Click Start on the Windows taskbar and point to All Programs 2 Point to PictureGear Studio and click PictureGear Studio The PictureGear Studio main window appears 3 Click the question mark icon in the lower right corner of the window The PictureGear Studio Help appears Page 93 ...

Страница 94: ...g your Media Center remote control or computer keyboard You can store your videos in folders for your own use or place them in the Shared Videos folder for all user accounts to access About My Videos Playing Videos About DVgate Plus Software Page 94 ...

Страница 95: ...oaded from the Internet or recorded from TV From the My Videos window you can perform many tasks such as Playing your favorite home videos Organizing your videos by title or date Storing video files in the My Videos folder for your own use Storing video files in the Shared Videos folder to share across all computer user accounts Viewing the videos created with the DVgate Plus software program Page...

Страница 96: ...s or Shared Video folders Your saved video files appear as folder and thumbnail icons To open the My Videos folder 1 Click Start on the Windows taskbar and point to My Computer The My Computer window appears 2 In the left panel under Other Places click My Documents 3 In the right panel click the My Videos folder The My Videos window appears displaying your available video files The My Videos folde...

Страница 97: ...keyboard The Shared Video or My Videos window appears1 2 Select My Videos or Shared Video to view the contents of your video libraries You can browse the contents of your video libraries by file name or creation date 3 When you locate the desired video file select the file and then press OK to begin playback 1 The most recently used folder appears in the Media C enter My V ideo window Page 97 ...

Страница 98: ...the video and export it into specific folders to play back with My Videos The DVgate Plus software program also enables you to import recorded TV programs from Media Center make edits and export them back to Media Center For details on how to connect your digital video camera to your computer refer to the documentation supplied with your camera or see the online VAIO Computer User Guide Page 98 ...

Страница 99: ...tion is intended to highlight a few features of the DVgate Plus software program For details on using this software see the software program s Help 1 Click Start on the Windows taskbar and point to All Programs 2 Point to DVgate Plus and then click DVgate Plus Help Page 99 ...

Страница 100: ... Settings click the Settings menu and select Capture 9 Click Capture To change the file destination folder click Browse and locate the desired destination folder 10 Type a working file name By default DVgate Plus software automatically adds a 3 digit number to your file name 11 Click OK 12 Video capture begins and progress is displayed in the DV Auto Capturing window 13 When the capture is finishe...

Страница 101: ...and clicking on the desired clips Rearrange clip order by dragging the clip to the desired location in the Clip List To select consecutive clips 1 Click the desired first clip 2 Hold the Shift key while clicking the last clip in the sequence All clips in the sequence are selected 5 From the Output to section click File Output Settings 6 Choose your settings in the File Output Settings window For m...

Страница 102: ... Plus software click Cancel to close the Mode Select Guide 2 Confirm that the Output mode is active If you are in Capture Mode click Go to Output Mode 3 From the File menu click Add Video Recorded with Media Center The Add Video Recorded with Media Center window appears Add Video Recorded with Media Center 4 Click to select a video in the Video list and then click OK The DVgate Plus software conve...

Страница 103: ...enter feature is not available To change recording formats 1 After starting DVgate Plus software click Settings from the menu bar 2 Click Switch Video Format A warning message appears 3 Click Yes The Video Format Settings window appears 4 Click to select the option NTSC Japan U S etc 5 Click OK Page 103 ...

Страница 104: ...ice The exported file size can be more than 2 GB MPEG1 mpg Uses a file compression method that is compatible with Video CD Files are relatively small MPEG2 mpg Uses a file compression method that is compatible with DVD The image quality is higher and file size is larger than MPEG1 but smaller than DV CODEC AVI 1 0 2 0 MICROMV mmv Uses the same compression method as a MICROMV device Click to DVD Pr...

Страница 105: ...nt TV program listings enabling you to browse for your favorite shows My TV is a feature that offers full control over your TV viewing TV program recording and system settings About My TV Watching Live TV About the TV Program Guide Recording TV Programs Scheduling a TV Recording Single Or Series Setting Up Recording Preferences Playing Previously Recorded TV Programs Page 105 ...

Страница 106: ...series Watch TV programs on a full screen or inset window Search your local TV guide by category title or keyword Set your TV viewing or recording preferences As you watch live TV programming Media Center continuously captures 30 minute increments of the program This enables you to rewind replay and fast forward in a TV program This TV programming buffer is temporary and is not saved or stored on ...

Страница 107: ...rmation see the instructions in your online VAIO Computer User Guide in the section Setting Up Media Center Verify that you have completed the Media Center setup wizard For more information see Using the Media Center Setup Wizard To locate the VAIO Computer User Guide 1 Click Start in the Windows taskbar click All Programs then click VAIO Control Center 2 From the VAIO Control Center menu click th...

Страница 108: ...menu using the mouse or the remote control The remote control must be used within 26 feet 8 meters of the front of remote sensor unit From the Media Center Start menu there are three shortcut icons Recorded TV View previously recorded TV programs Live TV Begin watching TV Movies Select and watch TV movies as available through your local TV programming Media Center Start Page 108 ...

Страница 109: ...or resumes TV after it has been paused or stopped STOP Stops live TV or stops TV recording REW Rewind Reverses the TV program FF Fast Forward Advances the TV program PAUSE Pauses TV Press again to resume the TV program REPLAY Returns to the previous seven seconds of the TV program buffer or TV recording SKIP Advances 30 seconds forward into the TV program recording buffer To change channels Use th...

Страница 110: ...V programming appears in full screen mode You can also use the My TV button on the remote control or keyboard the My TV window appears Select Live TV to start viewing TV programs If you have TV recordings scheduled or in progress they appear in the My TV window My TV window Page 110 ...

Страница 111: ...aptures 30 minute increments of the program into a buffer which is displayed by the time shift status bar This buffer enables you to use the rewind replay and fast forward features When you change channels Media Center deletes the current TV programming buffer and begins capturing again after a short delay This TV programming buffer is not saved or stored on your computer s hard disk drive Page 11...

Страница 112: ...able categories of TV program and press OK on the remote control 2 Use the arrow buttons to scroll through the search results 3 Press OK to play your selection Title 1 Type the title of the TV program in the text box or use the numeric buttons on the remote control to enter information 2 Use the arrow buttons to scroll through the search results 3 Press OK to play your selection Keyword 1 Type a k...

Страница 113: ...3 Press OK to play your selection Page 113 ...

Страница 114: ...enter to automatically update the program guide or manually update whenever you are connected to the Internet The program guide displays Channel and network information TV program titles TV program schedules The number of days displayed in the guide decreases if the guide is not updated The program guide does not display past listings Page 114 ...

Страница 115: ...through the available TV program listings in a specific time slot schedule Press the right and left arrows to scroll across and view the TV programming available on a specific channel You can also use the mouse to click the up and down arrow buttons located on the media playback controls or the directional arrows on the keyboard 3 Press the up down left or right arrow buttons to select a TV progra...

Страница 116: ...ars Media Center Guide Settings Edit Channels Provides options for adding or removing channels You can also change or correct channel numbers Add Missing Channels Enables you to add new channels to the TV Program Guide Set Up Guide Listing Configures the TV Program Guide Get Latest Guide Listing Refreshes your TV Program Guide listings Guide Terms of Service Connects to the Internet to provide leg...

Страница 117: ...d TV programs on your hard disk drive organize them with Media Center or burn them to a DVD media using Click to DVD software For more information on copying recorded TV programs to DVD see Media Center Create DVD My TV enables you to Watch and record a live TV program simultaneously Schedule recordings of future TV programs Record recurring episodes of a TV program Page 117 ...

Страница 118: ...V program to avoid interrupting the recording process While you are watching a TV program begin recording with one of these methods Press the REC button on your remote control or keyboard Use the mouse to click the Record button on the media playback toolbar Media playback toolbar 1 Media C enter recording is controlled by the time and date settings of your computer s clock V erify that your compu...

Страница 119: ...e the pointer over the icon to display the title of the TV program that is being recorded Press the GUIDE button on your remote control The GUIDE window displays the Record icon next to the title of the program being recorded The Record icon disappears when the recording is complete Page 119 ...

Страница 120: ... session Press the Stop button on the remote control or keyboard Use the mouse to click the Stop button on the media playback toolbar Right click the Record icon on the Taskbar Notification area and select Stop Current Recording Page 120 ...

Страница 121: ...control or keyboard to place your computer immediately into Stand by mode Media Center displays a pop up message if a recording conflict occurs and provides alternative times to record a TV program or an episode in a series Scheduling a recording for a TV program series records each episode of that program from any available channel that is scheduled to broadcast it Media Center does not record du...

Страница 122: ...ow button to view the programs that are scheduled for broadcast at a later date or time 3 Press the up down and left arrow buttons to locate and select the TV program you want to record 4 Press REC on the remote control or keyboard The Record button appears next to the program title TV program recording Page 122 ...

Страница 123: ...select the first episode of the TV series you want to record 4 Press OK The PROGRAM INFO window appears Program Info 5 Select Record Series The GUIDE window reappears with a Record series icon next to the title of the selected TV program series TV program series recording You can quickly schedule a series recording episodes by locating the first episode of the TV program series and pressing the RE...

Страница 124: ...he remote control or right click in the Guide window A shortcut menu appears 4 Select Do Not Record and press OK The Record icon disappears You can also cancel a scheduled single or series recording as follows 1 Locate the scheduled single recording or the first episode of a series recording 2 Press the REC button once to cancel a single recording or press it twice to cancel a series recording Pag...

Страница 125: ...g conflict Replace the previously scheduled recording with the current recording request Select episodes that are in different date or time slots to avoid the conflict Decide which program is to be recorded for each schedule conflict Record only the episodes in a series recording that are not in conflict with the other recording You can see which schedule recording is in conflict when the icon app...

Страница 126: ...at are scheduled for broadcast at a later date or time 3 Press the up down and left arrow buttons to locate and select the TV program you want to record Press OK The PROGRAM INFO window appears 4 Select Advanced Record and press OK The RECORD SETTINGS window appears Record Settings 5 Select your recording preferences for features such as frequency quality and length of time to keep a recording 6 S...

Страница 127: ...Recorded TV window 1 Press the Recorded TV button on the remote control You can also press on the remote control select My TV and then select the Recorded TV shortcut Your recently recorded programs are automatically displayed in the Recorded TV window 2 Use the remote control to select a title and press OK to play the program Page 127 ...

Страница 128: ...Recorded TV programs View recently recorded TV programs Search for a recorded TV program by sorting by date or title Schedule a TV program recording View future scheduled TV program recordings Recorded TV Page 128 ...

Страница 129: ...re enables you to manage your digital music files Use the Media Center remote control to browse your music playlists by artist album song or music genre About My Music Using My Music About SonicStage Software Selecting Compatible CD Media Page 129 ...

Страница 130: ...nd create your own music playlists for viewing or playback with Media Center From the My Music window you can Play audio CDs Play digital music files from playlists created with SonicStage or Windows Media Player software programs Search your music files and playlists by specific category View music CD details and album art using your Internet connection Page 130 ...

Страница 131: ...ers or files are selected they are outlined with a green border Use the arrow and OK buttons on the remote control to select and activate your selection My Music plays your audio CDs and enables you to browse and play all of your recorded music Create your music playlists with SonicStage or Windows Media Player software programs and then play your favorite music with My Music Page 131 ...

Страница 132: ...Stage software appear as albums on the ALBUMS window1 Playlists created with the Windows Media Player software program appear when the Playlist option is selected 3 Use the arrow buttons on the remote control to select an album Press OK The Album Details window appears 4 Press Play and then press OK Music playback begins You can select music by the artist playlist title song title or genre You can...

Страница 133: ...ble CD Edit Info Change album information such as title or genre Delete Permanently delete music files from the Media Library and your computer s hard disk drive 1 The playlists recorded with SonicStage software may not be immediately visible on the A LBUMS window If this occurs wait a few moments for the playlists to appear Page 133 ...

Страница 134: ...Next A Music Discovery window appears 2 Select the Add folders option and click Next You can delete music files with the Remove folders option Use the remote control to clear the check marks by the songs you wish to permanently delete from the Media Library and your computer s hard disk drive 3 Select one or both file location options and click Next Media Center searches for the folder locations t...

Страница 135: ...t A New Playlist frame appears New Playlist 4 In the All Music frame open the All Music directory and select an album that contains the music files for your new playlist 5 Click to select a music file and drag to the New Playlist You can select all songs in an album by holding down the Shift key and clicking on the first and the last song in the album You can select specific songs by holding down ...

Страница 136: ...The new playlist appears Page 136 ...

Страница 137: ...by artist or genre Download music from the Sony Connect music download service on the Internet Use the Sony Connect music download service to download music tracks from the Internet You can include them in your playlists and check them out to your portable digital music devices Import audio files onto your computer Import MP3 and WAV audio files into SonicStage software to add to playlists or reco...

Страница 138: ...SonicStage software 1 Click Start on the Windows taskbar and point to All Programs 2 Point to SonicStage and then click SonicStage The main SonicStage window1 appears SonicStage 1 You may see a different SonicStage main window if you are not connected to the Internet For first time use you may see other message windows Respond to the instructions on the screen Page 138 ...

Страница 139: ...onicStage Record 6 If you are registered to use the Compact Disc Database CDDB music recognition service click CD Info in the lower right corner of the Record window CDDB opens and names your CD and its song titles The Gracenote CDDB music recognition service has a registration wizard that enables you to register with the CDDB service Your computer requires Internet access to enable registration a...

Страница 140: ...ve by selecting the correct type of blank recording media understanding the different disc formats and using compatible playback equipment 1 C D media compatibility may vary by manufacturer If you experience difficulty with recording or playback try a different disc or a different brand Page 140 ...

Страница 141: ...dable media can be written to once and cannot be erased CD R media is appropriate for both music and data CD burning CD RW CD Rewritable media can be written to erased and written to again CD RW media is appropriate for music and data CD burning Page 141 ...

Страница 142: ...Incompatible media Do not use the following media for recording data or music CD ROM compact disc read only media DVD R for Authoring DVD RAM DVD ROM Page 142 ...

Страница 143: ...it easy to burn your own DVDs After recording your favorite TV programs with Media Center copy them to a recordable DVD for your personal collection1 About Create DVD Selecting Appropriate DVD Media 1 Unauthorized duplication of protected audio and video files is a violation of applicable law Page 143 ...

Страница 144: ...ange the settings for your computer s power management to allow sufficient time for the recording session to complete To change power management settings 1 Click Start in the Windows taskbar then click Control Panel 2 Click Performance and Maintenance 3 Click Power Options 4 From the Power Schemes tab in the section Settings for Home Office Desk power scheme change the settings for System standby ...

Страница 145: ...the amount of DVD space required for recording Do not exceed your media s capacity especially if you plan to record a very long program or more than one program Creating a DVD 4 Select Burn and press OK A message appears prompting you to insert a recordable DVD media 5 Insert a recordable DVD and press OK The progress of the recording session displays at the bottom of the window 6 A message appear...

Страница 146: ...grams DVD burning can take over an hour to complete depending on the size of your video file If the Media Center software program stops responding during your DVD burning session do not attempt to stop or restart the DVD burning process The Click to DVD software program continues to create the DVD even if Media Center software is not open Media Center software stops responding Pop up messages Page...

Страница 147: ...p you understand the different disc formats and limitations Your computer s configuration may vary from the hardware configuration discussed in this section See the online specifications sheet for details about your specific computer model 1 C ertain V A IO computers are equipped with a DV D R Double Layer DV D RW drive See your computer s specifications sheet for details on hardware configuration...

Страница 148: ...sc before beginning a new recording session DVD RW media is appropriate for both video and data DVD burning DVD R DVD R Recordable media can be written to once and cannot be erased You can use your DVD RW drive to write data to a DVD R disc until the disc is full You cannot erase or overwrite any existing data DVD R media is appropriate for both video and data DVD burning DVD RW DVD RW Rewritable ...

Страница 149: ...g with your DVD RW drive DVD R for Authoring DVD RAM DVD ROM DVD R DL Double layer DVD R Media compatibility with different equipment varies between manufacturers If you experience difficulty with recording data or playing a disc try a different disc or a different brand of media Page 149 ...

Страница 150: ...ftware programs You can burn CDs or DVDs start an online instant messaging conversation synchronize the content on your music or video devices with your hard disk drive and download movies About More Programs Create CD DVD Create DVD InterVideo Messenger Movielink Sync to Device Page 150 ...

Страница 151: ...through other Media Center features or menus 1 Press the Start button on the remote control The Media Center Start menu appears When you go to More Programs shortcut icons are displayed 2 Select More Programs and then press OK The More Programs window appears Media Center More Programs Page 151 ...

Страница 152: ... and press OK The Album Details window appears 4 Select all or some of the songs to include on the CD and press OK A status message at the bottom of the window shows the amount of available recording space on the CD 5 Select View CD The View CD window appears You can add or delete songs change playback order change the CD name or cancel the recording 6 Select Create CD and press OK To create a vid...

Страница 153: ...o place more data on the CD or DVD combining music pictures and video content to the same CD or DVD A status message at the bottom of the window shows the available recording space on the media 5 Select Create CD Create DVD to begin recording the media files to the CD or DVD4 To create a DVD Slide Show Follow steps 1 and 2 in the section Creating a CD or DVD using a recordable DVD 1 From the Disc ...

Страница 154: ...w appears showing the recording s progress 1 A rewritable optical drive is required to use this feature such as a C D RW DV D RW DV D RW drive A C D RW drive is not compatible with recording to DV D media 2 You can also use the remote control to enter a name for the media 3 You can select specific media files or entire folders 4 Burning a DV D may take a long time depending on the type of media fi...

Страница 155: ...s to select a recorded program A DVD icon and text appears in the lower left of the window indicating the size of the video file and the amount of DVD space required for recording Do not exceed your media s capacity especially if you plan to record a very long program or more than one program 3 Select Burn and press OK A message appears prompting you to insert a recordable DVD media 4 Insert a rec...

Страница 156: ...pecific speakers or speaker systems Insert and begin playing a DVD before attempting to change the audio configuration and environment settings About changing audio and video settings 1 Click Start on the Windows taskbar and point to All Programs 2 Point to InterVideo WinDVD 5 and then click InterVideo WinDVD 5 for VAIO 3 Right click in the main window A shortcut menu appears 4 Click Help The WinD...

Страница 157: ... Video Setup with Windows Media Center PCs Page 157 ...

Страница 158: ...r 1 Press the Start button on the remote control The Media Center Start menu appears 2 Use the arrow buttons on the remote control to select Settings select Help and then press OK 3 Select Help Get help using Media Center and the press OK The Media Center Assistance window appears 4 Select Use Media Center and then press OK 5 Select Use Messenger in Media Center and the press OK 6 View each topic ...

Страница 159: ...rough your Internet connection This pay to view service enables you to download movies to your computer s hard disk drive to view now or later About Movielink Go to the Movielink Web site at http www movielink com for more information about this service Page 159 ...

Страница 160: ...he remote control The Media Center Start menu appears 2 Use the arrow buttons on the remote control to select Settings select Help and then press OK 3 Select Help Get help using Media Center and then press OK The Media Center Assistance window appears 4 Select Media Files and then press OK The Media Files window appears 5 Use the direction arrows on the remote control to locate the option Synchron...

Страница 161: ...a Center Settings You can customize all of the settings for Media Center features About Windows User Accounts About General Settings Changing TV Recorder Settings Locating Help and Support Options Page 161 ...

Страница 162: ...s Computer Administrator General settings that affect all user accounts1 Limited User Custom settings that affect specific user accounts Set up Media Center Change appearance settings Set up the Internet connection Change sound settings Change the privacy settings Turn on or off transition animation Set parental controls Turn notifications on or off Customize the program guide Adjust display setti...

Страница 163: ...About General Settings Changes to the general settings affect all user accounts The Windows computer administrator is the only account that has the system authority to change general settings Page 163 ...

Страница 164: ...w TV signal and privacy information TV Change the recording and TV Program Guide settings set up your TV signal configure your TV or display monitor and set up closed captioning Help Access available support options on your computer or over the Internet Find help for Media Center hardware and software programs Media Center Settings 2 From the Media Center Start menu select the General shortcut ico...

Страница 165: ...havior Startup and Window Behavior Select options for the way Media Center starts displays on screen and enables notifications and tips 1 Use the arrow buttons on the remote control to enable or disable an option A check mark indicates that the option is enabled 2 Select Save and then press OK Media Center Settings Visual and Sound Effects Page 165 ...

Страница 166: ...nd video background color 1 Use the arrow buttons on the remote control to enable or disable an option A check mark indicates that the option is enabled 2 For video background color use to locate your color choice 3 Select Save and the press OK Media Center Settings More Program Options Page 166 ...

Страница 167: ...n also enable or disable the software programs supported by the More Programs feature See About More Programs for more information 1 Use the arrow buttons on the remote to enable or disable an option A check mark indicates that the option is enabled 2 Select Save and then press OK Media Center Settings Media Center Setup Page 167 ...

Страница 168: ...nfiguration TV or monitor configuration automatic updates or run the entire setup wizard again 1 Select an option and then press OK 2 Follow the on screen instructions Media Center Settings Parental Controls Parental Controls Establish accessibility limits for your family s TV DVD and movie viewing Create a parent only access code that keeps your viewing choices safe from changes Page 168 ...

Страница 169: ...nd press OK An options menu appears Media Center Settings Parental Controls Options 2 Select a setting and click OK Use the arrow buttons on the remote to enable or disable settings A check mark indicates that the setting is enabled 3 Select Save and then press OK Media Center Settings Automatic Downloads Page 169 ...

Страница 170: ...ion or download movies 1 Use the arrow buttons on the remote to enable or disable the option A check mark indicates that the option is enabled 2 Select Save and then press OK Media Center Settings About Media Center About Media Center View information about Media Center software and service providers or view the TV Page 170 ...

Страница 171: ...enable or disable your system s privacy settings To change privacy settings 1 Select Privacy Settings and click OK 2 Use the arrow buttons on the remote to enable or disable the option A check mark indicates that the option is enabled 3 Select Save and press OK After changing general settings press Back twice on the remote control to return to the Settings window 1 You can also use the numeric key...

Страница 172: ... Television Recorder Settings window appears Media Center Television Recorder Settings 4 View recording status or change the settings for these options History Review a list of your recorded programs and sort the list by date status or name Recorder Storage Change the settings that control recording space See the section Managing storage space for recorded TV programs Recording Defaults Customize ...

Страница 173: ... drive Record your TV programs to the largest drive partition if your computer s hard disk drive is partitioned Media Center does not support recording to removable drives network drives or drives with less than 5 MB of available space Archive your recorded TV programs to recordable DVD media using Click to DVD software For more information see About Create DVD Change the recording quality setting...

Страница 174: ...Help shortcut icon and then press OK The Help options window appears Media Center Help options Help Find immediate answers to questions about setting up and using all of the Media Center features Community Go online to find information from Microsoft s Media Center forums Tips Locate easy to use advice on using Media Center features Hardware Resolve your Media Center hardware issues Page 174 ...

Страница 175: ...in your home Set up one of the VAIO computers on your home network to act as a media server then get ready to share the fun and memories with your family and friends VAIO Media Software Overview VAIO Media Software System Requirements Setting Up a Client Computer Preparing Your Multimedia Content Starting VAIO Media Console Using VAIO Media Using an Analog Device for Video Playback Page 175 ...

Страница 176: ... network client computers can access these video files Still image files Supporting picture files in JPEG GIF BMP PNG and TIFF formats Still images can be placed in folders and registered to the VAIO Media Server The network client computers can access these picture files TV broadcast VAIO computers equipped with Giga Pocket software can stream a live TV signal to other VAIO computers connected to...

Страница 177: ...ofessional Edition and Microsoft Windows Media Center Edition operating systems VAIO Media software is not supported by other computers or environments All client computers must be connected to the same network with a server using a router ethernet cables or a wireless LAN Configure each client to use a router or an access point on the network All client computers must have VAIO Media software ver...

Страница 178: ...client Begin the client computer registration process after you have installed the VM31Inst exe file to the client 1 Save the installer program to the client computer and then double click to open and install it Follow the on screen installation instructions 2 Restart the client computer after installing the file VAIO Media software appears in the Start menu 3 Click Start on the Windows taskbar an...

Страница 179: ...lient computers recognize each other the server computer generates a four digit number for the client Type this number on the client machine Each client computer has a unique number that cannot be used by the other clients on the network If the registration process is cancelled no number is generated The registration process must begin again for that client computer 8 Restart the client computer i...

Страница 180: ...Server software delivers the recorded contents to the client computers on your network You can also use a VAIO computer with Giga Pocket software1 version 5 0 or later to create Video Capsules Video files using DV AVI MPEG1 MPEG2 DIVX2 and WMV file formats can be stored in registered folders and accessed by the client computers on your network Giga Pocket Personal Video Recorder software creates v...

Страница 181: ...rver access 1 Click Start in the Windows taskbar and then point to All Programs 2 Point to VAIO Media point to Server Administration and click VAIO Media Console VAIO Media Console The VAIO Media Console software window appears enabling you to Check the status of your servers Troubleshoot problems Start and stop all media servers Identify devices registered to the server Register folders Add passw...

Страница 182: ...tent such as playlists recorded TV programs and still images to registered folders 2 Close VAIO Media software if it is running 3 Refresh the VAIO Media software Information about the new content is updated when the server software starts again When you stop and restart the server it displays new connections and refreshes the content on the network computers Page 182 ...

Страница 183: ...found the Please select a server window appears Select a VAIO Media computer from the list If only one VAIO Media computer is found on your network a Please select a server window appears displaying available music or video contents A Folder Photo Lists window appears if you have selected Photo from the main menu A Channel List window appears if you have selected TV from the main menu 4 Click the ...

Страница 184: ...device 4 On your computer click Start and point to All Programs 5 Point to VAIO Media and then click VAIO Media 6 Click TV One of the following windows appears If there are other TV servers that can stream analog input on your network VAIO Media software displays them on the server list Click to select the computer equipped with Media Center from the server list If your computer is the only TV ser...

Страница 185: ...ck panel of the computer 1 Composite Video 1 The Composite video In jack on the back panel of the computer 2 S Video 2 The S video In jack on the front panel of the computer 3 Composite Video 2 The Composite video In jack on the front panel of the computer Page 185 ...

Страница 186: ...software Your computer may not be equipped with all of the features or software discussed in this section depending on the computer model or configuration purchased About VAIO Computer Functions About System Security About Media Center About the Mouse and Keyboard About the Modem About the Speakers About Using a Microphone About Using Peripheral Equipment Page 186 ...

Страница 187: ...gged the computer into a power strip or Uninterruptible Power Supply UPS make sure the power strip or UPS is turned on and working Verify that the monitor is plugged into a power source and turned on If your computer has a built in monitor confirm that it is plugged into an appropriate power source and that the computer is turned on Verify that the brightness or contrast control dials are adjusted...

Страница 188: ...gged the computer into a power strip or Uninterruptible Power Supply UPS make sure the power strip or UPS is turned on and working Verify that the monitor is plugged into a power source and turned on If your computer has a built in monitor confirm that it is plugged into an appropriate power source and that the computer is turned on Verify that the brightness or contrast control dials are adjusted...

Страница 189: ...t Down Windows1 window appears 3 Click the drop down list box and select Restart 4 Click OK The computer turns off and restarts If the Shut Down Windows window does not appear 1 Press Ctrl Alt Delete The Windows Task Manager window appears 2 Click Shut Down 3 Restart your computer If your computer still does not respond and you cannot restart shut down your computer by pressing and holding the pow...

Страница 190: ... troubleshooting information you can search Windows Help 1 Click Start in the Windows taskbar and select Help and Support The Help and Support Center menu appears 2 Select Fixing a Problem and then select Startup and Shut Down problems A list of specific problem topics appears on the right side of the window 3 Select Startup and Shutdown Troubleshooter Follow the on screen instructions according t...

Страница 191: ...urrently using Increasing the computer memory may also help For information on installing memory please see the online VAIO User Guide To access the online User Guide 1 Click Start in the Windows taskbar click All Programs then click VAIO Control Center 2 From the VAIO Control Center menu click the Categories tab then click the Documentation folder 3 Click VAIO User Guide Page 191 ...

Страница 192: ... in the Windows taskbar and then select Control Panel 2 Select Appearance and Themes and then select Change the screen resolution 3 Click the Settings tab 4 Change the Screen resolution and Color quality to the desired levels 5 Click Apply and then click OK Page 192 ...

Страница 193: ...For troubleshooting information you can search Windows Help 1 Click Start in the Windows taskbar and select Help and Support The VAIO Help And Support Center menu appears 2 Select Fixing a Problem and then select Startup and Shut Down problems A list of specific problem topics appears on the right side of the window 3 Select Startup and Shutdown Troubleshooter Follow the on screen instructions acc...

Страница 194: ...e Internet The Windows Updates Web site This site enables you to download computer updates without turning on the Automatic Updates feature Your computer must be connected to the Internet before you can receive updates To use the Automatic Updates feature 1 Connect to the Internet 2 Click the Automatic Updates icon in the Taskbar notification area The Automatic Updates Setup Wizard appears 3 Click...

Страница 195: ...e Internet The Windows Updates Web site This site enables you to download computer updates without turning on the Automatic Updates feature Your computer must be connected to the Internet before you can receive updates To use the Automatic Updates feature 1 Connect to the Internet 2 Click the Automatic Updates icon in the Taskbar notification area The Automatic Updates Setup Wizard appears 3 Click...

Страница 196: ...on area If you have not previously registered the antivirus software a series of information wizards appear 1 Follow the on screen instructions to complete each wizard 2 Double click the Norton Internet Security icon again The Norton Internet Security window appears If you have previously registered this antivirus software the Norton Internet Security window automatically appears 2 Click Live Upda...

Страница 197: ... Digital Studio computers See your online specifications sheet for more information about your computer s configuration Why doesn t the REW button on the remote control work when I use My Music The REW button does not rewind music files Instead press Replay on your remote control for a similar function Page 197 ...

Страница 198: ... Digital Studio computers See your online specifications sheet for more information about your computer s configuration Why doesn t the REW button on the remote control work when I use My Music The REW button does not rewind music files Instead press Replay on your remote control for a similar function Page 198 ...

Страница 199: ...enMG ATRAC format and make edits such as title artist or genre using SonicStage software the changes become visible when the music file is played in My Music If you make changes to a music file using Media Center the changes are not visible when played in SonicStage software Page 199 ...

Страница 200: ...tware to edit the song s information you may not see your changes when you play the song in My Music Windows Media Player supports playback of songs recorded in OpenMG ATRAC3 or ATRAC3 format but does not support any edits made to the OpenMG format music files Use SonicStage software to edit song information for music files that are recorded in OpenMG format Page 200 ...

Страница 201: ...n you use SonicStage software to optimize music files to ATRAC3 or ATRAC3 format it may take a few moments for the music files to be available in My Music To access these files sooner start Windows Media Player software first and then play the song with My Music Page 201 ...

Страница 202: ...yback of this file You can go to Microsoft and download a patch to resolve this issue1 as follows 1 Go to http support microsoft com 2 Enter 814129 in the Search the Knowledge Base text box 3 Click on the topic FIX Error in Windows Media Player 9 Series When You Play Specific MP3 Files located in the Summaries Search Results area 4 Follow the on screen instructions to download and install the patc...

Страница 203: ...with SonicStage software Playlists albums recorded with SonicStage software may not be immediately available in the Media Center Album window To access these files sooner start Windows Media Player software first and then play the song with My Music Page 203 ...

Страница 204: ...e of Click to DVD software both require the use a TV tuner MPEG encoder card and cannot access the card at the same time To avoid recording conflicts Do not open Media Center while capturing analog video using Click to DVD or Click to DVD Automatic Mode software Do not schedule a TV recording to start while capturing analog video using Click to DVD or Click to DVD Automatic Mode software If a sche...

Страница 205: ... background in the View window the movie may be copyright protected Your computer is not able to display or record a video or DVD that is copyright protected by Macrovision or CGMS A Copy Generation Management System Analog Media Center software does not support recording a movie using analog input from external devices such as a VCR DVD player or Digital video camera Page 205 ...

Страница 206: ...Why can t I fast forward or rewind a video The rewind and fast forward features are not supported by all video formats Try using the Skip or Replay buttons which provides a similar function Page 206 ...

Страница 207: ... TV programs Media Center software and remote control do not have video adjustment capability Use the controls on the monitor to adjust video settings such as contrast hue and brightness See the information provided with your monitor for instructions on adjusting its video controls Page 207 ...

Страница 208: ...s 1 Right click on the desktop and click Properties from the shortcut menu The Display Properties window appears 2 Click the Settings tab and then click Advanced 3 Click the Monitor tab and in the Monitor settings box confirm the screen refresh rate is set to 60 Hertz 4 If the refresh rate is not set to 60 Hz click the drop down arrow and select 60 Hertz Page 208 ...

Страница 209: ...use there may be dust or dirt inside the mouse mechanism To clean the mouse follow these steps 1 Save and close all software programs and turn off your computer 2 Turn the mouse upside down 3 Remove the mouse ball cover on the back of the mouse by turning clockwise the ring that covers the mouse ball 4 Turn the mouse upright and drop the mouse ball into your hand 5 Using a piece of tape remove any...

Страница 210: ...f battery do not mix alkaline with manganese batteries Using incompatible batteries or mixing used new or different types of batteries can damage the mouse 1 For wireless or standard optical mice 2 O perate the mouse V GP WMS1 within 32 feet of the computer O perate the mouse PC V A MS2 within 2 5 feet of the computer Page 210 ...

Страница 211: ...use there may be dust or dirt inside the mouse mechanism To clean the mouse follow these steps 1 Save and close all software programs and turn off your computer 2 Turn the mouse upside down 3 Remove the mouse ball cover on the back of the mouse by turning clockwise the ring that covers the mouse ball 4 Turn the mouse upright and drop the mouse ball into your hand 5 Using a piece of tape remove any...

Страница 212: ...f battery do not mix alkaline with manganese batteries Using incompatible batteries or mixing used new or different types of batteries can damage the mouse 1 For wireless or standard optical mice 2 O perate the mouse V GP WMS1 within 32 feet of the computer O perate the mouse PC V A MS2 within 2 5 feet of the computer Page 212 ...

Страница 213: ...ws taskbar then click Control Panel 2 Click Printers and Other Hardware then click Mouse The Mouse Properties dialog box appears 3 From the Buttons tab select Switch primary and secondary buttons under the Button Configuration options 4 Click Apply then click OK Page 213 ...

Страница 214: ...peration Avoid using radio controlled toys or equipment CB radios and other wireless devices in the area near your wireless keyboard These devices may cause interference causing your keyboard to stop working properly Do not place metal furniture near your computer or wireless keyboard as this may create interference causing your keyboard to stop working properly Do not mix old used and new batteri...

Страница 215: ...SP check the following Contact your telephone company and ask them to verify that your telephone line is free from line noise If your problem is fax related check that there are no problems with the fax machine you are calling and that it is compatible with fax modems For optimum performance verify that your ISP point of presence POP telephone number is compliant with V 90 standards If you are hav...

Страница 216: ...SP check the following Contact your telephone company and ask them to verify that your telephone line is free from line noise If your problem is fax related check that there are no problems with the fax machine you are calling and that it is compatible with fax modems For optimum performance verify that your ISP point of presence POP telephone number is compliant with V 90 standards If you are hav...

Страница 217: ... modem If you have installed other software contact the software publisher for information on how to configure the software in order to recognize the modem If it appears that your modem is not functioning properly check the device status 1 Click Start in the Windows taskbar then click Control Panel 2 Click Printers and Other Hardware and then select Phone and Modem Options 3 From the Modems tab cl...

Страница 218: ... Click Start in the Windows taskbar then click Control Panel 2 Click Printers and Other Hardware then click Phone and Modem options 3 From the Dialing Rules tab click Edit The Edit Location dialog box appears 4 Select the Tone or Pulse option Click OK Page 218 ...

Страница 219: ...ect All Programs 2 Point to Accessories point to Communications and then click New Connection Wizard The New Connection Wizard appears The Location Information and the Phone and Modem Options windows appear when using your computer for the first time Enter your information as requested and continue to the New Connection Wizard window 3 Follow the on screen instructions to finish setting up your di...

Страница 220: ...ume level You may not hear sound from your speakers if headphones are connected to your computer If the software program you are using has its own volume control check that the volume is turned up Check the volume controls in the Windows operating system using these steps 1 Click Start in the Windows taskbar then select Control Panel 2 Select Sounds Speech and Audio Devices then click Adjust the s...

Страница 221: ...ume level You may not hear sound from your speakers if headphones are connected to your computer If the software program you are using has its own volume control check that the volume is turned up Check the volume controls in the Windows operating system using these steps 1 Click Start in the Windows taskbar then select Control Panel 2 Select Sounds Speech and Audio Devices then click Adjust the s...

Страница 222: ...indow opens 3 Right click in the WinDVD window A shortcut menu appears 4 Click Setup to view the Setup dialog box 5 Select the Audio tab 6 From the section Audio Speaker Configuration select 6 channel speaker 5 1 Home Theater or the desired speaker configuration To enable S PDIF go to Audio Output Configuration and select Digital S PDIF out to External Processor 7 Click Apply and then click OK Int...

Страница 223: ...speaker system Change the audio settings in the RealTek Sound Effect Manager software program Change the audio settings in the InterVideo WinDVD software program Change the audio settings in the Media Center software program s DVD settings 1 Your computer s supplied accessories may not include a 5 1 channel speaker system See your specifications sheet for details on your computer s supplied access...

Страница 224: ...About Using a Microphone Why doesn t my microphone work properly Check that the microphone is plugged into the Microphone jack Page 224 ...

Страница 225: ...About Using a Microphone Why doesn t my microphone work properly Check that the microphone is plugged into the Microphone jack Page 225 ...

Страница 226: ... Sound recording section and click Volume The Recording Control dialog box appears If the volume control for the microphone is visible skip to step 6 4 Select the Options menu and click Properties The Properties dialog box appears 5 In the section Show the following volume controls click to select the Microphone check box Click OK 6 From the Recording Control dialog box decrease the microphone vol...

Страница 227: ...ce a check mark in the box Automatically detect and install my Plug and Play printer if you are installing a recently manufactured printer equipped with Plug and Play capability 5 Select the appropriate port usually LPT1 if using the parallel port and then click Next 6 Select the appropriate printer manufacturer and model 7 Follow the on screen instructions to print a test page and complete printe...

Страница 228: ...ce a check mark in the box Automatically detect and install my Plug and Play printer if you are installing a recently manufactured printer equipped with Plug and Play capability 5 Select the appropriate port usually LPT1 if using the parallel port and then click Next 6 Select the appropriate printer manufacturer and model 7 Follow the on screen instructions to print a test page and complete printe...

Страница 229: ...y when the computer resumes from a power saving mode Clear the printer memory by turning the printer off for approximately 10 seconds and then turning it back on If your printer does not resume normal operations try restarting your computer Page 229 ...

Страница 230: ... procedures for handling your computer and common peripheral devices and using storage media About the Power Source About Handling the Computer About Using a Monitor Display About Disposing of the Lithium Battery About Recording and Data Storage Media Page 230 ...

Страница 231: ...wer fluctuations you may want to purchase an Uninterruptible Power Supply UPS This device contains both a surge protector and a battery backup The surge protector prevents damage to your computer caused by power surges The battery backup safeguards your data during a brief period of power loss The power control button on the front panel does not turn off the AC power To remove power from the compu...

Страница 232: ...cables otherwise problems may result Do not use cut or damaged connection cables Always switch the power off before connecting your computer to peripheral equipment otherwise damage may occur to the integrated circuits in your computer Your computer keyboard and mouse consist of high precision electronic parts Do not drop them or bump them against other objects Your Sony computer does not work wit...

Страница 233: ...nterference causing your wireless device to stop working properly The hard disk drive Do not place the computer in a location that is subject to vibration or shock Do not move the computer during operation Do not subject the computer to sudden changes in temperature Do not turn off the power while the computer is accessing the hard disk drive Optical mouse An optical mouse requires an ideal surfac...

Страница 234: ...thy period of time The image disappears after a period of time You can use a screen saver to prevent residual images The screen becomes warm during operation This is normal and does not indicate a malfunction Do not leave the LCD in direct sunlight as this may damage the screen Use caution when using the computer near a window Do not exert pressure on the LCD or scratch the surface as this may cau...

Страница 235: ...y Service Center or Factory Service Center For the Sony Service Center nearest you visit the Sony online support Web site at http www sony com pcsupport Do not handle damaged or leaking lithium batteries The lithium battery may explode if mistreated Do not disassemble it or dispose of it in fire Replace the battery with a Sony CR2032 lithium battery Using a type of battery other than a CR2032 may ...

Страница 236: ...y suggests using only the MagicGate Memory Stick media to store and transfer any data created with SonicStage and OpenMG software VAIO computers may not support all of the high speed data transfer or access control features of the new Memory Stick PRO media You can use the new Memory Stick PRO media as you would use a standard Memory Stick media Visit the Sony online support Web site at http www s...

Страница 237: ...ms or to locate support for your VAIO computer This section describes all available resources and offers suggestions on how to access this information for maximum results Immediate Help and Support Software Help and Support Resources for Additional Help and Support Page 237 ...

Страница 238: ...of your VAIO computer To view the online specifications sheet 1 Connect to the Internet 2 Go to the Sony online support Web site at http www sony com pcsupport 3 Click the Documentation button and follow the on screen instructions to locate your model s specifications sheet Preinstalled software Help files Each preinstalled software program provides online Help within the software that describes t...

Страница 239: ...rn DVDs from a digital video DV device Create DVDs by capturing video content straight from a DV device or by importing video from stored files You can also edit the video Create DVD photo albums and slide shows with picture files or by importing pictures from a digital still camera What s more you can easily give a professional look to your DVDs by adding chapter menus backgrounds and menu screen...

Страница 240: ...866 541 8233 Norton Internet Security Symantec Corp Web site http www symantec com techsupp PictureGear Studio Sony Electronics Inc PictureGear Studio is picture management software that can display photos from your hard drive or a Sony digital still camera The photos appear in a convenient light table format so that you can easily view the contents of an entire folder create your own photo albums...

Страница 241: ...les in WAV format Web site http www sony com pcsupport telephone 888 4 SONY PC 888 476 6972 hours 7 days a week 24 hours a day SpySubtract Intermute Inc Web site http www intermute com support html VAIO Control Center Sony Electronics Inc VAIO Control Center provides a central location that gathers resources to configure your VAIO personal computer and view your computer s configuration specificat...

Страница 242: ...4 SONY PC 888 476 6972 hours 7 days a week 24 hours a day VAIO Zone Sony Electronics Inc VAIO Zone software delivers an effortless way to browse and enjoy picture music and video files on your computer all through an elegant next generation interface You can enjoy media content stored on other VAIO computers media servers on your network VAIO Zone software enables you to record video and photo sli...

Страница 243: ...status review warranty information e mail your question or comments to the Sony Customer Information Services Center check pricing and availability for products accessories and parts as well as purchase online access the Sony Solutions Knowledge Base a database that contains answers to many frequently asked questions Sony Customer Information Services Center If other support options do not resolve...

Отзывы: