Creating movies with MovieShaker software
Using your imported clips, you can create a short movie using the Shake feature. The Shake feature selects clips from the
Story Board tray, adds effects, and combines them randomly into a 30-second movie. After you "Shake" your video, you can
edit it by adding effects and text, by adjusting the color and contrast, and by modifying its length.
Importing images and sound clips
1.
Click
. The Import file browser window appears.
2.
Find the clips you want to add.
3.
Click the clips. The files are added to the Import clip tray.
4.
Repeat this process to gather each of the images and video and sound clips you want to use in your movie.
You can delete a clip from the Import clip tray by dragging the clip's icon to the trash icon located on the Edit tray of
the working panel.
Importing image or sound files that are over 30 seconds in length may cause the MovieShaker software to stop
responding.
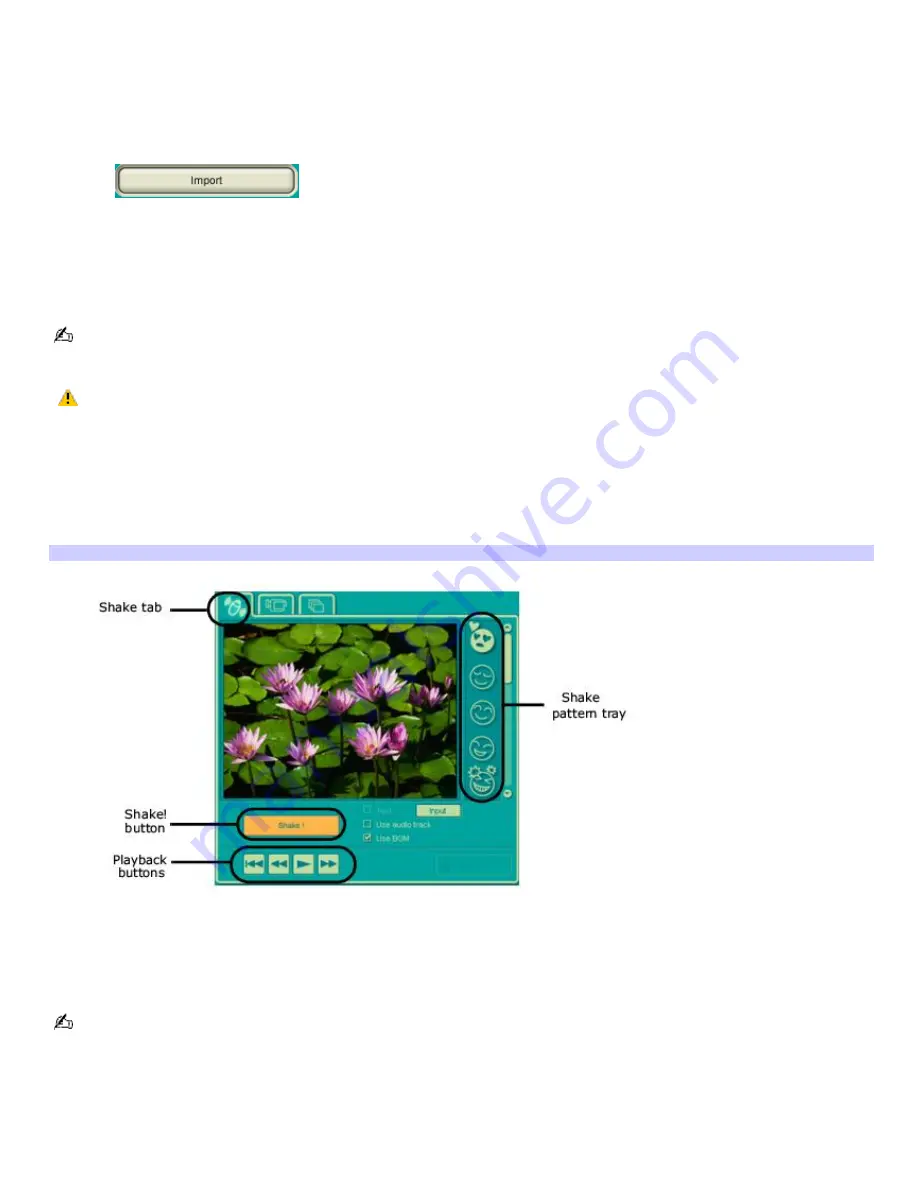
Using the Shake feature
1.
Click the
Shake
tab. The
Shake
tray appears
2.
Select a mood by clicking a face in the
Shake
pattern tray.
Shake tray
3.
Click the
Shake!
button. A 30-second movie is automatically generated.
4.
Optional:
Add text to your new movie by clicking on the
Text
button.
5.
To preview, rewind, or fast forward your movie, use the
Playback
buttons.
Scenes created with the Shake feature begin with a black screen in the Shake tray window. Your scenes appear
during movie playback.
You can improve the image quality produced by the Shake feature (at the cost of longer Shake times) by turning off the
"Shorten the Shake time" feature in the General panel of the Setting dialog box. See the Menu reference section of the
online Help file for details.
Adding effects to a scene or a clip
Page 159
Содержание VAIO PCG-GRX700K
Страница 21: ...Internet and Network Connections Internet Connections Network Connections Page 21 ...
Страница 31: ...CDs and DVDs Inserting and Ejecting CDs or DVDs Copying and Playing CDs Copying and Playing DVDs Page 31 ...
Страница 46: ...Printer Connections Printing With Your Computer Page 46 ...
Страница 49: ...See the guide that accompanied the printer for more information on its installation and use Page 49 ...
Страница 66: ...Mice and Keyboards Using the Keyboard Connecting External Mice and Keyboards Page 66 ...
Страница 74: ...Page 74 ...
Страница 77: ...Floppy Disks PC Cards and i LINK Connections Using a Floppy Disk Drive Using PC Cards Page 77 ...
Страница 91: ...Port Replicators Locating Ports and Jacks Connecting a Port Replicator Disconnecting a Port Replicator Page 91 ...
Страница 118: ...Preinstalled Programs Programs On Your Computer DVgate Program Notes Program Support Information Page 118 ...


