background image

SER

SER

SER

SER

SERVICE MANUAL

VICE MANUAL

VICE MANUAL

VICE MANUAL

VICE MANUAL

BA-4D 

BA-4D 

BA-4D 

BA-4D 

BA-4D 

CHASSIS

CHASSIS

CHASSIS

CHASSIS

CHASSIS

MODEL

COMMANDER

DEST

CHASSIS NO.

KV-21ME43

KV-21ME43

KV-21ME43

KV-21ME43

KV-21ME43

RM-Y156

E

SCC-S55A-A

TRINITRON

TRINITRON

TRINITRON

TRINITRON

TRINITRON

®

®

®

®

®

 COLOR TV

 COLOR TV

 COLOR TV

 COLOR TV

 COLOR TV

RM-Y156

KV-21ME43

900 Cover.p65

11/30/00, 8:09 AM

1

Содержание TRINITRON RM-Y156

Страница 1: ...A 4D BA 4D CHASSIS CHASSIS CHASSIS CHASSIS CHASSIS MODEL COMMANDER DEST CHASSIS NO KV 21ME43 KV 21ME43 KV 21ME43 KV 21ME43 KV 21ME43 RM Y156 E SCC S55A A TRINITRON TRINITRON TRINITRON TRINITRON TRINITRON COLOR TV COLOR TV COLOR TV COLOR TV COLOR TV RM Y156 KV 21ME43 900 Cover p65 11 30 00 8 09 AM 1 ...

Страница 2: ...ed Supplied Supplied Accessories Accessories Accessories Accessories Accessories Remote Commander RM Y156 Size AA R6 batteries 2 Optional Optional Optional Optional Optional Accessories Accessories Accessories Accessories Accessories Dipole antenna Connecting cables VMC 810S 820S VMC 720M YC 15V 30V RK74A U V mixer EAC 66 KV 21M43 Power Requirements Number of inputs outputs Video 1 2 Audio Input 2...

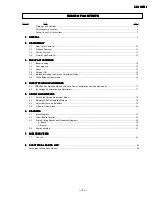
Страница 3: ...TMENTS ADJUSTMENTS ADJUSTMENTS 4 1 R582 Confirmation Method HV Hold Down Confirmation and Readjustments 17 4 2 B Voltage Confirmation and Adjustment 17 5 5 5 5 5 CIRCUITADJUSTMENTS CIRCUITADJUSTMENTS CIRCUITADJUSTMENTS CIRCUITADJUSTMENTS CIRCUITADJUSTMENTS 5 1 Setting the Service Adjustment Mode 19 5 2 Memory Write Confirmation Method 19 5 3 Adjust Buttons and Indicators 19 5 4 A Board Adjustments...

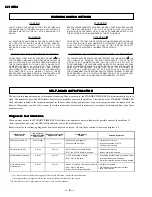
Страница 4: ...ELF DIAGNOSTIC FUNCTION SELF DIAGNOSTIC FUNCTION SELF DIAGNOSTIC FUNCTION SELF DIAGNOSTIC FUNCTION SELF DIAGNOSTIC FUNCTION The units in this manual contain a self diagnostic function If an error occurs the STANDBY TIMER LED will automatically begin to flash The number of times the LED flashes translates to a probable source of the problem A definition of the STANDBY TIMER LED flash indicators is ...

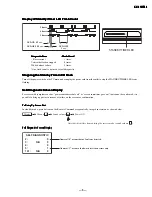
Страница 5: ...rom the outlet to stop the STANDBY TIMER LED from flashing Self Diagnostic Screen Display Self Diagnostic Screen Display Self Diagnostic Screen Display Self Diagnostic Screen Display Self Diagnostic Screen Display For errors with symptoms such as power sometimes shuts off or screen sometimes goes out that cannot be confirmed it is possible to bring up past occurrences of failure on the screen for ...

Страница 6: ...creen turn off the power switch on the Remote Commander or the main unit Self diagnostic Circuit Self diagnostic Circuit Self diagnostic Circuit Self diagnostic Circuit Self diagnostic Circuit IC301 Y CHROMA JUNGLE IC541 V OUT IC001 SYSTEM IC003 MEMORY IK IN FROM CRT 21 HP PROTECT SDA FROM IC521 PIN 7 18 35 IO SDAT O LED 37 REF 3 I PROT IO BDAT 17 36 B DAT 5 18 DISPLAY B over B over B over B over ...

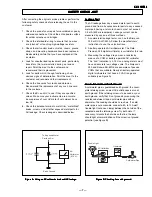
Страница 7: ...eakage tester such as the Simpson 229 or RCA WT 540A Follow the manufacturers instructions to use these instructions 2 A battery operated AC milliammeter The Data Precision 245 digital multimeter is suitable for this job 3 Measuring the voltage drop across a resistor by means of a VOM or battery operated AC voltmeter The limit indication is 0 75 V so analog meters must have an accurate low voltage...

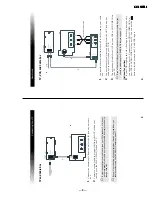
Страница 8: ...n of the antenna for best reception 4 User Guide Connecting Additional Equipment TV and VCR 1 Connect the coaxial cable from your TV antenna or cable TV to the IN jack on your VCR 2 Connect a coaxial cable not supplied from the OUT jack on your VCR to the VHF UHF IN jack on the TV Optional Connection 3 If your VCR is equipped with video inputs for best picture quality you should connect A V connec...

Страница 9: ...should consider using the CHANNEL FIX feature on page 17 6 User Guide TV VCR and Cable box 1 Connect the coaxial cable from the wall to the IN jack on your cable box 2 Connect a coaxial cable not supplied from the OUT jack on your cable box to the IN jack on your VCR 3 Connect a coaxial cable from OUT on your VCR to VHF UHF IN on your TV Optional Connection 4 If your VCR is equipped with video inp...

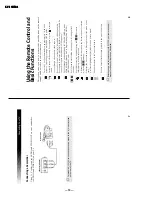
Страница 10: ...d Cycles through the available video inputs Press once to show current time if set and channel number Press again to activate CAPTION VISION settings if available To cancel press again until DISPLAY OFF appears Cycles through the Multi Channel TV Sound MTS options STEREO SAP Second Audio Programming and MONO KV 20S42 20S43 only Press for channel selection the channel will change after 2 seconds Pr...

Страница 11: ...ently broadcasting Dotted lines or stripes Adjust the antenna Move the TV away from other electronic equipment Some electronic equipment can create electrical noise which can interfere with TV reception Double images or ghosts Check your outdoor antenna or call your cable service 26 User Guide If after reading these operating instructions you have additional questions related to the use of your So...

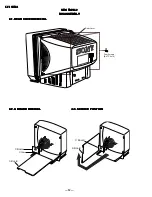
Страница 12: ...EMOV 2 1 REAR COVER REMOV 2 1 REAR COVER REMOV 2 1 REAR COVER REMOV 2 1 REAR COVER REMOVAL AL AL AL AL 2 2 2 2 2 2 2 2 2 2 A A A A A BOARD REMOV BOARD REMOV BOARD REMOV BOARD REMOV BOARD REMOVAL AL AL AL AL 2 3 SER 2 3 SER 2 3 SER 2 3 SER 2 3 SERVICE POSITION VICE POSITION VICE POSITION VICE POSITION VICE POSITION Rear Cover Four Screws BVTP 4x16 C Board Claw A Board A Board C Board ...

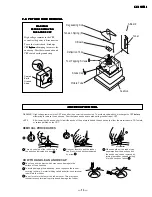
Страница 13: ... to remove the anode cap Short between anode and coated earth ground strap of CRT NOTE After removing the anode short circuit the anode of the picture tube and the anode cap to either the metal chassis CRT shield or carbon painted on the CRT 1 Do not use sharp objects which may cause damage to the surface of the anode cap 3 Do not force turn the foot of the rubber cover This may cause the shatter ...

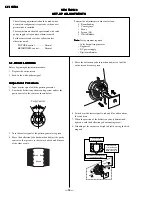
Страница 14: ...Green 5 Move the deflection yoke forward and adjust so that the entire screen becomes green 6 Switch over the raster signal to red and blue and confirm the condition 7 When the position of the deflection yoke is determined tighten it with the deflection yoke mounting screw 8 If landing at the corner is not right adjust by using the disk magnets b a c d d b c Purity control corrects this area Disk ...

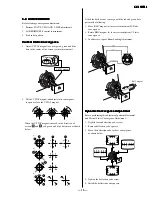
Страница 15: ...d blue dots move as shown below a b b B G R a b B G R a B G R R G B b R G B b b a R G B 1 3 2 If the blue dot does not converge with the red and green dots perform the following 1 Move BMC magnet a to correct insufficient H Static convergence 2 Rotate BMC magnet b to correct insufficient V Static convergence 3 In either case repeat Beam Landing Adjustment PURITY V STAT BMC MAGNET b a BMC magnet Dy...

Страница 16: ...rvice Mode Procedure Service Mode Procedure Service Mode Procedure 1 Standby mode power off 2 Display Channel 5 Sound volume Power ON on the Remote Commander press each button within a second Service Service Service Service Service Adjustment Mode In Adjustment Mode In Adjustment Mode In Adjustment Mode In Adjustment Mode In 1 The CRT displays the item being adjusted SERVICE HSIZ 0 Disp Item Item ...

Страница 17: ...mally attach See Figure 1 on the following page 2 Input a dot signal and set PICTURE and BRIGHTNESS to minimum IABL 95 100 95µA 3 Confirm the voltage of A Board TP 600 is 117 0 0 3 VDC 4 Connect the digital voltmeter and the DC power supply via diode 1SS119 to C574 and ground See Figure 1 on the following page 5 Increase the DC power voltage gradually until the picture blanks out 6 Read the digita...

Страница 18: ...ltimeter TP600 TP600 TP600 TP600 TP600 Figure 1 R582 R582 R582 R582 R582 Ammeter 3mA DC Range ABL1 ABL1 ABL1 ABL1 ABL11 1 1 1 1 A T504 T504 T504 T504 T504 FBT FBT FBT FBT FBT 1SS119 1SS119 1SS119 1SS119 1SS119 Digital Multimeter Power Supply C574 C574 C574 C574 C574 ...

Страница 19: ...ENTS ADJUSTMENTS ADJUSTMENTS Carry out step 1 when adjusting IDs 0 4 and when replacing and adjusting IC003 5 2 Memory W 5 2 Memory W 5 2 Memory W 5 2 Memory W 5 2 Memory Write Confirmation Method rite Confirmation Method rite Confirmation Method rite Confirmation Method rite Confirmation Method 1 After adjustment remove the power plug from the AC outlet then plug it in again 2 Turn the power swit...

Страница 20: ...V G OUTPUT DRIVE CONTROL 0 63 31 24 26 BDRV B OUTPUT DRIVE CONTROL 0 63 31 27 27 RCUT R OUTPUT CUTOFF CONTROL 0 15 7 28 GCUT G OUTPUT CUTOFF CONTROL 0 15 7 6 29 BCUT B OUTPUT CUTOFF CONTROL 0 15 7 7 30 DCOL DYNAMIC COLOR ON OFF 0 1 0 0 31 SHUE SUB HUE 0 31 14 18 32 SCOL SUB COLOR 0 31 14 18 33 SBRT SUB BRIGHTNESS 0 31 14 10 34 RON R OUTPUT ON OFF 0 1 0 1 35 GON G OUTPUT ON OFF 0 1 0 1 36 BON B OUT...

Страница 21: ... D DISPLAY POSITION 0 127 0 5 66 PADJ POWER ADJUSTMENT 0 63 3 42 67 HCHM 0 255 69 69 68 HCLM 0 255 16 16 69 HCHS 0 255 69 69 70 HCLS 0 255 16 16 71 PVCH 0 1 0 0 72 PVON 0 1 0 1 73 PVLN 0 31 17 17 74 PVSB 0 255 64 64 75 PVLV 0 255 130 130 76 ID1 ID1 0 255 3 See ID Map below 77 ID2 ID2 0 255 11 See ID Map below 78 ID3 ID3 0 255 1 See ID Map below 79 ID4 ID4 0 255 23 See ID Map below 80 ID5 ID5 0 255...

Страница 22: ...r 1 50 0 1 Vp p Black White 1 70 0 05 Vp p 9 Reset the item DCOL to 1 10 Press then to save into the memory 11 Return the following back to normal after adjustment PICTURE MAX COLOR CENTER BRIGHT CENTER R ON ON 1 G ON OFF 0 B ON OFF 0 Display Position Display Position Display Position Display Position Display Position Adjustment DISP Adjustment DISP Adjustment DISP Adjustment DISP Adjustment DISP ...

Страница 23: ...enter H Center Adjustment HPOS Adjustment HPOS Adjustment HPOS Adjustment HPOS Adjustment HPOS Perform this adjustment after checking H Frequency 1 Input a crosshatch signal 2 Set to Service Adjustment Mode 3 Select the HPOS item with and 4 Adjust the value of HPOS with and for the best horizontal center 5 Press then to save into the memory V V V V V Linearity VLIN V Correction Linearity VLIN V Co...

Страница 24: ... 24 KV 21ME43 KV 21ME43 KV 21ME43 KV 21ME43 KV 21ME43 NOTES ...

Страница 25: ... 25 KV 21ME43 KV 21ME43 KV 21ME43 KV 21ME43 KV 21ME43 NOTES ...

Страница 26: ... 26 KV 21ME43 KV 21ME43 KV 21ME43 KV 21ME43 KV 21ME43 NOTES ...

Страница 27: ...LID FPRD NON FLAMMABLE CARBON FUSE NON FLAMMABLE FUSIBLE RW NON FLAMMABLE WIREWOUND RS NON FLAMMABLE METAL OXIDE RB NON FLAMMABLE CEMENT ADJUSTMENT RESISTOR COIL LF 8L MICRO INDUCTOR CAPACITOR TA TANTALUM PS STYROL PP POLYPROPYLENE PT MYLAR MPS METALIZED POLYESTER MPP METALIZED POLYPROPYLENE ALB BIPOLAR ALT HIGH TEMPERATURE ALR HIGH RIPPLE The components identified by shading and mark are critical...

Страница 28: ...6 2 0 Q666 R 3 9 1 C 6 1 6 R 0 7 3 H D Y H D Y H D Y H D Y V D Y V D Y 1 2 3 4 5 6 7 8 9 1 0 1 1 1 2 6 7 1 6 1 1 9 1 1 1 1 1 1 2 22 B E C 1 6 IC301 TP103 30V TP101 9V AFT OUT TP102 DET OUT TP602 5V R OUT L OUT TP400 AUDIO VCC TP500 H DRIVE SET 9V TP601 TP508 V OUT TP507 V MID ABL 13V HEATER 13V 200V TP600 B TP505 900V TP504 180V TP506 H OUT TP502 13V TP501 13V STBY 5V TP001 TP403 L OUT R OUT TP404...

Страница 29: ... E F F L F T MTZJ T 77 30D 40 GP08DPKG23 4A RGP10GPKG23 4G RGP15GPKG23 4G RGP15GPKG23 4G HD MTZJ T 77 8 2B 40 1 0 0 p C H C C C P 4 7 0 k Z Z C P 6 8 0 Z Z C P 1 k Z Z C P 2 2 0 Z Z C P 1 0 0 Z Z C P 4 7 k Z Z C P 2 2 0 Z Z C P 2 2 0 Z Z C P 1 0 k Z Z C P 6 8 0 Z Z C P 6 8 0 Z Z C P 6 8 0 Z Z C P 1 0 k Z Z C P 1 0 0 Z Z C P 1 0 0 Z Z C P 4 7 0 k Z Z C P 4 7 0 Z Z C P 1 0 0 Z Z C P 100 ZZ CP 1 0 k ...

Страница 30: ...dom required for routine ser vice Some delay should be anticipated when ordering these items Les composants identifies per un trame et une Les composants identifies per un trame et une Les composants identifies per un trame et une Les composants identifies per un trame et une Les composants identifies per un trame et une marque marque marque marque marque sont critiques pour la securite Ne les son...

Страница 31: ...1ME43 KV 21ME43 KV 21ME43 A 1299 446 A A 1299 446 A A 1299 446 A A 1299 446 A A 1299 446 A ABOARD COMPLETE ABOARD COMPLETE ABOARD COMPLETE ABOARD COMPLETE ABOARD COMPLETE Thehigh voltageleadsassociatedwiththeFBTonthisboardarenot includedand Thehigh voltageleadsassociatedwiththeFBTonthisboardarenot includedand Thehigh voltageleadsassociatedwiththeFBTonthisboardarenot includedand Thehigh voltagelead...

Страница 32: ...F 20 200V C504 1 102 228 00 CERAMIC CHIP 470pF 10 500V C505 1 117 626 11 FILM 2000pF 3 1 2KV C507 1 117 633 11 FILM 3900pF 3 1 2KV C508 1 106 371 00 MYLAR 0 015µF 20 200V C509 1 162 115 00 CERAMIC CHIP 330pF 10 2KV C511 1 117 665 11 FILM 0 33µF 5 250V C531 1 106 387 00 MYLAR 0 068µF 10 200V C541 1 126 969 11 ELECT 220µF 20 50V C542 1 126 967 11 ELECT 47µF 20 50V C543 1 136 169 00 FILM 0 22µF 5 50V...

Страница 33: ...77 5 1C D310 8 719 073 01 DIODEMA111 TX D311 8 719 073 01 DIODEMA111 TX D320 8 719 976 99 DIODE UDZ TE 17 5 1B D403 8 719 991 33 DIODE1SS133T 77 D434 8 719 991 33 DIODE1SS133T 77 D501 8 719 945 80 DIODE ERC06 15S D502 8 719 302 43 DIODE RGP10GPKG23 D541 8 719 908 03 DIODE GP08DPKG23 D552 8 719 302 43 DIODE RGP10GPKG23 D561 8 719 979 85 DIODE RGP15GPKG23 D562 8 719 979 85 DIODE RGP15GPKG23 D571 8 7...

Страница 34: ...ANSISTOR2SB709A QRS TX Q302 8 729 216 22 TRANSISTOR2SB709A QRS TX Q303 8 729 423 33 TRANSISTOR2SC3311A QRSTA Q305 8 729 216 22 TRANSISTOR2SB709A QRS TX Q390 8 729 422 27 TRANSISTOR2SD601A QRS TX Q391 8 729 422 27 TRANSISTOR2SD601A QRS TX Q392 8 729 216 22 TRANSISTOR2SB709A QRS TX Q393 8 729 216 22 TRANSISTOR2SB709A QRS TX Q394 8 729 216 22 TRANSISTOR2SB709A QRS TX Q501 8 729 140 50 TRANSISTOR2SC32...

Страница 35: ...09 11 CARBON 220 5 1 4W R240 1 249 417 11 CARBON 1K 5 1 4W R242 1 249 433 11 CARBON 22K 5 1 4W R243 1 216 085 00 RES CHIP 33K 5 1 10W R245 1 216 295 11 SHORT 0 R251 1 216 041 00 RES CHIP 470 5 1 10W R252 1 216 041 00 RES CHIP 470 5 1 10W R253 1 215 899 11 METALCHIP 15K 5 2W R254 1 216 025 11 RES CHIP 100 5 1 10W R255 1 216 025 11 RES CHIP 100 5 1 10W R256 1 249 425 11 CARBON 4 7K 5 1 4W R257 1 216...

Страница 36: ...TCH SWITCH SWITCH SWITCH SWITCH S001 1 692 431 21 SWITCHTACTILE S002 1 692 431 21 SWITCHTACTILE S003 1 692 431 21 SWITCHTACTILE S004 1 692 431 21 SWITCHTACTILE S005 1 692 431 21 SWITCHTACTILE S006 1 692 431 21 SWITCHTACTILE S007 1 692 431 21 SWITCHTACTILE TRANSFORMER TRANSFORMER TRANSFORMER TRANSFORMER TRANSFORMER T501 1 437 210 11 TRANSFORMER HORIZONTAL DRIVE T504 1 453 238 21 TRANSFORMER FBT ASS...

Страница 37: ...RIST ARIST ARIST ARISTOR OR OR OR OR VDR601 1 803 585 11 VARISTOR ENE271D 10A CR CR CR CR CRYST YST YST YST YSTAL AL AL AL AL X001 1 767 487 11 VIBRATOR CRYSTAL X301 1 567 505 11 OSCILLATOR CRYSTAL A 1331 917 A A 1331 917 A A 1331 917 A A 1331 917 A A 1331 917 A CBOARD MOUNTED CBOARD MOUNTED CBOARD MOUNTED CBOARD MOUNTED CBOARD MOUNTED 4 382 854 11 SCREW M3X10 P SW CAP CAP CAP CAP CAPACIT ACIT ACI...

Страница 38: ... 86 NOTES NOTES 50 KV 21ME43 KV 21ME43 KV 21ME43 KV 21ME43 KV 21ME43 ...

Страница 39: ... Technical Services Technical Services Service Promotion Dept Service Promotion Dept Service Promotion Dept Service Promotion Dept Service Promotion Dept 9 965 900 01 9 965 900 01 9 965 900 01 9 965 900 01 9 965 900 01 English English English English English 2000KJ74048 1 2000KJ74048 1 2000KJ74048 1 2000KJ74048 1 2000KJ74048 1 Printed in U S A Printed in U S A Printed in U S A Printed in U S A Pri...

Отзывы: