13
(GB)
Follow the instructions in the SU-WL500 instruction
manual to confirm.
Follow the instructions in the SU-WL500 instruction
manual to remove.
2
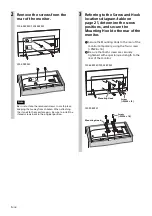
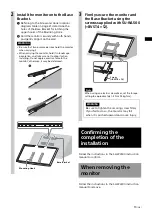
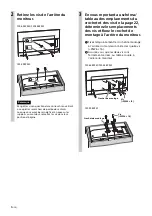
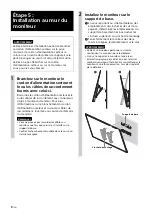
Install the monitor onto the Base
Bracket.
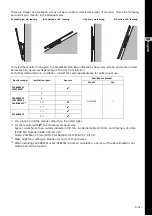
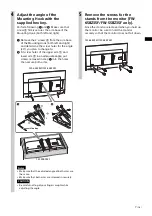
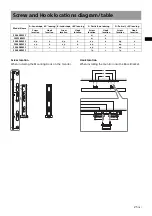
Referring to the Screw and Hook locations
diagram/table on page 21, determine the
holes of the Base Bracket for latching the
upper hooks of the Mounting Hook.
Hold the monitor securely with both hands,
and gently align it on the wall.
WARNING
• Be sure that two or more persons hold the monitor
when carrying it.
• When carrying the monitor, hold it in landscape
orientation, and take care not to drop it when
installing. Do not apply excessive force to the
monitor; otherwise, it may be deformed.
Base Bracket
Mounting Hook
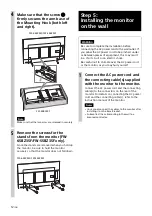
3
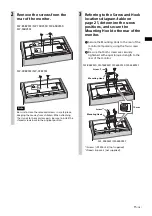
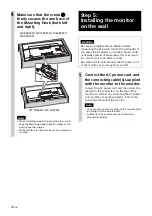
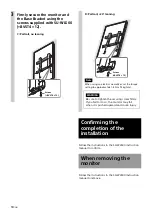
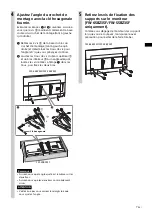
Firmly secure the monitor and
the Base Bracket using the
screws supplied with SU-WL500
(+BVST4 × 12).
Note
When using an electric screwdriver, set the torque
setting to approximately 1.5 N·m {15 kgf·cm}.
Confirming the
completion of the
installation
When removing the
monitor
Screw
(+BVST4 × 12)
WARNING
Be sure to tighten the securing screw firmly.
If you fail to do so, the monitor may fall
when it is pushed upward and cause injury.

