50
[Capture]
Click the [Capture] button when person whose face you
want to register is facing the front. The screen display
becomes a still image display, and frames are displayed
on the detected faces. Click the frame for the person you
want to register.
Only register a face when the person is facing the front.
Faces not facing the front cannot be identified.
[Redo]
Click the button to perform the capture operation again.
[Name]
Enter the name of the person to register. Enabled when
the unit is ready to register the face.
[Register]
Register the face data in the face database. The
[Register] button is enabled when the unit is ready to
register the face.
Not enabled if the maximum number of registered faces
has been reached.
[Registered Faces]
Displays the faces registered in the face database. The
number at the top left of each face image is the detection
priority. When registered faces appear simultaneously
on the screen, the person with the highest priority is
tracked.
[Edit]
Click to open the edit screen for the face database.
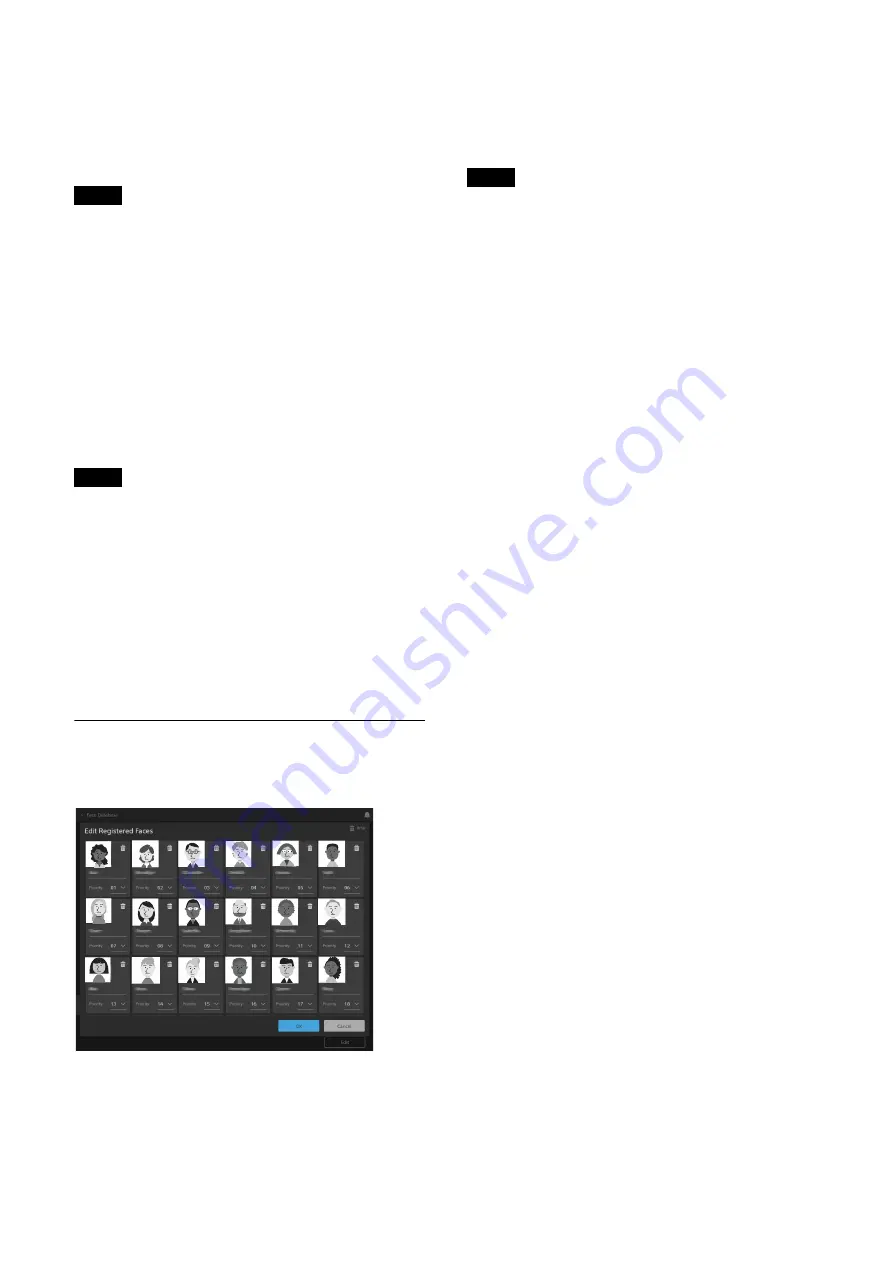
Editing the face database
On the edit screen, you can change the name, change the
priority, and delete face data.
Registered faces are displayed in thumbnail view. The
face data displayed for each person comprises a face
picture, trash icon, name, and priority number.
Face picture
Picture of the face of the registered person.
Trash icon
Click the trash icon, turning it blue, to select that face for
deletion. All faces showing a blue trash icon are deleted
when the [OK] button at the bottom right of the screen
is clicked. Multiple face data can be marked for deletion.
Deletion of face data cannot be undone. If a face is
deleted by error, register the face again.
[Name]
Edit the name. Changes are applied when the [OK]
button at the bottom right of the screen is clicked.
[Priority]
You can edit the [Priority] level. The displayed faces are
sorted by priority starting from 1. Changes are applied
when the [OK] button at the bottom right of the screen
is clicked.
[OK] button, [Cancel] button
Click the corresponding button to apply changes or
cancel changes to the face database. After clicking, the
display returns to the face registration screen.
Note
Note
Note


