


1-12
48
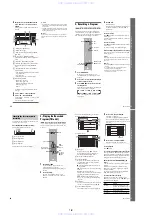
Remind defaults
• “auto tune”: sets the recorder to change
channels automatically when the Remind
timer is activated.
• “when”: sets the recorder to display a
notification message at a designated time
before or after the selected program is
scheduled to start.
4
Select one of the available options from the
Panel Menu.
5
Adjust the default setting using
<
/
,
, and
press ENTER.
The cursor moves to “done.”
Press ENTER again to exit the Panel Menu.
49
Ti
me
r
Re
co
rd
in
g
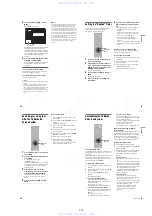
Timer Recording
Before Recording
Before you start recording…
• This recorder can record on various discs. Select
the disc type according to your needs (page 10).
• Check that the disc has enough available space
for the recording (page 31). For HDD,
DVD+RWs, and DVD-RWs, you can free up
disc space by erasing titles (page 76).
• Adjust the recording picture quality and picture
size if necessary (page 53).
z
Hint
Timer recordings will be made regardless whether or not
the recorder is turned on. You can turn off the recorder
without affecting the recording even after recording
starts.
b
Note
To play a recorded disc on other DVD equipment,
finalize the disc (page 40).
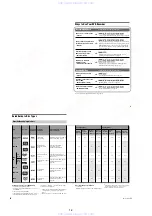
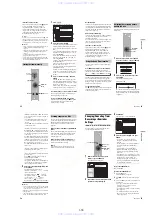
Like the SP or LP recording mode of VCRs, this
recorder has eight different recording modes.
Select a recording mode according to the time and
picture quality you need. For example, if picture
quality is your top priority, select the High Quality
mode (HQ). If recording time is your priority,
Super Extended Play mode (SEP) can be a
possible choice. Note that recording times in the
following table are approximate and the actual
times may differ. Note also that the maximum
continuous recording time for a single title is eight
hours. Contents beyond this time will not be
recorded.
Press REC MODE repeatedly to switch the
recording modes.
* The recording time for DVD+R DL (Double Layer)
discs is as follows:
HQ: 1 hour 48 minutes
HSP: 2 hours 42 minutes
SP: 3 hours 37 minutes
LSP: 4 hours 31 minutes
LP: 5 hours 25 minutes
EP: 7 hours 14 minutes
SLP: 10 hours 51 minutes
SEP
:
14 hours 28 minutes
“HQ+” recording mode
“HQ+” records pictures in higher quality than HQ
on the HDD. Set “HQ Setting” in “Features” setup
to “HQ+” (page 97). Maximum recording time is
21 hours. “HQ” appears in the display.
b
Note
Situations below may cause slight inaccuracies with the
recording time.
– Recording a program with poor reception, or a program
or video source of low picture quality
– Recording on a disc that has already been edited
– Recording only a still picture or just sound
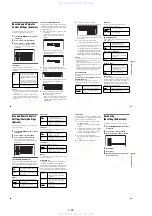
Recording mode
Recording
mode
Recording time
(hours)
HDD
DVD
*
HQ (High quality)
33
1
HSP
R
51
1 hr.
30 min.
SP (Standard mode)
67
2
LSP
r
85
2 hr.
30 min.
LP
r
103
3
EP
r
137
4
SLP
r
204
6
SEP (Long duration)
269
8
,
continued
50
The recorder can receive and record stereo/SAP
programs.
Stereo programs
If there is noise in the stereo program, set “Auto
Stereo” in “Options” setup to “Off” (page 98). The
sound will be recorded in monaural but with less
noise.
SAP (Second Audio Program)
When a SAP (Second Audio Program) is received,
the “SAP” indicator lights up on the front panel
display. To record only SAP sound, set “Tuner
Audio” in “Options” setup to “SAP” (page 98).
* The recorded disc can be played only on CPRM
compatible equipment (page 10).
Timer Recording (TV GUIDE/
Manual)
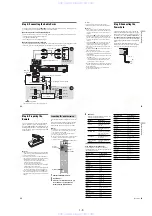
There are two methods to set the timer – setting
the timer using the TV Guide On Screen system
and setting the timer manually.
b
Notes
• When the recorder is connected to a cable box and you
want to record using the TV Guide On Screen system,
do the following: Turn on the cable box, connect the set
top box controller, and set “Set Top Box Control” in the
“Settings” setup to “On.”
• Do not operate your cable box or satellite receiver just
before or during a timer recording. This may prevent
the accurate recording of a program.
You can use the TV Guide On Screen system to set
the timer to record a program up to eight days in
advance.
Recording a stereo/SAP program
None (a blank screen is
recorded)
Recording with the TV Guide On
Screen system (TV GUIDE)
+
RW
-RWVR -RW
Video
-
R
+
R
HDD
1
2
3
4
6
7
8
9
0
5
<
/
M
/
m
/
,
,
ENTER
x
REC STOP
MENU
TV GUIDE
z
REC
51
Ti
me
r
Re
co
rd
in
g
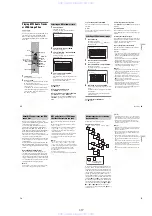
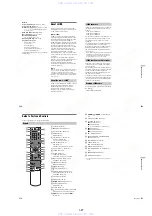
1
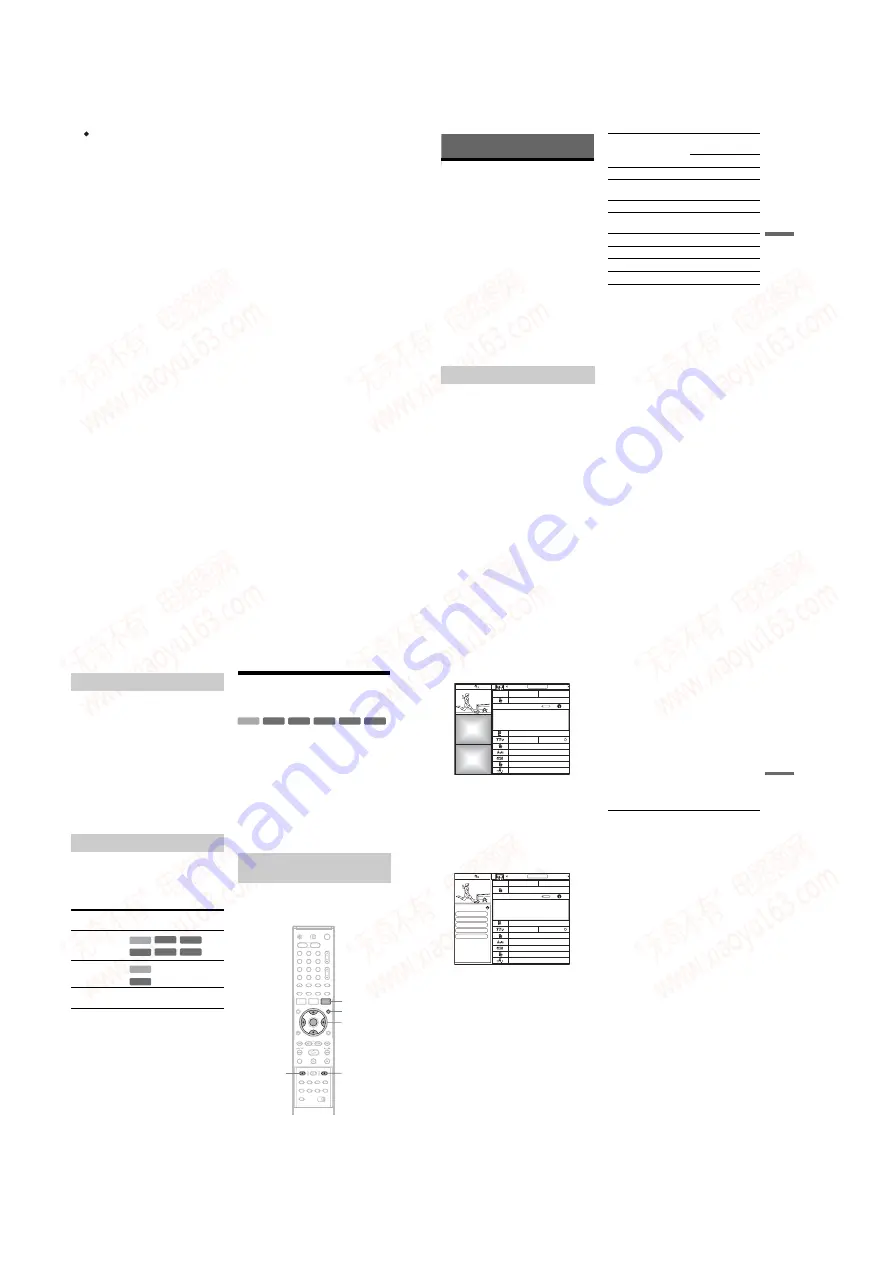
Press TV GUIDE.
2
Select a program using
<
/
M
/
m
/
,
.
To search for a program alphabetically, by
category or by keyword, select “SEARCH” in
the Service Bar. See “Searching for a Program
with the TV Guide On Screen System” on
page 46 for more information about searching
for a program.
3
Press MENU.
The “Episode Options” menu appears.
4
Select “set recording” using
M
/
m
, and
press ENTER.
The “Record Options” menu appears with the
default settings.
• “schedule recording”: press ENTER to set
the recording timer with the displayed
options.
• “frequency”: sets the timer to record “once,”
“regularly” or “weekly.” Select “off” to turn
off the timer.
• “start”: sets the timer to begin recording
before or after the program is scheduled to
start.
• “end”: sets the timer to stop recording before
or after the program is scheduled to end.
• “recorder”: sets the recording destination to
either HDD or DVD.
• “quality”: sets the recording mode
(page 49).
5
Select an option using
M
/
m
, and make an
adjustment using
<
/
,
.
6
Select “schedule recording,” and press
ENTER.
The
a
mark appears next to the program title,
the TIMER REC indicator lights up in the
front panel display and the recorder is ready to
start recording. When recording from a cable
box, be sure to turn it on.
Unlike a VCR, there is no need to turn off the
recorder before the timer recording starts.
If there is a recording conflict, follow the
instructions on your TV screen to resolve the
conflict.
To change or cancel timer recording
See “Changing/Canceling Timer Recording or
Reminder Settings” on page 55.
To stop recording during timer recording
Open the remote’s cover and press
x
REC STOP.
Note that it may take a few seconds for the
recorder to stop recording, and that the recording
cannot be stopped within the first minute of
recording.
To adjust the recording quality
See step 3 of “Adjusting the recording picture
quality and size” on page 53.
Rec Mode Adjust
If there is not enough available disc space for the
recording, the recorder automatically adjusts the
recording mode to enable the entire program to be
recorded. Set “Rec Mode Adjust” in “Features”
setup to “On” (page 97).
Auto Title Erase (HDD only)
If there is not enough space for a timer recording,
the recorder automatically erases old titles
recorded on the HDD.
Set “Auto Title Erase” in “Features” setup to “On”
(page 97). The oldest, played title is erased. The
protected titles are not erased.
Promotional
Panel
Promotional
Panel
RECORDINGS
8:05
SEARCH
LISTINGS
Teams from across the globe face off in a yearly tournament to
determine the best soccer country in the world.
8:00
9:00
INFO
13WFXT
8:00PM
8:30PM
World Soccer
Today's News
The Urban Garden
Music Show
Local News
Chemicals and Chemistry
Doctors and Lawyers
TODAY
High Places
The Law and You
go to Service Bar
Episode Options
tune to channel
set recording
set reminder
cancel
,
continued
www. xiaoyu163. com
QQ 376315150
9
9
2
8
9
4
2
9
8
TEL 13942296513
9
9
2
8
9
4
2
9
8
0
5
1
5
1
3
6
7
3
Q
Q
TEL 13942296513 QQ 376315150 892498299
TEL 13942296513 QQ 376315150 892498299


