96
3
Select the media, where the files
you want to transfer are stored,
and the file format on the
thumbnail screen.
4
Press the MENU button.
5
Select
(NETWORK SET)
t
[FTP TRANSFER]
t
[EXECUTE]
t
network connection method.
• The network connection starts. The
status of the network connection is
displayed using the following icons.
• The thumbnail screen appears when
connection to the FTP server is
successful.
• If the file format is set to [XAVC] in
step 3, select the file to transfer using
“Main” and “PROXY.”
6
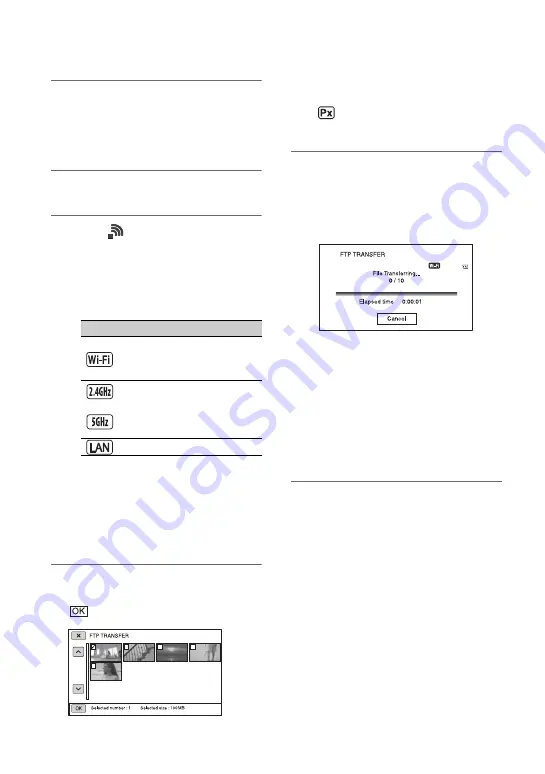
Select the thumbnail of the file
you want to transfer, and select
.
• Up to 100 files can be selected.
• Press the thumbnail to preview the
image.
•
appears on the thumbnail of files
that have a proxy file.
7
Select whether to turn the
camcorder off (Yes) or not (No)
automatically when the FTP
transfer is completed.
• File transfer starts.
• To cancel the transfer, select [Cancel].
• If [Yes] was selected in step
7
, the
camcorder turns off automatically
when the transfer is completed.
Selecting [OK] after transfer is
completed will not automatically turn
off the power.
If [No] was selected, select [OK]. You
can also continue transferring files.
b
Notes
• When transferring files via FTP, the camcorder
does not turn off even if the LCD screen is
closed and the viewfinder is returned to its
original position.
• Only files that were recorded by the camcorder
can be transferred using FTP.
• Do not exchange a memory card after starting a
file transfer.
• FTP transfer is not available in shooting mode.
To start a file transfer, first press the
THUMBNAIL button to switch to playback
mode.
• FTP transfer of still images is not available.
• Only wired LAN connection is supported when
[AIRPLANE MODE] is set to [ON].
Icon
Meaning
Before wireless LAN
connection and after
disconnection
or
Wireless LAN connection
(icon varies depending on
frequency band of access
point)
Wired LAN connection
Using the FTP transfer function (Continued)


