background image

32

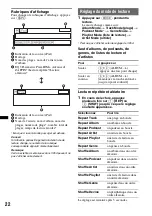
Transmission en continu de 
musique

Ecoute de musique à partir d’un 
périphérique audio

Vous pouvez écouter de la musique lue sur un 
périphérique audio sur cet appareil si le 
périphérique audio prend en charge le profil 
A2DP (Advanced Audio Distribution Profile) de 
la technologie Bluetooth.

1

Connectez cet appareil et le 
périphérique audio Bluetooth 
(page 27)
.

L’indication «

» s’affiche en cours de 

connexion.

2

Diminuez le volume de l’appareil.

3

Appuyez plusieurs fois sur 

(SOURCE)


jusqu’à ce que l’indication « Bluetooth 
Audio » apparaisse.

4

Faites fonctionnez le périphérique 
audio pour commencer la lecture.

5

Réglez le volume sur cet appareil.

Réglage du niveau de volume

Le niveau de volume peut être réglé pour corriger 
toutes les différences entre l’appareil et le 
périphérique audio Bluetooth.

1

Démarrez la lecture sur le périphérique audio 
Bluetooth, à un niveau de volume moyen.

2

Réglez votre appareil sur le volume d’écoute 
habituel.

3

Appuyez sur la touche de sélection.

4

Tournez la molette de réglage pour 
sélectionner « Bluetooth Audio Level », puis 
appuyez sur la touche de sélection.

5

Tournez la molette de réglage pour régler le 
niveau d’entrée (« +18dB » – « 0dB » – 
« –8dB »).

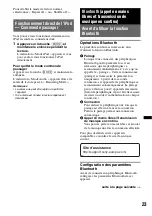
Fonctionnement d’un périphérique 
audio avec cet appareil

Vous pouvez effectuer les opérations suivantes 
sur cet appareil si le périphérique audio prend en 
charge le profil AVRCP (Audio Video Remote 
Control Profile) de la technologie Bluetooth. (Le 
fonctionnement diffère selon le périphérique 
audio.)

*1

En fonction du périphérique, il peut être nécessaire 
d’appuyer deux fois sur la touche.

*2

Appuyez plusieurs fois jusqu’à ce que le réglage 
souhaité s’affiche.

Les opérations autres que celles citées ci-dessus 
doivent être effectuées à partir du périphérique 
audio.

Remarques

Selon le périphérique audio, ses informations, 
comme le titre, le numéro de plage/la durée, le statut 
de lecture, etc. peut ne pas s’afficher sur cet 
appareil. Cette information est affichée uniquement 
pendant la lecture Bluetooth Audio.

Même si la source change sur cet appareil, la 
lecture ne s’interrompt pas sur le périphérique 
audio.

Conseil

Vous pouvez connecter un téléphone mobile 
compatible avec le profil A2DP (Advanced Audio 
Distribution Profile) comme périphérique audio et 
écouter de la musique.

Autres paramètres

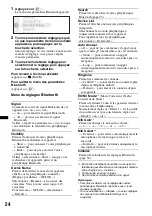
Intialisation de Bluetooth Settings

Vous pouvez initialiser tous les réglages relatifs 
au Bluetooth sur cet appareil.

1

Appuyez sur 

(BT)

.

Le menu des paramètres Bluetooth apparaît.

2

Tournez la molette de réglage pour 
sélectionner « Initialize », puis 
appuyez sur la touche de sélection.

Le message de confirmation apparaît.

3

Sélectionnez « Yes ».

« Initializing... » apparaît lors de 
l’initialisation des paramètres Bluetooth.

Remarque

Lorsque vous mettez cet appareil au rebut, les 
données du répertoire doivent être supprimées en 
utilisant « Initialize ».

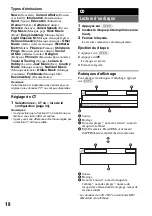
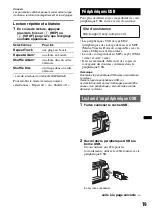
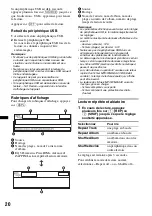
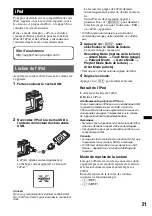
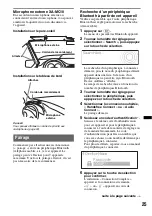
Pour

Appuyez sur

lire

(6)

 (PAUSE)*

1

 sur cet appareil

interrompre la 
lecture

(6)

 (PAUSE)*

1

 sur cet appareil

ignorer des 
plages

(SEEK)

 –/+ (

.

/

>

) [une 

fois pour chaque plage]

revenir en 
arrière/avancer 
rapidement

sur la touche 

(SEEK)

 –/+ 

(

.

/

>

) et maintenez-la 

enfoncée.

effectuer une 
lecture répétée

(1)

 (REP) sur cet appareil*

2

effectuer une 
lecture aléatoire

(2)

 (SHUF) sur cet appareil*

2

ignorer des 
albums

(3)

/

(4)

 (ALBUM –/+)

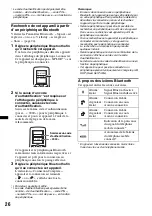
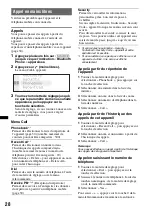
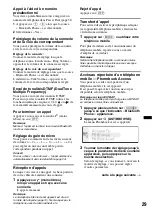
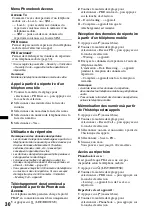
Содержание MEXBT5700U - CD Receiver Bluetooth Hands-Free

Страница 1: ...700U FR IT NL To cancel the demonstration Demo display see page 7 Zum Deaktivieren der Demo Anzeige Demo schlagen Sie bitte auf Seite 7 nach Pour annuler la demonstration Demo reportez vous a la page 7 Per annullare la dimostrazione Demo vedere pagina 7 Om de demonstratie Demo te annuleren zie pagina 7 Bluetooth Audio System Bluetooth Audio System ...

Страница 2: ...l negative consequences for the environment and human health which could otherwise be caused by inappropriate waste handling of this product The recycling of materials will help to conserve natural resources For more detailed information about recycling of this product please contact your local Civic Office your household waste disposal service or the shop where you purchased the product Applicabl...

Страница 3: ...indows Media contained in this device WM DRM to protect the integrity of their content Secure Content so that their intellectual property including copyright in such content is not misappropriated This device uses WM DRM software to play Secure Content WM DRM Software If the security of the WM DRM Software in this device has been compromised owners of Secure Content Secure Content Owners may reque...

Страница 4: ...18 USB devices Playing back a USB device 19 Display items 19 Repeat and shuffle play 20 iPod Playing back iPod 20 Display items 21 Setting the play mode 22 Repeat and shuffle play 22 Operating an iPod directly Passenger control 22 Bluetooth Handsfree calling and Music streaming Before using the Bluetooth function 23 Bluetooth operations 23 Configuring Bluetooth Settings 23 External microphone XA M...

Страница 5: ...Q about Bluetooth function 5 Other functions Changing the sound settings 31 Adjusting the sound characteristics 31 Customizing the equalizer curve EQ3 Parametric Tune 32 Adjusting setup items SET 32 Using optional equipment 33 Auxiliary audio equipment 33 CD changer 34 Rotary commander RM X4S 34 Additional Information Precautions 35 Notes on discs 35 Playback order of MP3 WMA AAC files 36 About iP...

Страница 6: ...ANT NOTICE Safe and efficient use Changes or modifications to this unit not expressly approved by Sony may void the user s authority to operate the equipment Please check for exceptions due to national requirement or limitations in usage of Bluetooth equipment before using this product Driving Check the laws and regulations on the use of cellular phones and handsfree equipment in the areas where y...

Страница 7: ...y solely upon any electronic device for essential communications such as medical emergencies Remember in order to make or receive calls the handsfree and the electronic device connected to the handsfree must be switched on in a service area with adequate cellular signal strength Emergency calls may not be possible on all cellular phone networks or when certain network services and or phone feature...

Страница 8: ... RDS feature page 17 Detaching the front panel You can detach the front panel of this unit to prevent theft Caution alarm If you turn the ignition switch to the OFF position without detaching the front panel the caution alarm will sound for a few seconds The alarm will only sound if the built in amplifier is used 1 Press OFF The unit is turned off 2 Press OPEN The front panel is flipped down 3 Sli...

Страница 9: ... Place the hole A of the front panel onto the spindle B on the unit then lightly push the left side in Press SOURCE on the unit or insert a disc to operate the unit Note Do not put anything on the inner surface of the front panel ...

Страница 10: ...revious display C SOURCE button To power on change the source Radio CD USB AUX Bluetooth audio Bluetooth phone 1 D ZAP button page 15 To enter ZAPPIN mode E Control dial select handsfree end call button To adjust volume rotate select setup items press and rotate Bluetooth phone To enter the CALL menu receive end a call F Receptor for the card remote commander G Display window H OPEN button page 8 ...

Страница 11: ... press skip albums continuously press and hold 5 DM Improves digitally compressed sound such as MP3 To activate the DM function set on To cancel set off 6 PAUSE To pause playback To cancel press again Radio To receive stored stations press store stations press and hold Bluetooth audio device 2 1 REP page 30 2 SHUF page 30 3 4 ALBUM page 30 6 PAUSE To pause playback To cancel press again Bluetooth ...

Страница 12: ...ssenger control E MENU button To enter menu F LIST BROWSE button To list up Radio enter the Quick BrowZer mode CD USB Bluetooth phone To enter the Phonebook Access menu G DSPL display PTY Program Type button page 17 To change display items select PTY in RDS H Number buttons page 24 27 28 To input numbers phone number passcode etc Buttons 1 to 6 share the same functions as the number buttons on the...

Страница 13: ...ound To cancel press again Q VOL volume buttons To adjust volume R button page 28 In the case of a CD changer being connected when SOURCE is pressed CD and the unit number will appear in the display Furthermore if MODE is pressed you can switch the changer Note If the unit is turned off and the display disappears it cannot be operated with the card remote commander unless SOURCE on the unit is pre...

Страница 14: ...g by skip items Jump mode When many items are in a category you can search the desired item quickly 1 Press SEEK in Quick BrowZer mode The following display appears A Current item number B Total item number in the current layer C Item name Then the item name will appear 2 Rotate the control dial to select the desired item or one near the desired item It skips in steps of 10 of the total item numbe...

Страница 15: ...UNER appears To change the band press MODE repeatedly You can select from FM1 FM2 FM3 MW or LW 2 Press and hold the select button The setup display appears 3 Rotate the control dial until BTM appears then press the select button The unit stores stations in order of frequency on the number buttons A beep sounds when the setting is stored Storing manually 1 While receiving the station that you want ...

Страница 16: ...ng RDS data Setting AF and TA 1 Press AF TA repeatedly until the desired setting appears Storing RDS stations with the AF and TA setting You can preset RDS stations along with the AF TA setting If you use the BTM function only RDS stations are stored with the same AF TA setting If you preset manually you can preset both RDS and non RDS stations with the AF TA setting for each 1 Set AF TA then stor...

Страница 17: ...ecting PTY 1 Press and hold AF TA PTY during FM reception The current program type name appears if the station is transmitting PTY data 2 Rotate the control dial until the desired program type appears 3 Press the select button The unit starts to search for a station broadcasting the selected program type Type of programs Note You cannot use this function in countries regions where no PTY data is a...

Страница 18: ...tist name Disc album name Track name Disc Album number Track number Elapsed playing time The information of a CD TEXT MP3 WMA AAC is displayed Tip Displayed items will differ depending on the disc type recording format and settings Repeat and shuffle play 1 During playback press 1 REP or 2 SHUF repeatedly until the desired setting appears When an MP3 WMA AAC is played To return to normal play mode...

Страница 19: ...repeatedly until USB appears Press OFF to stop playback Removing the USB device 1 Stop the USB device playback 2 Remove the USB device If you remove your USB device during playback data in the USB device may be damaged Notes Do not use USB devices so large or heavy that they may fall down due to vibration or cause a loose connection Do not detach the front panel during playback of the USB device o...

Страница 20: ...appears After 3 seconds the setting is complete To return to normal play mode select Repeat off or Shuffle off iPod For details on the compatibility of your iPod see About iPod on page 36 or visit the support site In these Operating Instructions iPod is used as a general reference for the iPod functions on the iPod and iPhone unless otherwise specified by the text or illustrations Playing back iPo...

Страница 21: ...nel during playback of the iPod otherwise data may be damaged This unit cannot recognize iPod via a USB hub Tips When the ignition key is turned to the ACC position and the unit is on the iPod will be recharged If the iPod is disconnected during playback NO Device appears in the display of the unit Resuming mode When the iPod is connected to the dock connector the mode of this unit changes to resu...

Страница 22: ...d appears and you will be able to operate the iPod directly To exit the passenger control Press and hold MODE Then Mode Audio will appear and the play mode will change to Resuming Mode Notes The volume can be adjusted only by the unit If this mode is canceled the repeat setting will be turned off To Press Skip 3 4 ALBUM press once for each Skip continuously 3 4 ALBUM hold to desired point Select T...

Страница 23: ... To exit the Bluetooth settings menu Press BT Bluetooth Settings menu Support site http support sony europe com Signal Switches the Bluetooth signal output of this unit to on or off on to output the Bluetooth signal off to not output the Bluetooth signal Be sure to set to on when you connect from a Bluetooth device Visibility Allows other Bluetooth devices to search for this unit Show to allow the...

Страница 24: ...elect button The process of searching for a connectable device begins then the detected device name s appear in a list If a device name cannot be received Bluetooth Device Address will be displayed Search time varies depending on the number of Bluetooth devices 3 Rotate the control dial to select the device then press the select button 4 Select your desired connection Handsfree Connect or Audio Co...

Страница 25: ... this unit cannot be detected from another device To enable detection disconnect the current connection and search for this unit from another device Depending on the device searching from this unit may not be possible In this case search for this unit from the connecting device If you search for this unit and the connecting device mutually at the same time this unit will not recognize the connecti...

Страница 26: ...p With Bluetooth signal on when the ignition is switched to on this unit reconnects automatically to the last connected cellular phone But automatic connection also depends on the cellular phone s specification If this unit does not reconnect automatically connect manually Connecting an audio device 1 Be sure that both this unit and the audio device are switched to Bluetooth signal on 2 Connect to...

Страница 27: ...ct button 2 Input the phone number using number buttons the control dial or card remote commander 3 Select Yes To input press and hold the 0 button on the card remote commander Calling by preset number You must store a phone number to the Preset Dial beforehand page 30 1 Press 1 6 with the Bluetooth Phone source selected 2 Select Yes Presetting the volume of ring tone and talker s voice You can pr...

Страница 28: ...ee connection may be cut off when call transfer is attempted Accessing a Phonebook in a cellular phone Phonebook Access You can access the phonebook in a cellular phone via this unit This function may not be available depending on the cellular phone Note on PBAP Cellular phone supports PBAP handsfree connection only 1 Press SOURCE repeatedly until Bluetooth Phone appears 2 Press LIST BROWSE The Ph...

Страница 29: ...te the cellular phone Storing the numbers from call history 1 Press handsfree 2 Rotate the control dial to select Recent Call then press the select button 3 Select a name and number from the call history 4 Select Save to PB 5 Input a name Up to 40 characters can be input To enter the Phonebook Phonebook Access PB Access may not be available depending on the cellular phone 1 Press LIST BROWSE 2 Rot...

Страница 30: ...hone s recognition function For details see the support site Do not use voice dialing on the cellular phone during handsfree device connection Tips Speak in the same way as you did when you stored the voice tag Store a voice tag while seated in the car via this unit with Bluetooth Phone source selected Music streaming Listening to music from an audio device You can listen to music of an audio devi...

Страница 31: ...he sound settings Adjusting the sound characteristics 1 Press the select button 2 Rotate the control dial until the desired menu item appears then press the select button Depending on the setting by rotating the control dial again other items can be set 3 Rotate the control dial to select the setting then press the select button 4 Press BACK The setting is complete and the display returns to norma...

Страница 32: ...omplete and the display returns to normal play reception mode To restore the factory set equalizer curve select Initialize and Yes in step 3 Tip Other equalizer types are also adjustable Adjusting setup items SET 1 Press and hold the select button The setup display appears 2 Rotate the control dial until the desired menu item appears then press the select button 3 Rotate the control dial to select...

Страница 33: ...Off Shuts off automatically after a desired time when the unit is turned off NO 30sec seconds 30min minutes 60min minutes Demo Demonstration Activates the demonstration on off Image Sets various display images Movie to display a movie SA 1 3 All to display the Spectrum Analyzer Wall P 1 3 All to display a wallpaper off to not display any image All to display all images Information Displays the ite...

Страница 34: ...he rotary commander Location of controls The corresponding buttons on the rotary commander control the same functions as those on this unit The following controls on the rotary commander require a different operation from the unit ATT attenuate button To attenuate the sound To cancel press again PRESET DISC control CD USB The same as 3 4 ALBUM on the unit push in and rotate Radio To receive stored...

Страница 35: ...aning cloth from the center out Do not use solvents such as benzine thinner commercially available cleaners This unit is designed to playback discs that conform to the Compact Disc CD standard DualDiscs and some of the music discs encoded with copyright protection technologies do not conform to the Compact Disc CD standard therefore these discs may not be playable by this unit Discs that this unit...

Страница 36: ...one another such is the case with infrared technology For example you can use such a device in a bag or pocket Bluetooth technology is an international standard supported by millions of companies all over the world and employed by various companies worldwide On Bluetooth communication Bluetooth wireless technology operates within a range of about 10 m Maximum communication range may vary depending...

Страница 37: ...itions of use When the battery becomes weak the range of the card remote commander becomes shorter Replace the battery with a new CR2025 lithium battery Use of any other battery may present a risk of fire or explosion Notes on the lithium battery Keep the lithium battery out of the reach of children Should the battery be swallowed immediately consult a doctor Wipe the battery with a dry cloth to a...

Страница 38: ...y 25 kHz Sensitivity MW 26 µV LW 45 µV USB Player section Interface USB Full speed Maximum current 500 mA Wireless Communication Communication System Bluetooth Standard version 2 0 EDR Output Bluetooth Standard Power Class 2 Max 4 dBm Maximum communication range Line of sight approx 10 m 33 ft 1 Frequency band 2 4 GHz band 2 4000 2 4835 GHz Modulation method FHSS Compatible Bluetooth Profiles 2 A2...

Страница 39: ...roblem is not solved visit the following support site Halogenated flame retardants are not used in the certain printed wiring boards Halogenated flame retardants are not used in cabinets Packaging cushions are made from paper General No power is being supplied to the unit Check the connection or fuse If the unit is turned off and the display disappears it cannot be operated with the remote command...

Страница 40: ...rect tInstall the unit at an angle of less than 45 in a sturdy part of the car Defective or dirty disc The operation buttons do not function The disc will not eject Press the RESET button page 7 Radio reception The stations cannot be received The sound is hampered by noises The connection is not correct tConnect a power antenna aerial control lead blue or accessory power supply lead red to the pow...

Страница 41: ... Adjust the volume accordingly using Mic Gain adjustment page 24 Echo or noise occurs in phone call conversations Lower the volume EC NC Mode is set to off tSet EC NC Mode to Mode 1 or Mode 2 page 23 If the ambient noise other than the phone call sound is loud try reducing this noise E g If a window is open and road noise etc is loud shut the window If the air conditioner is loud lower the air con...

Страница 42: ...lar phone is not connected tConnect to a cellular phone Hubs Not Supported USB hub is not supported on this unit Invalid Code Password is incorrect tIf you forget the password initialize via the Bluetooth Settings menu Load The CD changer is loading the disc tWait until loading is complete Local Seek The local seek mode is on during automatic tuning NO AF There is no alternative frequency for the ...

Страница 43: ...the disc tWait until reading is complete and playback starts automatically Depending on the disc structure it may take more than a minute or During reverse or fast forward you have reached the beginning or the end of the disc and you cannot go any further The character cannot be displayed with the unit 1 If an error occurs during playback of a CD the disc number of the CD does not appear in the di...

Страница 44: ... elektronischen Geräten abgegeben werden muss Durch Ihren Beitrag zum korrekten Entsorgen dieses Produkts schützen Sie die Umwelt und die Gesundheit Ihrer Mitmenschen Umwelt und Gesundheit werden durch falsches Entsorgen gefährdet Materialrecycling hilft den Verbrauch von Rohstoffen zu verringern Weitere Informationen über das Recycling dieses Produkts erhalten Sie von Ihrer Gemeinde den kommunale...

Страница 45: ...Integrität des Inhalts Sicherer Inhalt zu gewährleisten sodass sich keine Person das geistige Eigentum einschließlich Urheberrecht an diesen Inhalten widerrechtlich aneignen kann Bei diesem Gerät wird WM DRM Software zum Wiedergeben sicherer Inhalte verwendet WM DRM Software Bei Gefährdung der Sicherheit der WM DRM Software dieses Geräts können Eigentümer sicherer Inhalte Secure Content Owners for...

Страница 46: ...nem USB Gerät 19 Informationen im Display 20 Repeat und Shuffle Play 20 iPod Wiedergabe mit einem iPod 21 Informationen im Display 22 Einstellen des Wiedergabemodus 22 Repeat und Shuffle Play 22 Direktes Bedienen eines iPod Direkte Steuerung 23 Bluetooth Freisprechanrufe und Musik Streaming Vorbereitungen für die Bluetooth Funktion 23 Nutzen der Bluetooth Funktion 23 Konfigurieren von Bluetooth Ei...

Страница 47: ... Bluetooth Funktion 5 Weitere Funktionen Ändern der Klangeinstellungen 33 Einstellen der Klangeigenschaften 33 Individuelles Einstellen der Equalizer Kurve EQ3 Parametric Tune 34 Einstellen von Konfigurationsoptionen SET 35 Verwenden gesondert erhältlicher Geräte 36 Zusätzliche Audiogeräte 36 CD Wechsler 36 Joystick RM X4S 37 Weitere Informationen Sicherheitsmaßnahmen 38 Hinweise zu CDs 38 Wiederg...

Страница 48: ...ückliche Genehmigung von Sony durchgeführt werden können die Befugnis des Betreibers zur Verwendung des Geräts aufheben Bitte überprüfen Sie vor dem Gebrauch dieses Produkts ob es auf nationaler Ebene Vorschriften oder Bestimmungen gibt die die Verwendung von Bluetooth Geräten einschränken Führen von Fahrzeugen Erkundigen Sie sich in den Gebieten in denen Sie unterwegs sind nach Gesetzen und Vorsc...

Страница 49: ... auf elektronische Geräte Wenn Sie Anrufe tätigen oder empfangen wollen denken Sie daran dass die Freisprecheinrichtung und das elektronische Gerät das mit der Freisprecheinrichtung verbunden ist eingeschaltet sein müssen und nur in Gebieten mit ausreichender Mobilfunksignalstärke verwendet werden können Notrufe sind unter Umständen nicht bei allen Mobilfunknetzen möglich oder stehen bei Verwendun...

Страница 50: ... auch automatisch einstellen lassen Seite 18 Abnehmen der Frontplatte Um zu verhindern dass das Gerät gestohlen wird können Sie die Frontplatte abnehmen Warnton Wenn Sie den Zündschlüssel in die Position OFF stellen ohne die Frontplatte abzunehmen ertönt einige Sekunden lang ein Warnton Der Warnton wird nur ausgegeben wenn der integrierte Verstärker verwendet wird 1 Drücken Sie OFF Das Gerät schal...

Страница 51: ...sparung A an der Frontplatte am Stift B am Gerät an und drücken Sie dann die linke Seite behutsam hinein Drücken Sie SOURCE am Gerät bzw legen Sie eine CD ein um das Gerät einzuschalten Hinweis Legen Sie auf der Innenseite der Frontplatte nichts ab ...

Страница 52: ...24 33 35 Zurückschalten zur vorherigen Anzeige C Taste SOURCE Einschalten bzw Wechseln der Tonquelle Radio CD USB AUX Bluetooth Audio Bluetooth Telefon 1 D Taste ZAP Seite 15 Aufrufen des ZAPPIN Modus E Steuerregler Auswahltaste Taste Freisprechen Anruf beenden Einstellen der Lautstärke drehen bzw Auswählen von Einstelloptionen drücken und drehen Bluetooth Telefon Aufrufen des Menüs CALL bzw Entge...

Страница 53: ...rspringen mehrerer Alben hintereinander gedrückt halten 5 DM Dient zum Verbessern digital komprimierten Klangs wie z B bei MP3 Dateien Zum Aktivieren der DM Funktion wählen Sie on Zum Deaktivieren der Funktion stellen Sie off ein 6 PAUSE Anhalten der Wiedergabe Zum Beenden der Funktion drücken Sie die Taste erneut Radio Einstellen gespeicherter Sender drücken bzw Speichern von Sendern gedrückt hal...

Страница 54: ...ählen des Wiedergabemodus am iPod Gedrückt halten Einschalten Abbrechen der direkten Steuerung E Taste MENU Aufrufen des Menüs F Taste LIST BROWSE Auflisten Radio bzw Aktivieren des Quick BrowZer Modus CD USB Bluetooth Telefon Aufrufen des Menüs für den Telefonbuchzugriff G Taste DSPL Anzeige PTY Programmtypauswahl Seite 17 Wechseln der Informationen im Display bzw Auswählen des Programmtyps PTY b...

Страница 55: ...Sie die Informationen im Display durchlaufen O Taste SOUND Aufrufen der Klangeinstellung P Taste ATT Dämpfen des Tons Dämpfen des Tons Zum Beenden der Funktion drücken Sie die Taste erneut Q Tasten VOL Lautstärke Einstellen der Lautstärke R Taste Seite 29 Ist ein CD Wechsler angeschlossen erscheinen beim Drücken der Taste SOURCE die Anzeige CD sowie die Gerätenummer im Display Außerdem können Sie ...

Страница 56: ...ch wenn eine Kategorie viele Elemente enthält können Sie das gewünschte Element schnell ausfindig machen 1 Drücken Sie im Quick BrowZer Modus die Taste SEEK Die folgende Anzeige erscheint A Nummer des aktuellen Elements B Gesamtzahl der Elemente in der aktuellen Ordnerebene C Name des Elements Anschließend erscheint der Name des Elements 2 Drehen Sie den Steuerregler um das gewünschte Element oder...

Страница 57: ...Sie den wiederzugebenden Titel bestätigen Radio Speichern und Empfangen von Sendern Achtung Wenn Sie während der Fahrt Sender einstellen sollten Sie die BTM Funktion Speicherbelegungsautomatik verwenden Andernfalls besteht Unfallgefahr Automatisches Speichern von Sendern BTM 1 Drücken Sie SOURCE so oft bis TUNER erscheint Zum Wechseln des Frequenzbereichs drücken Sie mehrmals MODE Sie können zwisc...

Страница 58: ...nz 2 Programmdienstname RDS Daten 1 Wenn Information auf on gesetzt ist TP leuchtet wenn ein Verkehrsfunksender TP empfangen wird TA AF leuchtet wenn TA AF aktiviert ist 2 Beim Empfang eines RDS Senders wird RDS links neben der Frequenz angezeigt RDS Funktionen Mit diesem Gerät stehen folgende RDS Funktionen automatisch zur Verfügung Hinweise Je nach Land bzw Region stehen möglicherweise nicht all...

Страница 59: ...wechselt wird Wenn Sie den Empfangsbereich des betreffenden Regionalsenders verlassen stellen Sie während des Empfangs eines UKW Senders bei der Konfiguration Regional off ein Seite 36 Hinweis Diese Funktion steht in Großbritannien und in einigen anderen Regionen nicht zur Verfügung Lokalsenderfunktion nur Großbritannien Mithilfe dieser Funktion können Sie andere Lokalsender auswählen auch wenn di...

Страница 60: ...etric Preset Voreinstellungen für parametrischen 3 Band Equalizer DM Advanced ZAPPIN Repeat Shuffle A Tonquelle B Uhrzeit E Interpretenname CD Albumname Titelname CD Albumnummer Titelnummer Verstrichene Spieldauer Die Informationen einer CD TEXT bzw einer MP3 WMA AAC Datei werden angezeigt News Nachrichten Current Affairs Aktuelles Zeitgeschehen Information Informationen Sport Sport Education Erzi...

Страница 61: ...s empfiehlt sich eine Sicherungskopie der Daten auf dem USB Gerät zu erstellen Hinweis Lassen Sie den Motor an bevor Sie das USB Gerät anschließen Bei manchen USB Geräten kann es zu Fehlfunktionen und Beschädigungen kommen wenn Sie zuerst das Gerät anschließen und dann den Motor anlassen Wiedergabe mit einem USB Gerät 1 Schieben Sie die USB Abdeckung auf 2 Schließen Sie das USB Gerät an den USB An...

Страница 62: ...er Verstrichene Spieldauer Hinweise Je nach USB Gerät Aufnahmeformat und Einstellungen werden unterschiedliche Informationen angezeigt Im Folgenden wird die Höchstzahl an anzeigbaren Daten angegeben Ordner Alben 128 Dateien Titel pro Ordner 512 Lassen Sie das USB Gerät nicht in einem geparkten Fahrzeug liegen Andernfalls kann es zu Fehlfunktionen kommen Je nach Menge der aufgezeichneten Daten kann...

Страница 63: ...de t Album Mode t Track Mode t Podcast Mode t Genre Mode t Playlist Mode t Artist Mode Wird je nach iPod Einstellung möglicherweise nicht angezeigt 4 Stellen Sie die Lautstärke ein Drücken Sie zum Stoppen der Wiedergabe OFF Lösen des iPod 1 Stoppen Sie die Wiedergabe am iPod 2 Trennen Sie den iPod von diesem Gerät Vorsicht beim iPhone Wenn Sie ein iPhone über USB anschließen wird die Lautstärke be...

Страница 64: ...olgendermaßen Album Mode t Track Mode t Podcast Mode t Genre Mode t Playlist Mode t Artist Mode Wird je nach iPod Einstellung möglicherweise nicht angezeigt Überspringen von Alben Podcasts Genres Playlists und Interpreten Repeat und Shuffle Play 1 Drücken Sie während der Wiedergabe 1 REP oder 2 SHUF so oft bis die gewünschte Einstellung im Display erscheint A B D C A B E Funktion Taste Überspringe...

Страница 65: ...derlich Dies wird als Pairing bezeichnet Diese Registrierung Pairing ist nur beim ersten Mal erforderlich da dieses Gerät und die anderen Geräte sich ab dem nächsten Mal automatisch erkennen Das Pairing kann mit bis zu 9 Geräten ausgeführt werden Je nach Gerät muss beim Herstellen einer Verbindung möglicherweise jedes Mal ein Passwort eingegeben werden 2 Verbindung Wenn Sie das Gerät nach dem Pair...

Страница 66: ...bundenen Gerät angezeigt wird Standardeinstellung XPLOD Wählen Sie Rename aus und geben Sie Zeichen ein Bis zu 13 Zeichen können für diesen Namen eingegeben werden Wenn Sie XPLOD wiederherstellen wollen wählen Sie Default Search Suchen Damit können Sie andere Bluetooth Geräte suchen Seite 25 Device List Geräteliste Eine Liste der registrierten Geräte wird angezeigt Wählen Sie den Namen des Geräts ...

Страница 67: ...n mit bis zu 9 Geräten ausgeführt werden Ist das Pairing einmal erfolgt braucht es nicht erneut ausgeführt zu werden Suchen nach einem Bluetooth Gerät von diesem Gerät aus Überprüfen Sie zunächst ob das andere Bluetooth Gerät so eingestellt ist dass es gesucht bzw erkannt werden kann 1 Drücken Sie BT Das Bluetooth Einstellmenü erscheint 2 Wählen Sie durch Drehen des Steuerreglers Search aus und dr...

Страница 68: ...be Passwort ein z B 0000 In diesem Gerät und im Bluetooth Gerät werden die Informationen für das jeweils andere Gerät gespeichert und nachdem das Pairing erfolgt ist können Sie eine Verbindung zwischen diesem und dem anderen Gerät herstellen 3 Starten Sie am Bluetooth Gerät das Herstellen der Verbindung mit diesem Gerät Connection Complete erscheint und die Verbindung ist damit hergestellt oder er...

Страница 69: ...weis Beim Streaming von Bluetooth Audiodaten wird der Wiedergabeton beim Herstellen der Verbindung möglicherweise durch ein Geräusch gestört Tipp Bei eingeschaltetem Bluetooth Signal Wenn die Zündung eingeschaltet wird versucht dieses Gerät automatisch eine Verbindung zu dem Mobiltelefon herzustellen mit dem es zuletzt verbunden war Ob die Verbindung automatisch hergestellt werden kann hängt aller...

Страница 70: ...nrufmenü 1 Wenn Security eingestellt ist erscheint Security Code und die Funktion steht nicht zur Verfügung 2 Ein Zeichen das mit diesem Gerät nicht angezeigt werden kann wird nicht richtig angezeigt Tätigen eines Anrufs über das Telefonbuch dieses Geräts 1 Wählen Sie durch Drehen des Steuerreglers Phonebook aus und drücken Sie anschließend die Auswahltaste 2 Wählen Sie in der Liste der Anfangsbuc...

Страница 71: ...Steuerregler Talk Volume erscheint und die Lautstärke für die Stimme des Gesprächsteilnehmers ist eingestellt Senden von DTMF Signalen Doppeltonmehrfrequenz Sie können DTMF Signale senden Zum Senden von DTMF Signalen drücken Sie während eines Anrufs die erforderlichen Zahlentasten 0 9 oder auf der Kartenfernbedienung So beenden Sie einen Anruf Drücken Sie erneut Freisprechen oder drücken Sie OFF H...

Страница 72: ... Namen usw sind danach möglicherweise doppelt vorhanden Telefonbuchdaten können verloren gehen wenn dieses Gerät beschädigt wird Wenn Sie das Gerät entsorgen sollten Sie die Telefonbuchdaten unbedingt mit Initialize löschen Seite 33 Im Telefonbuch können bis zu 300 Kontakte gespeichert werden Wenn Sie versuchen mehr als 300 Nummern zu speichern erscheint Memory Full Herunterladen von Telefonbuchda...

Страница 73: ...en Sie nur im Menü CALL auswählen 1 Rufen Sie ein Telefonbuch auf Seite 31 2 Wählen Sie den zu löschenden Namen aus 3 Wählen Sie Delete Contact 4 Wählen Sie Yes Wenn Sie alle Telefonbuchdaten löschen wollen wählen Sie in Schritt 1 die Option Delete All Vergewissern Sie sich nach dem Löschen dass alle Telefonbuchdaten ordnungsgemäß gelöscht wurden Ändern eines Namens im Telefonbuch Diese Funktion k...

Страница 74: ...aming Wiedergeben von Musik von einem Audiogerät Sie können mit diesem Gerät Musik von einem Audiogerät wiedergeben lassen wenn das Audiogerät das Bluetooth Profil A2DP Advanced Audio Distribution Profile unterstützt 1 Stellen Sie eine Verbindung zwischen diesem Gerät und dem Bluetooth Audiogerät her Seite 27 wird während der Verbindung angezeigt 2 Drehen Sie die Lautstärke an diesem Gerät herunte...

Страница 75: ... Klangeinstellungen Einstellen der Klangeigenschaften 1 Drücken Sie die Auswahltaste 2 Drehen Sie den Steuerregler bis die gewünschte Menüoption angezeigt wird und drücken Sie anschließend die Auswahltaste Je nach Einstellung können Sie weitere Optionen einstellen indem Sie den Steuerregler weiter drehen 3 Wählen Sie durch Drehen des Steuerreglers die Einstellung aus und drücken Sie anschließend d...

Страница 76: ...wählen Stellen Sie wie in Schritt 1 bis 2 erläutert die übrigen Frequenzbereiche ein HPF Speaker Select Hochpassfilter und Lautsprecherauswahl Speaker Wählen Sie hier die Lautsprecher aus All Front oder Rear FREQ Wählen Sie hier die Grenzfrequenz aus OFF 80Hz 100Hz 120Hz 140Hz 160Hz DSO Dynamische Klangraumverbesserung Erzeugt eine bessere Raumklangwirkung Wählen Sie hier den DSO Modus aus 1 2 3 o...

Страница 77: ...t Uhr einstellen Seite 8 CT Uhrzeit Seite 16 18 Beep Signalton Zum Einstellen des Signaltons on off RM Joystick Zum Ändern der Drehrichtung der Regler am Joystick NORM Die werkseitig eingestellte Drehrichtung des Joysticks wird beibehalten REV Wenn Sie den Joystick auf der rechten Seite der Lenksäule anbringen AUX Audio 1 AUX Tonquelle Zum Einstellen der AUX Tonquellenanzeige on off Seite 36 Auto ...

Страница 78: ...n Sie die Lautstärke an diesem Gerät herunter 2 Drücken Sie SOURCE so oft bis AUX erscheint 3 Starten Sie die Wiedergabe am tragbaren Audiogerät mit gemäßigter Lautstärke 4 Stellen Sie die gewohnte Hörlautstärke an diesem Gerät ein 5 Stellen Sie den Eingangspegel ein Seite 34 CD Wechsler Auswählen des Wechslers 1 Drücken Sie SOURCE so oft bis CD erscheint 2 Drücken Sie MODE so oft bis der gewünsch...

Страница 79: ...n Lautstärkeregler VOL Entspricht dem Steuerregler am Gerät drehen Regler SEEK AMS Entspricht SEEK am Gerät drehen oder drehen und gedreht halten Taste DSPL Anzeige Wechseln der Informationen im Display Wechseln der Drehrichtung Die Drehrichtung der Regler ist werkseitig wie in der folgenden Abbildung zu sehen eingestellt Wenn Sie den Joystick rechts von der Lenksäule anbringen können Sie die Dreh...

Страница 80: ... Sie es doch versuchen kann das Gerät beschädigt werden 8 cm CDs Hinweise zu CD Rs CD RWs Höchstzahl an nur CD Rs CD RWs Ordnern Alben 150 einschließlich Stammordner Dateien Titeln und Ordnern 300 gegebenenfalls weniger als 300 wenn die Ordner Dateinamen viele Zeichen enthalten Anzeigbaren Zeichen für einen Ordner Dateinamen 32 Joliet 64 Romeo Wenn eine Multisession CD mit einer CD DA Session begi...

Страница 81: ...erät Wenn dieses Gerät innerhalb von 10 m Entfernung von einem WLAN Gerät verwendet wird schalten Sie das WLAN Gerät aus Stellen Sie dieses Gerät und das Bluetooth Gerät möglichst nahe beieinander auf Von einem Bluetooth Gerät ausgehende Mikrowellen können den Betrieb von medizinischen Geräten beeinflussen Schalten Sie dieses Gerät und andere Bluetooth Geräte an folgenden Orten aus Andernfalls bes...

Страница 82: ...icherung aus Brennt die neue Sicherung ebenfalls durch kann eine interne Fehlfunktion vorliegen Wenden Sie sich in einem solchen Fall an Ihren Sony Händler Reinigen der Anschlüsse Das Gerät funktioniert möglicherweise nicht ordnungsgemäß wenn die Anschlüsse zwischen dem Gerät und der Frontplatte verschmutzt sind Um dies zu vermeiden nehmen Sie die Frontplatte ab Seite 8 und reinigen Sie die Anschl...

Страница 83: ...indlichkeit MW 26 µV LW 45 µV USB Player Schnittstelle USB Full Speed Maximale Stromstärke 500 mA Drahtlose Kommunikation Kommunikationssystem Bluetooth Standard Version 2 0 EDR Sendeleistung Bluetooth Standard Leistungsklasse 2 max 4 dBm Maximale Kommunikationsreichweite Sichtlinie ca 10 m 1 Frequenzbereich 2 4 GHz Frequenzbereich 2 4000 2 4835 GHz Modulationsverfahren FHSS Kompatible Bluetooth P...

Страница 84: ...gende Support Website In bestimmten Leiterplatten werden keine halogenierten Flammschutzmittel verwendet Im Gehäuse werden keine halogenierten Flammschutzmittel verwendet Papier wird als Verpackungsfüllmaterial verwendet Allgemeines Das Gerät wird nicht mit Strom versorgt Prüfen Sie die Verbindung oder Sicherung Wenn Sie das Gerät ausschalten und die Anzeige ausgeblendet ist können Sie es nicht mi...

Страница 85: ...erden können Im Display angezeigte Informationen laufen nicht automatisch durch Bei CDs mit sehr viel Textinformationen laufen diese im Display möglicherweise nicht durch Auto Scroll ist auf off gesetzt tStellen Sie Auto Scroll on ein Seite 35 tHalten Sie DSPL SCRL gedrückt Tonsprünge treten auf Das Gerät ist nicht richtig installiert tInstallieren Sie das Gerät in einem Winkel von unter 45 an ein...

Страница 86: ...estellt werden Je nach dem anderen Gerät ist die Suche von diesem Gerät aus unter Umständen nicht möglich tSuchen Sie vom anderen Gerät aus nach diesem Gerät Je nach dem Status des anderen Geräts ist die Suche von diesem Gerät aus unter Umständen nicht möglich tSuchen Sie vom anderen Gerät aus nach diesem Gerät Schlagen Sie die Erläuterungen zum Pairing und zum Herstellen einer Verbindung im Handb...

Страница 87: ... wieder ein Bei einem Anruf über die Freisprecheinrichtung wird über die Lautsprecher des Fahrzeugs kein Ton ausgegeben Wenn der Ton über das Mobiltelefon ausgegeben wird stellen Sie dieses so ein dass der Ton über die Lautsprecher des Fahrzeugs ausgegeben wird Das externe Mikrofon funktioniert nicht Die Einstellung für das Mikrofon ist nicht korrekt tSetzen Sie MIC Select auf External Seite 24 Bu...

Страница 88: ...zin in den CD Wechsler ein NO Music Die CD bzw das USB Gerät enthält keine Musikdateien tLegen Sie eine Musik CD in dieses Gerät oder einen MP3 kompatiblen CD Wechsler ein tSchließen Sie ein USB Gerät an das eine Musikdatei enthält NO TP Das Gerät sucht weiter nach verfügbaren Verkehrsfunksendern Not Supported Das angeschlossene USB Gerät wird nicht unterstützt tEinzelheiten zur Kompatibilität Ihr...

Страница 89: ......

Страница 90: ... manière appropriée vous aiderez à prévenir les conséquences négatives potentielles pour l environnement et la santé humaine Le recyclage des matériaux aidera à préserver les ressources naturelles Pour toute information supplémentaire au sujet du recyclage de ce produit vous pouvez contacter votre municipalité votre déchetterie ou le magasin où vous avez acheté le produit Accessoires compatibles T...

Страница 91: ...rotéger l intégrité de leur contenu Contenu sécurisé pour que la propriété intellectuelle y compris les droits d auteur de ce contenu ne soit pas détournée Cet appareil utilise le logiciel WM DRM pour lire le contenu sécurisé Logiciel WM DRM Si la sécurité du logiciel WM DRM de cet appareil a été compromise les propriétaires du contenu sécurisé Propriétaires du contenu sécurisé peuvent exiger de M...

Страница 92: ...ériphérique USB 19 Rubriques d affichage 20 Lecture répétée et aléatoire 20 iPod Lecture de l iPod 21 Rubriques d affichage 22 Réglage du mode de lecture 22 Lecture répétée et aléatoire 22 Fonctionnement direct de l iPod Commande passager 23 Bluetooth appel en mains libres et transmission de musique en continu Avant d utiliser la fonction Bluetooth 23 Opérations Bluetooth 23 Configuration des para...

Страница 93: ...on Bluetooth 5 Autres fonctions Modification des réglages du son 33 Réglage des caractéristiques du son 33 Personnalisation de la courbe de l égaliseur EQ3 Parametric Tune 33 Réglage des paramètres de configuration SET 34 Utilisation d un appareil en option 35 Appareil audio auxiliaire 35 Changeur CD 36 Satellite de commande RM X4S 36 Informations complémentaires Précautions 37 Remarques sur les d...

Страница 94: ...s ou changements apportés à cet appareil qui ne sont pas approuvés expressément par Sony peuvent annuler le droit d utilisation de l appareil Veuillez vérifier les exceptions dues à des exigences ou limitations nationales relatives aux équipements Bluetooth avant d utiliser ce produit Conduite Vérifiez la législation et la réglementation en vigueur concernant l utilisation des téléphones mobiles e...

Страница 95: ...mmunications importantes telles que les urgences médicales Rappelez vous que pour passer ou recevoir des appels le périphérique mains libres et le périphérique électronique connecté à celui ci doivent être activés dans une zone de service dans laquelle la puissance des signaux cellulaires est adaptée Les appels d urgence peuvent ne pas être possibles sur tous les téléphones mobiles ou lorsque cert...

Страница 96: ... horloge automatiquement au moyen de la fonction RDS page 18 Retrait de la façade Vous pouvez retirer la façade de cet appareil pour le protéger du vol Alarme d avertissement Si vous mettez la clé de contact en position OFF sans ôter la façade l alarme d avertissement retentit pendant quelques secondes L alarme est émise uniquement lorsque l amplificateur intégré est utilisé 1 Appuyez sur OFF L ap...

Страница 97: ... de la façade sur la tige B de l appareil puis poussez légèrement sur le côté gauche pour l enclencher Appuyez sur la touche SOURCE de l appareil ou insérez un disque pour le faire fonctionner Remarque Ne posez rien sur la face interne de la façade ...

Страница 98: ...an précédent C Touche SOURCE Permet de mettre l appareil sous tension de changer de source Radio CD USB AUX son Bluetooth téléphone Bluetooth 1 D Touche ZAP page 15 Permet de passer en mode ZAPPIN E Molette de réglage touche de sélection mains libres fin d appel Permet de régler le volume tournez de sélectionner des paramètres de configuration appuyez et tournez Téléphone Bluetooth Permet d accéde...

Страница 99: ...s albums en continu appuyez sur la touche et maintenez la enfoncée 5 DM Permet d améliorer le son compressé numériquement notamment celui des fichiers MP3 Pour activer la fonction DM choisissez on Pour l annuler choisissez off 6 PAUSE Permet d interrompre la lecture Appuyez de nouveau sur cette touche pour annuler Radio Permet de capter les stations enregistrées appuyez de mémoriser des stations a...

Страница 100: ... la pression pour activer désactiver la commande passager E Touche MENU Permet d accéder au menu F Touche LIST BROWSE Permet d établir une liste des fréquences Radio de passer en mode Quick BrowZer CD USB Téléphone Bluetooth Permet d accéder au menu Phonebook Access G Touche DSPL affichage PTY Type d émission page 17 Pour modifier les paramètres d affichage sélectionnez PTY en RDS H Touches numéri...

Страница 101: ...ubrique d affichage O Touche SOUND Permet de valider un réglage du son P Touche ATT atténuer Permet d atténuer le son Appuyez de nouveau sur cette touche pour annuler Q Touches VOL volume Permettent de régler le niveau du volume R Touche page 29 Lors du raccordement d un changeur CD si vous appuyez sur la touche SOURCE CD et le numéro de l appareil s affichent à l écran En outre si vous appuyez su...

Страница 102: ...ode Jump Lorsqu une catégorie comprend plusieurs éléments vous pouvez rechercher rapidement l élément souhaité 1 Appuyez sur SEEK en mode Quick BrowZer L écran suivant apparaît A Numéro de l élément actuel B Nombre total d éléments dans la couche actuelle C Nom de l élément Puis le nom de l élément apparaît 2 Tournez la molette de réglage pour sélectionner l élément souhaité ou un autre élément pr...

Страница 103: ...ement Pour syntoniser des stations pendant que vous conduisez utilisez la fonction de mémorisation des meilleurs accords BTM afin d éviter les accidents Mémorisation automatique BTM 1 Appuyez plusieurs fois sur SOURCE jusqu à ce que l indication TUNER apparaisse Pour changer de bande appuyez plusieurs fois sur MODE Vous pouvez sélectionner FM1 FM2 FM3 MW PO ou LW GO 2 Appuyez sur la touche de séle...

Страница 104: ...C Horloge D Numéro de préréglage E Fréquence 2 nom du service de l émission données RDS 1 Lorsque Information on est réglé TP s allume lorsque TP est capté TA AF s allume lorsque TA AF est activé 2 Lorsque vous captez la station RDS RDS est affiché à gauche de l indication de la fréquence Services RDS Cet appareil propose automatiquement les services RDS comme suit Remarques Selon le pays ou la ré...

Страница 105: ... régionale ayant une fréquence plus puissante ne soit pas captée Si vous quittez la zone de réception de cette émission régionale réglez Regional off lors de la configuration en cours de réception FM page 35 Remarque Cette fonction est inopérante au Royaume Uni et dans certaines autres régions Fonction de liaison locale Royaume Uni uniquement Cette fonction vous permet de sélectionner d autres sta...

Страница 106: ... Advanced ZAPPIN Lecture répétée Lecture aléatoire A Source B Horloge E Nom de l artiste nom du disque de l album nom des plages numéro du disque de l album numéro de plage temps de lecture écoulée Les données d un CD TEXT ou d un fichier MP3 WMA AAC sont affichées News Nouvelles Current Affairs Dossiers d actualité Information Informations Sport Sports Education Education Drama Théâtre Cultures C...

Страница 107: ...ec correspondant est MP3 mp3 WMA wma et AAC m4a Il est recommandé d effectuer des copies de sauvegarde des données contenues dans le périphérique USB Remarque Raccordez le périphérique USB après avoir démarré le moteur Selon le type de périphérique USB un dysfonctionnement ou des dommages peuvent être causés si ce périphérique a été raccordé avant de démarrer le moteur Lecture d un périphérique US...

Страница 108: ...m numéro de plage temps de lecture écoulée Remarques Les paramètres affichés peuvent varier selon le type de périphérique USB le format d enregistrement et les réglages Le nombre maximum de données affichables est le suivant dossiers albums 128 fichiers plages par dossier 512 Ne laissez pas de périphérique USB dans un véhicule en stationnement car cela pourrait entraîner des problèmes de fonctionn...

Страница 109: ...nge comme suit Resuming Mode reprise de la lecture t Album Mode t Track Mode plage t Podcast Mode t Genre Mode t Playlist Mode liste de lecture t Artist Mode artiste Peut ne pas s afficher selon le réglage de l iPod 4 Réglez le volume Appuyez sur OFF pour arrêter la lecture Retrait de l iPod 1 Arrêtez la lecture de l iPod 2 Retirez l iPod Avertissement à propos de l iPhone Si vous raccordez un iPh...

Страница 110: ...e lecture t Artist Mode artiste Peut ne pas s afficher selon le réglage de l iPod Saut d albums de podcasts de genres de listes de lecture et d artistes Lecture répétée et aléatoire 1 En cours de lecture appuyez plusieurs fois sur 1 REP ou 2 SHUF jusqu à ce que le réglage souhaité apparaisse Le réglage est terminé après 3 secondes A B D C A B E Pour Appuyez sur Sauter 3 4 ALBUM appuyez une fois po...

Страница 111: ...ous connectez des périphériques Bluetooth pour la première fois il est nécessaire que les périphériques se reconnaissent mutuellement C est ce qu on appelle le pairage Cette reconnaissance pairage est nécessaire la première fois uniquement à partir de la seconde connexion cet appareil et le périphérique se reconnaissent automatiquement Le pairage peut s effectuer pour 9 appareils maximum Selon le ...

Страница 112: ...rique à rechercher Veillez à sélectionner Show lorsque vous recherchez cet appareil à partir d un périphérique Bluetooth Device Name Permet de modifier le nom de cet appareil affiché sur les périphériques connectés Réglage par défaut XPLOD Sélectionnez Rename et saisissez des caractères Vous pouvez saisir jusqu à 13 caractères Pour restaurer XPLOD sélectionnez Default Search Permet de rechercher d...

Страница 113: ...rique à connecter démarre puis le nom du périphérique détecté apparaît dans une liste Si le nom d un périphérique ne peut être reçu Bluetooth Device Address s affiche Le temps de recherche varie en fonction du nombre de périphériques Bluetooth 3 Tournez la molette de réglage pour sélectionner le périphérique puis appuyez sur la touche de sélection 4 Sélectionnez la connexion souhaitée Handsfree Co...

Страница 114: ...e passe en fonction du périphérique Remarques En cours de connexion avec un périphérique Bluetooth cet appareil ne peut pas être détecté par un autre périphérique Pour permettre la détection désactivez la connexion en cours et recherchez l appareil à partir de l autre périphérique Selon le périphérique il peut être impossible de rechercher un périphérique à partir de cet appareil Dans ce cas reche...

Страница 115: ...tooth activé si la clé de contact est réglée en position on cet appareil se reconnecte automatiquement au dernier téléphone mobile connecté Mais la connexion automatique dépend également des spécifications du téléphone mobile Si cet appareil ne se reconnecte pas automatiquement connectez le manuellement Connexion d un périphérique audio 1 Veillez à ce que le signal Bluetooth soit activé sur cet ap...

Страница 116: ...e sélection 2 Sélectionnez un nom et un numéro à partir de l historique des appels 3 Sélectionnez Call Remarque Vous pouvez effectuer un appel à partir de l historique des appels de cet appareil uniquement Appel en saisissant le numéro de téléphone 1 Tournez la molette de réglage pour sélectionner Dial puis appuyez sur la touche de sélection 2 Saisissez le numéro de téléphone à l aide des touches ...

Страница 117: ...i page 24 Réception d appels Lorsque vous recevez un appel les haut parleurs de votre véhicule émettent une sonnerie 1 Appuyez sur mains libres lorsqu un appel est reçu avec une sonnerie L appel commence Remarque Le microphone interne de cet appareil est situé à l arrière de la façade page 10 Ne masquez pas le microphone avec du ruban adhésif etc Rejet d appel Appuyez sur OFF Transfert d appel Pou...

Страница 118: ...partir d un téléphone mobile 1 Appuyez sur mains libres 2 Tournez la molette de réglage pour sélectionner Receive PB puis appuyez sur la touche de sélection Waiting apparaît 3 Envoyez les données du répertoire à l aide du téléphone mobile L indication Data Receiving apparaît pendant la réception des données du répertoire Complete apparaît une fois la réception terminée Remarques Avant de recevoir ...

Страница 119: ...églage pour sélectionner Recent Call puis appuyez sur la touche de sélection 3 Sélectionnez le nom ou le numéro de téléphone à enregistrer puis Preset Memory 4 Sélectionnez le numéro présélectionné P1 à P6 à enregistrer Activation de la composition vocale Vous pouvez activer la composition vocale avec un téléphone mobile raccordé à cet appareil en prononçant le repère vocal mémorisé sur le télépho...

Страница 120: ...riphérique il peut être nécessaire d appuyer deux fois sur la touche 2 Appuyez plusieurs fois jusqu à ce que le réglage souhaité s affiche Les opérations autres que celles citées ci dessus doivent être effectuées à partir du périphérique audio Remarques Selon le périphérique audio ses informations comme le titre le numéro de plage la durée le statut de lecture etc peut ne pas s afficher sur cet ap...

Страница 121: ...ametric Preset Permet de sélectionner la courbe de l égalisateur parmi 7 types de musique EQ3 Parametric Tune 1 Permet de personnaliser les réglages de l égaliseur Subwoofer Tune LPF Phase Permet de sélectionner la phase uniquement lorsque la fonction LPF est activée Normal Reverse FREQ Permet de sélectionner la fréquence de coupure du caisson de graves 80Hz 100Hz 120Hz 140Hz 160Hz OFF Level Perme...

Страница 122: ...e que le paramètre de menu souhaité apparaisse puis appuyez sur la touche de sélection 3 Tournez la molette de réglage pour sélectionner le réglage puis appuyez sur la touche de sélection Le réglage est terminé 4 Appuyez sur BACK L affichage revient en mode de lecture réception normale Remarques Les rubriques affichées diffèrent selon la source et le réglage Ne s affiche pas lorsque la source Blue...

Страница 123: ...nstration on off Image Permet de régler différentes images affichées Movie pour afficher un film SA 1 3 All pour afficher l analyseur de spectre Wall P 1 3 All pour afficher un papier peint off pour qu aucune image ne s affiche All pour afficher toutes les images Information Permet d afficher les éléments selon la source etc on off Dimmer Permet de modifier la luminosité de l affichage Auto pour r...

Страница 124: ...celles de l appareil Touche ATT atténuer Permet d atténuer le son Appuyez de nouveau sur cette touche pour annuler Commande PRESET DISC CD USB identique à la touche 3 4 ALBUM de l appareil enfoncez et tournez Radio pour capter les stations enregistrées appuyez et tournez Commande VOL volume Identique à la molette de réglage de l appareil tournez Commande SEEK AMS Identique à la touche SEEK de l ap...

Страница 125: ...aud et ne les laissez pas dans un véhicule garé en plein soleil Avant de lire les disques essuyez les avec un chiffon de nettoyage en partant du centre N utilisez pas de solvants comme de l essence du dissolvant ou des nettoyants disponibles dans le commerce Cet appareil est conçu pour la lecture des disques conformes à la norme Compact Disc CD Les DualDiscs et certains disques de musique encodés ...

Страница 126: ...onnées entre des appareils numériques comme un téléphone mobile et un casque La technologie sans fil Bluetooth fonctionne dans un rayon d environ 10 m Le raccordement de deux appareils est courant mais certains appareils peuvent être raccordés à plusieurs périphériques à la fois Vous n avez pas besoin d utiliser un câble de raccordement étant donné que la technologie Bluetooth est une technologie ...

Страница 127: ...fonctionner avec les téléphones mobiles en fonction des conditions des ondes radio et de l endroit où l appareil est utilisé Si vous éprouvez une gêne après avoir utilisé le périphérique Bluetooth cessez de l utiliser immédiatement Si le problème persiste consultez votre revendeur Sony le plus proche Si vous avez des questions ou des problèmes concernant cet appareil qui ne sont pas abordés dans c...

Страница 128: ...anément deux clés de déblocage jusqu à ce qu elles émettent un déclic 2Tirez sur les clés de déblocage pour extraire l appareil 3Faites glisser l appareil en dehors de son support Spécifications Lecteur CD Rapport signal bruit 120 dB Réponse en fréquence 10 à 20 000 Hz Pleurage et scintillement en dessous du seuil mesurable Radio FM Plage de syntonisation 87 5 à 108 0 MHz Borne d antenne connecteu...

Страница 129: ...0 dB à 60 Hz XPLOD Médiums 10 dB à 1 kHz XPLOD Aigus 10 dB à 10 kHz XPLOD Alimentation requise batterie de véhicule 12 V CC masse négative Dimensions environ 178 50 182 mm l h p Dimensions du support environ 182 53 162 mm l h p Poids environ 1 3 kg Accessoire fourni Mini télécommande RM X305 Composants destinés à l installation et au raccordement 1 jeu Microphone XA MC10 Appareils accessoires en o...

Страница 130: ...ler le niveau de volume L appareil audio portatif n était pas raccordé lorsque AUX a été sélectionné comme SOURCE tRaccordez l appareil audio portatif à la prise d entrée AUX Lecture de CD Impossible d introduire le disque Un autre disque est déjà en place Le disque a été introduit de force à l envers ou dans le mauvais sens La lecture du disque ne commence pas Le disque est défectueux ou sale Les...

Страница 131: ... lecture tVeillez à arrêter la lecture avant de débrancher un périphérique USB afin de protéger les données Le son est intermittent Il est possible que le son soit intermittent à un haut débit binaire supérieur à 320 kbit s Fonction Bluetooth Le périphérique à connecter ne détecte pas cet appareil Réglez Signal sur on page 24 Réglez Visibility sur Show page 24 En cours de connexion avec l autre pé...

Страница 132: ...dant n est pas enregistré dans le répertoire tEnregistrez le dans le répertoire page 30 Le téléphone appelant n est pas réglé pour envoyer le numéro de téléphone Un appel commence involontairement Le téléphone à connecter est réglé pour commencer un appel automatiquement Le paramètre Auto Answer de cet appareil est réglé sur Short ou Long page 24 Echec du pairage dans le délai imparti Selon le pér...

Страница 133: ...chargeur n a pas été inséré dans le changeur CD tInsérez le chargeur dans le changeur CD NO Music Le disque ou le périphérique USB ne contient pas de fichier de musique tInsérez un CD audio dans cet appareil ou un changeur CD compatible MP3 tRaccordez un périphérique USB comprenant un fichier audio NO TP L appareil continue à rechercher les stations diffusant des messages de radioguidage Not Suppo...

Страница 134: ...d un punto di raccolta appropriato per il riciclo di apparecchi elettrici ed elettronici Assicurandovi che questo prodotto sia smaltito correttamente voi contribuirete a prevenire potenziali conseguenze negative per l ambiente e per la salute che potrebbero altrimenti essere causate dal suo smaltimento inadeguato Il riciclaggio dei materiali aiuta a conservare le risorse naturali Per informazioni ...

Страница 135: ...a possibile appropriarsi indebitamente della proprietà intellettuale incluso il copyright in tali contenuti Il presente dispositivo utilizza il software WM DRM per riprodurre Contenuto Protetto Software WM DRM Qualora la protezione del Software WM DRM del presente dispositivo sia stata compromessa i proprietari di Contenuto Protetto Proprietari del Contenuto Protetto potranno richiedere che Micros...

Страница 136: ...oduzione del contenuto di un dispositivo USB 19 Voci del display 19 Riproduzione ripetuta e in ordine casuale 20 iPod Riproduzione tramite un iPod 20 Voci del display 21 Impostazione del modo di riproduzione 22 Riproduzione ripetuta e in ordine casuale 22 Uso diretto dell iPod Controllo passeggero 22 Bluetooth chiamate vivavoce e streaming musicale Prima di utilizzare la funzione Bluetooth 23 Oper...

Страница 137: ...unzioni Modifica delle impostazioni audio 33 Regolazione delle caratteristiche dell audio 33 Personalizzazione della curva dell equalizzatore EQ3 Parametric Tune 33 Regolazione delle voci di impostazione SET 34 Uso di apparecchi opzionali 35 Apparecchio audio ausiliare 35 Cambia CD 36 Telecomando a rotazione RM X4S 36 Informazioni aggiuntive Precauzioni 37 Note sui dischi 37 Ordine di riproduzione...

Страница 138: ...biamenti al presente apparecchio non esplicitamente approvati da Sony potrebbero invalidare l autorizzazione all uso dell apparecchio Prima di utilizzare il presente prodotto controllare le eccezioni dovute a requisiti o limitazioni nazionali relative ai dispositivi Bluetooth Guida Verificare le leggi e le normative che regolano l uso dei telefoni cellulari e degli apparecchi vivavoce in vigore ne...

Страница 139: ...ni importanti quali le chiamate per emergenze mediche Per poter effettuare o ricevere le chiamate è necessario che l apparecchio vivavoce e il dispositivo elettronico ad esso connesso siano accesi e si trovino in un area con segnale cellulare sufficientemente potente Le chiamate di emergenza potrebbero non venire effettuate in alcune reti cellulari o durante l uso di servizi di rete e o funzioni t...

Страница 140: ... RDS pagina 17 Rimozione del pannello anteriore Per evitare il furto dell apparecchio è possibile estrarne il pannello anteriore Segnale di avvertimento Se la chiave di accensione viene impostata sulla posizione OFF senza che il pannello anteriore sia stato rimosso viene emesso per alcuni secondi un segnale acustico di avvertimento Tale segnale viene emesso solo se è in uso l amplificatore incorpo...

Страница 141: ... nel mandrino B dell apparecchio quindi spingere il lato sinistro verso l interno evitando di esercitare eccessiva pressione Per attivare l apparecchio premere SOURCE sull apparecchio o inserire un disco Nota Non collocare alcun oggetto sulla superficie interna del pannello anteriore ...

Страница 142: ...agina 14 23 33 34 Per tornare al display precedente C Tasto SOURCE Per attivare l alimentazione per cambiare la sorgente Radio CD USB AUX audio Bluetooth telefono Bluetooth 1 D Tasto ZAP pagina 15 Per impostare il modo ZAPPIN E Manopola di controllo tasto di selezione vivavoce fine chiamata Per regolare il volume ruotare per selezionare le voci di impostazione premere e ruotare Telefono Bluetooth ...

Страница 143: ...album in modo continuo tenere premuto 5 DM Consente di migliorare la qualità dell audio compresso digitalmente ad esempio dei file MP3 Per attivare la funzione DM impostare on Per disattivarla impostare off 6 PAUSE Per effettuare una pausa durante la riproduzione Per annullare l impostazione premere di nuovo il tasto Radio Per ricevere le stazioni memorizzate premere per memorizzare le stazioni te...

Страница 144: ... per impostare disattivare il controllo passeggero E Tasto MENU Per accedere a un menu F Tasto LIST BROWSE Per utilizzare la funzione di elenco radio per impostare il modo Quick BrowZer CD USB Telefono Bluetooth Per accedere al menu Phonebook Access G Tasto DSPL display PTY tipo di programma pagina 17 Per cambiare le voci del display selezionare PTY nel modo RDS H Tasti numerici pagina 25 28 29 Pe...

Страница 145: ...y O Tasto SOUND Per effettuare l impostazione dell audio P Tasto ATT attenuazione audio Per attenuare l audio Per annullare l impostazione premere di nuovo il tasto Q Tasti VOL volume Per regolare il volume R Tasto pagina 29 Nel caso in cui sia collegato un cambia CD se viene premuto SOURCE sul display vengono visualizzati CD e il numero dell apparecchio Inoltre se viene premuto MODE è possibile s...

Страница 146: ...le voci Modo Jump Se all interno di una categoria sono presenti più voci è possibile ricercare rapidamente la voce desiderata 1 Premere SEEK nel modo Quick BrowZer Viene visualizzato il seguente display A Numero della voce corrente B Numero totale di voci incluse nello strato corrente C Nome della voce Quindi viene visualizzato il nome della voce 2 Ruotare la manopola di controllo per selezionare ...

Страница 147: ...io Memorizzazione e ricezione delle stazioni Attenzione Per la sintonizzazione delle stazioni durante la guida utilizzare la funzione BTM memorizzazione automatica delle emittenti con sintonia migliore per evitare incidenti Memorizzazione automatica BTM 1 Premere più volte SOURCE fino a visualizzare TUNER Per cambiare la banda premere più volte MODE È possibile selezionare FM1 FM2 FM3 MW o LW 2 Te...

Страница 148: ...ina durante l uso della funzione TA AF 2 Durante la ricezione della stazione RDS RDS è visualizzato a sinistra dell indicazione della frequenza Servizi RDS Il presente apparecchio fornisce i servizi RDS in modo automatico come segue Note È possibile che non tutte le funzioni RDS siano disponibili a seconda del paese o della regione La funzione RDS non è disponibile quando il segnale è troppo debol...

Страница 149: ...la ricezione FM premere un tasto numerico da 1 a 6 in corrispondenza del quale è memorizzata una stazione locale 2 Entro 5 secondi premere nuovamente il tasto numerico della stazione locale Ripetere questa procedura fino alla ricezione della stazione locale Selezione del modo PTY 1 Tenere premuto AF TA PTY durante la ricezione FM Se la stazione sta trasmettendo dati PTY viene visualizzato il nome ...

Страница 150: ...itolo del brano numero del disco dell album numero del brano tempo di riproduzione trascorso Vengono visualizzate le informazioni di un file CD TEXT MP3 WMA AAC Suggerimento Le voci visualizzate potrebbero non corrispondere a seconda del tipo di disco del formato di registrazione e delle impostazioni effettuate Riproduzione ripetuta e in ordine casuale 1 Durante la riproduzione premere più volte 1...

Страница 151: ...o USB 1 Arrestare la riproduzione del dispositivo USB 2 Rimuovere il dispositivo USB Se durante la riproduzione viene rimosso il dispositivo USB è possibile che i dati memorizzati nel dispositivo USB vengano danneggiati Note Non utilizzare dispositivi USB di dimensioni o peso eccessivi che potrebbero cadere a causa di vibrazioni o causare un collegamento non sufficientemente saldo Non rimuovere il...

Страница 152: ... più volte 1 REP o 2 SHUF fino a visualizzare l impostazione desiderata Dopo 3 secondi l impostazione è completata Per ritornare al modo di riproduzione normale selezionare Repeat off o Shuffle Off iPod Per ulteriori informazioni sulla compatibilità dell iPod vedere Informazioni sull iPod a pagina 38 oppure visitare il sito di assistenza In queste Istruzioni per l uso il termine iPod viene utilizz...

Страница 153: ...dell iPod onde evitare che i dati vengano danneggiati Il presente apparecchio non è in grado di riconoscere l iPod mediante un hub USB Suggerimenti Quando la chiave d accensione è impostata sulla posizione ACC e l apparecchio è acceso l iPod viene ricaricato Se l iPod viene scollegato durante la riproduzione nel display dell apparecchio viene visualizzato NO Device Modo di ripristino Se l iPod è c...

Страница 154: ...bile utilizzare direttamente l iPod Per annullare il modo di controllo passeggero Tenere premuto MODE Quindi viene visualizzato Mode Audio e il modo di riproduzione passa a Resuming Mode Note È possibile regolare il volume solo tramite l apparecchio Se questo modo viene annullato l impostazione della riproduzione ripetuta verrà disattivata Per Premere Saltare 3 4 ALBUM premere una volta per ogni b...

Страница 155: ...ni Bluetooth Prima di stabilire la connessione a un dispositivo Bluetooth configurare il menu Bluetooth Settings sul presente apparecchio 1 Premere BT Viene visualizzato il menu delle impostazioni Bluetooth 2 Ruotare la manopola di controllo fino a visualizzare la voce di menu desiderata quindi premere il tasto di selezione A seconda dell impostazione ruotando di nuovo la manopola di controllo è p...

Страница 156: ...Consente di visualizzare l elenco dei dispositivi registrati Selezionare il nome del dispositivo da connettere o disconnettere dal presente apparecchio Per eliminare tutti i dispositivi selezionare Delete All Auto Answer off per avviare una chiamata solo dopo avere premuto vivavoce Short per avviare in modo automatico una chiamata al momento della relativa ricezione circa 3 secondi dopo Long per a...

Страница 157: ...ionare la connessione desiderata Handsfree Connect o Audio Connect Viene avviata l associazione 5 Immettere un codice di protezione Immettere lo stesso codice di protezione per il presente apparecchio e il dispositivo di connessione utilizzando la manopola di controllo o il telecomando a scheda Il codice di protezione può essere costituito da un numero selezionato dall utente o dal numero determin...

Страница 158: ...ivo potrebbe non essere possibile effettuare la ricerca dal presente apparecchio In questo caso ricercare l apparecchio dal dispositivo di connessione Se si effettua la ricerca del presente apparecchio e del dispositivo di connessione contemporaneamente l apparecchio non sarà in grado di riconoscere il dispositivo di connessione Per la ricerca e la connessione potrebbe essere necessario attendere ...

Страница 159: ... Suggerimento Con il segnale Bluetooth attivo attivando la chiave di accensione il presente apparecchio si connette di nuovo automaticamente all ultimo telefono cellulare connesso La connessione automatica dipende inoltre dalle specifiche del telefono cellulare Se il presente apparecchio non si riconnette automaticamente procedere manualmente Connessione di un dispositivo audio 1 Accertarsi che l ...

Страница 160: ...ere il tasto di selezione 2 Selezionare un nominativo e un numero dall elenco cronologico delle chiamate 3 Selezionare Call Nota È possibile effettuare chiamate solo dall elenco cronologico del presente apparecchio Come effettuare una chiamata mediante immissione del numero telefonico 1 Ruotare la manopola di controllo per selezionare Dial quindi premere il tasto di selezione 2 Digitare il numero ...

Страница 161: ...n modo automatico all orario impostato pagina 24 Ricezione di chiamate Quando si riceve una chiamata dai diffusori dell auto viene emesso un tono di chiamata 1 Alla ricezione di una chiamata con emissione di un tono di chiamata premere vivavoce La chiamata telefonica viene avviata Nota Il microfono incorporato dell apparecchio si trova sul retro del pannello anteriore pagina 10 Non coprire il micr...

Страница 162: ... Ricezione dei dati della rubrica da un telefono cellulare 1 Premere vivavoce 2 Ruotare la manopola di controllo per selezionare Receive PB quindi premere il tasto di selezione Viene visualizzato Waiting 3 Inviare i dati della rubrica utilizzando il telefono cellulare Durante la ricezione dei dati della rubrica viene visualizzato Data Receiving Una volta terminata la ricezione viene visualizzato C...

Страница 163: ...e vivavoce 2 Ruotare la manopola di controllo per selezionare Recent Call quindi premere il tasto di selezione 3 Selezionare il nominativo o il numero telefonico da memorizzare quindi selezionare Preset Memory 4 Selezionare il numero di preselezione da P1 a P6 da memorizzare Attivazione delle chiamate vocali È possibile attivare la funzione di chiamata vocale con un telefono cellulare connesso al ...

Страница 164: ...mere il tasto due volte 2 Premere più volte fino a visualizzare l impostazione desiderata Le operazioni diverse da quelle descritte sopra devono essere eseguite sul dispositivo audio Note A seconda del dispositivo audio le relative informazioni quali titolo numero durata del brano stato della riproduzione e così via potrebbero non venire visualizzate sul presente apparecchio Le informazioni vengon...

Страница 165: ...i gamma Low 60 Hz o 100 Hz Mid 500 Hz o 1 0 kHz Hi 10 0 kHz o 12 5 kHz EQ3 Parametric Preset Consente di selezionare una curva dell equalizzatore tra 7 tipi musica EQ3 Parametric Tune 1 Consente di personalizzare le impostazioni dell equalizzatore Subwoofer Tune LPF Phase Consente di selezionare la fase solo se è attivato LPF Normal Reverse FREQ Consente di selezionare la frequenza di taglio del s...

Страница 166: ... di selezione L impostazione è completata 4 Premere BACK Il display torna al modo di riproduzione ricezione normale Note Le voci visualizzate sono diverse a seconda della sorgente e dell impostazione Non visualizzabile con la sorgente Bluetooth Phone selezionata È possibile impostare le seguenti voci per ulteriori informazioni consultare la pagina di riferimento Configurazione 60Hz MID HI 100Hz 50...

Страница 167: ...n visualizzare alcuna immagine All per visualizzare tutte le immagini Information Consente di visualizzare le varie voci a seconda della sorgente e così via on off Dimmer Consente di modificare la luminosità del display Auto per ridurre automaticamente la luminosità del display quando vengono accesi i fari Opzione disponibile solo se è collegato il cavo di controllo dell illuminazione on per atten...

Страница 168: ... in base al modo in cui si desidera montare il telecomando a rotazione Individuazione dei comandi I tasti del telecomando a rotazione corrispondenti a quelli dell apparecchio controllano le stesse funzioni I comandi del telecomando a rotazione riportati di seguito controllano operazioni diverse da quelle dell apparecchio Tasto ATT attenuazione audio Per attenuare l audio Per annullare l impostazio...

Страница 169: ...Note sui dischi Non esporre i dischi alla luce solare diretta o a fonti di calore quali condotti d aria calda né lasciarli all interno di un auto parcheggiata alla luce solare diretta Prima della riproduzione pulire i dischi con un panno di pulizia procedendo dal centro verso l esterno Non utilizzare solventi quali benzina acquaragia detergenti disponibili in commercio o spray antistatici per disc...

Страница 170: ...ooth è una tecnologia senza fili a breve raggio che consente la comunicazione di dati senza fili tra dispositivi compatibili quali un telefono cellulare e un auricolare La tecnologia senza fili Bluetooth funziona entro un raggio di circa 10 m Di solito vengono collegati due dispositivi sebbene alcuni apparecchi supportino il collegamento di più dispositivi contemporaneamente Trattandosi di una tec...

Страница 171: ...el luogo in cui l apparecchio viene utilizzato potrebbe non essere possibile utilizzare il dispositivo Bluetooth con i telefoni cellulari Se in seguito all uso del dispositivo Bluetooth si avvertono dei fastidi interrompere immediatamente l uso Se il problema persiste rivolgersi ad un rivenditore Sony Per eventuali domande o problemi riguardanti l apparecchio non trattati nel presente manuale rivo...

Страница 172: ...tori e rimuovere la chiave dal blocchetto di accensione Non toccare mai direttamente i connettori con le dita o con oggetti di metallo Rimozione dell apparecchio 1 Rimuovere la cornice protettiva 1Rimuovere il pannello anteriore pagina 8 2Afferrare entrambe le estremità della cornice protettiva quindi estrarla 2 Rimuovere l apparecchio 1Inserire contemporaneamente entrambe le chiavi di rilascio fi...

Страница 173: ...i connettori a tenuta Impedenza diffusori 4 8 ohm Potenza di uscita massima 52 W 4 a 4 ohm Generali Uscite Terminale delle uscite audio anteriore posteriore Terminale di uscita subwoofer mono Terminale di controllo del relè dell antenna elettrica Terminale di controllo dell amplificatore di potenza Ingressi Terminale di ingresso del telecomando Terminale di ingresso dell antenna Terminale di contr...

Страница 174: ...f pagina 35 Sito di assistenza clienti http support sony europe com Il display viene disattivato non viene visualizzato nella relativa finestra L attenuatore di luminosità è impostato su Dimmer on pagina 35 Il display scompare tenendo premuto OFF tTenere premuto OFF sull apparecchio fino a visualizzare il display I connettori sono sporchi pagina 40 La funzione di spegnimento automatico non è opera...

Страница 175: ... un altra stazione Il modo PTY visualizza La stazione corrente non è una stazione RDS I dati RDS non vengono ricevuti La stazione non specifica il tipo di programma Riproduzione USB Non è possibile eseguire la riproduzione mediante un hub USB Il presente apparecchio non è in grado di riconoscere i dispositivi USB mediante un hub USB Non è possibile eseguire la riproduzione Un dispositivo USB non f...

Страница 176: ... o altri dispositivi che emettono onde radio tSpegnere gli altri dispositivi tRidurre la distanza dagli altri dispositivi Durante la connessione tra il presente apparecchio e il telefono cellulare l audio di riproduzione si interrompe momentaneamente Non si tratta di un problema di funzionamento Non è possibile controllare il dispositivo audio Bluetooth connesso Verificare che il dispositivo audio...

Страница 177: ...stati scollegati un dispositivo o un cavo USB tAccertarsi di collegare un dispositivo e un cavo USB NO Devices Found Il presente apparecchio non è in grado di rilevare un dispositivo a cui connettersi tVerificare l impostazione Bluetooth del dispositivo di connessione NO Disc Il disco non è inserito nel cambia CD tInserire i dischi nel cambia CD NO Magazine Il contenitore di dischi non è inserito ...

Страница 178: ...en milieu negatieve gevolgen die zich zouden kunnen voordoen in geval van verkeerde afvalbehandeling De recycling van materialen draagt bij tot het vrijwaren van natuurlijke bronnen Voor meer details in verband met het recyclen van dit product neemt u contact op met de gemeentelijke instanties het bedrijf of de dienst belast met de verwijdering van huishoudafval of de winkel waar u het product heb...

Страница 179: ... uitgeschakeld nadat u het systeem hebt uitgeschakeld Zo voorkomt u dat de accu leeg raakt Als u de functie voor automatisch uitschakelen niet instelt houdt u OFF ingedrukt totdat het scherm verdwijnt wanneer u het contactslot uitzet Inhoudsleveranciers gebruiken de technologie voor beheer van digitale rechten voor Windows Media die in dit apparaat is opgenomen WM DRM om de integriteit van hun inh...

Страница 180: ... Een USB apparaat afspelen 19 Schermitems 19 Herhaaldelijk en willekeurig afspelen 20 iPod Een iPod afspelen 20 Schermitems 21 De weergavestand instellen 22 Herhaaldelijk en willekeurig afspelen 22 Een iPod rechtstreeks bedienen Passagiersbediening 22 Bluetooth handsfree bellen en muziek streamen Voordat u de Bluetooth functie gebruikt 23 Bluetooth bewerkingen 23 Bluetooth instellingen configurere...

Страница 181: ...luetooth functie 5 Overige functies De geluidsinstellingen wijzigen 33 De geluidskenmerken wijzigen 33 De equalizercurve aanpassen EQ3 Parametric Tune 33 Instelitems aanpassen SET 34 Optionele apparaten gebruiken 35 Randapparatuur voor audio 35 CD wisselaar 35 Bedieningssatelliet RM X4S 36 Aanvullende informatie Voorzorgsmaatregelen 37 Opmerkingen over discs 37 Afspeelvolgorde van MP3 WMA AAC best...

Страница 182: ...assingen van dit systeem die niet nadrukkelijk zijn goedgekeurd door Sony kunnen het gebruiksrecht van de gebruiker teniet doen Controleer voordat u dit product gebruikt de uitzonderingen vanwege nationale vereisten of beperkingen met betrekking tot het gebruik van Bluetooth apparatuur Autorijden Controleer de wetgeving en de voorschriften met betrekking tot het gebruik van mobiele telefoons en ha...

Страница 183: ...eden kan worden gegarandeerd Vertrouw daarom voor belangrijke communicatie zoals medische noodgevallen niet alleen op elektronische apparaten Houd er rekening mee dat als u wilt bellen of gesprekken wilt ontvangen het handsfree apparaat en het elektronische apparaat dat is verbonden met het handsfree apparaat moeten zijn ingeschakeld in een servicegebied met voldoende mobiele ontvangst Noodoproepe...

Страница 184: ... Het voorpaneel verwijderen U kunt het voorpaneel van het systeem verwijderen om diefstal te voorkomen Waarschuwingstoon Wanneer u het contact in de stand OFF zet zonder het voorpaneel te verwijderen hoort u gedurende enkele seconden de waarschuwingstoon U hoort de waarschuwingstoon alleen als de ingebouwde versterker wordt gebruikt 1 Druk op OFF Het systeem wordt uitgeschakeld 2 Druk op OPEN Het ...

Страница 185: ...opening A van het voorpaneel op pin B van het systeem en druk de linkerzijde voorzichtig naar binnen Druk op SOURCE op het systeem of plaats een disc om het systeem te activeren Opmerking Plaats niets op de binnenkant van het voorpaneel ...

Страница 186: ...ACK toets pagina 14 23 33 34 Terugkeren naar het vorige scherm C SOURCE toets Inschakelen de bron wijzigen radio CD USB AUX Bluetooth audio Bluetooth telefoon 1 D ZAP toets pagina 15 De ZAPPIN stand openen E Regelknop selectie handsfree gesprek beëindigen toets Volume aanpassen draaien instelitems selecteren indrukken en draaien Bluetooth telefoon Het menu CALL openen een gesprek ontvangen beëindi...

Страница 187: ...albums blijven overslaan ingedrukt houden 5 DM Digitaal gecomprimeerd geluid zoals MP3 verbeteren Als u de DM functie wilt activeren stelt u on in Stel off in om de functie te annuleren 6 PAUSE Afspelen onderbreken Druk nogmaals op de toets om te annuleren Radio De opgeslagen zenders ontvangen indrukken zenders opslaan ingedrukt houden Bluetooth audioapparaat 2 1 REP pagina 32 2 SHUF pagina 32 3 4...

Страница 188: ...toets Het menu openen F LIST BROWSE toets De lijst openen radio de Quick BrowZer stand openen CD USB Bluetooth telefoon Het menu Phonebook Access openen G DSPL scherm PTY programmatype toets pagina 17 Schermitems wijzigen PTY in RDS selecteren H Cijfertoetsen pagina 25 28 Cijfers invoeren telefoonnummer toegangscode enzovoort Toetsen 1 tot en met 6 hebben dezelfde functies als de cijfertoetsen op ...

Страница 189: ...eren Q VOL volume toetsen Het volume aanpassen R toets pagina 28 In het geval dat een CD wisselaar wordt aangesloten wanneer er op SOURCE wordt gedrukt worden CD en het apparaatnummer weergegeven op het scherm Als er op MODE wordt gedrukt kunt u bovendien de wisselaar wijzigen Opmerking Als het systeem wordt uitgeschakeld en het scherm verdwijnt kan het systeem niet worden bediend met de kaartafst...

Страница 190: ...r items over te slaan Jump stand Wanneer er veel items in een categorie staan kunt u het gewenste item snel zoeken 1 Druk op SEEK in de Quick BrowZer stand Het volgende scherm wordt weergegeven A Huidig itemnummer B Totaalaantal items in de huidige laag C Itemnaam De itemnaam wordt weergegeven 2 Draai de regelknop om het gewenste item of een item in de buurt van het gewenste item te selecteren Er ...

Страница 191: ...den moet u de BTM functie geheugen voor beste afstemming gebruiken om ongelukken te vermijden Automatisch opslaan BTM 1 Druk herhaaldelijk op SOURCE tot TUNER wordt weergegeven Druk herhaaldelijk op MODE om de band te wijzigen U kunt FM1 FM2 FM3 MW of LW selecteren 2 Houd de selectietoets ingedrukt Het installatievenster wordt weergegeven 3 Draai de regelknop tot BTM wordt weergegeven en druk op d...

Страница 192: ...ensten Dit systeem biedt automatisch RDS diensten op de volgende manier Opmerkingen In bepaalde landen regio s zijn wellicht niet alle RDS functies beschikbaar RDS functioneert wellicht niet als het ontvangstsignaal zwak is of als de zender waarop u hebt afgestemd geen RDS gegevens verzendt AF en TA instellen 1 Druk herhaaldelijk op AF TA tot de gewenste instelling wordt weergegeven A B C D E AF a...

Страница 193: ...angst op een cijfertoets 1 tot en met 6 waaronder een lokale zender is opgeslagen 2 Druk binnen 5 seconden nogmaals op de cijfertoets van de lokale zender Herhaal dit tot de lokale zender wordt ontvangen PTY selecteren 1 Houd AF TA PTY ingedrukt tijdens FM ontvangst De naam van het huidige programmatype verschijnt als de zender PTY gegevens uitzendt 2 Draai de regelknop tot het gewenste programmat...

Страница 194: ...acknummer verstreken speelduur De informatie over een CD TEXT MP3 WMA AAC wordt weergegeven Tip De weergegeven items zijn afhankelijk van het disctype de opname indeling en de instellingen Herhaaldelijk en willekeurig afspelen 1 Druk tijdens het afspelen herhaaldelijk op 1 REP of 2 SHUF tot de gewenste instelling wordt weergegeven Bij het afspelen van een MP3 WMA AAC bestand Als u wilt terugkeren ...

Страница 195: ...at is aangesloten kunt u het afspelen starten door herhaaldelijk op SOURCE te drukken tot USB wordt weergegeven Druk op OFF om het afspelen te stoppen Het USB apparaat verwijderen 1 Stop het afspelen van het USB apparaat 2 Verwijder het USB apparaat Als u het USB apparaat verwijdert terwijl het wordt afgespeeld kunnen de gegevens op het USB apparaat worden beschadigd Opmerkingen Gebruik geen USB a...

Страница 196: ...het afspelen herhaaldelijk op 1 REP of 2 SHUF tot de gewenste instelling wordt weergegeven Na 3 seconden is de instelling voltooid Als u wilt terugkeren naar de normale weergavestand selecteert u Repeat off of Shuffle off iPod Zie Informatie over iPod op pagina 37 of ga naar de ondersteuningssite voor meer informatie over de compatibiliteit van de iPod In deze gebruiksaanwijzing wordt iPod gebruik...

Страница 197: ...l niet terwijl de iPod wordt afgespeeld anders kunnen de gegevens worden beschadigd Dit systeem kan geen iPod via een USB hub herkennen Tips Wanneer de contactsleutel in de ACC positie is gezet en het systeem is ingeschakeld wordt de iPod opgeladen Als de iPod wordt losgekoppeld tijdens het afspelen wordt NO Device op het scherm van het systeem weergegeven Hervattingsstand Als de iPod is aangeslot...

Страница 198: ...sagiersbediening uitschakelen Houd MODE ingedrukt Mode Audio wordt weergegeven en de weergavestand wordt gewijzigd in Resuming Mode Opmerkingen Het volume kan alleen worden aangepast op het systeem Als deze modus wordt geannuleerd wordt de instelling voor herhalen uitgeschakeld Actie Toets Overslaan 3 4 ALBUM één keer drukken voor elk item Blijven overslaan 3 4 ALBUM ingedrukt houden tot gewenst p...

Страница 199: ... selectietoets Afhankelijk van de instelling kunt u de regelknop nogmaals draaien om andere items in te stellen 3 Draai de regelknop om de instelling te selecteren en druk op de selectietoets Terugkeren naar het vorige scherm Druk op BACK Het menu Bluetooth Settings openen Druk op BT Het menu Bluetooth Settings Ondersteuningssite http support sony europe com Signal De uitvoer van het Bluetooth sig...

Страница 200: ... doen Een Bluetooth apparaat zoeken vanaf dit systeem Controleer vooraf of zoeken herkenbaar is ingesteld op het andere Bluetooth apparaat 1 Druk op BT Het menu Bluetooth Settings wordt weergegeven Auto Answer off een gesprek pas starten als er op handsfree is gedrukt Short een gesprek ongeveer 3 seconden na ontvangst automatisch starten Lang een gesprek ongeveer 10 seconden na ontvangst automatis...

Страница 201: ...f paswoord enzovoort worden genoemd afhankelijk van het apparaat Dit systeem zoeken vanaf een Bluetooth apparaat Controleer de Bluetooth instellingen Signal moet zijn ingesteld op on en Visibility op Show pagina 23 1 Stel het Bluetooth apparaat in om te zoeken naar dit systeem Een lijst met gevonden apparaten wordt weergegeven op het scherm van het te verbinden apparaat Dit systeem wordt weergegev...

Страница 202: ... is gemaakt begint u de bewerking vanaf dit punt Verbinding maken met een mobiele telefoon 1 Zorg dat dit systeem en de mobiele telefoon zijn overgeschakeld naar Bluetooth signaal ingeschakeld 2 Maak verbinding met dit systeem met de mobiele telefoon wordt weergegeven wanneer de verbinding is gemaakt Verbinding maken met geregistreerde apparaten 1 Druk op BT Het menu Bluetooth Settings wordt weerg...

Страница 203: ...teerd De verbinding verbreken Selecteer Audio Disconnect in stap 4 De registratie van een verbonden apparaat verwijderen Selecteer Delete in stap 4 Handsfree bellen Controleer vooraf of er verbinding is gemaakt tussen dit systeem en de mobiele telefoon Bellen U kunt dit systeem gebruiken om te bellen met de verbonden mobiele telefoon U kunt via dit systeem bellen vanuit het telefoonboek op een mob...

Страница 204: ...ijl de telefoon overgaat Ring Volume wordt weergegeven en het volume van de beltoon wordt ingesteld Het stemgeluid aanpassen Draai de regelknop terwijl de bron Bluetooth Phone is geselecteerd Talk Volume wordt weergegeven en het volume voor het stemgeluid wordt ingesteld DTMF tonen Dual Tone Multiple Frequency verzenden U kunt DTMF tonen verzenden Als u DTMF tonen wilt verzenden drukt u op de vere...

Страница 205: ...gegeven 3 Draai de regelknop tot het gewenste menu item wordt weergegeven en druk op de selectietoets Afhankelijk van de instelling kunt u de regelknop nogmaals draaien om andere items in te stellen Het menu Phonebook Access Als Security is ingesteld wordt Security Code weergegeven en is bediening niet mogelijk Opmerking Laat de mobiele telefoon in de stand bymodus staan Bellen vanuit het telefoon...

Страница 206: ...gegevens wilt annuleren moet u de mobiele telefoon bedienen De nummers uit de gespreksgeschiedenis opslaan 1 Druk op handsfree 2 Draai de regelknop om Recent Call te selecteren en druk op de selectietoets 3 Selecteer een naam en nummer in de gespreksgeschiedenis 4 Selecteer Save to PB 5 Voer een naam in U kunt maximaal 40 tekens invoeren De telefoonboek openen Phonebook Access PB Access is mogelij...

Страница 207: ...rkt deze functie mogelijk niet in bepaalde gevallen Lawaai zoals een lopende motor kunnen de geluidsherkenning verstoren Om de herkenning te verbeteren moet u de functie gebruiken bij omstandigheden met zo min mogelijk lawaai Spraakkeuze werkt mogelijk niet in bepaalde situaties afhankelijk van de effectiviteit van de herkenningsfunctie van de mobiele telefoon Raadpleeg de ondersteuningssite voor ...

Страница 208: ...len op het audioapparaat niet gestopt Tip U kunt een mobiele telefoon die ondersteuning biedt voor A2DP Advanced Audio Distribution Profile verbinden als audioapparaat en naar muziek luisteren Overige instellingen Bluetooth instellingen initialiseren U kunt alle Bluetooth instellingen initialiseren vanaf dit systeem 1 Druk op BT Het menu Bluetooth Settings wordt weergegeven 2 Draai de regelknop om...

Страница 209: ...100 Hz Mid 500 Hz of 1 0 kHz Hi 10 0 kHz of 12 5 kHz EQ3 Parametric Preset Een equalizercurve selecteren uit 7 muziektypen EQ3 Parametric Tune 1 Aangepaste equalizerinstellingen Subwoofer Tune LPF Phase De fase selecteren alleen effectief wanneer LPF is ingeschakeld Normal Reverse FREQ De kantelfrequentie van de subwoofer selecteren 80Hz 100Hz 120Hz 140Hz 160Hz OFF Level Het subwoofervolume aanpas...

Страница 210: ...ave ontvangststand Opmerkingen De weergegeven items zijn afhankelijk van de bron en de instelling Kan niet weergeven wanneer de bron Bluetooth Phone is geselecteerd De volgende items kunnen worden ingesteld volg de paginaverwijzing voor meer informatie Setup Instellen Display Scherm 60Hz MID HI 100Hz 500Hz 1 0kHz 10 0kHz 12 5kHz LOW 10dB 10dB 0dB Hz Q 1 0 1 5 2 0 1 0 1 5 2 0 dB Clock Adjust pagina...

Страница 211: ...ingangsniveau aan pagina 33 CD wisselaar De wisselaar selecteren 1 Druk herhaaldelijk op SOURCE tot CD wordt weergegeven 2 Druk herhaaldelijk op MODE tot de gewenste wisselaar wordt weergegeven Het afspelen wordt gestart Information De items weergeven afhankelijk van de bron enzovoort on off Dimmer De helderheid van het scherm wijzigen Auto het scherm automatisch dimmen wanneer u de lichten inscha...

Страница 212: ...aien Radio de opgeslagen zenders ontvangen indrukken en draaien VOL volume regelaar Dezelfde functie als de regelknop op het systeem draaien SEEK AMS regelaar Dezelfde functie als SEEK op het systeem draaien of draaien en vasthouden DSPL scherm toets De schermitems wijzigen De werkingsrichting wijzigen De werkingsrichting van de bedieningselementen is in de fabriek ingesteld zoals hieronder wordt ...

Страница 213: ...nden tracks en mappen 300 misschien minder dan 300 als de map bestandsnaam veel tekens bevat tekens die kunnen worden weergegeven voor de naam van een map bestand 32 Joliet 64 Romeo Als een disc met Multi Session meerdere sessies begint met een CD DA sessie wordt deze herkend als een CD DA disc en worden andere sessies niet afgespeeld Discs die NIET kunnen worden afgespeeld met dit systeem CD R s ...

Страница 214: ...t systeem binnen 10 meter van een draadloos LAN apparaat wordt gebruikt schakelt u het draadloze LAN apparaat uit Plaats dit systeem en het Bluetooth apparaat zo dicht mogelijk bij elkaar in de buurt Microgolven die afkomstig zijn van een Bluetooth apparaat kunnen van invloed zijn op de werking van elektronische medische apparaten Schakel dit systeem en andere Bluetooth apparaten uit op de volgend...

Страница 215: ...laar Als de zekering doorbrandt moet u de voedingsaansluiting controleren en de zekering vervangen Brandt de zekering vervolgens nogmaals door dan kan er sprake zijn van een defect in het systeem Raadpleeg in dat geval de dichtstbijzijnde Sony handelaar Aansluitingen schoonmaken De werking van het systeem kan worden verstoord als de aansluitingen tussen het systeem en het voorpaneel niet schoon zi...

Страница 216: ...g Aansluiting voor externe antenne Tussenfrequentie 25 kHz Gevoeligheid MW 26 µV LW 45 µV USB speler Interface USB Full speed Maximale voeding 500 mA Draadloze communicatie Communicatiesysteem Bluetooth norm versie 2 0 EDR Uitvoer Bluetooth norm klasse 2 Max 4 dBm Maximaal communicatiebereik Gezichtslijn ongeveer 10 m 1 Frequentieband 2 4 GHz band 2 4000 2 4835 GHz Modulatiemethode FHSS Compatibel...

Страница 217: ...ten gebruikt in de betreffende printplaat printplaten In het omhulsel werden geen halogeen bevattende brandvertragende producten gebruikt Als beschermings en opvulmateriaal werd er papier gebruikt Algemeen Het systeem wordt niet van stroom voorzien Controleer de aansluiting of de zekering Als het systeem wordt uitgeschakeld en het scherm verdwijnt kan het systeem niet worden bediend met de afstand...

Страница 218: ...ud DSPL SCRL ingedrukt Het geluid verspringt Het systeem is niet goed geïnstalleerd tInstalleer het systeem onder een hoek van minder dan 45 op een stabiele plaats in de auto Disc defect of vuil De bedieningstoetsen werken niet De disc wordt niet uitgeworpen Druk op de RESET toets pagina 7 Radio ontvangst De zenders kunnen niet worden ontvangen Het geluid is gestoord De aansluiting is niet juist t...

Страница 219: ...te manier verzonden tStel Ringtone in op Default pagina 24 Het volume van de spreker is te zacht Pas het volume aan bij Talk Volume De persoon waarmee u belt zegt dat het volume te laag of te hoog is Pas het volume aan met de functie voor het aanpassen van de microfoonsterkte pagina 24 Er treedt echo of ruis op in de telefoongesprekken Zet het volume zachter EC NC Mode is ingesteld op off tStel EC...

Страница 220: ...isc Het USB apparaat is niet automatisch herkend tSluit het opnieuw aan Druk op Z om de disc te verwijderen De inhoud van het telefoonboek is gewijzigd tijdens toegang tot een mobiele telefoon tVoer Phonebook Access opnieuw uit Error Please Initialize Bluetooth Setting Data Er is een fout met het geheugen opgetreden tOpen het menu Bluetooth Settings en selecteer Initialize Failure De luidsprekers ...

Страница 221: ...e bron met SOURCE tDit geeft aan dat het USB apparaat buiten gebruik is of dat een apparaat is aangesloten dat niet wordt ondersteund Push Reset De CD speler de CD wisselaar of het USB apparaat kan niet worden bediend vanwege een probleem tDruk op de RESET toets pagina 7 Read Alle track en albuminformatie op de disc wordt gelezen tWacht totdat het lezen is voltooid en het afspelen automatisch word...

Страница 222: ......

Страница 223: ......

Страница 224: ... Bedienungsanleitung heraus falls Sie diese im Fahrzeug aufbewahren möchten Bitte bewahren Sie den Geräte Pass an einem sicheren Ort auf Er kann im Falle eines Diebstahls zur ldentifikation lhres Eigentums dienen caraudio Geräte Pass Dieser Geräte Pass dient als Eigentumsnachweis für Ihr caraudio Gerät im Falle eines Diebstahls Wir empfehlen den Geräte Pass nicht im Fahrzeug aufzubewahren um Missb...

Отзывы: