


A
d
mini
s
tra
ting
t
he
Came
ra
Setting the Operations from the Viewer — Trigger Menu
90
Voice alert
To use the voice alert function linked with the sensor
input or the detection functions, select
On
.
Repeat
Select playback repeat time from
1
to
3
.
Alarm
Select the alarm to be linked with the voice alert
function.
Sensor input 1:
The external sensor that is connected to
sensor input of camera I/O port.
Camera tampering detection:
An alarm that is
triggered if the camera detects tampering, such as
direction shifting or spray.
VMF:
An alarm of the VMF detection function.
Motion detection:
The alarm detected by the motion
detection function.
Click
Detection
to display Motion detection menu to
allow you to set the motion detection function
(page 93).
Audio detection:
Click
Detection
, and the audio
detection menu is displayed to allow you to set the
audio detection function (page 93).
Notes
• If voice alert is actively linked with a different alarm
type while another voice alert is occurring, the first
voice alert is cancelled and the second one is output.
• If two or three audio files are set to be output
simultaneously linked with the same alarm type,
priority is given in the order
Voice alert 1
,
2
then
3
.
• Audio detection alarm is off during the playback of
audio files.
Effective period
Set the period during which alarm detection is effective.
Always:
Alarm detection is always effective.
Schedule:
You can specify the period during which
alarm detection is effective.
Click
Schedule
, and the menu for the effective
period is displayed. (“Setting the Schedule —
Schedule Menu” on page 92)
OK/Cancel
See “Buttons common to every menu” on page 33.
Setting the Operations
from the Viewer
— Trigger
Menu
Click
in the Administrator menu to display the
Trigger menu.
This allows you to select the activities that can be
performed when the button on the Trigger panel is
clicked on the main viewer.
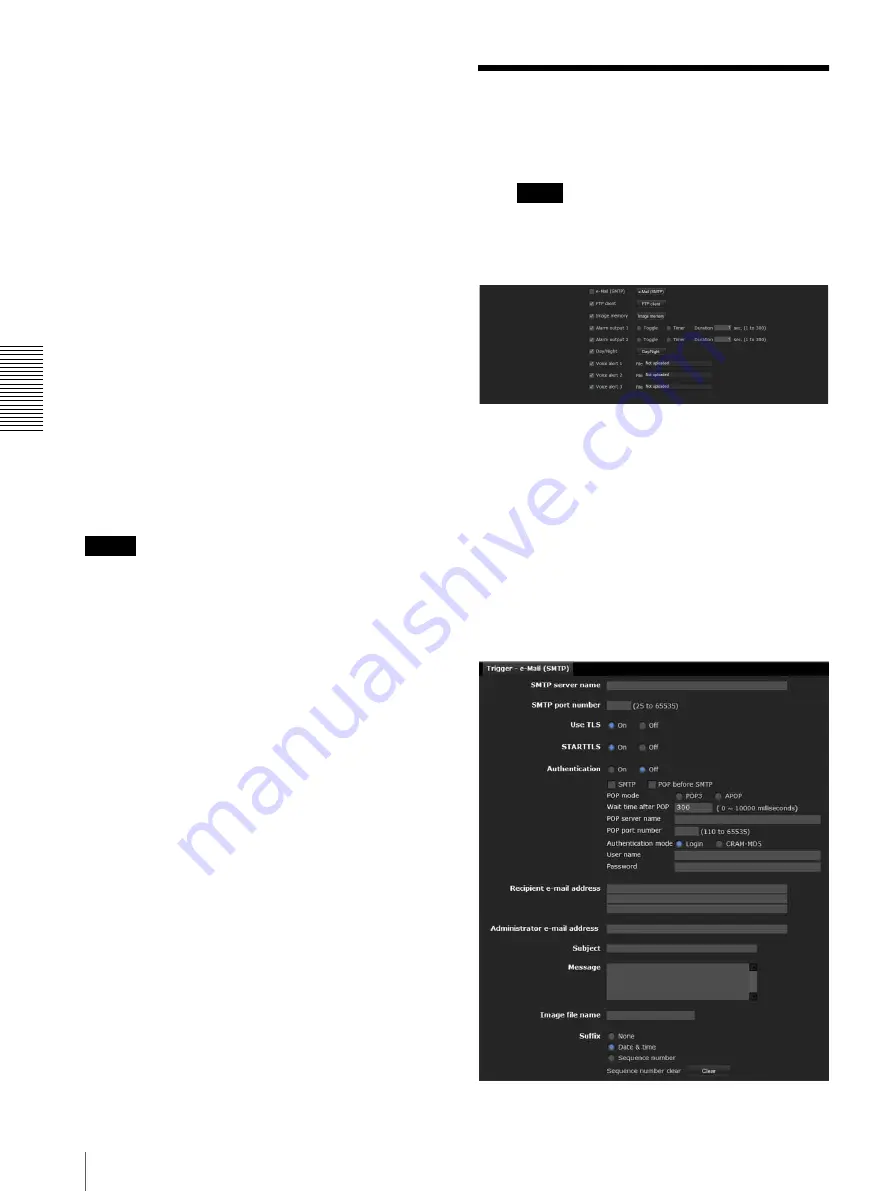
e-Mail (SMTP)
Checking this box allows you to select
e-Mail (SMTP)
on the Trigger panel in the main viewer.
By clicking
e-Mail (SMTP)
a still image of the moment
you click is captured, and your e-mail with the image file
attached is sent to the specified mail address.
When you click
e-Mail (SMTP)
, the
Trigger-e-Mail
(SMTP)
menu is displayed. You can set the necessary
options here. The setting options and setting procedures
are the same as those of the e-Mail (SMTP) menu
(page 75).
Trigger


