52
Note
You may not be able to retrieve metadata from some files. And, since
WAV files do not contain metadata, their file information will not be
displayed on the server. If necessary, edit the metadata on the server
◆
Supported file formats
The software supports WAV, MP3, AAC, WMA and ATRAC
formats. To transfer these files, the software converts them to the
formats supported by the server as follows:
– WAV files are converted according to the setting on the
software, either LPCM or MP3.
– AAC, WMA, and ATRAC files are converted only to MP3.
– MP3 files are transferred without being converted.
The server supports the following LPCM and MP3 format files:
• LPCM
– Sampling rates: 44.1 kHz
– Content audio channel modes: Stereo (2ch)
– Quantization: 16 bit
• MP3
– Sampling rates: 32 kHz, 44.1 kHz, 48 kHz
– Content audio channel modes: Stereo (2ch), Mono (1ch)
– Bit rates: 32 Kbps, 40 Kbps, 48 Kbps, 56 Kbps, 64 Kbps, 80
Kbps, 96 Kbps, 112 Kbps, 128 Kbps, 160 Kbps, 192 Kbps, 224
Kbps, 256 Kbps, 320 Kbps
– Encoding types: Constant Bit Rate (CBR), Variable Bit Rate
(VBR)
Notes
• You can convert to LPCM only from WAV files of stereo, 44.1 kHz,
and 16 bit. Other format files and WAV files that do not meet these
specifications need conversion to MP3.
• Copy-protected music files are not transferable.
To set the source folder
When the software is opened for the first time, you will be asked
to select a source folder, and whether you want to register its
files.
1
In the pop-up window, check the default folder.
• If the pop-up window does not appear (from the second
time), click [Sync Settings] on the “File” menu.
• Proceed to step 4 when using the default folder.
2
Erase the current folder setting by clicking
[Delete].
3
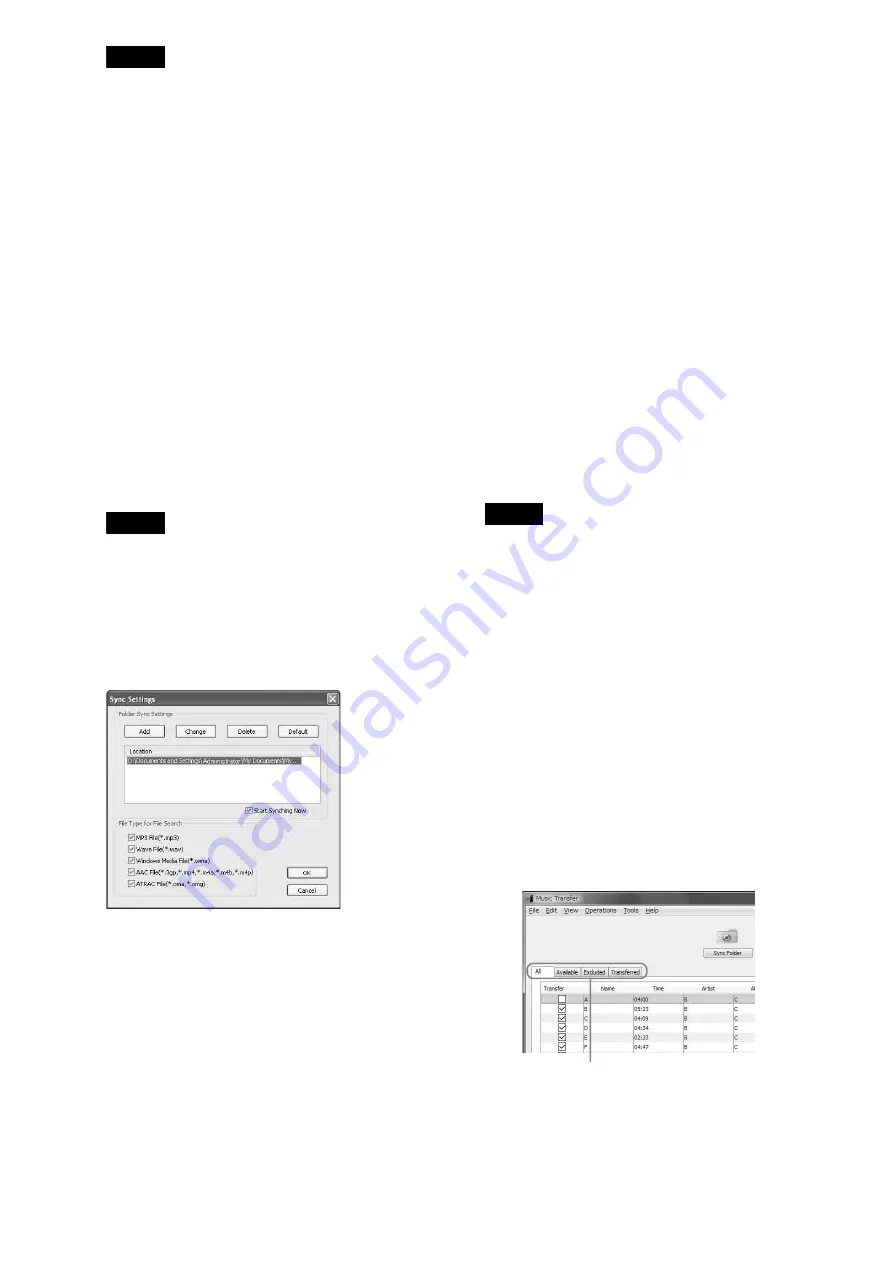
Click [Add] and select a folder.
Also, check if other file search settings are
appropriate.
4
Click [Start Synching Now] (checked by default).
When this is checked, all files within the folder will
be registered to the database when you click [OK] in
step 6.
5
Click [OK].
When you want to sync the database with the
source folder
Clicking the [Sync Folder] button on the main window is the
simplest way.
Follow the steps below only if you need to check or change
settings (e.g., source folder or target file format).
1
On the “File” menu, click [Sync Settings].
2
In the pop-up window, check if the other file
search settings are appropriate.
Change the folder if necessary.
3
Click [OK] on the pop-up window.
To search for a folder
1
On the “File” menu, click [Folder Sync].
The pop-up window appears.
2
Select a folder whose contents you want to
register and click [OK].
z
Hints
• To register a single file, directly drag and drop the file on the main
window. Or click [File Sync] on the “File” menu, select a file and click
[Open].
• In “File Type for File Search,” you can select to search for WAV
(.wav), MP3 (.mp3), WMA (.wma), AAC (.3gp, .mp4, .m4a, .m4b,
.m4p), or ATRAC (.oma, .omg) files, and register them to the database.
Note
The music files will not be registered if the format is not selected in “File
Type for File Search”.
To erase files from the database
The original data remains on the PC. The database saves or
erases the file's path and the metadata only.
1
Click the files to erase in the main window.
To select multiple files, click files while pressing
SHIFT.
2
On the “Edit” menu, click [Erase].
z
Hints
• You can select [Erase], [Select All], [Clear All] by right-clicking.
• To cancel all registrations, click [Initialize Database] on the “Tools”
menu.
To transfer music files
1
On the “All” or “Available” tab sheet, select the
files you want to transfer by clicking on the check
box.
2
Click the [Transfer] button, or click [Transfer] on
the “Operations” menu.
Tabs
Содержание HES-V1000 - Home Entertainment Server
Страница 17: ...17 ...
Страница 31: ...31 Getting Started ...
Страница 37: ...37 Inserting Removing Discs and Memory Cards ...
Страница 107: ...107 Various Connections ...
Страница 125: ...125 Changing the Server Settings ...


