background image

ES

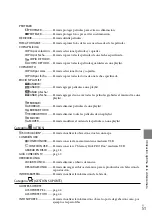
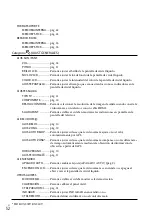
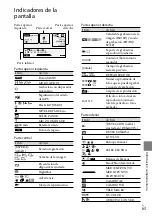
Indicador

Significado

Botón OPTION
Botón VISUALIZAR 

IMÁGENES
Botón de presentación de 

diapositivas
Botón  SU UBICACIÓN

 101-0005

Nombre del archivo de 

datos

Imagen protegida
Botón de índice

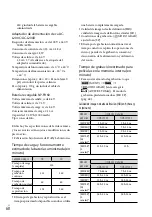
Los indicadores y sus posiciones son 

aproximados y pueden variar respecto de su 

apariencia real.

En función del modelo de la videocámara, 

puede que algunos indicadores no aparezcan.

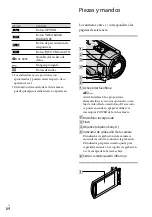
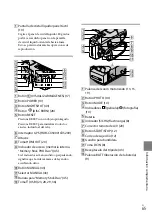
Piezas y mandos

Los números entre ( ) corresponden a las 

páginas de referencia.

 Active Interface Shoe


Active Interface Shoe proporciona 

alimentación a accesorios opcionales como 

luz de video, flash o micrófono. El accesorio 

se puede encender o apagar al utilizar el 

interruptor POWER de la videocámara.

 Micrófono incorporado

 Flash

 Objetivo (objetivo Sony G)

 Indicador de grabación de la cámara

El indicador de grabación de la cámara se 

enciende de color rojo durante la grabación. 

El indicador parpadea cuando queda poca 

capacidad restante en el soporte de grabación 

o si la energía de la batería es baja.

 Sensor remoto/puerto infrarrojo

Содержание Handycam HD-CX520

Страница 1: ...is product and answers to frequently asked questions can be found at our Customer Support Website http www sony net Printed on 70 or more recycled paper using VOC Volatile Organic Compound free vegetable oil based ink Printed in Japan Operating Guide US Guía de operaciones ES HDR CX500 CX500V CX520 CX520V ...

Страница 2: ...d do not expose the unit to rain or moisture Do not expose the batteries to excessive heat such as sunshine fire or the like This symbol is intended to alert the user to the presence of uninsulated dangerous voltage within the product s enclosure that may be of sufficient magnitude to constitute a risk of electric shock to persons This symbol is intended to alert the user to the presence of import...

Страница 3: ...et consult an electrician for replacement of the obsolete outlet Protect the power cord from being walked on or pinched particularly at plugs convenience receptacles and the point where they exit from the apparatus Only use attachments accessories specified by the manufacturer Use only with the cart stand tripod bracket or table specified by the manufacturer or sold with the apparatus When a cart ...

Страница 4: ... 1 15P plug rated for 125 V 15 A Europe Countries regions Voltage Frequency Hz Plug type Austria 230 50 C Belgium 230 50 C Czech 220 50 C Denmark 230 50 C Finland 230 50 C France 230 50 C Germany 230 50 C Greece 220 50 C Hungary 220 50 C Iceland 230 50 C Ireland 230 50 C BF Italy 220 50 C Luxemburg 230 50 C Netherlands 230 50 C Norway 230 50 C Poland 220 50 C Portugal 230 50 C Romania 220 50 C Rus...

Страница 5: ...60 A Jamaica 110 50 A Mexico 120 127 60 A Nicaragua 120 240 60 A Panama 110 220 60 A South America Countries regions Voltage Frequency Hz Plug type Argentina 220 50 C BF O Brazil 127 220 60 A C Chile 220 50 C Colombia 120 60 A Peru 220 60 A C Venezuela 120 60 A Middle East Countries regions Voltage Frequency Hz Plug type Iran 220 50 C BF Iraq 220 50 C BF Israel 230 50 C Saudi Arabia 127 220 50 A C...

Страница 6: ... not use the AC Adaptor placed in a narrow space such as between a wall and furniture Use the nearby wall outlet wall socket when using the AC Adaptor Disconnect the AC Adaptor from the wall outlet wall socket immediately if any malfunction occurs while using your camcorder Even if your camcorder is turned off AC power source mains is still supplied to it while connected to the wall outlet wall so...

Страница 7: ... equipment has been tested and found to comply with the limits for a Class B digital device pursuant to Part 15 of the FCC Rules These limits are designed to provide reasonable protection against harmful interference in a residential installation This equipment generates uses and can radiate radio frequency energy and if not installed and used in accordance with the instructions may cause harmful ...

Страница 8: ... result in a malfunction of the camcorder Even if the camcorder is turned off the GPS function is working as long as the GPS switch is set to ON Make sure that the GPS switch is set to OFF during take off and landing of an airplane HDR CX500V CX520V If you repeat recording deleting images for a long time fragmentation of data occurs on the recording media Images cannot be saved or recorded In such...

Страница 9: ...uality high definition This camcorder captures high definition footage in the AVCHD format DVD media containing AVCHD footage should not be used with DVD based players or recorders as the DVD player recorder may fail to eject the media and may erase its contents without warning DVD media containing AVCHD footage may be played on a compatible Blu ray Disc player recorder or other compatible device ...

Страница 10: ...os on a connected TV p 25 Saving movies and photos on a disc Saving movies and photos with a computer p 27 You can create a disc with either high definition image quality HD or standard definition image quality SD from high definition image quality HD movies imported to the computer See page 30 on the characteristics of each type of disc Creating a disc with a DVD writer or a recorder p 38 Deletin...

Страница 11: ...photos with a computer Preparing a computer Windows 27 When using a Macintosh 28 Selecting the method for creating a disc computer 30 Creating a disc with one touch One Touch Disc Burn 32 Importing movies and photos to a computer Easy PC Back up 33 Changing the destination drive or folder for movies and photos 33 Starting PMB Picture Motion Browser 34 Creating a high definition image quality HD di...

Страница 12: ...SD disc with a recorder etc 43 Making good use of your camcorder Deleting movies and photos 45 Adjusting for shooting conditions 46 Changing the recording media 47 To check the recording media settings 47 Dubbing or copying movies and photos from the internal memory to Memory Stick PRO Duo media 48 Customizing your camcorder with menus 49 Getting detailed information from the Handycam Handbook 56 ...

Страница 13: ...tion of the arrow until it clicks 3 Connect the AC Adaptor and the power cord mains lead to your camcorder and the wall outlet wall socket Align the mark on the DC plug with that on the DC IN jack The CHG flash charge lamp lights up and charging starts The CHG flash charge lamp turns off when the battery pack is fully charged 4 When the battery is charged disconnect the AC Adaptor from the DC IN j...

Страница 14: ...e lamp flashes during charging under the following conditions The battery pack is not attached correctly The battery pack is damaged The temperature of the battery pack is low Remove the battery pack from your camcorder and put it in a warm place The temperature of the battery pack is high Remove the battery pack from your camcorder and put it in a cool place Do not short circuit the DC plug of th...

Страница 15: ...m is not on the screen touch until the item appears 3 Set DST SET or SUMMERTIME date and time then touch The clock starts If you set DST SET or SUMMERTIME to ON the clock advances 1 hour The date and time does not appear during recording but they are automatically recorded on the recording media and can be displayed during playback To display the date and time touch MENU PLAYBACK SET under PLAYBAC...

Страница 16: ...OCK ADJ and AUTO AREA ADJ to OFF HDR CX500V CX520V To turn off the power Close the LCD screen The Movie lamp flashes for a few seconds and the power is turned off You can turn off your camcorder also by pressing POWER When POWER ON BY LCD p 55 is set to OFF turn off your camcorder by pressing POWER Changing the language setting You can change the on screen displays to show messages in a specified ...

Страница 17: ... HD on the internal memory p 47 52 Fasten the grip belt Open the LCD screen of your camcorder The lens cover is opened and your camcorder is turned on To turn on your camcorder when the LCD screen is already open press POWER Press START STOP to start recording You can start recording also by touching on the LCD screen POWER button ...

Страница 18: ...the LCD If you close the LCD screen while recording movies the camcorder stops recording See page 62 on the recordable time of movies The maximum continuous recordable time of movies is about 13 hours When a movie file exceeds 2 GB the next movie file is created automatically You can change the recording media and the image quality p 47 52 You can change the recording mode of movies p 52 STEADYSHO...

Страница 19: ...ing level by using the digital zoom Set the zooming level by touching MENU OTHER REC SET under SHOOTING SET category DIGITAL ZOOM a desired setting When viewing movies on an x v Color compliant TV record movies with the x v Color function Touch MENU OTHER REC SET under SHOOTING SET category X V COLOR ON Some settings may be required on a TV to view the movies Refer to the instruction manuals of th...

Страница 20: ...h MENU IMAGE SIZE under PHOTO SETTINGS category a desired setting You can record photos also during movie recording by pressing PHOTO The image size is 8 3M when recording high definition image quality HD movies Your camcorder flashes automatically when there is insufficient ambient light The flash does not work during movie recording You can change how your camcorder flashes by touching MENU FLAS...

Страница 21: ... information from the GPS satellites Acquiring the location information enables you to use functions such as the Map Index The indicator changes according to the strength of GPS signal reception Make sure that the GPS switch is set to OFF during take off and landing of an airplane Built in map is powered by companies as follows Map of Japan by ZENRIN CO LTD other areas by NAVTEQ ...

Страница 22: ...press POWER p 15 Press VIEW IMAGES The VISUAL INDEX screen appears after some seconds You can display the VISUAL INDEX screen also by touching VIEW IMAGES on the LCD screen Touch or a desired movie Switches operating button display To MENU screen Displays the screen to select the index type DATE INDEX MAP HDR CX500V CX520V FILM ROLL FACE p 53 Displays high definition image quality HD movies Displa...

Страница 23: ...es slowly As you repeat touching during playback movies are played as fast as about 5 times about 10 times about 30 times about 60 times You can display the VISUAL INDEX by touching MENU VISUAL INDEX under PLAYBACK category The recording date time and shooting conditions and coordinates HDR CX500V CX520V are recorded automatically during recording This information is not displayed during recording...

Страница 24: ...ot displayed when PHOTO MEDIA SET p 47 is set to MEMORY STICK 2 appears when the standard definition image quality SD movie is selected with SET p 52 3 is displayed when is touched Your camcorder displays the selected photo You can zoom in the photo by moving the power zoom lever while viewing photos PB ZOOM If you touch a point in the PB ZOOM frame the point comes to the center in the frame When ...

Страница 25: ...amcorder and touch MENU TV CONNECT Guide under OTHERS category on the LCD screen Use the supplied AC Adaptor as the power source p 14 Connect your camcorder and TV referring to TV CONNECT Guide When the A V connecting cable is used to output movies movies are output with standard definition image quality SD Play back movies and photos on your camcorder p 22 Make the required output settings on you...

Страница 26: ...tible with the Photo TV HD standard Photo TV HD allows for highly detailed photo like depiction of subtle textures and colors By connecting Sony s Photo TV HD compatible devices using an HDMI cable or the component A V cable a whole new world of photos can be enjoyed in breathtaking full HD quality The TV will automatically switch to the appropriate mode when displaying photos Setup of the TV will...

Страница 27: ... or faster or Intel Core 2 Duo 1 66 GHz or faster is recommended However Intel Pentium III 1 GHz or faster is sufficient for the following operations Importing the movies and photos to the computer One Touch Disc Burn Creating an Blu ray disc AVCHD format disc DVD video Intel Pentium 4 2 8 GHz or faster is required when creating a DVD video by converting high definition image quality HD to standar...

Страница 28: ...r from the lower to the higher If the version number of the previously installed PMB is higher than that of the PMB of your camcorder uninstall PMB from the computer and then re install it in order from lower to higher If you install a higher version of PMB first some functions may not work correctly See page 56 on the Handycam Handbook Confirm that your camcorder is not connected to the computer ...

Страница 29: ...llow the instructions to install the required software Restart the computer if required to complete the installation When the installation is completed following icons will appear Remove the CD ROM from your computer Other icons may appear No icon may appear depending on the installation procedure The Handycam Handbook is not installed in this procedure p 56 To disconnect your camcorder from the c...

Страница 30: ...eating a AVCHD format disc with high definition image quality HD p 34 HD Ordinary DVD playback devices a DVD player a computer that can play DVDs etc Importing movies and photos to a computer Easy PC Back up p 33 Creating a standard definition image quality SD disc p 36 SD To create a Blu ray disc the BD Add on Software for PMB must be installed p 35 Characteristics of each type of disc Using a Bl...

Страница 31: ... US Disc type Features DVD R DVD R DVD R DL Unrewritable DVD RW DVD RW Rewritable Always maintain your PLAYSTATION 3 to use the latest version of the PLAYSTATION 3 system software The PLAYSTATION 3 may not be available in some countries regions ...

Страница 32: ...on image quality HD movies import movies to a computer first p 33 and then create a standard definition image quality SD disc p 36 Install PMB beforehand p 28 however do not start PMB Connect your camcorder to the wall outlet wall socket using the AC Adaptor supplied for this operation p 14 With One Touch Disc Burn function on your camcorder you can save movies and photos recorded on the internal ...

Страница 33: ...es and photos are imported to your computer When the operation is completed the PMB screen appears When the operation is completed a screen to indicate that movies are being analyzed may appear It may take a long time to analyze movies In the meantime you can operate PMB You can create either high definition image quality HD discs Blu ray disc AVCHD format disc p 34 or standard definition image qu...

Страница 34: ...B You may start PMB also by clicking Start All Programs Sony Picture Utility PMB 3 Click Folders or Calendar on the left side in the window and select the folder or date then select the high definition image quality HD movies High definition image quality HD movies are marked with You cannot save photos on a disc To select plural movies hold the Ctrl key down and click thumbnails Starting PMB Pict...

Страница 35: ...ed smoothly depending on the computer environment Creating a Blu ray disc You can create a Blu ray disc with a high definition image quality HD movie previously imported to a computer p 33 To create a Blu ray disc the BD Add on Software for PMB must be installed Click BD Add on Software on the installation screen of PMB and install this plug in according to the on screen instructions Connect your ...

Страница 36: ...ty PMB 3 Click Folders or Calendar on the left side in the window and select the folder or date then select the movies and photos High definition image quality HD movies are marked with To select plural movies and photos hold the Ctrl key down and click thumbnails 4 At the top of the window click Manipulate DVD Video SD Creation The window used to select movies and photos appears To add movies and...

Страница 37: ...B select the movie you want to edit then click Manipulate Video Trimming on the menu to display the Video Trimming window See PMB Guide on the operation p 34 Capturing photos from a movie You can save a frame of a movie as a photo file On the movie playback window of PMB click to display Save Frame windows See PMB Guide on the operation p 34 Click ...

Страница 38: ...d disc type AVCHD format playback devices a Sony Blu ray disc player PLAYSTATION 3 etc Creating a high definition HD image quality disc with DVD writer DVDirect Express p 39 Creating a high definition HD image quality disc with a DVD writer etc other than DVDirect Express p 42 HD Ordinary DVD playback devices a DVD player a computer that can play DVDs etc Creating a standard definition SD image qu...

Страница 39: ...VD writer The EXTERNAL DRIVE screen appears on the camcorder screen Use the supplied AC Adaptor as the power source p 14 When using battery power the DVD writer does not work When there are unsaved high definition HD and standard definition SD image quality movies they will be saved on individual discs according to image quality 2 Insert an unused disc into the DVD writer and close the disc tray T...

Страница 40: ...rd definition image quality SD Touch YES on the camcorder screen The disc tray on the DVD writer opens after creating the disc Remove the disc from the DVD writer and close the disc tray To create another disc of the same contents insert a new disc and touch CREATE SAME DISC After the operation is completed touch EXIT END on the camcorder screen Close the disc tray on the DVD writer and disconnect...

Страница 41: ...high definition image quality HD disc that you created should not be used in DVD players recorders Because DVD players recorders are not compatible with the AVCHD format DVD players recorders may fail to eject the disc If the total memory size of movies to be burnt by the DISC BURN operation exceeds that of the disc disc creation stops when the limit is reached The last movie on the disc may be cu...

Страница 42: ...able supplied The USB SELECT screen appears on the camcorder screen 2 Touch USB CONNECT when movies are recorded on the internal memory or USB CONNECT when movies are recorded on a Memory Stick PRO Duo media on the camcorder screen 3 Record movies on the connected device For details refer to the instruction manuals supplied with the device to be connected 4 After the operation is completed touch E...

Страница 43: ...Connect the A V connecting cable to the input jack of another device A V connecting cable with S VIDEO sold separately When connecting to another device via the S VIDEO jack by using an A V connecting cable with an S VIDEO cable sold separately higher quality images can be produced than with an A V connecting cable Connect the white and red plug left right audio and the S VIDEO plug S VIDEO channe...

Страница 44: ...TINGS under GENERAL SET category DISP OUTPUT LCD PANEL the default setting To record the date time coordinates HDR CX500V CX520V or camera settings data touch MENU PLAYBACK SET under PLAYBACK category DATA CODE a desired setting In addition touch MENU OUTPUT SETTINGS under GENERAL SET category DISP OUTPUT V OUT PANEL When the screen size of display devices TV etc is 4 3 touch MENU OUTPUT SETTINGS ...

Страница 45: ...YES To delete all photos at one time In step 2 touch DELETE DELETE ALL YES YES Formatting the recording media Formatting deletes all the movies and photos to recover recordable free space Connect your camcorder to the wall outlet wall socket using the AC Adaptor supplied for this operation p 14 To avoid the loss of important images you should save them p 27 before formatting the recording media Pr...

Страница 46: ...the default setting to the MANUAL dial How to use the MANUAL dial Press MANUAL to switch to manual operation mode and rotate the dial to make the adjustment Pressing MANUAL switches the operation mode between manual and automatic To assign a menu item Press and hold MANUAL for a few seconds to display the DIAL SETTING screen Rotate the MANUAL dial to assign an item You can assign FOCUS EXPOSURE AE...

Страница 47: ...d Selecting the media for photos Touch MENU MEDIA SETTINGS under MANAGE MEDIA category PHOTO MEDIA SET The PHOTO MEDIA SET screen appears Touch the desired recording medium Touch YES The recording medium is changed To check the recording media settings Light up the Movie lamp to check the recording medium used for movies or the Photo lamp for photos The media icon is displayed at the top right cor...

Страница 48: ...y Stick Duo media slot or image data may be damaged Touch YES To record only photos on Memory Stick PRO Duo media touch NO If Failed to create a new Image Database File It may be possible that there is not enough free space is displayed in step 2 format the Memory Stick PRO Duo media p 45 To eject the Memory Stick PRO Duo media Open the Memory Stick Duo media jack cover and lightly push the Memory...

Страница 49: ...amcorder recording movie photo or playback Touch the menu item to be changed After changing the setting touch To register your favorite menu items to MY MENU In step 3 of Using MY MENU touch MY MENU SETTING Touch the MY MENU type you want to change MOVIE Change the MY MENU for movie recording PHOTO Change the MY MENU for photo recording PLAYBACK Change the MY MENU for playback Touch the item to be...

Страница 50: ...ory to category Displays and You may not be able to set some menu items depending on the recording or playback conditions Grayed out menu items or settings are not available You can touch or and drag on the screen to scroll the list of the menu After changing the setting touch To return to the previous screen touch Depending on the menu items being changed your camcorder switches between playback ...

Страница 51: ...g After completing the setting touch Grayed out menu items or settings are not available When the item you want is not on the screen touch another tab There may be no tab The tabs and items that appear on the screen depend on the recording playback status of your camcorder at the time OPTION Menu item Tab ...

Страница 52: ...DEFRAME Displays the frame to make sure the subject is horizontal or vertical STEADYSHOT Sets the SteadyShot function when recording movies CONVERSION LENS Optimizes the SteadyShot function and focus according to the attached lens LOW LUX Records bright color images in the dim FACE DETECTION Adjusts the image quality of the face s automatically PRIORITY SETTING Select the subject that has priority...

Страница 53: ... the face scenes PLAYLIST Displays and plays the playlist of movies HIGHLIGHT Selects a number of short scenes and plays them back together as a digest of your movies with music and visual effects SCENARIO Plays the favorite scenario saved in Highlight Playback PLAYBACK SET SET Sets image quality for recording playback or editing movies DATA CODE Displays the detailed recording data during playbac...

Страница 54: ...a via USB DISC BURN p 32 TV CONNECT Guide p 25 MUSIC TOOL EMPTY MUSIC Deletes music files DOWNLOAD MUSIC Download music files that can be played with Highlight Playback BATTERY INFO Displays the battery information MANAGE MEDIA category MEDIA SETTINGS MOVIE MEDIA SET p 47 PHOTO MEDIA SET p 47 MEDIA INFO Displays information on the recording media such as free space MEDIA FORMAT INT MEMORY p 45 MEM...

Страница 55: ...UTO AREA ADJ Sets whether the camcorder compensates for a time differences automatically by acquiring the current location information from GPS or not DST SET SUMMERTIME p 15 LANGUAGE SET p 16 POWER SETTINGS A SHUT OFF Changes the A SHUT OFF setting p 14 POWER ON BY LCD Sets whether or not the camcorder is turned on and off when you open and close the LCD screen OTHER SETTINGS DEMO MODE Sets wheth...

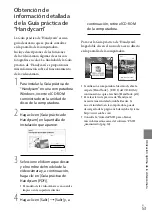
Страница 56: ...screen displayed click Handycam Handbook 3 Select the desired language and the model name of your camcorder then click Handycam Handbook PDF The model name of your camcorder is printed on its bottom surface 4 Click Exit Exit then remove the CD ROM from your computer To view the Handycam Handbook double click the short cut icon on the computer screen When using a Macintosh open the Handbook US fold...

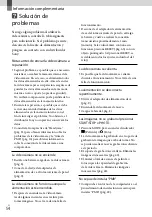
Страница 57: ... to be ready to shoot after the power is turned on This is not a malfunction Disconnect the AC Adaptor from the wall outlet wall socket or remove the battery pack then reconnect it after about 1 minute If your camcorder still does not work press RESET p 66 using a pointed object If you press RESET all settings including the clock setting are reset Your camcorder gets warm Your camcorder may become...

Страница 58: ...ature is high Change the battery pack or place it in a cool place No Memory Stick PRO Duo media is inserted p 47 When the indicator flashes there is not enough free space for recording images Delete unnecessary images p 45 or format the Memory Stick PRO Duo media p 45 after storing the images on other media The Image Database File is damaged Check the data base file by touching MENU REPAIR IMG DB ...

Страница 59: ...our camcorder Do not wrap your camcorder with a towel for example and operate it Doing so might cause heat to build up inside When disconnecting the power cord mains lead pull it by the plug and not the cord lead Do not damage the power cord mains lead such as by placing anything heavy on it Do not use a deformed or damaged battery pack Keep metal contacts clean If the battery electrolytic liquid ...

Страница 60: ... perform DELETE ALL DELETE ALL DELETE ALL or MEDIA FORMAT or formatting the media of the camcorder you may not delete data from the media completely When you transfer the camcorder it is recommended that you perform EMPTY See Getting detailed information from the Handycam Handbook on page 56 to prevent the recovery of your data Also when you dispose of the camcorder it is recommended that you dest...

Страница 61: ...6 9 For photos 38 456 mm 1 1 2 18 in 4 3 Color temperature AUTO ONE PUSH INDOOR 3 200 K OUTDOOR 5 800 K Minimum illumination 11 lx lux in default setting shutter speed 1 60 second 3 lx lux LOW LUX is set to ON shutter speed 1 30 second 0 lx lux NIGHTSHOT is set to on The unique pixel array of Sony s ClearVid and the image processing system BIONZ allow still image resolution equivalent to the sizes...

Страница 62: ...g and playback time is approximate time available using a fully charged battery pack High definition image quality HD Standard definition image quality SD Recording condition REC MODE is set to SP Typical recording time shows the time when you repeat recording start stop turning the power on off and zooming Expected recording time of movies in the internal memory in minute To set the recording mod...

Страница 63: ...ory Stick Duo Memory Stick PRO Duo Memory Stick PRO HG Duo MagicGate MagicGate Memory Stick and MagicGate Memory Stick Duo are trademarks or registered trademarks of Sony Corporation InfoLITHIUM is a trademark of Sony Corporation x v Color is a trademark of Sony Corporation BIONZ is a trademark of Sony Corporation BRAVIA is a trademark of Sony Corporation DVDirect is a trademark of Sony Corporatio...

Страница 64: ...n button Center Indicator Meaning STBY REC Recording status Photo size Slide show set NightShot Warning Playback mode Upper right Indicator Meaning Recording image quality HD SD and recording mode FH HQ SP LP Recording playback editing media be the trademarks or registered trademarks of their respective companies Furthermore and are not mentioned in each case in this manual Upper left Center Upper...

Страница 65: ...icator Meaning FACE DETECTION set to OFF SMILE DETECTION LOW LUX Manual focus SCENE SELECTION White balance SteadyShot off SPOT MTR FCS SPOT METER EXPOSURE AE SHIFT WB SHIFT TELE MACRO X V COLOR CONVERSION LENS OPTION button VIEW IMAGES button Slide show button YOUR LOCATION button 101 0005 Data file name Protected image Indicator Meaning Index button Indicators and their positions are approximate...

Страница 66: ...46 Memory Stick Duo media slot 48 USB jack 28 32 33 39 Parts and controls Figures in are reference pages Active Interface Shoe The Active Interface Shoe supplies power to optional accessories such as a video light a flash or a microphone The accessory can be turned on or off as you operate the POWER switch on your camcorder Built in microphone Flash Lens Sony G lens Camera recording lamp The camer...

Страница 67: ... 18 20 24 PHOTO button 19 MODE button 15 movie Photo lamps 15 Battery pack CHG flash charge lamp 13 A V Remote Connector 25 START STOP button 17 Grip belt 17 Hook for a shoulder belt DC IN jack 13 Tripod receptacle 46 BATT battery release lever 14 ...

Страница 68: ...tware 28 Specifications 61 Supplied items 7 T Tripod 46 Troubleshooting 57 Turning the power on 15 TV 25 TV CONNECT Guide 25 U Using a wall outlet wall socket as a power source 14 V VISUAL INDEX 22 Volume 23 W Warning indicators 58 Windows 27 Z Zoom 18 20 24 A AVCHD 30 38 B Battery 13 Battery of the Wireless Remote Commander 60 Blu ray disc 35 C Capturing photos from a movie 37 Care 59 Charging th...

Страница 69: ......

Страница 70: ... arroje al fuego No manipule baterías de iones de litio dañadas o que presenten fugas Asegúrese de cargar la batería con un cargador de baterías original de Sony o con un dispositivo que pueda cargarla Mantenga la batería fuera del alcance de niños pequeños Mantenga la batería seca Sustitúyala únicamente por otra del mismo tipo o equivalente recomendada por Sony Deshágase de la baterías usada lo a...

Страница 71: ...eda grabar o reproducir películas y fotos Cuando conecte la videocámara a otro dispositivo mediante cables de comunicación asegúrese de insertar la clavija del conector en la dirección correcta Si inserta la clavija a la fuerza en el terminal dañará el terminal lo que podría ocasionar una falla de funcionamiento en la videocámara Incluso si la videocámara está apagada la función GPS funciona si el...

Страница 72: ...a definición HD con los siguientes dispositivos Otros dispositivos compatibles con el formato AVCHD que no sean compatibles con High Profile Dispositivos que no sean compatibles con el formato AVCHD Discos grabados con calidad de imagen de alta definición HD Esta videocámara captura imágenes de alta definición en formato AVCHD Los soportes DVD que contengan imágenes en formato AVCHD no deben usars...

Страница 73: ...conectado pág 20 Almacenamiento de películas y fotos en un disco Almacenamiento de películas y fotos con una computadora pág 22 Es posible crear un disco con calidad de imagen de alta definición HD o de definición estándar SD a partir de películas con calidad de imagen de alta definición HD importadas en la computadora Consulte las características de cada tipo de disco en la página 26 Creación de ...

Страница 74: ...tiliza una computadora Macintosh 23 Selección del método de creación de un disco computadora 26 Creación de un disco con un solo toque One Touch Disc Burn 28 Importación de películas y fotos a una computadora Easy PC Back up 29 Modificación de la unidad o la carpeta de destino de películas y fotos 30 Inicio de PMB Picture Motion Browser 30 Creación de un disco con calidad de imagen de alta definic...

Страница 75: ...r SD con una grabadora etc 40 Utilización óptima de la videocámara Eliminación de películas y fotos 42 Ajuste de las condiciones de filmación 43 Cambio del soporte de grabación 44 Para comprobar los ajustes del soporte de grabación 44 Copia de películas y fotos desde la memoria interna a un Memory Stick PRO Duo 45 Personalización de la videocámara a través de los menús 46 Obtención de información ...

Страница 76: ...ndica la flecha hasta que oiga un clic 3 Conecte el adaptador de alimentación de ca y el cable de alimentación a la videocámara y al tomacorriente de pared Alinee la marca de la clavija de cc con la marca de la toma DC IN El indicador CHG flash carga se enciende y se inicia el proceso de carga El indicador CHG flash carga se apaga cuando la batería está totalmente cargada Batería Toma DC IN Clavij...

Страница 77: ...elícula Foto pág 10 y el indicador de acceso pág 45 estén apagados El indicador CHG flash carga parpadea durante la carga en las condiciones siguientes La batería no está conectada correctamente La batería está dañada La temperatura de la batería es baja Extraiga la batería de la videocámara y colóquela en un lugar cálido La temperatura de la batería es alta Extraiga la batería de la videocámara y...

Страница 78: ... AJUS RELOJ Si un elemento no aparece en la pantalla toque hasta que aparezca 3 Ajuste HORA VERANO la fecha y la hora y a continuación toque El reloj empezará a funcionar Si ajusta HORA VERANO en ACTIVADO el reloj se adelanta 1 hora La fecha y la hora no aparecen durante la grabación aunque se graban automáticamente en el soporte de grabación y se pueden mostrar durante la reproducción Para visual...

Страница 79: ...ámara En este caso ajuste AJUS AUTO RELOJ y AJUS AUTO ZONA en DESACTIV HDR CX500V CX520V Para apagar la videocámara Cierre la pantalla de cristal líquido El indicador Película parpadea durante varios s segundo y se apaga la videocámara También puede apagar la videocámara al presionar POWER Cuando ENCEND CON LCD pág 52 esté ajustado en DESACTIV apague la videocámara al presionar POWER Cambio del aj...

Страница 80: ... 49 Ajuste la correa de sujeción Abra la pantalla de cristal líquido de la videocámara La tapa del objetivo se abre y la videocámara se enciende Para encender la videocámara cuando la pantalla de cristal líquido está abierta presione POWER Presione START STOP para iniciar la grabación También puede iniciar la grabación al tocar en la pantalla de cristal líquido Botón POWER ...

Страница 81: ...uido Si cierra la pantalla de cristal líquido mientras graba películas se detendrá la grabación Consulte la página 60 para conocer el tiempo de grabación de las películas El tiempo máximo de grabación continua de películas es de aproximadamente 13 h hora Cuando un archivo de película supera los 2 GB el siguiente archivo de película se crea automáticamente Puede cambiar el soporte de grabación y la...

Страница 82: ... zoom se puede aumentar mediante el zoom digital Para ajustar el nivel de aplicación del zoom toque MENU OTROS AJ GRAB en la categoría AJUSTES TOMA ZOOM DIGITAL el ajuste deseado Si las películas se visualizan en un televisor compatible con x v Color grábelas con la función x v Color Toque MENU OTROS AJ GRAB en la categoría AJUSTES TOMA X V COLOR ACTIVADO Es posible que sea necesario realizar algu...

Страница 83: ...o de la imagen toque MENU TAM IMAGEN en la categoría AJUST FOTO CÁM el ajuste deseado También puede capturar fotos durante la grabación de películas si presiona PHOTO El tamaño de la imagen es de 8 3M cuando graba películas con calidad de imagen de alta definición HD La videocámara activa el flash automáticamente cuando no hay suficiente luz Durante la grabación de películas el flash no está dispo...

Страница 84: ...a partir de los satélites GPS Con dicha información se habilitan funciones como el Índice de mapas El indicador cambia en función de la intensidad de recepción de la señal GPS Asegúrese de que el interruptor GPS esté ajustado en OFF durante el despegue y aterrizaje de un avión El mapa incorporado es proporcionado por las siguientes compañías el mapa de Japón es de ZENRIN CO LTD otras áreas son de ...

Страница 85: ...presione POWER pág 10 Presione VISUALIZAR IMÁGENES La pantalla VISUAL INDEX aparece al cabo de unos s segundo También puede mostrar la pantalla VISUAL INDEX al tocar VISUALIZAR IMÁGENES en la pantalla de cristal líquido Toque o la película deseada Permite cambiar la visualización del botón de funcionamiento A la pantalla MENU Muestra la pantalla para seleccionar el tipo de índice ÍNDICE DE FECHAS ...

Страница 86: ...as a cámara lenta Si sigue tocando durante la reproducción las películas se reproducen con un aumento de velocidad de aproximadamente 5 veces 10 veces 30 veces 60 veces Puede visualizar VISUAL INDEX si toca MENU VISUAL INDEX en la categoría REPRODUCCIÓN La fecha y hora de grabación así como las condiciones de filmación y las coordenadas HDR CX500V CX520V se guardan automáticamente durante la graba...

Страница 87: ... tipo de índice no se muestra si AJ SOPORTE FOTO pág 44 está ajustado en MEMORY STICK 2 aparece cuando se selecciona la película con calidad de imagen de definición estándar SD con AJUSTE pág 49 3 aparece cuando se toca Se muestra la foto seleccionada en la videocámara Para ampliar fotos mueva la palanca del zoom motorizado mientras las visualiza PB ZOOM Si toca un punto en el marco PB ZOOM el pun...

Страница 88: ...a y toque MENU GUÍA CONEXIÓN TV en la categoría OTROS en la pantalla de cristal líquido Utilice el adaptador de alimentación de ca suministrado como fuente de alimentación pág 9 Consulte GUÍA CONEXIÓN TV para conectar la videocámara y el televisor Cuando el cable de conexión de A V se utiliza para emitir películas éstas se emiten con calidad de imagen de definición estándar SD Reproduzca películas...

Страница 89: ...ible con el estándar Photo TV HD Photo TV HD es un formato que permite la reproducción de imágenes con un alto nivel de detalle con una sutil representación de las texturas y los colores que hace que parezcan fotografías Al conectar dispositivos Sony compatibles con Photo TV HD mediante un cable HDMI o un cable de A V de componente es posible disfrutar de todo un mundo nuevo con fotos que disponen...

Страница 90: ...dows XP SP3 2 Windows Vista SP1 3 CPU Intel Pentium 4 de 2 8 GHz o superior se recomienda Intel Pentium 4 de 3 6 GHz o superior Intel Pentium D de 2 8 GHz o superior Intel Core Duo de 1 66 GHz o superior o Intel Core 2 Duo de 1 66 GHz o superior Sin embargo una CPU Intel Pentium III de 1 GHz o superior es suficiente para las siguientes operaciones Importación de películas y fotos a la computadora ...

Страница 91: ...itivo compruebe la versión El número de la versión se muestra al hacer clic en Ayuda Acerca de PMB Compare el número de la versión del CD ROM suministrado con la versión de PMB que tiene instalada en la computadora para asegurarse de que las versiones se instalaron en el orden correcto de menor a mayor Si la versión de PMB que tenía instalada es posterior a la versión de PMB suministrada con la vi...

Страница 92: ...stalar Siga las instrucciones en pantalla para instalar el software En función de la computadora es posible que deba instalar software de terceros Si aparece la pantalla de instalación siga las instrucciones para instalar el software necesario Reinicie la computadora si es necesario para completar la instalación Una vez completada la instalación aparecerán los siguientes iconos Retire el CD ROM de...

Страница 93: ...n una computadora ES Toque FIN SÍ en la pantalla de la videocámara Desconecte el cable USB Es posible crear un disco Blu ray mediante una computadora con una grabadora de discos Blu ray Instale el Software Complementario de BD para PMB pág 32 ...

Страница 94: ...asy PC Back up pág 29 Creación de un disco de formato AVCHD con calidad de imagen de alta definición HD pág 31 HD Dispositivos de reproducción de DVD normales un reproductor de DVD una computadora capaz de reproducir DVD etc Importación de películas y fotos a una computadora Easy PC Back up pág 29 Creación de un disco con calidad de imagen de definición estándar SD pág 33 SD Para crear un disco Bl...

Страница 95: ...PMB Para obtener información sobre los discos Blu ray consulte la página 32 Tipo de disco Características DVD R DVD R DVD R DL No regrabable DVD RW DVD RW Regrabable Mantenga siempre su PLAYSTATION 3 actualizada con la última versión del software del sistema PLAYSTATION 3 Es posible que el sistema PLAYSTATION 3 no esté disponible en algunos países o regiones ...

Страница 96: ...en de alta definición HD importe primero las películas a una computadora pág 29 y a continuación cree un disco con calidad de imagen de definición estándar SD pág 33 Instale PMB de antemano pág 23 pero no inicie PMB Para esta operación utilice el adaptador de alimentación de ca suministrado para conectar la videocámara a un tomacorriente de pared pág 9 La función One Touch Disc Burn en la videocám...

Страница 97: ...alla de la computadora haga clic en Easy PC Back up Importar Las películas y fotos se importan a la computadora Al finalizar la operación aparece la pantalla PMB Cuando finalice la operación es posible que aparezca una pantalla que indica que las películas se están analizando El análisis de las películas puede tardar bastante Mientras tanto se puede utilizar PMB Se pueden crear discos tanto con ca...

Страница 98: ... aparece en la pantalla de la computadora haga clic en Inicio Todos los programas Sony Picture Utility PMB para iniciar PMB Es posible visualizar editar o crear discos de películas y fotos mediante PMB Lectura de la Guía de PMB Para obtener más información acerca del uso de PMB consulte la Guía de PMB Haga doble clic en el icono de acceso directo de Guía de PMB en la pantalla de la computadora par...

Страница 99: ...na 26 Si algún programa que no sea PMB se inicia automáticamente ciérrelo 2 Haga doble clic en el icono de acceso directo de PMB en la pantalla de la computadora para iniciar PMB Para iniciar PMB también puede hacer clic en Inicio Todos los programas Sony Picture Utility PMB 3 Haga clic en Carpetas o Calendario en el lado izquierdo de la ventana y seleccione la carpeta o la fecha y a continuación ...

Страница 100: ...9 Para crear un disco Blu ray debe tener instalado Software Complementario de BD para PMB Haga clic en Software Complementario de BD en la pantalla de instalación de PMB e instale este complemento de acuerdo con las instrucciones en pantalla Conecte la computadora a Internet cuando instale Software Complementario de BD Coloque un disco Blu ray vacío en la unidad de disco y haga clic en Manipular C...

Страница 101: ... Si algún programa que no sea PMB se inicia automáticamente ciérrelo 2 Haga doble clic en el icono de acceso directo de PMB en la pantalla de la computadora para iniciar PMB Para iniciar PMB también puede hacer clic en Inicio Todos los programas Sony Picture Utility PMB 3 Haga clic en Carpetas o Calendario en el lado izquierdo de la ventana y seleccione la carpeta o la fecha y a continuación selec...

Страница 102: ... Blu ray Edición de películas Es posible cortar las partes de una película que se consideran necesarias y guardarlas como un archivo separado Utilice PMB para seleccionar la película que desea editar y a continuación haga clic en Manipular Video Trimming en el menú para visualizar la ventana Video Trimming Para obtener más información sobre el funcionamiento consulte la Guía de PMB pág 30 Captura ...

Страница 103: ...producción en formato AVCHD un reproductor de discos Blu ray de Sony PLAYSTATION 3 etc Creación de un disco con calidad de imagen de alta definición HD con una grabadora de DVD DVDirect Express pág 36 Creación de un disco con calidad de imagen de alta definición HD con una grabadora de DVD etc que no sea DVDirect Express pág 39 HD Dispositivos de reproducción de DVD normales un reproductor de DVD ...

Страница 104: ...e la videocámara con el cable USB de la grabadora de DVD La pantalla UNIDAD EXTERNA aparece en la pantalla de la videocámara Utilice el adaptador de alimentación de ca suministrado como fuente de alimentación pág 9 Si utiliza alimentación de la batería la grabadora de DVD no funciona Si hay películas con calidad de imagen de alta definición HD y con calidad de imagen de definición estándar SD sin ...

Страница 105: ...e las películas se muestran en la pantalla de la videocámara MEMORIA INT MEMORY STICK Las miniaturas de las películas se muestran en la pantalla de la videocámara Toque la película que desea grabar en el disco Aparece Mantenga presionada la imagen en la pantalla de cristal líquido para confirmarla Toque para volver a la pantalla anterior Al tocar la fecha puede buscar imágenes por la fecha La cali...

Страница 106: ...utar GRABAR EN DISCO aparecen en la pantalla inserte otro disco en la grabadora de DVD y repita la operación de DISC BURN El disco creado con calidad de imagen de alta definición HD se puede reproducir solamente en dispositivos compatibles con el formato AVCHD También puede reproducir el disco con una grabadora de DVD conectada a la videocámara El disco con calidad de imagen de alta definición HD ...

Страница 107: ...able USB suministrado La pantalla SELEC USB aparece en la pantalla de la videocámara 2 En la pantalla de la videocámara toque CONEXIÓN USB si las películas están grabadas en la memoria interna o CONEXIÓN USB si las películas están grabadas en el Memory Stick PRO Duo 3 Grabe las películas en el dispositivo conectado Para obtener más detalles consulte el manual de instrucciones suministrado de los d...

Страница 108: ... V a la toma de entrada de otro dispositivo Cable de conexión de A V con S VIDEO se vende por separado Al establecer la conexión a otro dispositivo a través de la toma S VIDEO mediante un cable de conexión de A V con un cable de S VIDEO se vende por separado pueden producirse imágenes de mayor calidad que con un cable de conexión de A V Conecte las clavijas blanca y roja audio izquierdo derecho y ...

Страница 109: ...tor conectado toque MENU AJUSTES SALIDA en la categoría AJUST GENERALES SALIDA PANT LCD ajuste predeterminado Para grabar la fecha y la hora las coordenadas HDR CX500V CX520V o los datos de ajustes de la cámara toque MENU AJUSTES REPROD en la categoría REPRODUCCIÓN CÓDIGO DATOS el ajuste deseado Además toque MENU AJUSTES SALIDA en la categoría AJUST GENERALES SALIDA PANT SAL V LCD Si el tamaño de ...

Страница 110: ... vez En el paso 2 toque BORRAR BORRAR TODO SÍ SÍ Formateo del soporte de grabación El formateo borra todas las películas y fotos para recuperar espacio libre para grabar Para esta operación utilice el adaptador de alimentación de ca suministrado para conectar la videocámara a un tomacorriente de pared pág 9 Para evitar la pérdida de imágenes importantes guárdelas antes de formatear el soporte de g...

Страница 111: ...n el ajuste predeterminado al selector MANUAL Cómo usar el selector MANUAL Presione MANUAL para cambiar al funcionamiento en modo manual y gire el selector para realizar el ajuste Al presionar MANUAL el modo de operación cambia entre manual y automático Para asignar un elemento de menú Mantenga presionado MANUAL por unos segundo para que aparezca la pantalla AJUSTE SELECTOR Gire el selector MANUAL...

Страница 112: ... PEL Aparece la pantalla AJ SOPORTE PEL Toque el soporte deseado Toque SÍ El soporte de grabación se cambia Selección del soporte para fotos Toque MENU AJUSTES SOPORTE en la categoría GESTIÓN SOPORTE AJ SOPORTE FOTO Aparece la pantalla AJ SOPORTE FOTO Toque el soporte de grabación deseado Toque SÍ El soporte de grabación se cambia Para comprobar los ajustes del soporte de grabación Encienda el ind...

Страница 113: ...ección del Memory Stick PRO Duo Si inserta el Memory Stick PRO Duo forzadamente en la dirección incorrecta es posible que se dañe el Memory Stick PRO Duo la ranura para Memory Stick Duo o los datos de imagen Toque SÍ Para grabar solamente fotos en un Memory Stick PRO Duo toque NO Si aparece Error al crear un nuevo archivo de base de datos de imágenes Es posible que no exista suficiente espacio lib...

Страница 114: ... que aparecen en la pantalla dependen del estado de la cámara grabación película foto o reproducción Toque el elemento de menú que desea cambiar Tras cambiar el ajuste toque Para registrar los elementos de menú favoritos en MI MENÚ En el paso 3 de Uso de la función MI MENÚ toque AJUSTE MI MENÚ Toque el tipo de MI MENÚ que desea cambiar PELÍCULA Cambie MI MENÚ para grabación de películas FOTO Cambi...

Страница 115: ...que desea cambiar Se desplaza a través de 4 elementos de una vez Permite moverse de una categoría a la otra Permite visualizar y En función de las condiciones de reproducción y grabación es posible que no pueda ajustar algunos elementos de menú Los elementos o ajustes del menú que aparecen atenuados no están disponibles Puede tocar o y arrastrar la pantalla para desplazarse por la lista del menú T...

Страница 116: ...ando finalice el ajuste toque Los elementos o ajustes del menú que aparecen atenuados no están disponibles Si el elemento que desea no se muestra en la pantalla toque otra ficha Es posible que no haya fichas Las fichas y elementos que aparecen en la pantalla dependen del estado de la grabación reproducción de la videocámara en ese momento Elemento de menú Lengüeta OPTION ...

Страница 117: ...dición de las películas MODO GRAB Permite ajustar el modo de grabación de las películas Al grabar motivos que se mueven a gran velocidad se recomienda usar una alta calidad de imagen como por ejemplo FH GUÍA FOTOG Permite visualizar un marco para asegurarse de que el sujeto está en posición horizontal o vertical STEADYSHOT Permite ajustar la función SteadyShot al grabar películas OBJETIVO CONVER P...

Страница 118: ...Categoría REPRODUCCIÓN VISUAL INDEX pág 17 VISUALIZAR IMÁG ÍNDICE DE FECHAS Permite la búsqueda de imágenes por fecha MAPA Permite visualizar el Índice de mapas para buscar películas y fotos en función del lugar donde fueron capturadas ROLLO PELÍC Permite visualizar y reproducir escenas en un intervalo determinado CARA Permite visualizar y reproducir las escenas de caras PLAYLIST Permite visualiza...

Страница 119: ... agregar de una vez todas las películas grabadas el mismo día a una playlist BORRAR BORRAR Permite eliminar películas de una playlist BORRAR TODO BORRAR TODO Permite eliminar todas las películas de una playlist MOVER MOVER Permite modificar el orden de las películas en una playlist Categoría OTROS SU UBICACIÓN Permite visualizar la ubicación actual en un mapa CONEXIÓN USB CONEXIÓN USB Permite cone...

Страница 120: ...establecer si deben mostrarse las indicaciones en pantalla en la pantalla del televisor AJ REL IDIOM AJUS RELOJ pág 10 AJUS ZONA pág 10 AJUS AUTO RELOJ Permite ajustar si desea que la videocámara ajuste o no el reloj automáticamente por GPS AJUS AUTO ZONA Permite ajustar si desea que la videocámara compense o no las diferencias de tiempo automáticamente mediante la obtención de información de ubic...

Страница 121: ...e instalación que aparece 3 Seleccione el idioma que desee y el nombre del modelo de la videocámara y a continuación haga clic en Guía práctica de Handycam PDF El modelo de la videocámara se encuentra impreso en la superficie inferior 4 Haga clic en Salir Salir y a continuación retire el CD ROM de la computadora Para ver la Guía práctica de Handycam haga doble clic en el icono de acceso directo en...

Страница 122: ...ación de ca al tomacorriente de pared pág 9 La videocámara no funciona aunque la alimentación esté encendida Después de encenderse la videocámara tarda algunos instantes en estar lista para tomar imágenes No se trata de una falla de funcionamiento Desconecte el adaptador de alimentación de ca del tomacorriente de pared o extraiga la batería y vuelva a realizar la conexión transcurrido aproximadame...

Страница 123: ... C 06 La temperatura de la batería es alta Cambie la batería o colóquela en un lugar frío C 13 C 32 Desconecte la fuente de alimentación Conéctela de nuevo y vuelva a poner en funcionamiento la videocámara E 20 E 31 E 61 E 62 E 91 E 92 E 94 E 95 E 96 Vuelva a encender la videocámara y presione RESET para restaurarla pág 65 101 0001 Si el indicador parpadea lentamente el archivo está dañado o no se...

Страница 124: ...que la videocámara no pueda grabar correctamente Cerca de receptores de AM y de equipos de video Es posible que se produzcan ruidos En una playa o cualquier lugar con mucho polvo Si entra arena o polvo en la videocámara pueden causar una falla de funcionamiento En ocasiones esta falla de funcionamiento puede resultar irreparable Cerca de ventanas o en el exterior donde la pantalla de cristal líqui...

Страница 125: ...ño suave para limpiarla Si utiliza el kit de limpieza para la pantalla de cristal líquido se vende por separado no aplique el líquido de limpieza directamente sobre la pantalla Utilice papel de limpieza humedecido con el líquido Manipulación de la unidad Si la unidad está sucia limpie el cuerpo de la videocámara con un paño suave ligeramente humedecido con agua y a continuación pásele un paño suav...

Страница 126: ...del Memory Stick PRO Duo o formatee el Memory Stick PRO Duo en su videocámara o en una computadora es posible que no borre los datos del Memory Stick PRO Duo completamente Si le entrega el Memory Stick PRO Duo a otra persona es recomendable eliminar los datos completamente usando el software de eliminación de datos en una computadora Además cuando deseche el Memory Stick PRO Duo es recomendable de...

Страница 127: ...e imágenes fijas de 35 mm Para películas 43 516 mm 16 9 Para fotos 38 456 mm 4 3 Temperatura de color AUTOM UNA PULS INTERIOR 3 200 K EXTERIOR 5 800 K Iluminación mínima 11 lx lux ajuste predeterminado velocidad del obturación de 1 60 de segundo 3 lx lux LOW LUX está ajustado en ACTIVADO velocidad de obturación de 1 30 de segundo 0 lx lux NIGHTSHOT está ajustado en activado La exclusiva matriz de ...

Страница 128: ...ompleta 135 Tiempo de grabación continua 115 160 Tiempo de grabación normal 60 80 Tiempo de reproducción 195 260 El tiempo de grabación y reproducción es el tiempo aproximado disponible cuando se utiliza una batería completamente cargada Calidad de imagen de alta definición HD calidad de imagen de definición estándar SD Condiciones de grabación MODO GRAB ajustado en SP El tiempo de grabación norma...

Страница 129: ...ick PRO Duo en minuto Modo de grabación Capacidad de 4 GB Alta definición HD Definición estándar SD FH 25 25 HQ 55 40 55 50 SP 65 45 80 50 LP 5 1 canales 90 70 160 105 LP 2 canales 95 75 175 110 Puede cambiar el formato de sonido de la grabación con MODO AUDIO pág 49 Los números entre paréntesis indican el tiempo mínimo de grabación Se ha utilizado un Memory Stick PRO Duo de Sony El tiempo de grab...

Страница 130: ...rcas comerciales registradas de HDMI Licencing LLC Microsoft Windows Windows Media Windows Vista y DirectX son marcas comerciales registradas o marcas comerciales de Microsoft Corporation en los Estados Unidos y o en otros países Macintosh y Mac OS son marcas comerciales registradas de Apple Inc en los EE UU y en otros países Intel Intel Core y Pentium son marcas comerciales o marcas comerciales r...

Страница 131: ...rabación de la imagen HD SD y modo de grabación FH HQ SP LP Soporte de grabación reproducción edición 0 00 00 Contador hora minuto segundo 00min Tiempo de grabación restante previsto DESVANECEDOR 9999 9999 Número aproximado de fotos que se pueden grabar y soporte de grabación Carpeta de reproducción 100 112 Película o foto actual en reproducción número total de películas o fotos grabadas Parte inf...

Страница 132: ...os entre corresponden a las páginas de referencia Active Interface Shoe Active Interface Shoe proporciona alimentación a accesorios opcionales como luz de video flash o micrófono El accesorio se puede encender o apagar al utilizar el interruptor POWER de la videocámara Micrófono incorporado Flash Objetivo objetivo Sony G Indicador de grabación de la cámara El indicador de grabación de la cámara se...

Страница 133: ...tes incluido el del reloj Interruptor GPS HDR CX500V CX520V Altavoz Toma HDMI OUT 20 Indicador de acceso memoria interna Memory Stick PRO Duo 45 Si el indicador está encendido o parpadeando significa que la videocámara está leyendo o escribiendo datos Botón MANUAL 43 Selector MANUAL 43 Ranura para Memory Stick Duo 45 Toma USB 23 28 29 36 Palanca del zoom motorizado 13 15 19 Botón PHOTO 14 Botón MO...

Страница 134: ...grabación 44 T Televisor 20 Tiempo de grabación y reproducción 60 Trípode 43 U Unidad o carpeta de destino 30 Utilización de un tomacorriente de pared como fuente de alimentación 9 V VISUAL INDEX 17 Visualización de autodiagnóstico 55 Volumen 18 W Windows 22 Z Zoom 13 15 19 A Ajuste de la fecha y la hora 10 AVCHD 26 35 B Batería 8 Batería del control remoto inalámbrico 58 BORRAR 42 C Calidad de im...

Страница 135: ......

Отзывы: