16
Customizing Your Monitor
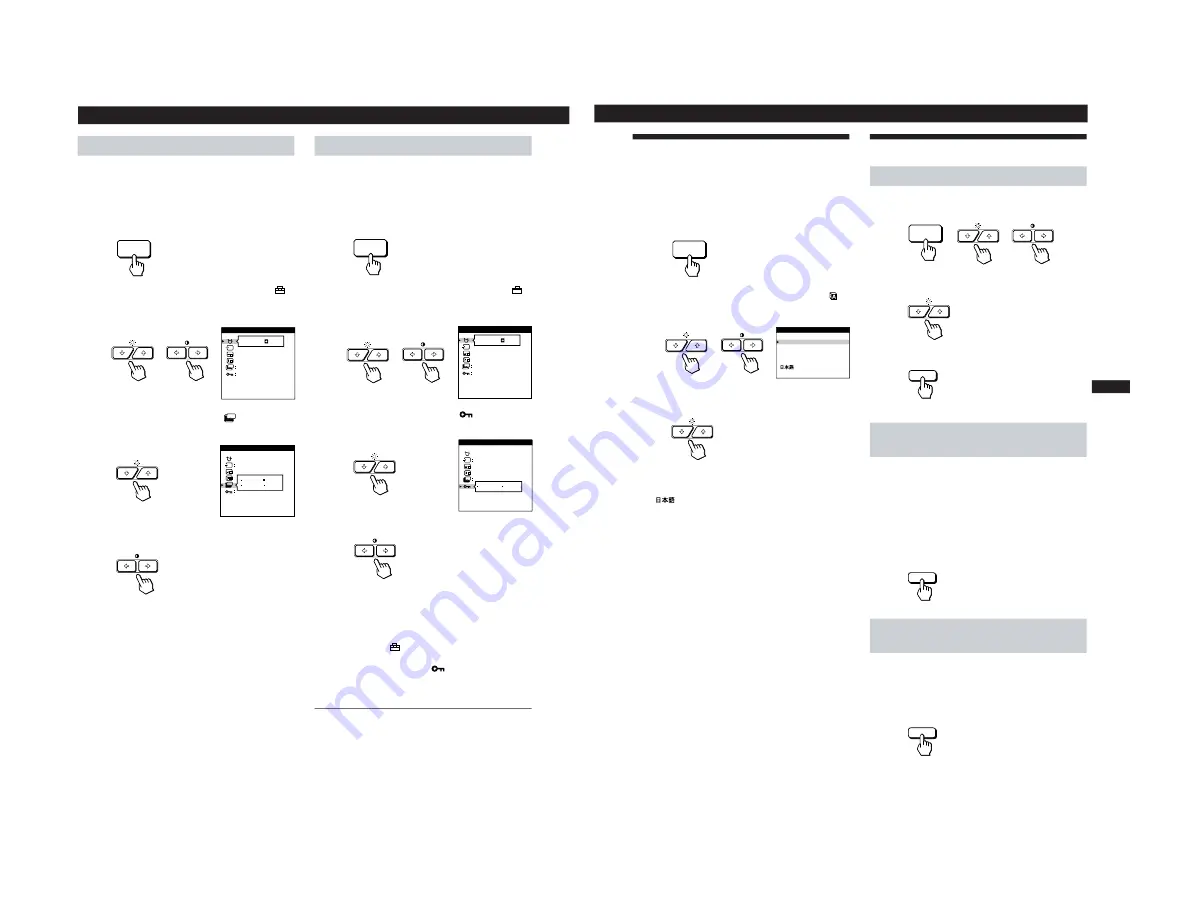
Locking the controls
The control lock function disables all of the buttons on the
front panel except the
u
(power) switch, MENU and INPUT
buttons.
1
Press the MENU button.
The MENU OSD appears.
2
Press the
¨
.
/
>
and
>
?
/
/
buttons to select “
OPTION,” and press the MENU button again.
The OPTION OSD appears.
3
Press the
¨
.
/
>
buttons to select “
(CONTROL
LOCK).”
4
Press the
>
?
/
/
buttons to select “LOCK.”
The OPTION OSD automatically disappears after about 30
seconds.
To close the OSD, press the MENU button again.
Once you select “LOCK,” you cannot select any items
except “EXIT” and ”
OPTION” in the MENU OSD.
If you press any button other than the
u
(power) switch,
MENU and INPUT buttons, the
mark appears on the
screen.
To cancel the control lock
Repeat steps 1 through 3 above and press the
>
?
/
/
buttons to select “UNLOCK.”
Setting the power saving delay time
You can set the delay time before the monitor enters the
power saving mode. See page 19 for more information on
this monitor’s power saving capabilities.
1
Press the MENU button.
The MENU OSD appears.
2
Press the
¨
.
/
>
and
>
?
/
/
buttons to select “
OPTION,” and press the MENU button again.
The OPTION OSD appears.
3
Press the
¨
.
/
>
buttons to select “
ZZ...
(PWR SAVE
DELAY).”
4
Press the
>
?
/
/
buttons to select the desired time.
When PWR SAVE DELAY is set to “OFF,” the monitor
does not go into power saving mode.
The OPTION OSD automatically disappears after about 30
seconds.
To close the OSD, press the MENU button again.
To reset, press the RESET button while the OSD is on.
MENU
ON
MANUAL DEGAUSS
UNLOCK
1 MIN
OPTION
ZZ...
MENU
ON
MANUAL DEGAUSS
UNLOCK
1 MIN
OPTION
ZZ...
ZZ...
PWR SAVE DELAY
OPTION
5 SEC
60 MIN
1 MIN
OFF
AUTO
ZZ...
CONTROL LOCK
OPTION
UNLOCK LOCK
AUTO
17
Getting Started
Customizing Your Monitor
F
EN
ES
C
Using the LANG (Language) On-
screen Display
English, French, German, Spanish and Japanese versions of
the OSDs are available.
1
Press the MENU button.
The MENU OSD appears.
2
Press the
¨
.
/
>
and
>
?
/
/
buttons to select “
LANG,” and press the MENU button again.
The LANGUAGE OSD appears.
3
Press the
¨
.
/
>
buttons to select the desired
language.
ENGLISH: English, FRANÇAIS: French,
DEUTSCH: German, ESPAÑOL: Spanish,
or
: Japanese.
The OSD automatically disappears after about 30 seconds.
To close the OSD, press the MENU button again.
To reset to English, press the RESET button while the OSD
is on.
MENU
RESET
RESET
MENU
RESET
Resetting the Adjustments
Resetting an adjustment item
1
Press the MENU,
¨
.
/
>
and
>
?
/
/
buttons to select
the OSD containing the item you want to reset.
2
Press the
¨
.
/
>
buttons to select the item you want
to reset.
3
Press the RESET button.
Resetting all of the adjustment data for
the current input signal
When there is no OSD displayed, press the RESET
button.
All of the adjustments data for the current input signal is
reset to the factory settings.
Note that adjustment data not affected by changes in input
signal (OSD language, OSD position, input signal selection,
power saving delay time and the control lock function) is
not reset to the factory settings.
Resetting all of the adjustment data for all
input signals
Press and hold the RESET button for more than two
seconds.
All of the adjustment data, including the brightness and
contrast, is reset to the factory settings.
ENGLISH
FRANÇAIS
DEUTSCH
ESPAÑOL
LANGUAGE
1-5


