30
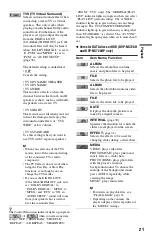
To display photo information
Press SUBTITLE while viewing photo files.
The detailed information for the selected
photo file appears.
is displayed when the picture was taken
using flash.
is displayed when the image is
automatically rotated.
To hide the information, press SUBTITLE.
Note that the above information may not
appear depending on the digital camera.
To stop viewing the photo
Press
x
.
b
PICTURE NAVI does not work if “MUSIC” is
selected in “MEDIA” (page 21).
Viewing a high quality slide
show (PhotoTV HD)
If you have a Sony TV that is compatible with
“PhotoTV HD,” you can enjoy the best
quality images by the following connection
and setting.
1
Connect the player to the TV using an
HDMI cord (supplied with DVP-
NS710HP, DVP-NS718HP, and DVP-
NS728HP only).
2
Set the TV’s video setting to “Video-A”
mode.
For details about “Video-A,” refer to the
operating instructions supplied with the
TV.
3
Set “JPEG RESOLUTION” to “PhotoTV
HD” in “HDMI SETUP” (page 38).
On “PhotoTV HD”
“PhotoTV HD” allows for highly-detailed
pictures, and photo-like expression of subtle
textures and colors. By connecting Sony
“PhotoTV HD” compatible devices using an
HDMI cord, whole new world of photos can
be enjoyed in breathtaking Full HD quality.
For instance, the delicate texture of the
human skin, flowers, sand, and waves can
now be displayed on a large screen in
beautiful photo-like quality.
b
• By connecting to a Sony “PhotoTV HD”
compatible device using an HDMI cord, the TV
will set the optimal image quality for viewing still
picture automatically. For more details, refer to
the operating instructions supplied with the TV.
• “PhotoTV HD” is activated when “JPEG
RESOLUTION” is set to “PhotoTV HD,” photo
playback is available, and the player is connected
to a TV by HDMI cord.
• You cannot select “CUSTOM PICTURE MODE”
and “SHARPNESS,” when “PhotoTV HD” mode
is activated.
• When “PhotoTV HD” mode is activated, the
player changes video signal output from “HDMI
RESOLUTION” to “1920
×
1080i,” “TV TYPE”
to “16:9,” and “YC
B
C
R
/RGB (HDMI)” to
“YC
B
C
R
” automatically even though the current
settings are kept.
• You cannot select “HDMI RESOLUTION” or
“YC
B
C
R
/RGB (HDMI)” in “HDMI SETUP”
(page 38), or “TV TYPE” in “SCREEN SETUP”
(page 33), when “PhotoTV HD” mode is
activated.
• If you set “PhotoTV HD” mode, the effect,
rotation and zoom functions are not available.
• When “PhotoTV HD” mode is activated, the
selection for “TV TYPE” is skipped during Quick
Setup (page 15).
Setting the pace for a
slide show (INTERVAL)
You can set the time the slides are displayed
on the screen.
1
After selecting
(INTERVAL) on
the Control Menu (page 19), press
X
/
x
to select a setting.
The default setting is underlined.
• NORMAL: sets to standard duration
• FAST: sets a duration shorter than
NORMAL
• SLOW 1: sets a duration longer than
NORMAL
• SLOW 2: sets a duration longer than
SLOW 1
2
Press ENTER.
b
Duration of interval depends on “JPEG
RESOLUTION” setting in “HDMI SETUP”
(page 38).

