


Tel: +44 (0)1732 861200
-
E
-
mail: [email protected]
-
Web: www.sontay.com
© 2017 Sontay Limited. All rights reserved
RF
-
LW
-
HUB
IoT LoRaWAN to BACnet IP/Modbus TCP/MQTT Hub
Issue Number 7.0
10/08/2022
Four Elms Road
-
Edenbridge
Kent
-
TN8 6AB
-
UK
18 of 27
Setting up a BACnet IP Network on the Hub
NB
-
These instructions assume that the LoRa sensors/devices have already been added to the hub.
Setting up an Ethernet port on the hub
There are 2 Ethernet ports on the hub, ETH1 and ETH2. It doesn
’
t matter which you use, but if one is already used it
’
s probably best to have
the other configured for a different domain, for example:
•
If ETH1 is configured for 192.168.1.xxx, then enter 192.168.0.xxx or 10.0.20.xxx for ETH2 for example.
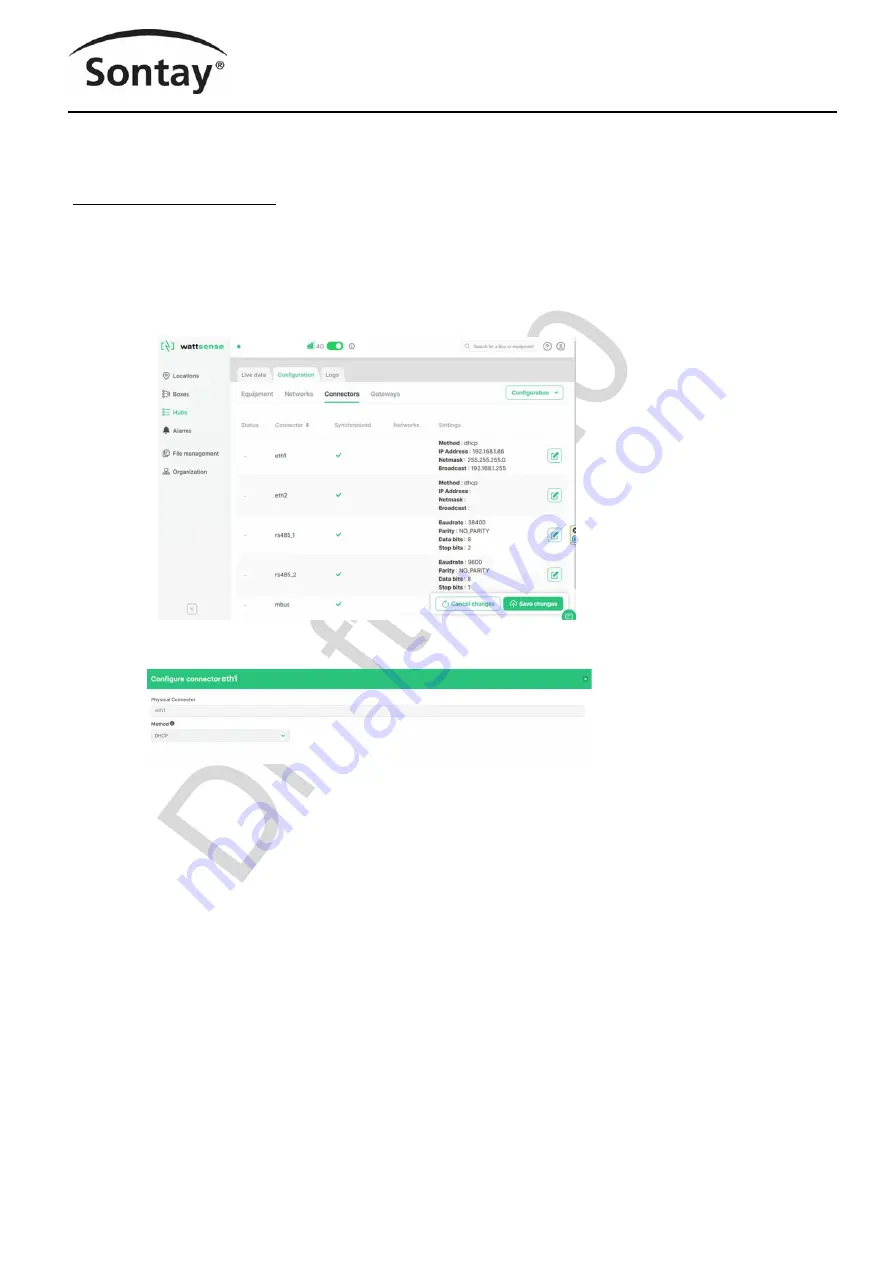
Click on the Hub
‘
Configuration
’
tab on the Sontay User Console, then click on the
‘
Connectors
’
tab. A list of available connections should be
visible, including ETH1 and ETH2 at the top of the list.
Click on the edit icon to the right of the Ethernet port you want to use. Here, you can set up the Ethernet port configuration.
By clicking on the
‘
Method
’
drop
-
down box, the initial options are either;
•
Manual –
the allows you to define the IP address and subnet mask, or
•
DHCP (Dynamic Host Configuration Protocol), which will allow the hub to be automatically assigned an IP address from the DHCP
server on your network (if installed and enabled).
NB
–
If you choose DHCP, you may not immediately be able to tell what IP address has been assigned.
If DHCP is selected, all that needs to be done to finish the connector configuration is to click the
‘
Save
’
button at the bottom right of the screen.
If you elect to use manual settings, you will need to fill in the
‘
IP Address
’, ‘
Netmask
’
and
‘
Gateway
’
fields (see next page).
Sontay


