background image

- 29 -

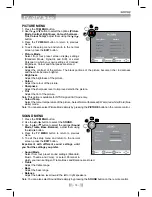
LOCATING A SPECIFIC TITLE (DVD)

If a DVD disc contains title numbers, you can locate a specific title by directly selecting its title 

number.

1. In STOP mode, press the 

GOTO

 button.

2. Press the   or   button to

 highlight a specific field and press the corresponding number 

button(s) for the title you want.

3. Press the 

ENTER•OK

 button to confirm. The unit will start playback about 3 second later.

LOCATING A SPECIFIC CHAPTER / TRACK 

If you know the chapter / track number you want to play, you can locate a specific chapter / 

track by directly selecting a chapter / track number.

1. Press the 

GOTO

 button to search for your desired chapter / track.

2. Press the   or   button to highlight a chapter / track and press the corresponding number 

button(s) for the chapter / track you want.

3. Press the 

ENTER•OK

 button to confirm. The unit will start playback about 3 second later.

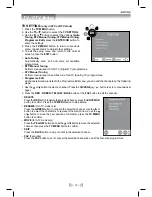
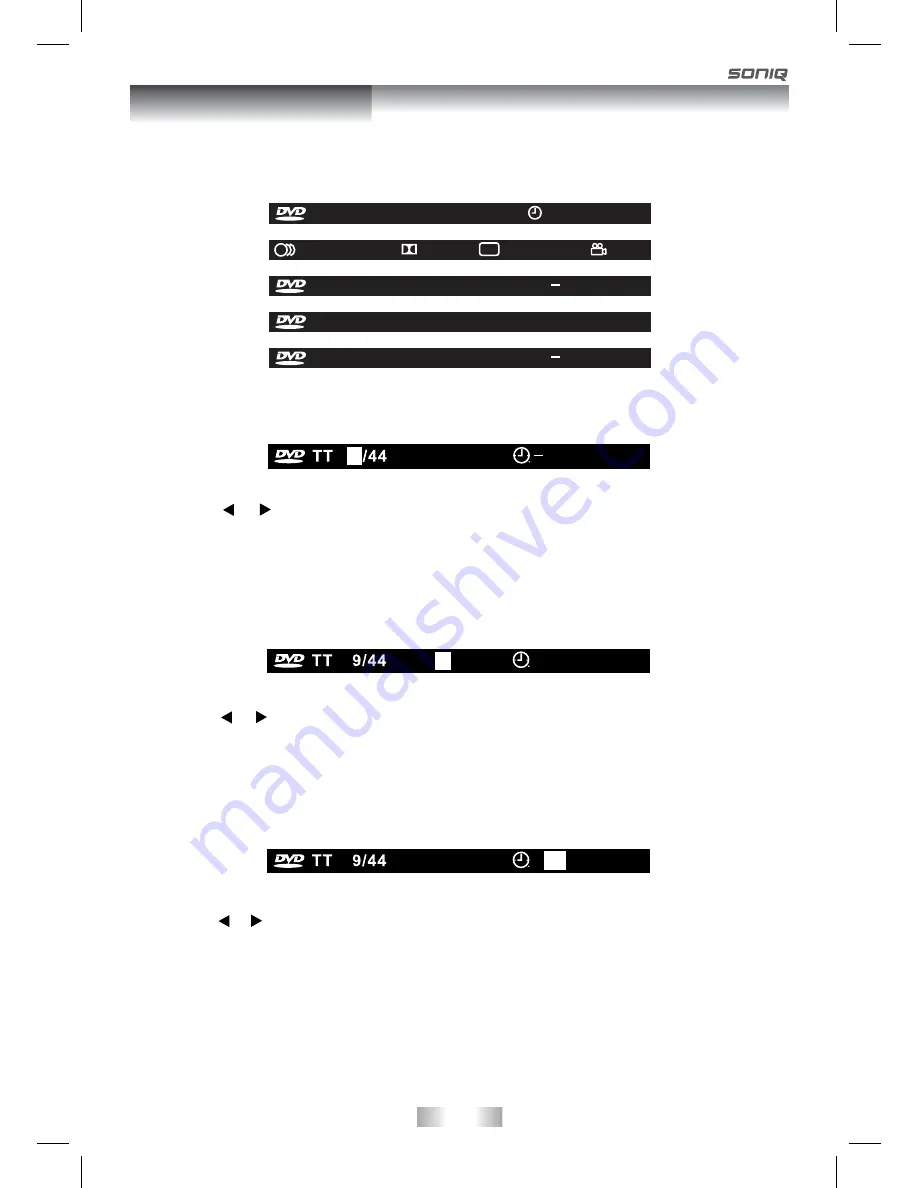
DISPLAY FUNCTION

While  the  disc  is  playing,  press  the 

DISPLAY

  button  repeatedly  to  display  information  on 

operation status.

LOCATING A SPECIFIC TIME

You  can  move  to  a  specific  location  by  entering  its  corresponding  time  (hours,  minutes, 

seconds)

1. Press the 

GOTO

 button.

2. Press the   or   button to highlight a time and press the corresponding number button(s) for 

the setting point you want.

3. Press the 

ENTER•OK

 button to confirm. The unit will start playback about 3 second later.

Note:

•  Some discs may not respond to this process.

•  This method of locating a title/chapter is available only on a DVD disc that contains title/

chapter numbers.

•  Some scenes may not be located as precisely as you specified.

•  This method for accessing specific locations is available only within the current title of the 

DVD disc.

Special Functions

TT      9/44 CH           4/8                   00 : 00 : 07

....

D 2CH           OFF                     OFF

1/1  ENG

TT      9/44 CH           4/8              C     00 : 00 : 07

TT      9/44 CH           4/8              T  00 : 00 : 07

TT      9/44 CH           4/8              T

00 : 00 : 07

CH

004/008

00 : 00 : 07

CH

004/008

00 : 00 : 07

CH

004/008

00 : 00 : 07

Содержание qv220lti

Страница 1: ... 1 ...

Страница 2: ...enu 21 TELETEXT 22 USING TO YOUR iPod 23 26 CD DVD OPERATION 27 28 Playing a disc 27 Playing a picture file disc 27 Pausing playback still mode 27 Stopping playback 27 Skipping to a different track 27 Fast forward fast reverse 28 Slow motion play DVD 28 Audio selection DVD 28 Subtitle selection DVD 28 Angle selection DVD 28 SPECIAL FUNCTIONS 29 Display function 29 Locating a specific title DVD 29 ...

Страница 3: ...ntilation The unit should be well situated so that its location or position does not interfere with its proper ventilation 9 Heat This unit should be placed away from heat sources such as radiators heat registers and stoves 10 Power Sources The unit should only be connectedtoapowersupplyasdescribed in the Instruction Manual or as marked on the unit 11 GroundingorPolarization Precautions should be ...

Страница 4: ... Do not drop or push objects into the television cabinet slots or openings Never spill any kind of liquid on the television Caution Never stand on lean on push suddenly the unit or its stand You should pay special attention to children Caution If the television is to be built into a compartment or similarly enclosed the minimum distances must be maintained Heat build up can reduce the service life...

Страница 5: ... the AC outlet Caution The panel used in this product is made of glass It can break when the unit is dropped or applied with force Individuals should execute caution when dealing with broken glass should the panel break Exemptions SONIQ is not liable for any damage caused by fires natural disaster such as thunder earthquake etc acts by the third parties accidents owner s misuse or use in other imp...

Страница 6: ...adcasting signals You can enjoy both analog and digital TV broadcasting now by switching to TV and DTV mode For detail operation you can refer to Instruction manual 810 312295W100 Wall Antenna Socket OutdoorAntenna VHF UHF RF Coaxial Wire 75 ohm Turning the unit on for the first time The first time you turn the unit on it will go straight into Auto scan mode Simply follow the screen prompts as bel...

Страница 7: ... discs on this unit if they were purchased from outside your geographic area or made for business purposes Disc Function or Operation that is Not Available When the symbol appears on the screen it indicates that the function or operation attempted is not available at that time This occurs because the DVD disc manufacturer determines the specific functions Certain functions may not be available on ...

Страница 8: ...ange the TV channels and highlight selections Up Down on the menu screen Press to select previous chapters or tracks on a disc Press to select next title chapter or track on a disc VOLUME controls iPod woofer Remote Sensor Standby Indicator Tweeters Dock for iPod PUSH OPEN button Disc Door Adjust the volume level Do not block this sensor or the remote control will not work Indicates whether the un...

Страница 9: ...nect the PC VGAsignal output of your personal computer Connect the PC audio output of your personal computer Connect composite Audio Video output of your AV device Connect to external antenna Main Unit Control Rear Panel AUDIO Jack PC IN AUDIO VIDEO IN Jacks PHONES jack TV Antenna Cable Terminal Coaxial TV antenna input ...

Страница 10: ... to select previous chapters or tracks on a disc 11 ANGLE button Press to switch the camera angle of the video presentation when scenes with multiple camera angles are recorded on a DVD SIZE button Press to set the letters size of teletext on the screen 12 SUBTITLE button Press to select one of the subtitle languages programmed on a DVD 13 TITLE Button Press to select the title menu screen 14 GOTO...

Страница 11: ... playback of a disc GUIDE button Press to display the PROGRAMME Guide in DTV mode PAUSE button Press to pause playback and single frame advance on DVD STEP INFO button Press to display the channel information in DTV mode 30 SLOW button Press to play a DVD in slow motion INDEX button Press to select the page number of the index from Teletext 31 AUDIO button Press to select audio soundtracks of a DV...

Страница 12: ...e positive and negative terminals in the correct direction as shown in the battery compartment Different types of batteries have different characteristics Do not mix different types Do not mix old and new batteries Mixing old and new batteries will shorten battery life and or cause chemical leaks from the old batteries When batteries fail to function replace them immediately Chemicals which leak f...

Страница 13: ...s plug is used as the disconnecting device It should remain readily accessible and should not be obstructed during use To be completely disconnected from the supply mains the mains plug of the apparatus should be disconnected from the mains socket outlet completely Wall Antenna Socket OutdoorAntenna VHF UHF RF Coaxial Wire 75 ohm Connecting ANTENNA Note For receiving over the air TV broadcasts we ...

Страница 14: ...AV mode Note Please refer to the user manual for the the other equipment for more information Connect the LINEOUT cable not included and VIDEO cable not included as shown Make sure you connect the cable from the other equipment AUDIO and VIDEO IN to this unit PHONE and DVD VIDEO OUT Press the FUNCTION or DVD button to select DVD mode Note Please refer to the user manual for the other equipment for...

Страница 15: ...he volume to your desired level When headphones earphones are connected no sound will come from the front speakers Note Avoid listening to sound at high levels for prolonged periods of time This may be harmful to you and may cause hearing loss CONNECTING A PC Connect the 15 pin D SUB PC VGA connector from your computer to the 15 pin D SUB PC VGA input on this unit using a monitor cable and stereo ...

Страница 16: ...t will go straight into Auto scan mode Simply follow the screen prompts as below to tune in the channels 1 Use the button to select the screen menu language you prefer 2 Use the button to move to Auto Tuning press the ENTER OK button to enter Auto Tuning menu 3 Use the button to move to Start Press the ENTER OK button confirm Start The system will automatically start to scan and preset all availab...

Страница 17: ...EXIT button to exit the PROGRAMME GUIDE menu Note Guide information display may be different according to the DTV programmes Use the or button to select an audio language or audio format if available press the or button to select soud track between L R Stereo L L Mono Left and R R Mono Right Press the ENTER OK button to confrim Press the or EXIT button to exit the Audio Language menu Note For anal...

Страница 18: ...menu you can edit the channels by the following steps 1 Use the or button to select a channel Press the CH PAGE button to skip to previous next page 2 Press the RED GREEN YELLOW BLUE button or the FAV button to edit the channel DELETE PresstheREDbuttontodeletetheselectedchannel presstheENTER OK button to confirm Press the TV MENU button to stop delete RENAME for ATV mode only Press the GREEN butto...

Страница 19: ...olour Temp Select the colour temperature of the picture Select Normal balanced Warm red white Cold blue white mode Note You can also select Picture Mode simply by pressing the PICTURE button on the remote control TV DTV Setup sound MENU 1 Press the TV MENU button 2 Use the or button to select the SOUND 3 Use the or button to select the options Sound Mode Treble Bass Balance adjust them using the o...

Страница 20: ...NU button 2 Use the or button to select the SETUP 3 Use the or button to select the options Language AudioLanguage SubtitleLanguage PCSetup RestoreSetting adjustthemusingthe or button 4 Press the TV MENU button to return to previous menu 5 To exit the setup menu and return to the normal screen press the EXIT button Language Select your preferred On Screen Display language Audio Language Select you...

Страница 21: ... password is 0000 4 Use the or button to select the options Lock System ChangePassword BlockProgramme Parental Guidance press the ENTER OK or or button to adjust 5 Press the TV MENU button to return to previous menu 6 To exit the setup menu and return to the normal screen press the EXIT button Lock System Select to lock or unlock the programmes Change Password If you change the password remember y...

Страница 22: ...t will be superimposed over the TV programme Press the MIX button again to return to the text page Page search whilst watching TV In Text mode press the CANCEL button Enter the page number you want using the Numeric buttons The top line of the text page will appear whilst the text searches for your page When the page is found the number will remain in the top left hand corner of the screen Double ...

Страница 23: ...l be connected automatically and iPod Home menu appears Note Your iPod will charge automatically until fully charged once it is connected no matter whether the unit is in iPod mode or not Make sure the software of iPod is the latest When playing iPod no picutre will be shown on TV Using to your iPod Before docking your iPod MAKE SURE your iPod has the latest FIREWARE Docking System for iPod WELCOM...

Страница 24: ...NTER OK button to begin playback If necessory use the control wheel and keys on your iPod to operate it Press the PAUSE button to pause press the PLAY button to resume Press the button to skip to the previous next photo 4 Press the iPod RETURN button to go back to the previous menu Using to your iPod Music Photos Videos Settings Docking System for iPod WELCOME Home Docking System for iPod WELCOME ...

Страница 25: ...te iPod s photo output The photo will appear on the screen Press the PAUSE button on remote control to pause press the PLAY button to resume Press the button on remote control to skip to the previous next photo 4 Press iPod SWITCH button on remote control to end the photo viewing and go back to the previous menu or press the iPod RETURN button on remote control to go back to the previous screen Us...

Страница 26: ...e iPod RETURN button on remote control to go back to the previous screen WARNING Due to the i Pod limitation not all functions of some i Pod models can be controlled via the remote control If the above screen appears you need to press the iPod SWITCH button to control the iPod library directly from your iPod via remote control Navigate your iPod Video Library directly from your iPod OR Press The i...

Страница 27: ...OPEN button to open the disc door 2 Hold the disc by its edge and gently push it onto the spindle with the label side facing the front until you hear a click 3 Push the door gently to close it The picture files on the disc will be displayed one by one automatically 4 Press the STOP button to go to the folder list 5 Press the or button to highlight a file to play Press the PLAY button to start play...

Страница 28: ... recorded the language does not change About two seconds later playback continues with the new subtitle you selected The number of languages recorded differs depending on the disc If no button is pressed within a few seconds playback continues without changing the current subtitle This function can only be used for discs on which subtitles have been recorded in multiple languages On some DVDs subt...

Страница 29: ...ack about 3 second later DISPLAY FUNCTION While the disc is playing press the DISPLAY button repeatedly to display information on operation status LOCATING A SPECIFIC TIME You can move to a specific location by entering its corresponding time hours minutes seconds 1 Press the GOTO button 2 Press the or button to highlight a time and press the corresponding number button s for the setting point you...

Страница 30: ... track is played repeatedly Repeating an entire disc 2 While the disc is playing press the REPEAT DISC button until the REP REP ALL indicator displays on the screen The entire disc is played repeatedly To resume normal playback 3 Press the REPEAT DISC button until the REP OFF indicator displays on the screen Repeating a specific section DVD CD You can play a specific section repeatedly 1 While the...

Страница 31: ...elected A prior subtitle language may be programmed on the disc Some DVDs allow to change subtitle selections only via the disc menu If this is the case press the DVD MENU button and choose the appropriate subtitle from the selection on the disc menu Some DVDs may not included your pre selected language In this case the DVD player automatically displays disc menus consistent with the disc s initia...

Страница 32: ... and left sides of the image so that it can be viewed on a conventional screen Some wide screen DVDs that do not permit Pan Scan playback are automatically played in Letter Box mode black bands at top and bottom of screen Letter Box When wide screen video is played in this mode on a conventional screen black bands appear at the top and bottom of the screen Wide screen This is the correct mode for ...

Страница 33: ...ean the disc Do NOT use irregular shape discs example heart shaped octagonal etc They may cause malfunctions Customizing the Function Settings Maintenance SYMPTOM CAUSE AND REMEDY The remote does not function Check that the AC power cord is connected The unit is not turned on Remove any obstacles between the remote and the unit Use the remote near the unit Point the remote at the remote sensor on ...

Страница 34: ...ption we strongly recommend you use a rooftop aerial If you do not have access to a rooftop aerial for example if you rent a flat and the aerial is the responsibility of your landlord or if you re using a second TV in the bedroom and don t want the hassle and expense of extension cables a set top aerial may be your only option Can I watch Freeview using a portable set top aerial Check the location...

Страница 35: ... refer to your iPod manual for details iPOD iPod does not dock properly or does not install properly iPod does not respond to the speaker system 811 312291W190 Design and specifications are subject to change without notice Troubleshooting Guide Specification Operation Voltage AC 240V 50Hz Power Consumption 64W Video Decode 1 8W 1 8W 553 L x 220 W x 465 H mm Net 6 1 kg Gross 7 85 kg 1080i 720p 576p...

Страница 36: ... 36 ...

Отзывы: