


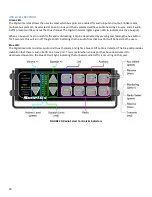


14
RADIO CONNECTIONS:
IMPORTANT: To ensure proper operation, the connection to the radio should be performed by a Qualified Radio
Technician.
If you are using a radio-specific interface cable, follow the directions included with the interface cable, then proceed
with this Installation Procedure.
IMPORTANT: If you are unsure that your Interface Cable is the proper one, or you want to know if Sonetics
manufactures a Radio-Specific Interface Cable for your radio(s), contact your local Sonetics Dealer.
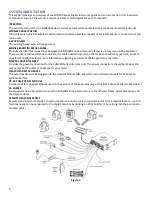
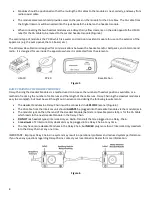
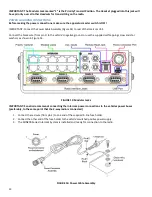
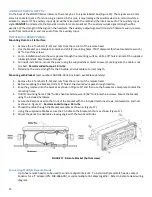
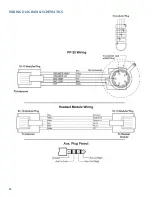
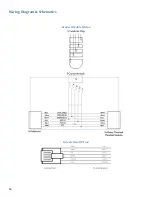
Plug the 9-Pin plug on the end of the MR-0X Mobile Radio Interface Cable into the desired Radio Interface Jack on the
rear of the intercom (Figure 15).
IMPORTANT: Tighten the 2 screws on the plug of the MR-0X. If these screws are not tightened, the 9-pin plug may
vibrate loose and cause problems with transmission, reception or other radio problems.
Using the information in Figure 16, connect the wires on the MR-0X Mobile Radio Interface Cable to the appropriate
places on the 2-way radio.
If the intercom is a SON202, SON203 or SON204 repeat “Radio Connections” steps for multiple radios.
FIGURE 15: SON204 Rear Panel
FIGURE 16: MR-0X Universal Radio Interface Cable