

6
© 2012 Observint Technologies, Inc. All rights reserved.
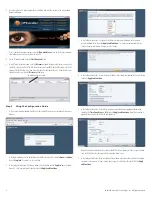
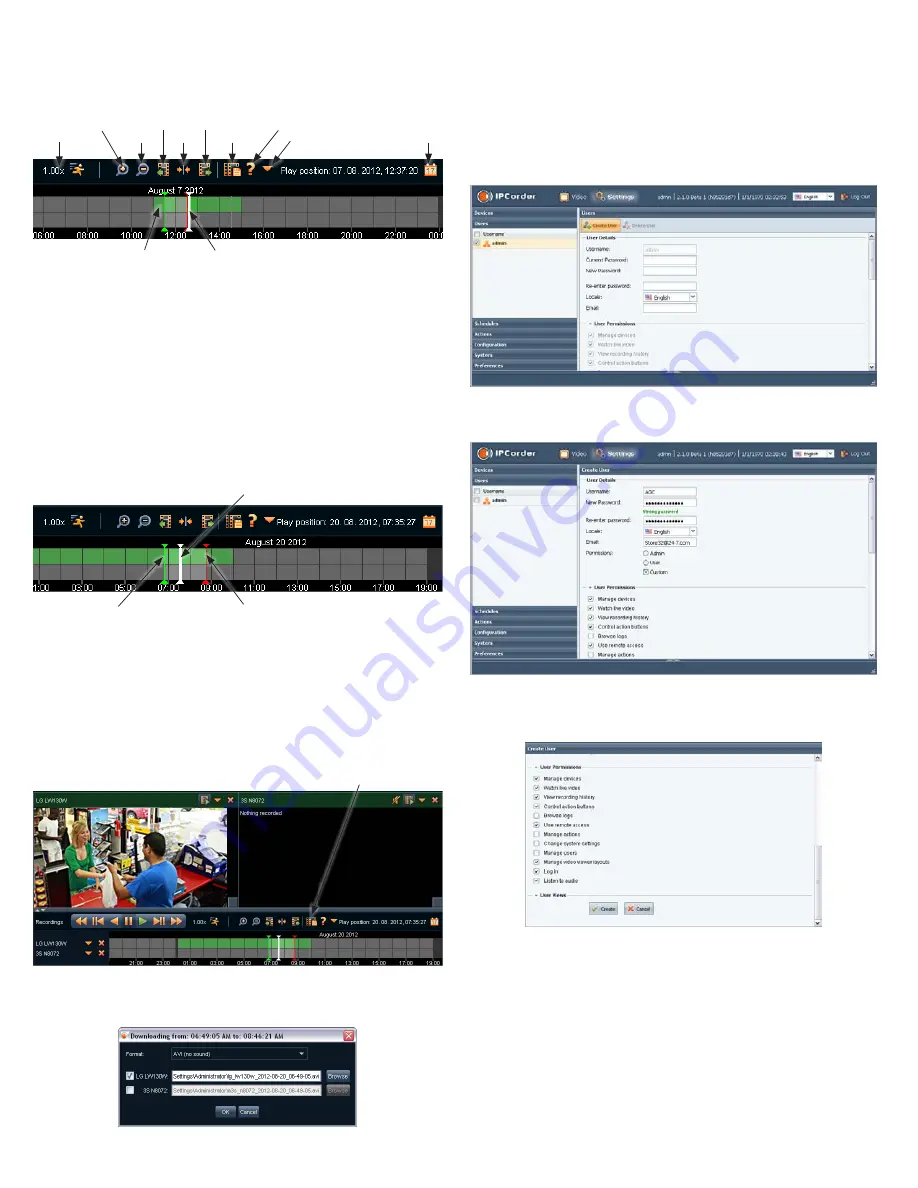
c. In a section of the timeline that shows recorded video (green segment, see below), click (once)
the time at which you want to start playing video. The current play position is indicated by a
white marker.
Shift left
Center
Payback rate
Expand
Contract
Open Legend
Open calendar
Export video
More actions
Shift right
Play position marker
(white)
Video recorded area
(green)
Controls on the time line include:
-
Click the
Expand
icon to widen the timeline
-
Click
Shift left
icon
or
Shift right
icon to shift the time span
-
Click the
Playback rate
icon to adjust the playback speed.
d. Click the Play button (
u
) in the playback controls to watch the video. Click the Pause icon
(
;
) to Stop.
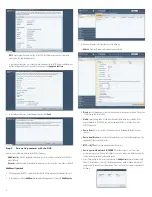
e. To mark a segment of the time line for repeated playback (or export), drag your mouse cursor
from the start of the segment to the end of the segment. The segment you selected will be
indicated by a green marker at the start and a red marker at the end.
Playback start marker (green)
Playback end marker (red)
Play position (white)
f. Click anywhere between the red marker and the green marker to set the play position, then click
the play button to continuously replay the segment. Click the Pause icon (
;
) to stop.
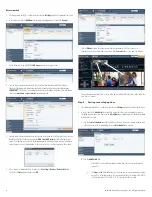
g. To export the video segment between the green marker and the red marker:
i.
Stop the video playback.
ii.
Click the
Export video
icon.
Export video icon
h. In the pop-up window, uncheck the cameras that you don’t want to download video from, then
click
Browse
and select the location where the video segment will be saved on your computer.
i. Click
OK
to export (download) the video segment. A window will open showing the progress of
the download.
Step 7. Add users to the NVR system
1. After logging into the NVR as an administrator, click the
Settings
option in the header of the screen.
2. In the left pane, click
Users
.
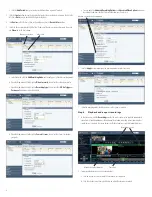
3. Click the
Create User
button. In the
Use Details
menu, enter a Username, enter then re-enter a
password (note that the password strength is calculated), then click a
Permissions
level.
The
Admin
and
User
options have pre-set
User Permissions
, however, as an Admin you can
change any permissions assigned to any user.
Create User - User Permissions list
4. After selecting the permissions for the new user, scroll to the bottom of the frame, then click the
Create
button.


