

5
c. Click the
Add Period
icon again to enter an additional time segment if needed.
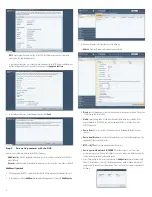
3. Click the
Create
button to save the schedule. Notice that the new schedule is shown in the list in the
left frame.
Note
: you can edit the default preset schedules.
4. Click
Devices
in the left frame, then, in the right pane, click the
Device Status
button.
5. Check the device select box to the left of the IP address of the camera you want to record, then click
the
Video
tab in the frame below.
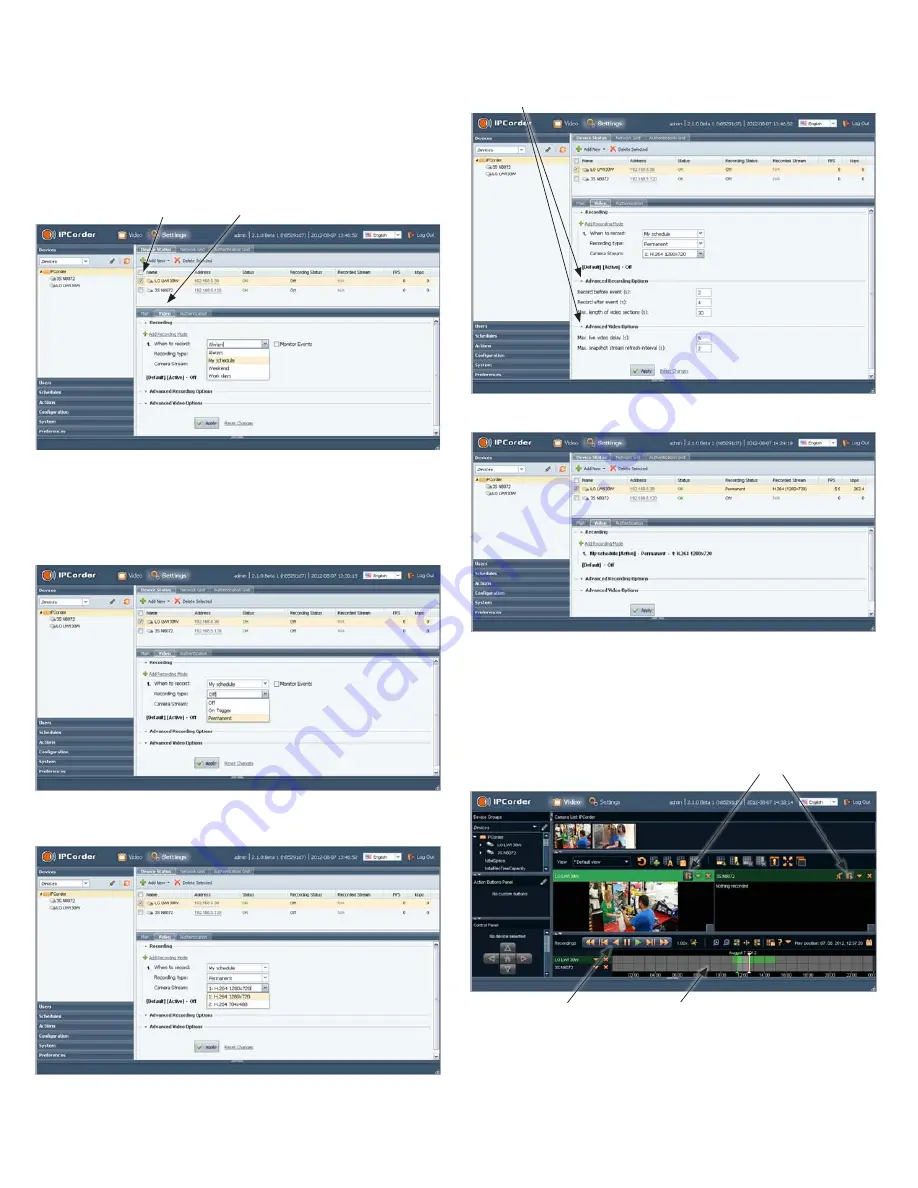
Device select box
Video tab
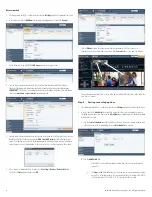
a. In the Video tab, click the
Add Recording Mode
icon to configure a scheduled recording mode.
b. Open the drop-down list to the right of
When to record
, then select the schedule you prefer.
c. Open the drop-down list to the right of
Recording type
, then select either
Off
,
On Trigger
, or
Permanent
(continuous when scheduled).
d. Open the drop-down list to the right of
Camera Stream
, then select the stream (resolution)
you prefer.
e. You can open the
Advanced Recording Options
and
Advanced Video Options
submenus
by clicking the
q
icons. Edit the fields in those submenus if necessary.
Click to open/close the submenu
6. Click the
Apply
button to complete the recording mode setup for the camera.
7. Setup the recording modes for other cameras in the system as needed.
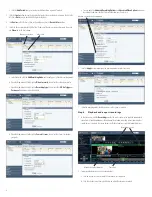
Step 6. Playback and export recordings
1. In the Video view, click the
Recordings
icon for the camera you want to playback or download
video from. A timeline will open at the bottom of the window indicating when video and other
recordings were made. In the screen below, the Playback icons were selected for both cameras.
Recordings icons
Playback control buttons
Timeline
2. To play recorded video (see screen capture below):
a. Click on the camera used to record the video you want to payback.
b. Click the calendar icon, then select the day on which the video was recorded.


