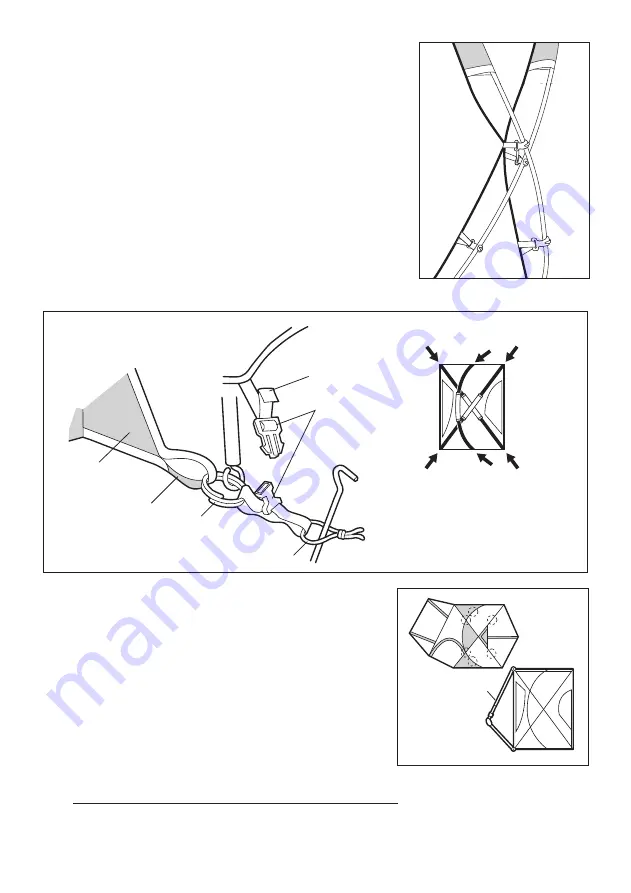
10) Attach all the Plastic Hooks to the corresponding
Poles (fig. I).
11) Close both door panels, front and back. Insert the
pegs into the loops at the six ends of each corner.
Peg down the Inner Tent by following the numbers,
and by pulling lightly to stretch out any slack at the
bottom of the tent (fig. J).
*Peg the tent down all the way, but do not use
undue force that may bend or break the pegs.
*Hammer gently, and if you find any obstacles
such as stones, change the entrance point of the
peg as needed.
*The door may not close later if it is open when
pegging down.
12) Check the direction of the Vestibule and
Back Room and lay the Fly in place (fig. K).
*Velcro Tape is attached to the inside of the
Fly (at the cross-section of the Pole and the
Guy Line Reinforcing Cloth) to keep the Fly
in place. Wind the Velcro Tape around the
Pole to secure it. When taking down the tent,
make sure to remove the Velcro Tape. If the
Fly is forcefully pulled while the Velcro Tape
is still wound on the Pole, the Velcro Tape
may be damaged.
*Ensure the Vestibule Building Tape is connected.
13) Extend the Vestibule Pole and connect firmly (1 pcs).
*Make sure to connect firmly without leaving a gap at the joint.
Corner Tape
Corner Loop
Ring
Buckle
Triangular Reinforcing
Cloth on the Bottom
The connection point of
the Fly and the Bottom
Fig. J
Adjusting Tape
Peg it down by following the
numbers, while also pulling
lightly to stretch out any slack on
the bottom.
Fig. K
Fig. I
③
④
⑤
⑥
①
②
Vestibule Building Tape
6


