Set-up Procedure
0) Make sure that two or more people take part in the set-up.
1) Spread the Inner Tent on a flat area.
There are two entrances to the Inner Tent; the side that has the Building Tape is
the Vestibule side and will become the main entrance. It is necessary to decide
the location of the Vestibule according to the predicted direction of the wind and
rain. Typically, the Vestibule should face downwind. If the Vestibule faces
windward, not only will wind and rain blow into the main entrance, but sudden
and strong gusts may cause damage to the tent when opening the door.
2) There are three Inner Tent Poles. Extend the two Poles with the yellow ends and
connect them firmly. Make sure to connect them without leaving gaps at the
joints.
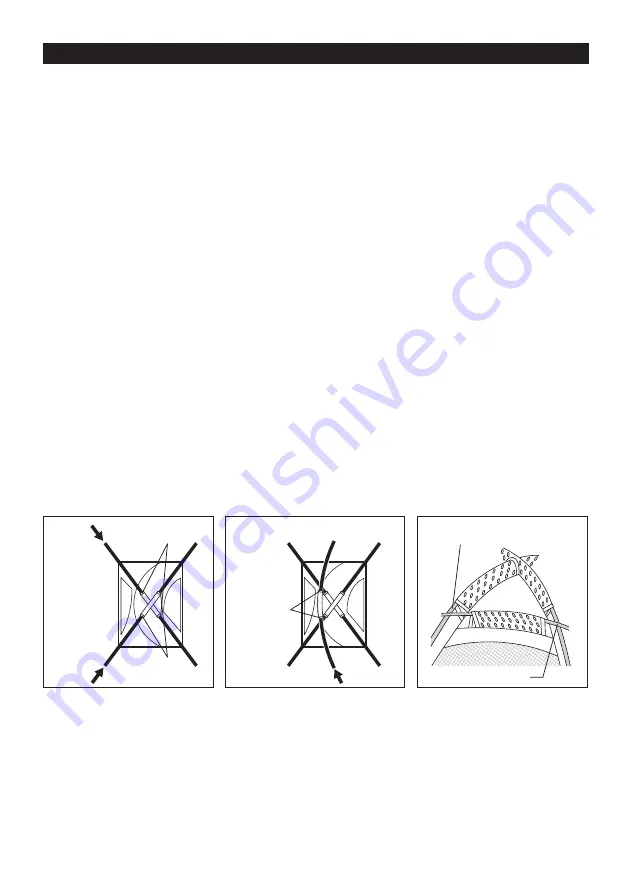
3) Slowly and one-by-one, insert the two yellow-ended Poles through the sleeves
with the yellow marks. (Hereafter this is called the ‘X’.) (fig. A)
4) Extend the remaining Pole for the Inner Tent (hereafter called the ‘Side Pole’)
and connect firmly.
5) Insert the Side Pole slowly into the sleeve with the green mark (fig. B).
The Side Pole should go over the X Pole (fig. C).
X Pole (Yellow Sleeve)
Side Pole (Green Sleeve)
Fig. C
Fig. A
Green Tape
(Side Pole)
Fig. B
Yellow Tape (X Pole)
Yellow Tape
4


