7
Assembly
Note:
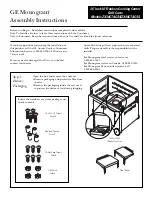
Carefully cut the tape holding the carton together. Cut the carton so that it can lay flat on
the ground to provide a clean surface for assembling your Grill. Remove the packing materials
and all the parts from inside the Cabinet. After unpacking all the parts, check to make sure you
HAVE all the parts. If anything is damaged or missing, contact our toll free number: 866-475-
5180. Discard all packing material in a safe and recyclable manner. Save this Assembly Manual
for future reference.
Tools Required: Phillips Head Screwdriver, Adjustable Wrench or Pliers
Step 2
Step 1
Step 1: Attach the Side Supporting Legs
Locate:
Grill Lid and Firebox Assembly, (2) Side
Supporting Legs, (4) spring washers and (4) M6x12
bolts
Procedure:
Attach (2) Side Supporting Legs to the
Grill Lid and Firebox Assembly using (4) spring
washers and (4) M6x12 bolts as shown in Fig. 1A
and Fig. 1B.
Fig. 1A
Fig. 1B
Step 2: Attach the Rear Supporting Leg
Locate:
Rear Supporting Leg, (2) spring washers
and (2) M6x12 bolts
Procedure:
Attach the Rear Supporting Leg to the
Grill Lid and Firebox Assembly using, (2) spring
washers and (2) M6x12 bolts as shown in Fig. 2.
Fig. 2


