background image

Instructions for the user

36

6.3

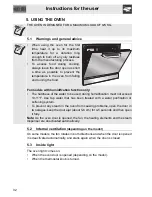
Cleaning and removing the door glass

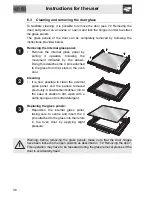
To facilitate cleaning, it is possible to remove the door (see 7.2 Removing the
door) and place it on a canvas, or open it and lock the hinges in order to extract
the glass panels.
The glass panels of the door can be completely removed by following the
instructions provided below.

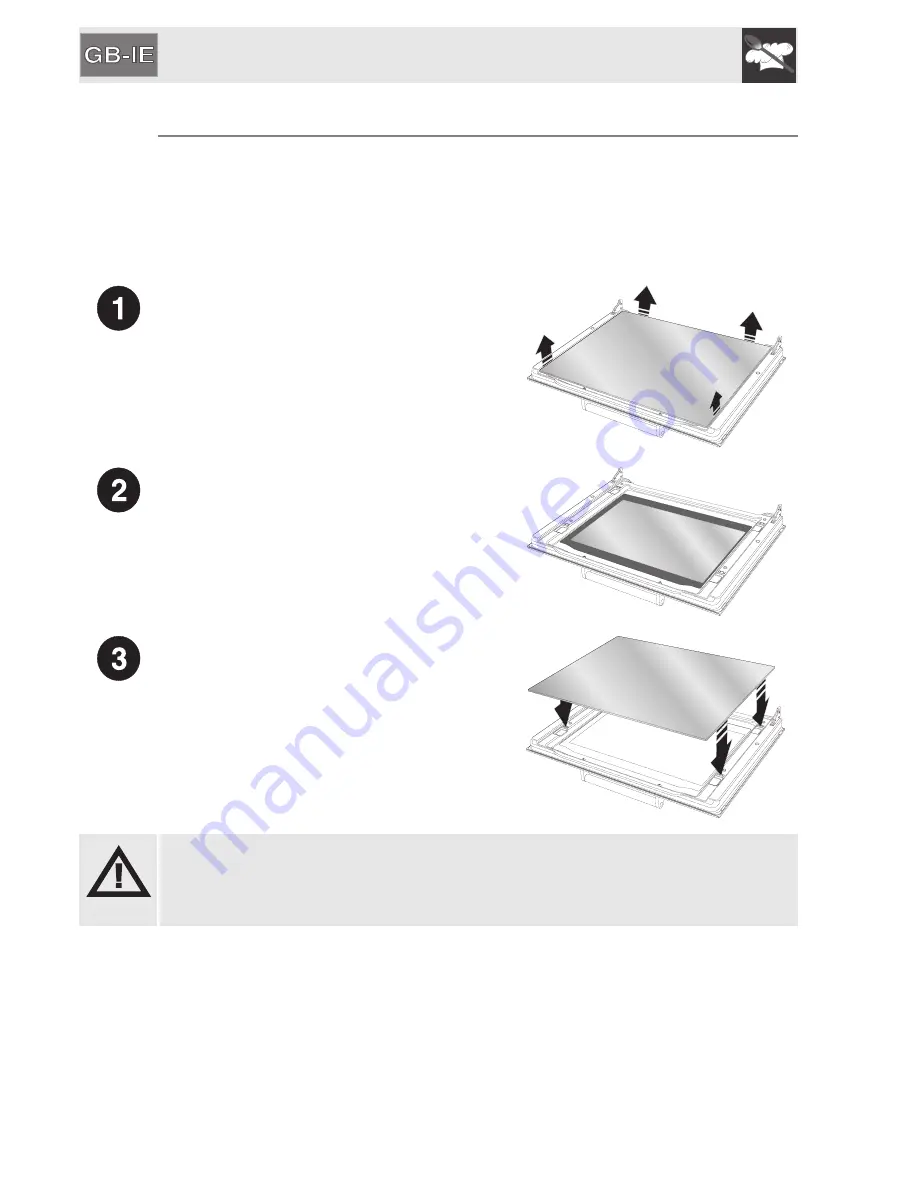
Removing the internal glass panel:

•  Remove the internal glass panel by

pulling it upwards, following the
movement indicated by the arrows.
Doing this detaches the 4 pins attached
to the glass from their slots in the oven
door.

Cleaning:

•  It is now possible to clean the external

glass panel and the panels removed
previously. Use absorbent kitchen roll. In
the case of stubborn dirt, wash with a
damp sponge and neutral detergent.

Replacing the glass panels:

•  Reposition the internal glass panel,

taking care to centre and insert the 4
pins attached to the glass into their slots
in the oven door by applying slight
pressure.

Warning: before removing the glass panels, make sure that the door hinges
have been locked in the open position as described in “7.2 Removing the door”.
This operation may have to be repeated during the glass removal process if the
door is accidentally freed.

Содержание RFF43

Страница 1: ...and the correct procedures for cleaning and maintenance of the appliance INSTRUCTIONS FOR THE INSTALLER these are intended for the qualified technician who must install the appliance set it functioning and carry out an inspection test 1 INSTRUCTIONS FOR USE 24 2 SAFETY PRECAUTIONS 26 3 ENVIRONMENTAL RESPONSIBILITY 28 4 GET TO KNOW YOUR OVEN 29 5 USING THE OVEN 32 6 CLEANING AND MAINTENANCE 34 7 EX...

Страница 2: ...INDICATED IF THE APPLIANCE IS INSTALLED ON BOATS OR IN CARAVANS DO NOT USE IT AS A ROOM HEATER DO NOT USE THIS APPLIANCE FOR HEATING ROOMS THIS APPLIANCE IS MARKED ACCORDING TO EUROPEAN DIRECTIVE 2002 96 EC ON WASTE ELECTRICAL AND ELECTRONIC EQUIPMENT WEEE THIS DIRECTIVE DEFINES THE STANDARDS FOR THE COLLECTION AND RECYCLING OF WASTE ELECTRICAL AND ELECTRONIC EQUIPMENT APPLICABLE THROUGHOUT THE EU...

Страница 3: ...F SUGARY FOODS SUCH AS JAM TO SET INSIDE THE OVEN IF THEY ARE ALLOWED TO SET FOR TOO LONG THEY COULD RUIN THE SURFACES DO NOT USE PLASTIC KITCHENWARE OR CONTAINERS THE HIGH TEMPERATURES INSIDE THE OVEN COULD MELT THE PLASTIC DAMAGING THE APPLIANCE DO NOT USE SEALED TINS OR CONTAINERS IN THE APPLIANCE OVERPRESSURE MAY OCCUR INSIDE THE CONTAINERS DURING COOKING CREATING A DANGER OF EXPLOSION DO NOT ...

Страница 4: ... ITS SOCKET MUST BE OF THE SAME TYPE AND CONFORM TO THE REGULATIONS IN FORCE THE SOCKET MUST BE ACCESSIBLE AFTER THE APPLIANCE HAS BEEN BUILT IN NEVER DISCONNECT THE PLUG BY PULLING ON THE CABLE IF THE POWER SUPPLY CABLE IS DAMAGED HAVE IT REPLACED IMMEDIATELY IT IS OBLIGATORY FOR ALL ELECTRICAL EQUIPMENT TO BE EARTHED ACCORDING TO THE METHODS LAID DOWN BY SAFETY REGULATIONS IMMEDIATELY AFTER INST...

Страница 5: ...M AND CAUSING SHORT CIRCUITS DO NOT MODIFY THIS APPLIANCE DO NOT SPRAY ANY SPRAY PRODUCTS NEAR THE ELECTRICAL APPLIANCE WHILE IT IS IN OPERATION DO NOT USE SPRAY PRODUCTS WHILE THE PRODUCT IS STILL HOT The manufacturer cannot be held liable for damage to persons or things caused by failure to observe the above instructions by interference with any part of the appliance or by the use of non origina...

Страница 6: ...r results in the application of administrative sanctions The product does not contain substances in quantities sufficient to be considered hazardous to health and the environment in accordance with current European directives 3 2 Your environmental responsibility Our productspackingismadeofnon pollutingmaterials which are therefore compatible with the environment and recyclable Please help by disp...

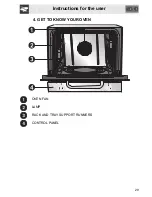
Страница 7: ...Instructions for the user 29 4 GET TO KNOW YOUR OVEN OVEN FAN LAMP RACK AND TRAY SUPPORT RUNNERS CONTROL PANEL ...

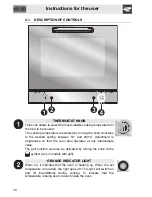
Страница 8: ...n 50 and 250 C Adjustment is progressive so that the oven also operates at any intermediate value The grill function can also be activated by turning the knob to the symbol only in models with grill ORANGE INDICATOR LIGHT When on it indicates that the oven is heating up When the set temperature is reached the light goes off This light will switch on and off intermittently during cooking to indicat...

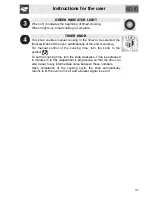
Страница 9: ...ches off the oven automatically at the end of cooking For manual control of the cooking time turn the knob to the symbol To set the cooking time turn the knob clockwise Time is expressed in minutes 5 to 60 Adjustment is progressive so that the time can also be set to any intermediate value between these numbers Upon completion of the cooking cycle the knob automatically returns to 0 the oven turns...

Страница 10: ...used during humidification must not exceed 10 11 F Use tap water that has been treated with a water purification or softening system To prevent any steam in the oven from causing problems open the door in two stages keep the door ajar about 5 6 cm for 4 5 seconds and then open it fully Note As the oven door is opened the fan the heating elements and the steam dispenser are deactivated automaticall...

Страница 11: ...ge light comes on to indicate that the oven is heating up Upon the set temperature being reached the indicator light goes off It switches on and off intermittently to indicate that the temperature is being kept constant 5 7 Timed cooking TIMER KNOB IN A POSITION BETWEEN 5 AND 60 Example THERMOSTAT KNOB AS DESIRED BETWEEN 50 C AND 250 C Example The orange light comes on to indicate that the oven is...

Страница 12: ...ed regularly at the end of the day Let it cool first To clean and preserve the stainless steel surfaces always use only specific products that do not contain abrasives or chlorine based acids How to use pour the product onto a damp cloth and wipe the surface rinse thoroughly and dry with a soft cloth or chamois leather Do not use metallic sponges or sharp scrapers as they will damage the surface U...

Страница 13: ...st Take out all removable parts Removing the guide frames makes it easier to clean the side parts of the oven To remove the guide frames pull the frame towards the inside of the oven to unhook it from its housing A then slide it out of the seats at the back B When cleaning is complete repeat the above procedures in reverse order to put the guide frames back in ...

Страница 14: ... 4 pins attached to the glass from their slots in the oven door Cleaning It is now possible to clean the external glass panel and the panels removed previously Use absorbent kitchen roll In the case of stubborn dirt wash with a damp sponge and neutral detergent Replacing the glass panels Reposition the internal glass panel taking care to centre and insert the 4 pins attached to the glass into thei...

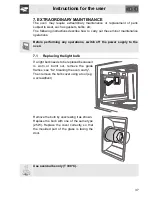
Страница 15: ...ing any operations switch off the power supply to the oven 7 1 Replacing the light bulb If a light bulb needs to be replaced because it is worn or burnt out remove the guide frames see 6 2 Cleaning the oven cavity Then remove the bulb cover using a tool e g a screwdriver Remove the bulb by unscrewing it as shown Replace the bulb with one of the same type 25W Replace the cover correctly so that the...

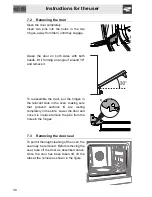
Страница 16: ...eassemble the door put the hinges in the relevant slots in the oven making sure that grooved sections C are resting completely in the slots Lower the door and once it is in place remove the pins from the holes in the hinges 7 3 Removing the door seal To permit thorough cleaning of the oven the seal may be removed Before removing the seal take off the door as described above Once the door has been ...

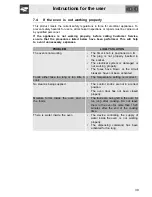
Страница 17: ...is not properly inserted in the socket The electrical system is damaged or not working properly The fuses have blown or the circuit breakers have not been activated Foods either take too long or too little to cook The temperature setting is incorrect No steam is being supplied The control knobs are not in a correct position The oven door has not been closed properly Moisture forms inside the oven ...

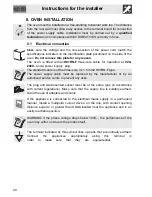
Страница 18: ...is of the three core 3 x 1 5 mm2 H07RN F type The power supply cable must be replaced by the manufacturer or by an authorised service centre to prevent any risks The plug and wall mounted socket must be of the same type in accordance with current regulations Make sure that the supply line is suitably earthed Avoid the use of adapters and shunts If the appliance is connected to the electrical mains...

Страница 19: ...ns or things caused by failure to observe the above instructions or deriving from tampering with any part of the appliance 8 2 Levelling Level the oven on the ground using the four adjustable feet To adjust them loosen each foot The adjustment screws have a range of 10 mm 8 3 Steam outlet pipe Depending on the model there are one or two outlet pipes on the back of the oven for releasing the steam ...

Страница 20: ...e installation maintain a distance of at least 50 mm between appliances Stacked installation a maximum of two appliances may be stacked Rotate the appliance feet so that there is a gap of at least 30 mm between the two appliances you should also set the top appliance back by 30 mm in relation to the appliance underneath Warning the appliance support base must not be over 1 60 m above the floor ...

Отзывы: