


HGM6100N Series Genset Controller User Manual Page 37 of 47
12
INSTALLATION
12.1
FIXING CLIPS
The module is held into the panel fascia using the supplied fixing clips.
—
Withdraw the fixing clip screw (turn anticlockwise) until it reaches proper position.
—
Pull the fixing clip backwards (towards the back of the module) ensuring four clips are inside their
allotted slots.
—
Turn the fixing clip screws clockwise until they make contact with the panel.
—
Care should be taken not to over tighten the screws of fixing clips.
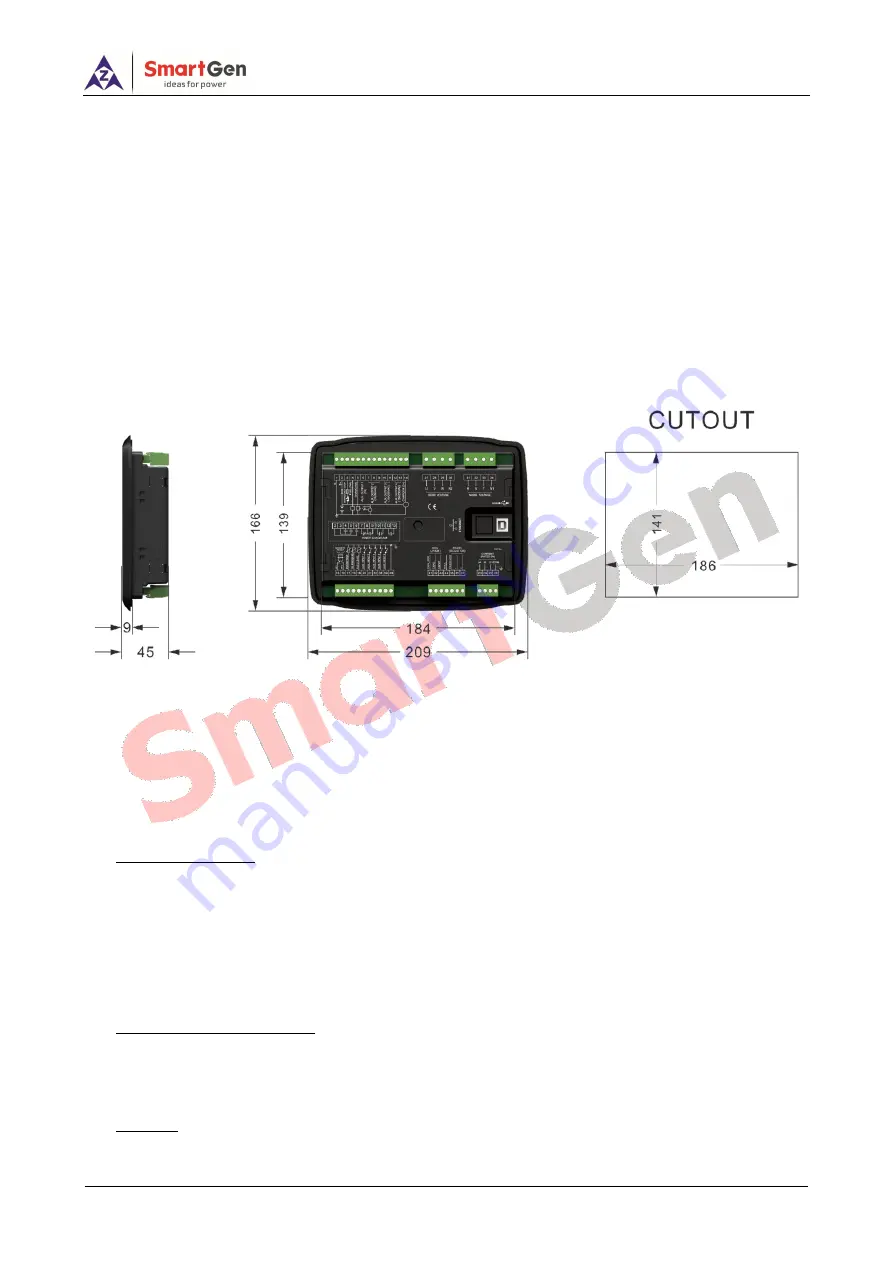
12.2
OVERALL DIMENSION AND PANEL CUTOUT
Unit: mm
Fig.11 – Case and Overall Dimensions
HGM6110N series controller can be applicable to (8~35) VDC battery voltage. Battery
negative must be reliably connected to engine shell. The connection between controller power and
battery should not be less than 2.5mm
2
. If a float charger is fitted, please connect output line of
the charger with battery directly, and then connect battery positive and negative to power input of
controller separately, in case that charger will interfere with the normal running of controller.
1)
Speed Sensor Input
Speed sensor is installed in the engine for testing flywheel teeth. The connection with
controller uses 2-core screen, shield layer should be connected to terminal 16 of controller and the
other end vacant. The other two signal lines are respectively connected to terminal 15 and terminal
16. At full speed, output voltage range is (1~24) VAC (RMS), 12VAC is recommended (rated speed).
During installing, make the speed sensor contact the flywheel firstly, then pour out 1/3 laps, finally
lock nut on the sensor.
2)
Output and Expansion Relay
All the outputs of controller are relay outputs. If need to expand relay, please add freewheeling
diode in both ends of relay coil (when expansion relay coil links DC), or add RC loop (when
expansion relay coil links AC), in case controller or other equipments are interfered.
3)
AC Input
HGM6110N series controller must externally connect to current transformer; CT secondary


