background image

N O T E

If you hide multiple 3D models on the same page with magic hats, each magic hat has a different

colored ribbon.

To hide a 3D model with a magic hat

1. Select the 3D model.

2. Press the 3D model’s menu arrow, and then select

Disguise > Disguised

.

To change the magic hat’s color

1. Select the magic hat.

2. Press the magic hat’s menu arrow, and then select

Disguise > Change Color

.

To reveal a 3D model under a magic hat

Use Mixed Reality Tools as described in

Manipulating 3D models using Mixed Reality Tools for

SMART Document Camera

on page 69.

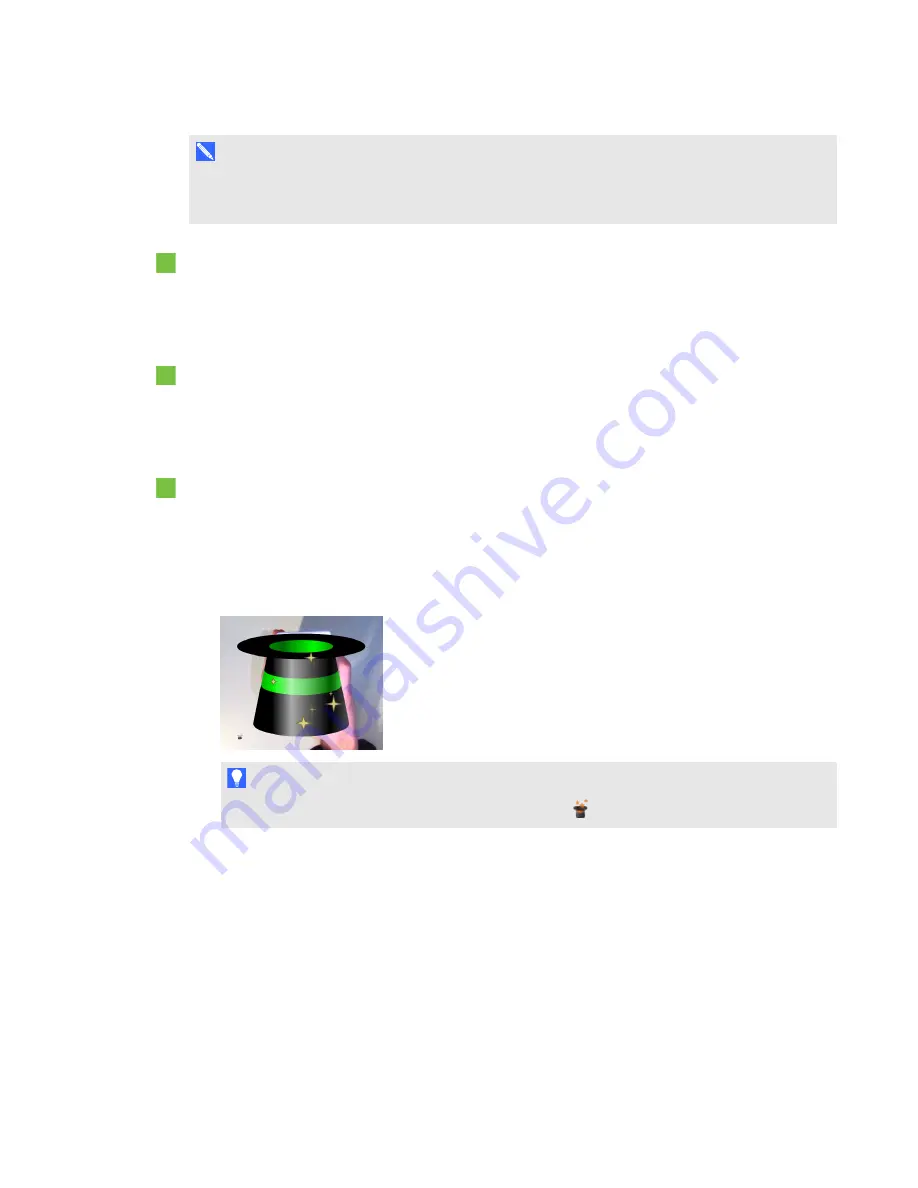
After Mixed Reality Tools assigns the 3D model to the cube, stars swirl around the magic hat,

and then the magic hat disappears, revealing the 3D model behind it.

T I P

You can also reveal the 3D model by pressing the hat

icon in the lower-left corner.

Using SketchUp sketching software and
Trimble 3D Warehouse

You can use the following 3D tools with 3D Tools for SMART Notebook software and Mixed Reality

Tools:

l

SketchUp sketching software

l

Trimble 3D Warehouse (formely Google 3D Warehouse)

C H A P T E R 7

Using 3D Tools for SMART Notebook software and Mixed Reality Tools

72

Содержание 450

Страница 1: ...SMART Document Camera 450 User s guide ...

Страница 2: ...Board SMART Notebook SMART Exchange smarttech the SMART logo and all SMART taglines are trademarks or registered trademarks of SMART Technologies ULC in the U S and or other countries Google 3D Warehouse and SketchUp are trademarks of Google Inc Adobe Reader and Acrobat are registered trademarks or trademarks of Adobe Systems Incorporated in the United States and or other countries Windows is eith...

Страница 3: ...roduct has joints that present a pinch hazard when you move the camera arm Keep clear of the pinch points l Do not stare into the light or shine the light directly into someone s eyes Turn off the light when displaying or capturing images of people l Do not overload power outlets or extension cords as this can result in a fire or electric shock l Turn off and disconnect your SMART product before a...

Страница 4: ...r cover the openings or slots on your SMART product These slots provide ventilation ensure reliable operation and protect your SMART product from overheating l Do not carry your SMART product by the camera arm Carry it by the base of the unit l Do not aim the camera lens at the sun l If your SMART product requires replacement parts make sure the service technician uses replacement parts specified ...

Страница 5: ...MART Document Camera 23 Introduction 23 Understanding Camera Computer Pass Through and Playback modes 23 Identifying features of each mode 25 Setting document camera modes 26 Displaying printed documents 27 Inserting and removing an SD SDHC card 28 Chapter 4 Using your SMART Document Camera in Camera mode 31 Introduction 31 Using Camera mode 31 Using the on screen display OSD menu in Camera mode 3...

Страница 6: ...ixed Reality Tools for SMART Document Camera 60 Inserting and manipulating 3D models 62 Using Mixed Reality Tools for SMART Document Camera 69 Using SketchUp sketching software and Trimble 3D Warehouse 72 Chapter 8 Troubleshooting 75 Document camera issues 75 Appendix A Hardware environmental compliance 79 Waste Electrical and Electronic Equipment regulations WEEE directive 79 Restriction of Certa...

Страница 7: ...6 Mixed reality cube 7 Power supply 7 USB cable 7 VGA cable 7 Composite video adapter cable 8 Microscope adapter 8 Anti glare sheet 8 Document camera modes 8 Document camera software 9 SMART Notebook software and SMART Product Drivers 9 Downloading software 9 Introduction Your document camera 450 can transform any classroom or lecture hall into a spontaneous and interactive learning environment It...

Страница 8: ...t camera to manipulate 3D models in SMART Notebook files Document camera features Camera l High resolution 5 MP CMOS sensor l 8 optical zoom 8 digital zoom l Internal memory l Up to 30 frames per second l Automatic or manual focus l Maximum shooting area 15 3 4 11 3 4 40 cm 30 cm l Microphone integrated into base l Microscope mode that requires adapters Output input l VGA and DVI I outputs XGA 102...

Страница 9: ...cted to a computer Parts of the document camera Adjustable camera arm and camera head You can fold and adjust the flexible arm to position the lens at any angle The camera head has a bright LED overhead light to enhance the lighting condition 1 2 3 4 5 Camera head Camera lens Overhead light Flexible arm Control panel Control panel You can use the control panel to switch between Camera Computer Pas...

Страница 10: ...off 10 Zoom in out 5 Select camera 11 Auto focus 6 Select computer pass through 12 Capture to SMART Notebook software or to local memory 13 USB indicator computer or USB drive For information on the different modes see Understanding Camera Computer Pass Through and Playback modes on page 23 C H A P T E R 1 Overview 4 ...

Страница 11: ...ble 4 Connect the supplied composite video adapter cable 5 Connect a USB connector of a computer Left side connection panel The left side connection panel has a DVI output a switch for selecting either a computer or a USB drive and audio in and out connect 1 Connect any display device with a DVI cable 2 USB switch 3 Connect a USB drive 4 Connect an external microphone 5 Connect speakers for video ...

Страница 12: ... switch is on the bottom control panel This switch enables you to change the format of the composite video output for your television Changes to the selected video output take effect the next time you turn on your document camera The resolution reset button resets the output VGA DVI resolution to XGA N O T E You can press the resolution reset button with a pen tip Pressing the button for three sec...

Страница 13: ...pecific connector that connects to the external power supply Plug adapters for North America Great Britain Europe and Australia are provided USB cable Use the USB cable to connect your document camera to your computer You can display objects capture images to SMART Notebook files and control your document camera from SMART Notebook software VGA cable Use the VGA cable to connect your document came...

Страница 14: ...e anti glare sheet over printed documents to reduce glare Document camera modes Your document camera has three modes you can use to control how it sends data to a computer projector monitor or television l Camera mode controls your document camera from its control panel and displays images on a projector monitor or television l Computer Pass Through mode displays the image from the VGA input on a ...

Страница 15: ...d Reality Collaboration tools see Using 3D Tools for SMART Notebook software and Mixed Reality Tools on page 59 You can find system requirements for your computer in the SMART Notebook software 11 1 release notes smarttech com kb 170138 I M P O R T A N T You need to have SMART Notebook software 11 SP1 or later installed on your computer before you connect your document camera Downloading software ...

Страница 16: ......

Страница 17: ...amera on and off 16 Connecting your document camera to external devices 16 Connecting your document camera to a microscope 16 Switching between VGA DVI and composite output 18 Connecting your document camera to an external microphone 18 Connecting your document camera to speakers 19 Shooting area overhead light and anti glare sheet 19 Shooting area 19 Overhead light 20 Anti glare sheet 20 External...

Страница 18: ...Place a hand on the base of the document camera to stabilize it 2 Press the camera head down and then pull the camera arm outward and upward 3 Move the camera head to aim the lens at your object I M P O R T A N T To use your document camera with SMART Notebook software you need to connect your document camera to a computer C H A P T E R 2 Setting up your SMART Document Camera 12 ...

Страница 19: ...ument camera as a USB camera or to transfer captured pictures videos from the memory source to your computer 2 Connect a USB cable to the USB receptacle on the rear connection panel 3 Locate the USB connector on your computer and then connect the cable to it To connect your document camera to a computer with a VGA cable 1 Connect a VGA cable to the VGA In receptacle on the rear connection panel 2 ...

Страница 20: ... TV left when using an RCA connection for a composite output Connecting your document camera to a monitor or a projector In this configuration your document camera is connected to your external display device with a VGA cable To connect your document camera to a monitor or a projector 1 Complete the basic connection steps see page 12 I M P O R T A N T Make sure the TV VGA switch is set to VGA 2 Co...

Страница 21: ...lay for all three modes Connecting your document camera to a TV or a projector In this configuration your document camera is connected to your computer with both a composite video adapter cable and an RCA cable To connect your document camera to a TV or a projector 1 Complete the basic connection steps see page 12 2 Connect a composite video adapter cable to your document camera s Composite Video ...

Страница 22: ...green to amber Connecting your document camera to external devices You can connect your document camera directly to the following external devices l Microscope l Microphone l Speakers Connecting your document camera to a microscope You can connect your document camera to a microscope This enables you to examine microscopic objects on a big screen To set up a microscope 1 Select the appropriate rub...

Страница 23: ...es the eyepiece 4 Fit the camera head with the microscope adapter over the microscope s eyepiece I M P O R T A N T Make sure the arrow on the camera head and microscope adapter are on the same side 5 Turn the microscope adapter counterclockwise to line up the arrows and lock the microscope adapter in place C H A P T E R 2 Setting up your SMART Document Camera 17 ...

Страница 24: ...osite output If you re using a projector or a computer display with a VGA or a DVI cable set your document camera to the VGA mode If you re using a television with the composite video cable set your document camera to the TV mode To set your document camera to the VGA mode Set the VGA TV switch on the right side connection panel to VGA To set your document camera to the TV mode Set the VGA TV swit...

Страница 25: ...aker receptacle on your document camera s left side connection panel Shooting area overhead light and anti glare sheet Shooting area The shooting area can view a maximum area of 15 3 4 11 3 4 40 cm 30 cm To rotate the image 1 Press the button on the control panel 2 Press the button on the control panel and then select 3 Press the button on the control panel 4 Press the button on the control panel ...

Страница 26: ...on on the control panel 7 Press the button on the control panel to close the menu Overhead light Press the button on your document camera s control panel to turn the overhead light on or off Anti glare sheet The anti glare sheet is a special coated film that helps eliminate any glare that could be encountered while displaying glossy objects such as magazines and photos Place the anti glare sheet o...

Страница 27: ...ed in the SD card slot Remove this piece of plastic before you insert your SD SDHC card N O T E S l Your document camera supports SD SDHC cards with up to 32 GB speed class 10 l SDHC card with class 6 or higher is recommended for high quality recording l Push in the SD SDHC card to eject it To connect a USB drive 1 Set the USB switch on the left side connection panel to Your document camera detect...

Страница 28: ......

Страница 29: ...era s different modes Understanding Camera Computer Pass Through and Playback modes You can use your document camera in Camera Computer Pass Through or Playback mode Each mode enables you to complete different functions and requires a specific connection to either a display a projector or a computer Camera mode In Camera mode you can view document camera images only in SMART Notebook software Came...

Страница 30: ...n Camera mode on page 31 Computer Pass Through mode Computer Pass Through mode switches your document camera s video output to the VGA input You can switch between the live camera image and your computer screen image You can view the document camera live image only in SMART Notebook software N O T E S l Capture button on the control panel has no effect in Computer Pass Through mode l In Computer P...

Страница 31: ...o SMART Notebook software Yes No No Capture to an SD SDHC memory card Yes No No Access the related on screen display menu Yes No Yes Capture to a USB drive Yes 2 No No N O T E S l 1 Only when the USB switch is set to See The Setting tab on page 39 l 2 Only when the USB switch is set to See The Setting tab on page 39 The following table describes outputs when your document camera is connected to a ...

Страница 32: ... 2 Connect your document camera to your computer with the USB cable 3 Set the TV VGA switch on the right side connection panel to VGA 4 Connect your document camera to a projector monitor or television with a VGA cable 5 Press the button on the control panel To set your document camera to Computer Pass Through mode 1 Connect your document camera to your computer with the USB cable 2 Connect your c...

Страница 33: ...ments 1 Place your documents on the table 2 Adjust the document camera and then aim its lens at your documents 3 Press the button on the control panel to adjust the focus To reduce glare If glare makes it difficult for you to read the printed documents that you re displaying place the anti glare sheet on top of the printed documents To optimize the image for text documents 1 Set your document came...

Страница 34: ...el to select and then press the button on the control panel See The Image tab on page 34 for an explanation of the settings Inserting and removing an SD SDHC card Your document camera has an SD SDHC card slot on the right side connection panel You can save document camera images to an SD SDHC card when your document camera is in Camera or Computer Pass Through mode When your document camera is in ...

Страница 35: ...HC card as the storage location see The Setting tab on page 39 l Ensure the label on the SD SDHC card is facing up To remove an SD SDHC card C A U T I O N To prevent memory card damage do not remove the memory card while capturing or deleting images 1 Press the button on the control panel and wait until your document camera displays a live image 2 Push in the card to eject it and then remove the c...

Страница 36: ......

Страница 37: ...os 43 Capturing images 43 Transferring images to your computer 44 Using a microscope 45 Introduction This chapter explains how to use your document camera in Camera mode Using Camera mode When your SMART Document Camera is connected to a projector flat panel display or television you can display a full screen image from your document camera You can use your document camera in Camera mode to perfor...

Страница 38: ...16 2 Press the button on the control panel To display objects 1 Press the button on the control panel 2 Place the object you want to display under the camera 3 Rotate the camera head to aim the lens at your object To adjust the zoom magnification Press the button on the control panel To automatically adjust the focus Press the button on the control panel To adjust brightness settings Press the but...

Страница 39: ... panel to make a selection 6 Press the button on the control panel to enter a submenu 7 Press the button on the control panel to return to the previous menu level 8 Press the button on the control panel to exit the menu The following OSD menu options are available when your document camera is in Camera mode Tab Options Image Brightness Contrast Mode Effect Mirror Advanced Focus Rotate See The Imag...

Страница 40: ... the control panel to select and then press the button on the control panel 4 Press the or button on the control panel to select and then press the button on the control panel Image options Description Brightness Adjust the image brightness manually Contrast Adjust the image contrast C H A P T E R 4 Using your SMART Document Camera in Camera mode 34 ...

Страница 41: ...p the image o OFF displays a normal image o ON displays a mirrored image Advanced o Auto Image Select to automatically adjust white balance and exposure and to correct color and exposure compensation o Exposure Select the exposure setting o AUTO automatically adjust the camera exposure o MANUAL manually adjust the camera exposure o White Balance Select the white balance setting for various light c...

Страница 42: ...ed as a USB camera To access the Presentation tab 1 Press the button on the control panel 2 Press the button on the control panel 3 Press the button on the control panel to select and then press the button on the control panel 4 Press the button on the control panel to select and then press the button on the control panel C H A P T E R 4 Using your SMART Document Camera in Camera mode 36 ...

Страница 43: ...t Screen o Divides the screen in two parts o Half of the screen displays thumbnail images and the other half displays the image from your document camera o Select the display location left right top bottom o Press the left right and up down navigation buttons to highlight the image o Press the button to select the image o Press the left right and up down navigation buttons to pan the stored image ...

Страница 44: ...live camera image This is useful for showing before and after comparisons N O T E The PiP feature is for display purposes only You can t capture an image while in PiP mode To display the PiP image 1 Display an object in Camera mode and then press the button on the control panel The OSD menu appears 2 Press the button on the control panel to select and then press the button on the control panel 3 P...

Страница 45: ...nt stored images The Setting tab To access the Setting tab 1 Press the button on the control panel 2 Press the button on the control panel 3 Press the button on the control panel to select and then press the button on the control panel 4 Press the button on the control panel to select and then press the button on the control panel C H A P T E R 4 Using your SMART Document Camera in Camera mode 39 ...

Страница 46: ...deo recording compression setting Storage Change the storage location o Audio and video recording can be saved only on an SD SDHC card or a USB drive Format Delete all the data in the selected memory USB to PC Select the status of your document camera when it s connected to the computer using a USB cable Make sure the USB switch on the left side connection panel is set to o Camera can be used as a...

Страница 47: ...ton on the control panel 5 Select STORAGE and then press the button on the control panel Action Storage Camera See the memory card from your computer Yes No View and use your document camera from SMART Notebook software No Yes Capture image to the memory card in both Computer Pass Through and Camera modes No Yes This mode enables you to see the contents of your USB drive or SD memory card from you...

Страница 48: ...on the control panel 3 Press the button on the control panel The OSD menu appears 4 Press the button on the control panel to select and then press the button on the control panel System options Description Language Select or change the language o English o Français o Deutsch o Español C H A P T E R 4 Using your SMART Document Camera in Camera mode 42 ...

Страница 49: ... setting to the selected profile number Information Display the product information Default Restore all the settings to the factory default settings Capturing and transferring images and videos You can capture images and videos from your document camera to an SD SDHC card or USB drive and transfer them to a computer Capturing images You can capture images and videos to an SD SDHC card or USB drive...

Страница 50: ...in AVI format in your SD SDHC card 5 Press the button on the control panel to stop recording To record a video using a USB drive 1 Insert a USB drive in your document camera s USB receptacle 2 Press the to select STORAGE and then press the button on the control panel The document camera detects the USB drive 3 Press the button on the control panel to start recording 2 N O T E The video saves in AV...

Страница 51: ...scope slide 1 Place a slide or object on the stage of the microscope 2 Focus the microscope so that the subject is in sharp focus 3 Position the microscope under your document camera so the camera lens is aligned with the microscope eyepiece C A U T I O N Ensure you do not hit your document camera lens with the microscope This could damage your document camera s lens 4 Press the button on the cont...

Страница 52: ......

Страница 53: ...N T Your document camera should be in Camera mode SMART Notebook software also works with the camera in the Computer Pass Through mode See The Setting tab on page 39 N O T E For information on using 3D Tools for SMART Notebook software and Mixed Reality Tools for SMART Document Camera see Using 3D Tools for SMART Notebook software and Mixed Reality Tools on page 59 To open a SMART Document Camera ...

Страница 54: ...e the appearance of the image rotate it 180º define the image color black and white or film negative You can also start and stop Microscope mode and start Mixed Reality Tools for SMART Document Camera automatically Start Mixed Reality Insert a screen capture on the current page and then close the window Capture an image and insert a screen capture on a new page and keep the current window open C H...

Страница 55: ... the last screen capture and the number of screen captures taken To use a microscope 1 Connect your document camera to a microscope See Connecting your document camera to external devices on page 16 2 Open a SMART Document Camera window 3 Press Additional Settings on the SMART Document Camera window menu bar and then select Start Microscope Mode N O T E The Additional Settings button doesn t appea...

Страница 56: ......

Страница 57: ...ard USB drive or internal memory You can browse through the stored images and display previously captured images either individually or as a slide show N O T E In this mode your document camera can t be connected by a USB cable and you must have images stored in either internal or external memory source Setting your document camera to Playback mode Playback mode takes over the video output of the ...

Страница 58: ... screen display OSD menu The Playback mode OSD menu shows the source storage location and controls how stored images are displayed Playback mode OSD menu options To access the Playback mode OSD menu 1 Connect your document camera directly to a projector or another display For connection information see page 13 2 Set the USB switch to The USB indicator on the control panel is lit OR Disconnect the ...

Страница 59: ...izontal in Current Storage Chooses the storage source if more than one is available Detects the storage source if only one is available Delete All Permanently deletes all the data in the selected memory source N O T E A warning message appears Select YES to continue or NO to stop To select the settings for a slide show 1 Press the button on the control panel to access the Playback mode OSD menu 2 ...

Страница 60: ...ormation see page 13 2 Set the USB switch to The USB indicator on the control panel is lit OR Insert an SD SDHC card or a USB drive in the appropriate receptacle 3 Press the button on the control panel Thumbnail images from the memory source are displayed 4 Press the button on the control panel 5 Press the button on the control panel twice to start the slide show 6 Press the button on the control ...

Страница 61: ...on information see page 13 2 Set the USB switch to The USB indicator on the control panel is lit 3 Insert an SD SDHC card or a USB drive in the appropriate receptacle 4 Press the button on the control panel Thumbnail images from the memory source are displayed 5 Press the and buttons on the control panel to toggle between images C H A P T E R 6 Using your SMART Document Camera in Playback mode 55 ...

Страница 62: ...on to rewind and the button to fast forward 8 Press the button on the control panel to stop the video or to return back to thumbnails view Deleting images in Playback mode You can delete all images at once from your document camera s three memory sources using the OSD menu or you can delete only selected images C H A P T E R 6 Using your SMART Document Camera in Playback mode 56 ...

Страница 63: ... panel to select YES or NO 6 Press the button on the control panel to DELETE or CANCEL 7 Press the button on the control panel again to close the Playback mode OSD menu N O T E The deleting image icon appears briefly while your document camera deletes images To delete selected image 1 Press the button on the control panel to display all the images in the memory storage 2 Press the or or or button ...

Страница 64: ......

Страница 65: ... Document Camera 69 Manipulating 3D models using Mixed Reality Tools for SMART Document Camera 69 Disguising 3D models before presenting them 71 Using SketchUp sketching software and Trimble 3D Warehouse 72 Using SketchUp sketching software 73 Using Trimble 3D Warehouse 73 Introduction This chapter provides the information you need to begin using 3D Tools for SMART Notebook software and Mixed Real...

Страница 66: ...xed Reality Tools for SMART Document Camera Activating 3D Tools for SMART Notebook software and Mixed Reality Tools 3D Tools for SMART Notebook software and Mixed Reality Tools provide an intuitive way for students and teachers to explore digital content with the SMART Document Camera When you connect your document camera to your computer 3D Tools for SMART Notebook software and Mixed Reality Tool...

Страница 67: ...k Close 6 If you accept the license agreement select the I accept the terms in the license agreement check box 7 Click Next 3D Tools for SMART Notebook software activates 8 Click Finish and then close the SMART Product Update window Hardware and software requirements To get started with Mixed Reality Tools for SMART Document Camera you need the following l SMART Notebook software 11 SP1 l SMART Do...

Страница 68: ... the cube A typical projector room is usually quite dark For Mixed Reality Tools to work properly the document camera s light should be turned on Don t manipulate the cube more than 14 35 cm from the document camera N O T E If SMART Notebook software doesn t enter Mixed Reality mode when you hold the cube under the camera shake the cube under the camera If the issue persists press and hold the bri...

Страница 69: ...se 3D models ensure the 3D model file is located in the correct folder structure with the supporting files and folders To insert a 3D model 1 Select Insert 3D File The Insert 3D File dialog box appears 2 Browse to and select the 3D model you want to insert 3 Press Open The 3D model appears on the page Manipulating 3D models After inserting a 3D model you can manipulate it in the same way you manip...

Страница 70: ...D model 2 Press and hold one of the side rotation handles 3 Drag your finger around the center of the 3D model and then release your finger when done To rotate a 3D model along multiple axes 1 Select the 3D model 2 Press and hold the center rotation handle 3 Drag your finger in the direction you want to rotate the 3D model and then release your finger when done To reset a 3D model to its original ...

Страница 71: ...ls You can use labels to highlight different components of a 3D model Labels can be text shapes or other 2D objects To add a label 1 Select the 3D model 2 Right click the 3D model where you want to connect the label and then select Add Label A label appears 3 To use text in the label double click the label s default text and then type your own text OR To use a shape or other 2D object in the label...

Страница 72: ... You can use the navigation controls to navigate any 3D model However not all 3D models contain internal details If you enter a 3D model that doesn t contain internal details the interior appears empty or dark l If you re using Mac OS X operating system software you re unable to enter a 3D scene while in Full Screen mode To enter a 3D scene first exit Full Screen mode and then complete the followi...

Страница 73: ...n press the gray border of the map to drag it to another area of the page if it s covering materials you want to present You can also resize the map by pressing and dragging the gray border in the lower right corner o You can press the gray background or center icon of a navigation control to drag it to another area of the page if it s covering materials you want to present C H A P T E R 7 Using 3...

Страница 74: ... in the scene G Move to the left in the scene H Move to the right in the scene I Move backward in the scene J Lower elevation Alternatively you can use keyboard buttons to navigate the 3D scene Keyboard button Use to W Change your orientation upward A Change your orientation to the left D Change your orientation to the right S Change your orientation downward C H A P T E R 7 Using 3D Tools for SMA...

Страница 75: ...e arrow becomes a circle when you re facing directly up or down Level Incline Decline Off screen level Upward Downward 4 Press Close when you re done Using Mixed Reality Tools for SMART Document Camera After inserting 3D models in your notebook files using 3D Tools for SMART Notebook software you can manipulate those models using Mixed Reality Tools for SMART Document Camera Manipulating 3D models...

Страница 76: ... and assigns the 3D model to the cube If there is more than one 3D model on the page move the cube until the animation on the page indicates that the cube is connected to the 3D model you want to manipulate N O T E SMART Notebook software enters Mixed Reality mode in this situation only if a 3D model is on the page Alternatively you can enter Mixed Reality mode by pressing SMART Document Camera in...

Страница 77: ...he cube s surface o To hide the image from the SMART Document Camera and show only the 3D model move the transparency slider to the left 5 If you ve purchased a second cube from SMART and there is more than one 3D model on the page manipulate another 3D model by completing steps 3 and 4 with the other cube N O T E The two cubes must have different patterns if you want to use them both at the same ...

Страница 78: ...ipulating 3D models using Mixed Reality Tools for SMART Document Camera on page 69 After Mixed Reality Tools assigns the 3D model to the cube stars swirl around the magic hat and then the magic hat disappears revealing the 3D model behind it T I P You can also reveal the 3D model by pressing the hat icon in the lower left corner Using SketchUp sketching software and Trimble 3D Warehouse You can us...

Страница 79: ...3D Warehouse Trimble 3D Warehouse formerly Google 3D Warehouse is an online repository of 3D models Using this link in the SMART Notebook software Gallery tab you can search for 3D models and download them to your computer You can then insert the 3D models into your notebook files To download 3D models 1 Press the Gallery tab 2 Press Google 3D warehouse 3 Search or browse for a 3D model that you w...

Страница 80: ...computer 6 Extract the contents of the zip file to a folder on your computer To insert a downloaded 3D model See Inserting 3D models on page 63 C H A P T E R 7 Using 3D Tools for SMART Notebook software and Mixed Reality Tools 74 ...

Страница 81: ...ions l Check the TV VGA switch on the right side connection panel of your document camera and set it to the type of display device you have l Reset the output resolution to 1024 768 by using a pen tip or other small object to press the resolution reset button on the bottom of the document camera No computer image displays Computer Pass Through mode l Ensure your document camera is turned on l Chec...

Страница 82: ... contrast manually to reduce the distortion l Press the button on the control panel if the image is blurry or out of focus SMART Notebook software doesn t detect your document camera l Make sure your USB cable is connected l Make sure the USB switch is set to l Make sure your software is up to date you should have at least SMART Notebook software 11 SP1 l Make sure the USB cable and the computer U...

Страница 83: ...ht doesn t turn on l Ensure an SD SDHC card or USB drive is installed l Disconnect the USB cable the document camera doesn t record video while being used as a USB camera or mass storage device The SD SDHC card or USB drive doesn t play video properly or the document camera stops responding during video recording Format the SD SDHC card or USB drive using the document camera s OSD menu Menu SETTIN...

Страница 84: ......

Страница 85: ...product when it has reached the end of its life If you require further information please contact your reseller or SMART Technologies for information on which recycling agency to contact Restriction of Certain Hazardous Substances RoHS directive This product meets the requirements of the European Union s Restriction of Certain Hazardous Substances RoHS directive 2002 95 EC Consequently this produc...

Страница 86: ......

Страница 87: ...43 COLLADA files 63 73 Computer Pass Through 24 Computer view 47 connections 5 12 control panel 3 D DAE files 63 73 disguises 71 document camera about 2 parts of 3 turning on and off 16 document cameras using with SMART Notebook software 47 downloading 9 E European Union regulations 79 external memory 21 F FBX files 63 features 2 flat panel displays 16 G Gallery 63 H head 3 I image tab 34 importan...

Страница 88: ...yback mode 41 Playback mode Playback mode OSD menu 51 power 7 16 printed documents displaying 27 projectors 16 R rear connection panel 5 recording video 32 right side connection panel 6 RoHS directive 79 S scenes 66 SD Card view 13 51 SD SDHC cards 28 setup 13 SketchUp sketching software 73 SMART Notebook 47 SMART Notebook software 9 speakers 19 T transferring images 44 Trimble 3D Warehouse 73 tro...

Страница 89: ......

Страница 90: ...SMART Technologies smarttech com support smarttech com contactsupport ...

Отзывы: