

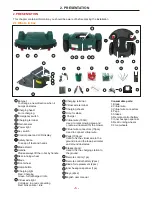


5. USE
5. USE
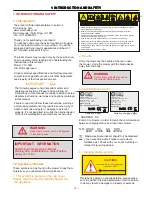
IMPORTANT INFORMATION
- Do not leave the mower to operate unattended if you
are pets,
children or people in the
know that there
- Mow only in daylight or in good artificial light.
- Avoid operating the mower in wet grass.
- Do not operate the mower when barefoot or wearing
- Always wear
substantial footwear and long trousers.
- Always be sure of your footing on slopes.
- Use extreme caution when reversing the mower
- Always switch on the mower according to instructions
away from the
blade.
with feet well
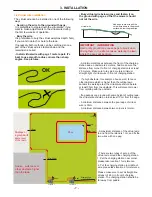
5.1 Preparation
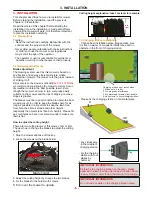
- Ensure the correct installation of the virtual wire.
- Periodically
inspect
the
area
where
the mower
and
remove
all
stones
,
sticks, wires,
is
to
be
used
objects
especially
the height
bones, and other foreign
- Periodically visually
inspect that
the
blades, blade
cutter assembly
are not worn or damaged.
bolts and
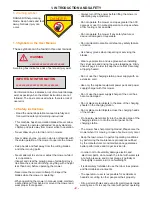
Read the safety instructions before you start
Keep your hands and feet away from the
rotating blade. Never put your hands or feet
close to or under the body when the
motors
WARNING
WARNING
vicinity
open sandals.
towards you.
your mower.
are
running
.
of the object
is
less
than
6cm.
Replace worn or damaged blades and bolts in sets to
- Connect the two ends of virtual wire to the terminal
on charging
virtual wire is in good
station, and ensure
colorless).
connecting. (Light on charging station is in
- Insert charger into charging station and secure it with
charger to power
threaded cap. And then connect
connecting
,
supply. Ensure the charging station has good
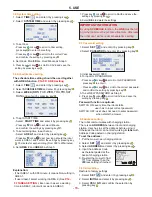
1.Turn on the key switch.
3. Input Password (Initial password:0000), the robot
enters on standby mode.
5.2 Starting the mower
preserve balance.
IMPORTANT INFORMATION
charging station is in Green
.
light on
- Periodically
inspect
the
lawn
is
without
any
small
hole
or
mound
.
User
can
not
start
the
mower
if
virtual
wire
or
charging
station
is not
in
good connecting
.
There are two locations of start the mower.
1.Put the mower clockwise onto virtual wire, make sure
that the mower is not connected with two charging
sheets on charging station. Otherwise, the mower is in
recharging mode, it can not be started.
2.Take the robot to start point.
wire and follow it back to charging station, it begins
cutting inside lawn after it meets the charging station.
To start the robot.
2.Clockwise rotate the Emergency switch on control
panel to turn on the robot.
4. Set Address to match with charging station firstly,
5. Select AUTO mode, the mower start working.
otherwise, the robot can not be started.
5.3 Stopping mower /Turning off mower
1. Press
power
button
from
remote
control. Mower
stops and enters standby mode.
2. The mower also can be powered off by press the
Emergency switch directly.
3. Rotate the key to power off the mower.
5.4 Emergency Switch
Press Emergency switch at any time the robot power
off at once. User has to restart it.
To set
on, the robot goes straight to find virtual
LINE
To set
off, the robot begins cutting inside lawn
LINE
directly.
- 11 -
IMPORTANT INFORMATION
It’s a normal phenomenon that the mower goes a
circle to calibrate direction while it is working inside
wire before it finishes a circle, it will go on to make a
new circle in new place.
of signed lawn. If it meets obstacle or detects virtual
Содержание TC-158N
Страница 22: ...USER MANUAL Robot lawn mower ...


