background image

C H A P T E R 4

Maintenance and troubleshooting

22

smarttech.com/kb/170410

Cleaning your interactive whiteboard

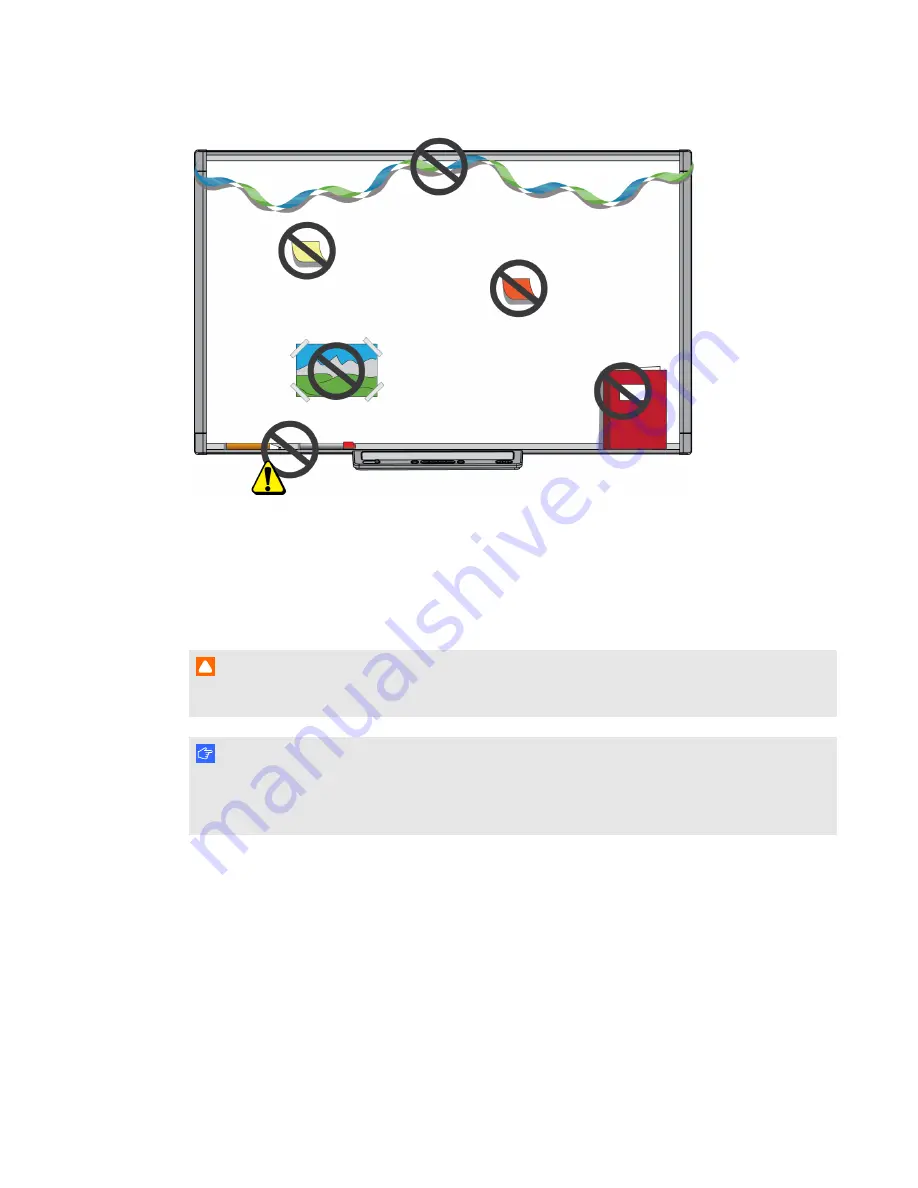
With proper care, your interactive whiteboard will provide years of trouble-free service. Follow these

tips to keep your interactive whiteboard clean.

C A U T I O N

Do not use harsh chemicals or abrasive cleaners on your interactive whiteboard.

I M P O R T A N T

l

Before you clean your interactive whiteboard, disconnect its USB and power cables.

l

To view dirt or streaks more easily, set your projector to standby (lamp off) mode.

l

To clean dust, dirt and finger grease, wipe the interactive surface with a damp cloth or sponge.

Use mild soap, if required.

l

Don’t spray cleaner directly onto the interactive surface. Instead, spray a light amount of cleaner

on a cloth and then gently wipe the interactive surface.

l

Don’t allow excess cleaner to flow onto the frame’s reflective surfaces or the cameras in the

corners of the frame.

Содержание M600 series

Страница 1: ...SMART Board M600 series Interactive whiteboard User s guide For models M680 M685 M680V and M685V...

Страница 2: ...uired to correct the interference at his own expense Trademark notice SMART Board SMART Notebook DViT SMART Ink smarttech the SMART logo and all SMART taglines are trademarks or registered trademarks...

Страница 3: ...tions in this user s guide and the included warnings document The included warnings document describes the safe and correct operation of your SMART Board interactive whiteboard and its accessories hel...

Страница 4: ......

Страница 5: ...eractive whiteboard 8 Orienting your interactive whiteboard 9 Chapter 3 Using your interactive whiteboard 11 Using the Pen Tray 12 Using the Floating Tools toolbar 14 Using gestures dual touch and dua...

Страница 6: ......

Страница 7: ...t you can do at your computer open and close applications scroll through files teach collaborative lessons create new documents or edit existing ones visit websites play video clips and more by touchi...

Страница 8: ...durable pen ledge that holds the two included pens DViT technology Four digital cameras one in each of the interactive whiteboard s corners track the position of your finger or the pen as it moves acr...

Страница 9: ...hiteboard When you pick up a pen and press one of the color buttons digital ink appears enabling you to write over your desktop or any open application When you install SMART Product Drivers a Floatin...

Страница 10: ...refer to the installation documents included with those components The optimal mounting height is 196 cm 77 from the floor to the center of the installation brackets However consider the general heig...

Страница 11: ...on the USB cables l Don t route USB cables close to common sources of EMI such as electric motors or fluorescent lighting ballasts l Don t bend USB cables sharply l Don t use USB plug adapters or pas...

Страница 12: ......

Страница 13: ...tor s resolution Ensure that the resolution settings for your projector and computer match If your computer s resolution doesn t match the projector s native resolution the image doesn t properly fill...

Страница 14: ...of the interactive whiteboard track the position of the pens and your finger on the interactive surface and then send the information to the SMART software which interprets this information as mouse...

Страница 15: ...w closes The orientation screen appears Orienting your interactive whiteboard After you install SMART Product Drivers on your computer and have completed the calibration procedure an orientation scree...

Страница 16: ...70410 3 Beginning at the first target on the screen touch the center of the target firmly with the tip of the pen and hold the pen steady until the target turns green When you lift the pen the target...

Страница 17: ...options right clicking 17 Enlarging an area or object 17 Reducing the scale of an object 17 Scrolling horizontally or vertically 18 Rotating an object 18 Best practices for gestures and tools 18 Updat...

Страница 18: ...addition to providing a convenient place to hold the included pens the interactive pen tray on your SMART Board M680 or M685 interactive whiteboard has several controls and indicators N O T E SMART Bo...

Страница 19: ...here see General troubleshooting on page 23 Select light state Meaning Flashing white Your interactive whiteboard is receiving power and is communicating successfully with your computer s USB HID dri...

Страница 20: ...the pen tray button settings 1 Press the SMART software icon in the Windows notification area or Mac Dock and then select SMART Settings SMART settings opens 2 Press SMART Hardware Settings and selec...

Страница 21: ...he screen o You can move this toolbar lower on your screen so younger students can reach it o You re unable to rotate this toolbar horizontally Using gestures dual touch and dual write Your interactiv...

Страница 22: ...e interactive surface to select or deselect an object or option This performs a standard mouse click N O T E This gesture starts applications if your operating system is set to start applications on a...

Страница 23: ...lling and manipulating objects Multi finger gestures include the following Displaying menu options right clicking Using two fingers on the same hand press and hold the screen with your left finger and...

Страница 24: ...atisfied with the view Rotating an object Place one finger on either side of the object you want to rotate Keep one finger stationary and quickly move your second finger around the object Release your...

Страница 25: ...from the interactive surface They can generate unintentional commands For click commands quickly tap your finger on the interactive surface Also make sure you lift your finger far enough away from th...

Страница 26: ...e Mac Dock and then select Check for Updates and Activation The SMART Product Update dialog box appears listing the SMART software products installed on your computer N O T E If you don t see the Chec...

Страница 27: ...to prevent any damage to it and its parts l Replace the pen when the nib wears out l Don t touch the interactive surface with sharp or pointed objects l Don t set up and use your interactive whiteboa...

Страница 28: ...A N T l Before you clean your interactive whiteboard disconnect its USB and power cables l To view dirt or streaks more easily set your projector to standby lamp off mode l To clean dust dirt and fing...

Страница 29: ...interactive whiteboard You can reset your interactive whiteboard by disconnecting and then reconnecting the power cable This turns the power off and back on restarting all components of your interact...

Страница 30: ...ch the interactive surface or any key on your keyboard to bring your computer out of standby mode Your computer is off Turn on your computer or press your computer s reset button and then log on as us...

Страница 31: ...echnologies Board Tools SMART Product Drivers isn t installed Install SMART Product Drivers on your computer For details about installing SMART Product Drivers see Installing SMART Product Drivers on...

Страница 32: ...MART Board Tools For Windows computers select Start All Programs SMART Technologies SMART Board Tools 2013 For Mac computers select Finder Applications SMART Technologies Board Tools SMART Product Dri...

Страница 33: ...re icon and then press SMART Settings SMART Settings opens 2 Select About Software and Product Support Tools Diagnostics The SMART Board Diagnostics window opens 3 Select Service Start 4 Close the SMA...

Страница 34: ...evice isn t running Start SMART Board service To determine whether the SMART Board service is running open SMART Settings and check the message that appears at the bottom SMART Product Drivers isn t i...

Страница 35: ...tobuy first Your reseller can often resolve the issue without delay Before you contact SMART Support ensure the following l You know the serial number of your interactive whiteboard l Your computer sp...

Страница 36: ......

Страница 37: ...tions for your product located at smarttech com SupportSBM600 Waste Electrical and Electronic Equipment and Battery regulations WEEE and Battery Directives Electrical and electronic equipment and batt...

Страница 38: ......

Страница 39: ...ng SMART Support 29 D Digital Vision Touch DViT technology 2 dual touch dual write 2 dust 21 G gestures 15 best practices 18 multi finger 17 single finger 16 H humidity 21 I installation connecting to...

Страница 40: ...ard features 2 how it works 3 resetting 23 SMART Ink 3 SMART Notebook software 1 3 SMART Product Drivers floating tools 14 installing 8 orienting your interactive whiteboard 9 SMART software updating...

Страница 41: ......

Страница 42: ...SMART Technologies smarttech com support smarttech com contactsupport smarttech com kb 170410...

Отзывы: