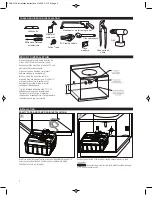
Hacksaw or metal tubing cutter
Channel lock
pliers
Philips and flathead
screwdrivers
PVC tubing cutters
Pipe joint
compound
Teflon
®
tape
Drill
Utility knife
Tape
measure
Crescent wrench
12”
(305 mm)
PRIOR TO INSTALLATION
1
2
INSTALLATION
VANITY TANK AND TANK DRAIN INSTALLATION
TOOLS REQUIRED FOR INSTALLATION
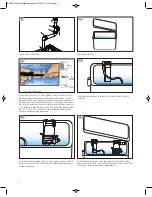
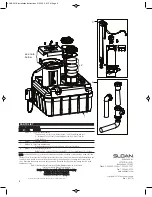
Insert free end of Discharge Tubing and Control Module Wire through 7/8”
hole in vanity cabinet at back. Pull tubing from outside while sliding
Collection Tank into vanity cabinet.
Position the Collection Tank in cabinet leaving adequate room for drain
connections.
REMINDER: The center line of lavatory sink drain outlet should be minimum
of 12” above the vanity shelf.
2
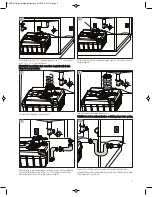
Prepare the lavatory vanity before installing the
Sloan
®
AQUS
®
Water Conservation System.
Engage a certified electrician to install a 110-volt
electrical outlet inside the vanity.
Disconnect existing plumbing components
between sink pop-up and wall drain.
Drill one hole in the side of the vanity for
discharge hose and electrical wire. Drill the 7/8”
maximum hole as close to back wall and
baseboard as possible to allow for proper
coverage or tubing and wire.
Trim the threaded tailpiece to allow 1 1/4” to
extend beyond the pop-up assembly (see
illustration). Use Teflon tape or pipe joint
compound on threaded portion of tailpiece before
repositioning onto pop-up assembly.
AQUS WCS Installation Instructions 5/25/10 2:01 PM Page 2


