


5
[8] MEMORY buttons
- use them to access memory banks; press M1-M4 to
access banks 1-4, press SHIFT + M1-M4 to access banks 5-8. Long press to
enter the memory settings, short press for execute recorded data. You can find
more about memory banks in
“
10. Record and playback” (p. 14)
.
[10] LED - charge indicator
- indicates the state of the device’s power supply.
OFF - there’s no power supply connected to the device;
RED - external power connected, the internal battery is being charged;
GREEN - external power connected, the internal battery is fully charged;
FLASHING RED/GREEN - error of the power supply.
[11] SCREEN
- shows current device’s state, settings menus, infos and many
more.
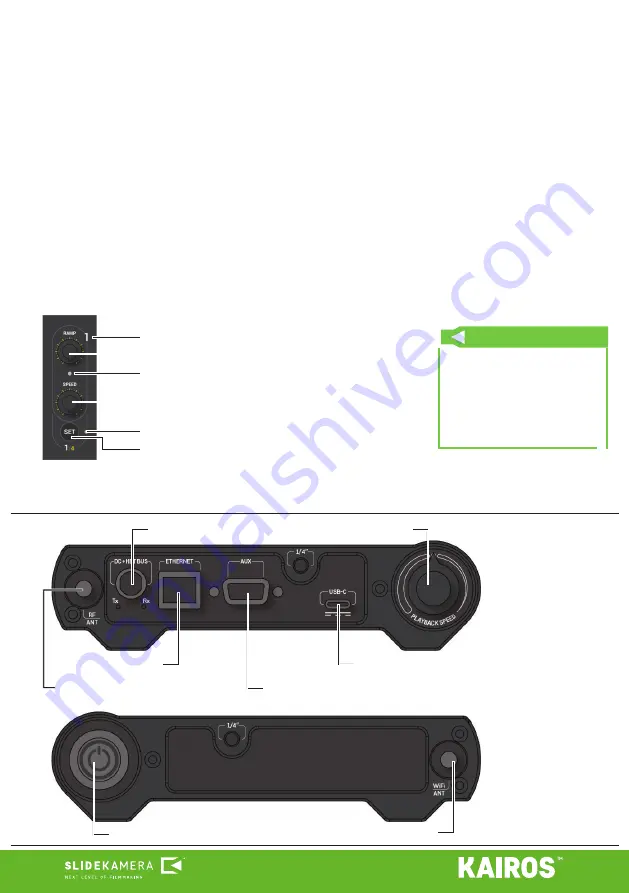
[12] AXIS SETTINGS
- axes 1-3 individual hardware controllers to set working
parameters; for details reffer to
“8. LIVE CONTROL mode” (p. 10)
.
[9] PLAYBACK SPEED
- with this knob you can change the speed of the
drives during playback of the motion stored in memory banks.
axis number
SPEED
- speed adjustment (limits top speed of the drive)
axis settings LED (GREEN when editing axis settings)
RAMP
- smooth start and stop adjustment („ramping”)
axis settings button („SET”) - press to enter axis settings
axis activity indicator - GREEN when the axis is enabled
TIP
To access settings for axes 4-6,
press SHIFT + SET (1 for 4th axis,
etc). You can change the working
parameters of those axes in the
settings menu -
“8.1. Axis custom
menu” (p. 10)
.
4.2. Sockets and connectors
HET-BUS
socket
PLAYBACK SPEED
ETHERNET
socket
USB-C
(charging and maintenance)
AUXILIARY
connector (COM port)
RF
antenna connector
POWER
button
Wi-Fi
antenna connector
Содержание HPN-2
Страница 18: ......


