


21
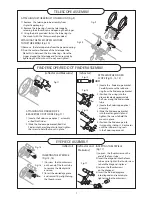
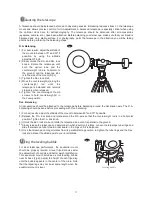
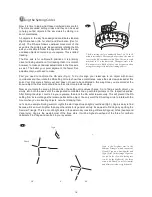
Secondary
mirror
Primary mirror
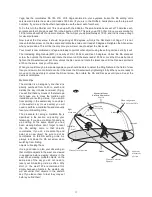
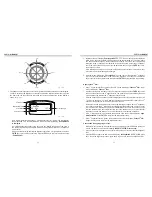
stop and keep your
hand here
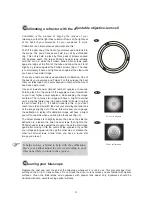
Both mirrors aligned
with collimating cap in
Both mirrors aligned with
eye looking in focuser
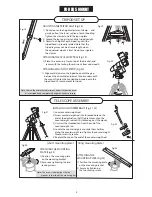
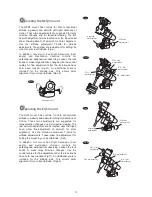
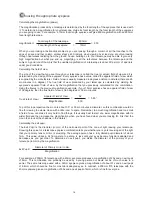
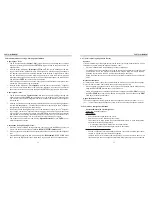
Aligning the Primary Mirror
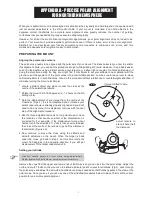
Find the three locking screws at the back of your telescope and loosen them by a few turns.
Adjusting screw
Locking screw
If you see 3 large nuts
protruding from the back of your
telescope
and
3
small
Phillip's-head screws besides
them, the Phillip's-head screws
are the locking screws and the
large nuts are the adjusting
screws.
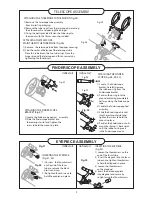
If you see 3 flat
headed screws and 3
thumbscrews, the flat
headed screws are
the adjusting screws
and the thumbscrews
are
the
locking
screws.
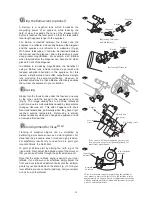
hex bolt
(Locking screw)
Adjusting screw
If you see 3 hex bolts and 3 Phillip's head screws, the
hex bolts are the locking screws and the Phillip's-head
screws are the adjusting screws. You will need an Allen
wrench to adjust the locking screws.
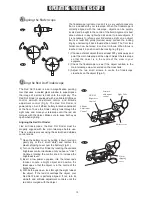
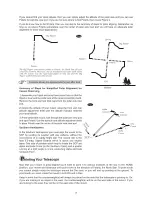
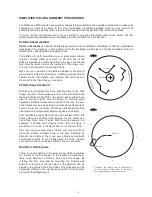
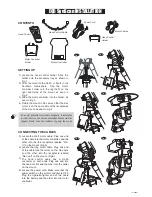
Now run your hand around the front of your
telescope keeping your eye to the focuser,
you will see the reflected image of your hand.
The idea here is to see which way the primary
mirror is defected; you do this by stopping at
the point where the reflected image of the
secondary mirror is closest to the primary
mirrors' edge (Fig.q-5).
When you get to that point, stop and keep
your hand there while looking at the back end
of your telescope, is there an adjusting screw
there? If there is you will want to loosen it
(turn the screw to the left) to bring the mirror
away from that point. If there isn't an adjusting
screw there, then go across to the other side
and tighten the adjusting screw on the other
side. This will gradually bring the mirror into
line until it looks like Fig.q-6. (It helps to have
a friend to help for primary mirror collimation.
Have your partner adjust the adjusting screws
according to your directions while you look in
the focuser.)
After dark go out and point your telescope at
Polaris, the North Star. With an eyepiece in
the focuser, take the image out of focus. You
will see the same image only now, it will be
illuminated by starlight. If necessary, repeat
the collimating process only keep the star
centered while tweaking the mirror.
Fig.q-5
Fig.q-6
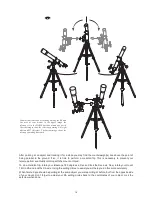
alternately loosen one and then compensate for the slack by tightening the other two. Stop when you see
all three mirror clips (Fig.q-4). Make sure that all three small alignment screws are tightened to secure the
secondary mirror in place.
Locking
screw
Adjusting
screw
Содержание EQ5
Страница 1: ...INSTRUCTION MANUAL Telescopes with NEQ3 EQ5 Mount 031007V3 ...
Страница 14: ......
Страница 27: ......
Страница 29: ...INSTRUCTION MANUAL SynScan TM 140303V4 Copyright Sky Watcher ...
Страница 51: ...SynScan TM ...


