2. PRINCIPLE OF OPERATION
2.1 Taking a Reading
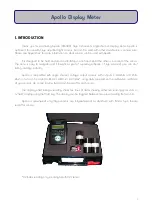
If you have bought Apollo as a package with Skye sensors, then it is ready to take a reading
immediately. If you have not ordered an Apollo package, and have another, suitable, sensor to use, please
see Section 2.2 to configure Apollo to work with it.
Install the battery provided, ensuring it is correctly fitted, and attach the sensor via the 5-pin socket
located at the top of Apollo, by matching the sensor and plug using the locating pin, then screwing it finger
tight. There is only one way the socket and plug will match, please be careful.
Switch Apollo on and you will be greeted by a welcome message, then a message that informs you
which sensor configuration is used. After this you are shown the live reading from the sensor on the top line,
along with the units on the bottom line.
Apollo can show the reading in two different units, which can be toggled between in the live reading
screen using the tu buttons. Default units are usually mW m-
2
and W m
-2
,. See Section 2.2 for information on
how to change these units.
For an accurate reading, ensure the sensor is as stationary as possible, and if measuring solar
radiation levels, the sensor is fully upright (Skye also offer a "levelling unit" that will be very useful in field
readings - please see Accessories in Appendix 1). We recommend you take a note of your geographical
location and time of day (so that you may obtain the solar zenith angle at the time), and also cloud cover
(0 to 10 as per WMO instructions, where 0 = no cloud cover, and 10 = 100% cloud cover).
If you have more than one sensor in your package, then you may have seen the wrong sensor name
come up. This will result in an incorrect reading being shown. To change the sensor configuration used to the
correct one, go to Menu > Sensor to Use > "Choose appropriate sensor 1-6". The name of the sensor whose
configuration you have selected will show up when you return to Menu > Read Sensor to the live reading.
2
Apollo Display Meter
Содержание APOLLO SKA 400
Страница 21: ...APPENDIX 3 MENU NAVIGATION TREE 18...


