


41
Skydio X2
Color/Thermal - Operator Manual
© 2022 Skydio, Inc. All rights reserved.
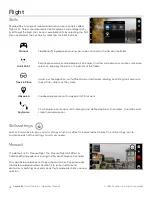
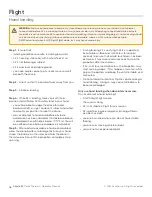
Flight
KeyFrame
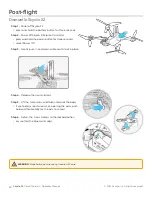
Step 1
- Select the
Cinematic
tab
from the skills menu
Step 2
- Select
KeyFrame
Step 3
- Fly to your first keyframe location
•
adjust the drone and camera position
Use the KeyFrame skill to choreograph professional cinematic aerial shots by capturing continuous, dynamic video
with smooth camera motion. KeyFrame flights can be flown repeatedly, with varying degrees of complexity, subtle
camera moves, speed adjustments, and obstacle avoidance. Set up your sequence by adding up to 100 keyframes
in a 3D space. Adjust the camera framing at each keyframe to create an elaborate, multi-point flight path.
NOTE:
Placing your initial keyframe close to your Launch Point will improve the accuracy of your flight path. KeyFrame
paths set far away from your launch point may be less accurate.
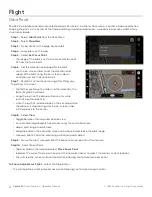
Step 4
- Select
Add
to lock in the keyframe location and position
•
add up to 100 keyframes
Step 5
- Select
Done
when you have completed your sequence
Step 6
- Select Play to fly
Step 7
- Adjust the speed at which the drone will fly to each keyframe
•
X2 will not fly the exact same path at two different speeds
•
X2E will dynamically slow down to 11 mph (5 m/s) around sharp turns, allowing you to increase the maximum
speed without sacrificing accuracy
X2 will begin at the last keyframe added and fly through your sequence along the spline until it reaches the first
keyframe added.
• Edit
or
Add
keyframes to your sequence along the spline at anytime
•
press the red X button in the top right to fly manually
•
keyframes will automatically be saved


