


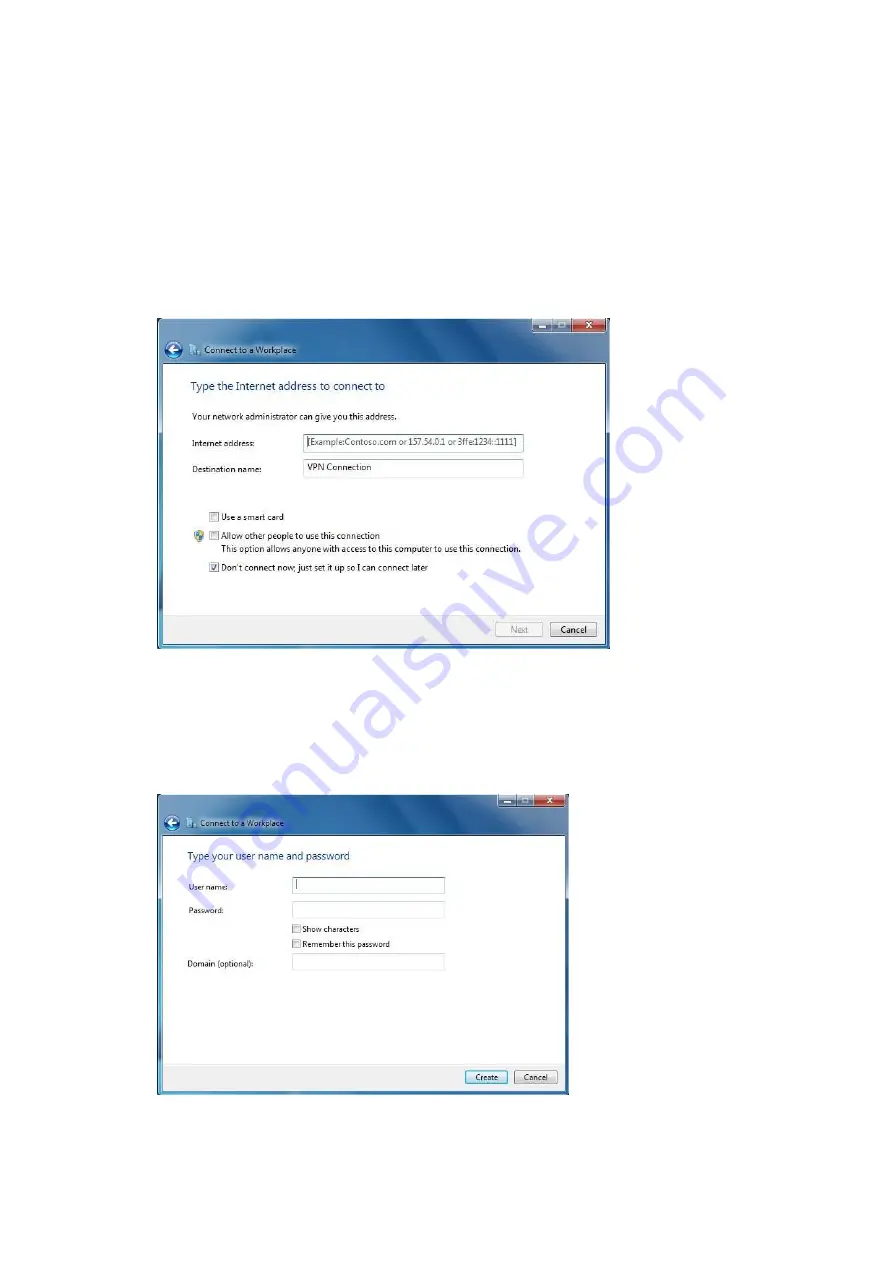
6. Complete the following fields:
Internet Address
Enter the WLR-6001 WAN IP address.
Destination name
Enter a name for the VPN client.
We recommend to select: Don’t connect now. Just set it up so I can connect
later.
Click
next
to continue.
7. Complete the following fields:
User name
Enter the username used to log onto the VPN tunnel.
Password
Enter the password used to log onto the VPN tunnel.
Click
Create
to continue.
Содержание N750 X6
Страница 1: ...WLR 6001 Wireless Gigabit VPN Router N750 X6 802 11a b g n ...
Страница 12: ...7 Setup LAN WAN WAN connection LAN connection ...
Страница 25: ...WLR 6001 Statistics Shows the counters of packets sent and received on WAN LAN WLAN ...
Страница 32: ...Enable or Disable Wireless function here Click Apply and wait for module to be ready loaded ...
Страница 61: ...8 Enable the VPN policy and then click Apply to save the VPN profile ...
Страница 67: ...5 Click Connect to a workplace and click Use my internet connection VPN ...
Страница 71: ...12 Go to Network and Sharing Center on the bottom right of the windows Under VPN Connection click Connect ...
Страница 73: ...3 Click on Create a network from the left side of the window 4 Click Next to continue to setup the VPN client ...
Страница 77: ...11 Click on the Security Tab from the top in the window and select Advanced click Settings to continue ...
Страница 80: ...Configuring a MacOS VPN Client 1 Select System Preferences 2 On the System preferences panel Click Network ...
Страница 81: ...3 Click on the sign on the bottom left 4 Select the VPN interface ...
Страница 86: ...3 Click on VPN 4 click on Add VPN Configuration ...
Страница 88: ...4 Set the Switch to ON to connect to the VPN Network ...
Страница 91: ...4 Click on the VPN network you have just created to connect ...
Страница 138: ......
Страница 139: ......


