42
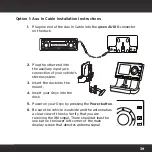
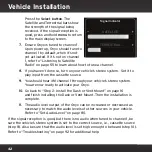
Press the
Select button
. The
Satellite and Terrestrial bars show
the strength of the signal being
received. If the signal reception is
good, press and hold
menu
to return
to the main display screen.
7.
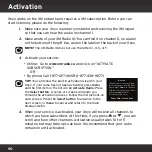
Ensure Onyx is tuned to channel 1.
Upon power up, Onyx should tune to
channel 1 by default, when it’s not
yet activated. If it’s not on channel
1, refer to “Listening to Satellite
Radio” on page 55 to learn about how to tune a channel.
8.
If you haven’t done so, turn on your vehicle’s stereo system. Set it to
play input from the cassette source.
9.
You should hear XM channel 1 through your vehicle’s stereo system.
You are now ready to activate your Onyx.
10.
Go back to “Step 2: Install the Dash or Vent Mount” on page 16
and finish installing the Dash or Vent Mount. Then the installation is
complete.
11.
The audio level output of the Onyx can be increased or decreased as
necessary to match the audio levels of other sources in your vehicle.
Refer to “Set Audio Level” on page 80.
If the signal reception is good, but there is no audio when tuned to channel 1, be
sure the vehicle’s stereo system is set to the correct source, i.e., cassette source
(step 8). Also be sure that the audio level is set high enough to be heard (step 10).
Refer to “Troubleshooting” on page 92 for additional help.
Signal Indicator
SATELLITE
TERRESTRIAL
Vehicle Installation
Содержание Onyx
Страница 1: ...Onyx Radio Vehicle Kit User Guide ...
Страница 2: ......
Страница 4: ...4 ...
Страница 5: ...5 Introduction ...
Страница 13: ...13 Vehicle Installation ...
Страница 48: ...48 ...
Страница 49: ...49 Activation ...
Страница 51: ...51 Using Your Onyx ...
Страница 62: ...62 ...
Страница 63: ...63 Special Features ...
Страница 71: ...71 Configuring Your Onyx ...
Страница 90: ...90 ...
Страница 91: ...91 Troubleshooting ...
Страница 96: ...96 ...
Страница 97: ...97 Product Specifications ...
Страница 103: ......

