background image

Before Using the Machine

18

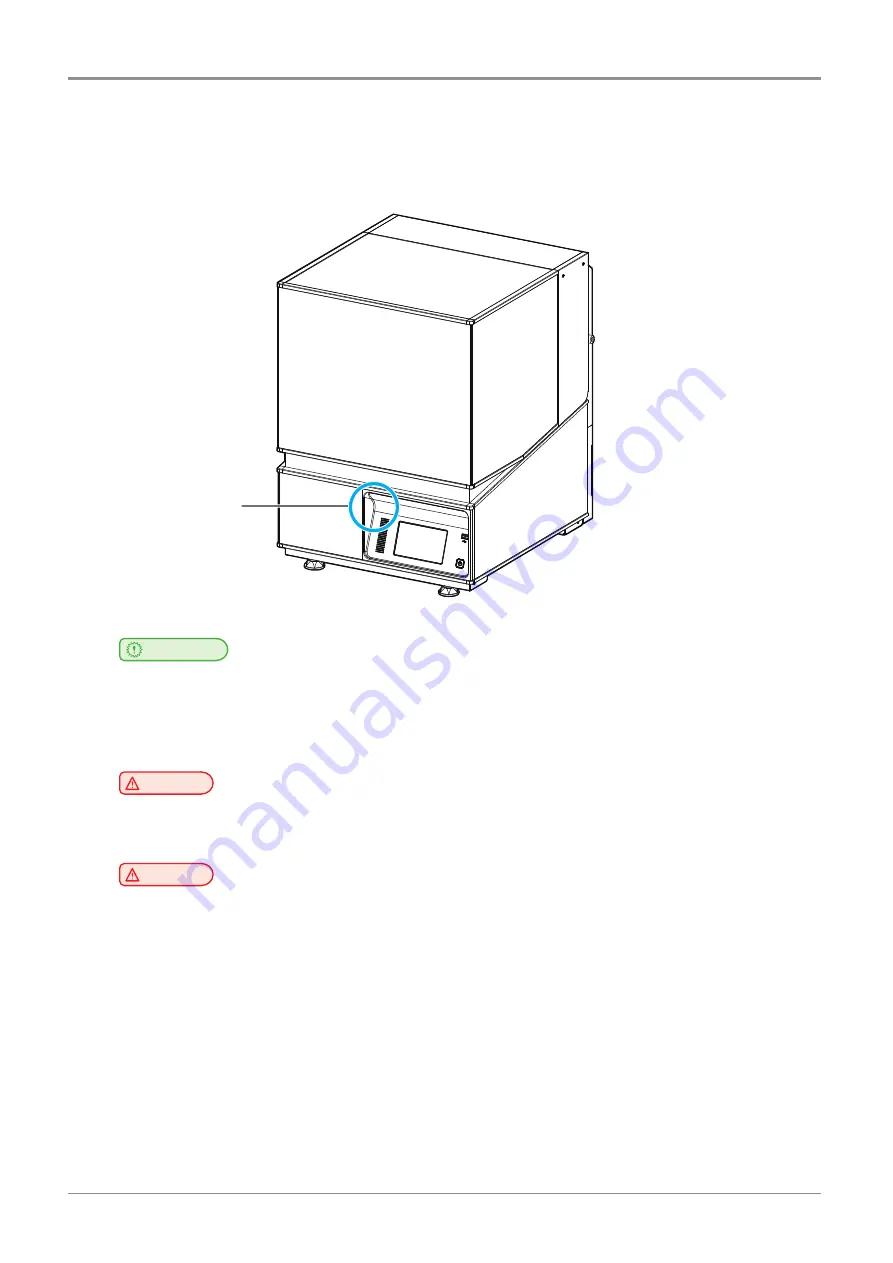
10.  Wifi Module Disclaimer

  This machine includes a WIFI module compatible only with Sindoh’s 3D Printer models.

      Whether the WIFI module is equipped or not can be differed by models.

Wifi Module Inside


Important


-  This Wifi module can cause radio interference, therefore it should not be used for any purposes related to 


  human lives.


-  Do not expose this product to water, humidity or liquid.


-  Do not expose this product to direct light, hot temperature or fire.


Caution


-  If the machine has been modified by unauthorized personnel, Sindoh is not liable for the machine 


    trouble or failure.


Caution


-  To prevent RF signals that exceed FCC RF exposure limits from being exposed to human, this 


    module has been mounted in a place that minimizes human access.

Содержание A1SD Series

Страница 1: ... This user manual contains the product warranty inside Please read this user manual before using this product and keep the manual nearby User Manual 3dprinter sindoh com Sindoh A1SD Series ...

Страница 2: ...ructions may lead to death or serious injury Caution Failure to observe instructions may cause injuries or damages to property Do not plug the power cord into extensions Plug the cord directly into the wall socket If the power cable or plug is worn or damaged pull out the power plug The exposure of the interior of the machine can cause electric shock or burns Exposure to inside the machine can cau...

Страница 3: ...ts of handling or operating the product in any case and for results occurring from user s negligence 3 The copyrighted literary works can be duplicated and used for personal use or household use and within the same parameter In other cases than the aforementioned it is prohibited by law 4 The above details present only a part of the applicable laws and regulations Details on these laws regulations...

Страница 4: ...ices 14 9 Disposal of Used Battery 17 10 Wifi Module Disclaimer 18 11 USB Flash Drive Disclaimer 20 Chapter 1 Preparation for Machine Operation 1 Specifications 1 2 1 1 Printing 1 2 1 2 Machine 1 2 1 3 Software Support 1 2 2 Components 1 3 2 1 Basic Components 1 3 2 2 Finisher Kit 1 4 3 Understanding the parts 1 5 4 Installation Incl Connection and S W Installation 1 7 4 1 Device Connection 1 7 4 ...

Страница 5: ...t 2 38 1 4 Saved Files 2 39 1 5 Info 2 43 1 6 Quick Guide 2 46 1 7 Programs 2 47 1 8 Cloud 2 49 Chapter 3 Printing 1 Printing 3 2 1 1 Printing from USB Flash Drive 3 2 1 2 Printing via PC 3 8 1 3 Cloud Monitoring 3 8 1 4 Changing Resin 3 12 Chapter 4 Checking Printed Output 1 Checking Printed Output 4 2 1 1 Detaching Printed Output 4 2 1 2 Finishing the Printed Output 4 5 1 3 Preparing the Next Pr...

Страница 6: ...5 11 2 Error Messages and Solutions 5 12 3 Problems and Solutions 5 13 3 1 Actions in Case of a Printing Failure 5 13 Removing Failed Print 5 13 Cleaning the Resin Tank and Platform 5 13 Resin Tank Release Film Replacement 5 13 When Reusing Resin Mix with Unused One 5 13 3 2 If Noise is Generated from the Lead Screw of Platform 5 14 4 Replacing consumables and important components 5 15 4 1 Replaci...

Страница 7: ...ge is prohibited by law The above details present only a part of the applicable laws and regulations and the details of the law may not stated as they are Sindoh is not responsible for its correctness and completeness Please consult your legal advisor to check if the object you intend to print is legal Note The user manual may include a little different descriptions of the machine from the actual ...

Страница 8: ...re to read these notes carefully for your safe operations of the machine Important Indicates points to pay attention to when using the machine and explanations of likely causes of resin misuse damage to originals or loss of data Be sure to read these explanations before operating the machine Note Indicates supplementary explanations of the machine s functions and instructions on resolving user err...

Страница 9: ...rn off the machine using power button first and remove the power cord from the power outlet Unplug and release all cords and cables before moving the machine Use only the genuine power cord enclosed in the product package box or only the spare cords approved by the manufacturer Do not put any portion of your body or objects during machine operation because there are parts moving in high speed in t...

Страница 10: ... before cleaning inside and outside of the machine to prevent electrical hazards When checking the machine unplug the power cord from the outlet first Caution SLA Resin Nitrile gloves should be worn in case of handling resin to preventing contact with resin Wearing protective glass is strongly recommended to prevent splashing of resin into eyes Be careful not to let resin accidentally enter inside...

Страница 11: ...ts Important Install the machine with its vents spaced at least 10cm away from walls and other equipments Secure properly sufficient space around the machine for easy ventilation and operation Do not install or use the machine outside Use the machine at temperatures of 20 30 and relative humidity of 15 70 If the temperature is over 30 or the humidity is over 70 we cannot guarantee the print qualit...

Страница 12: ...led irregular noise and vibration may occur resulting in splash resin or printing failure This product has four screws for the purpose of leveling The printer can be leveled by turning them according to the indication of the built in level For more details of leveling refer to Level Printer of 2 UI Menu Function ...

Страница 13: ...nd remove all cables before moving the machine Bend your knees enough to protect your spine when lifting the machine Use lift handles If you hold the other parts of the machine it may break them Repack the machine with the box provided when transporting a long distance is required Do not tilt or upset the box after repacking because it may cause the damage of the machine or malfunctions Do not mov...

Страница 14: ...tile it should be kept away from heat fire or sparks Caution Keep consumables out of reach of children pet etc If skin irritation occurs after touching resin please see a doctor Important Do not keep the resin cartridge in the following places Exposed to fire Exposed to direct sunlight Where temperature and humidity may rise Where dramatic change of temperature may occur Covered with dust Inside a...

Страница 15: ...rt plastic debris etc by filtering Use dedicated container to store resin and seal the cap firmly If resin is stored in the resin tank it can be cured or color dye can be separated Stir the resin with a rubber scrapper or spatula in every 24hours to mix it up well If resin tank is damaged due to improper resin tank management manufacture will not take a responsibility Resin in a liquid form is not...

Страница 16: ...est performance regularly because it can be easily diluted Caution We do not manufacture and sell Isopropyl alcohol Consult the manufacturer for details of safety information When disposing IPA be sure to follow the instructions specified by the manufacturer or supplier Important Do not use Isopropyl alcohol or ammonia based cleaner to clean orange cover Acryl PMMA material which orange cover is m...

Страница 17: ...ls while installing removing or moving it the machine may be damaged or if it falls on a person it may cause an injury Caution Do not operate the machine in a manner not specified in the instructions Do not remove any caution label or marking If a caution label or marking is dirty make sure to clean it for readability If it is damaged or cannot be made readable please request a service ...

Страница 18: ...printing Release film of the resin tank LCD Protective glass For details on how to clean the resin tank refer to Resin Tank of 5 Maintenance For details on how to clean the LCD Protective glass refer to LCD Protective Glass of 5 Maintenance LCD Protective Glass Release Film Important Do not open the orange cover during machine operation It is designed to stop temporarily for the safety of the user...

Страница 19: ...ion fan with an appropriate capacity 2 Ventilation fans are operated before the 3D printer is operated and at least 1 hour after the 3D printer is completed 3 Do not completely seal the door while the fan is running but keep the door slightly open 4 Use of a ventilator is carried out with natural ventilation Indoor ventilation natural ventilation 1 In spring and autumn open windows 5 20cm consider...

Страница 20: ... must not touch the floor Storage 20 40 Below 80 RH No condensation must not touch the floor Other conditions of use Indoor use dry location Altitude 2 000m or less Polution Degree Dust 0 1mg m3 or less average concentration for 8 hours Rating 100 240V 50 60Hz 5 0A Overvoltage Category II Disposal of the Products Do not dispose the machine and consumables together with household wastes For disposa...

Страница 21: ... could void the user s authority to operate the equipment This product has the certification issued under the authority of the FCC by one of Certification Body FCC ID 2AB83 A1SD IC Compliance This Class A digital apparatus complies with Canadian ICES 003 Cet appareil num rique de la classe A est conforme la norme NMB 003 du Canada Wireless LAN Specifications This wireless machine may be affected b...

Страница 22: ...lectricity bill is charged in Watt unit you have to multiply time spent in each mode by power consumption in order to calculate the energy use Total energy usage is the sum of energy used in each mode Condensation Dramatic change of the ambient temperature may produce water droplets on the interior and exterior of the machine Wipe the water droplets on the outer surface but for the inside please l...

Страница 23: ...al of Used Battery Control board uses a Lithium battery Please discard used batteries following the environmentally friendly procedure stated on the manufacturer guidelines To replace batteries please contact a qualified service engineer ...

Страница 24: ...ce therefore it should not be used for any purposes related to human lives Do not expose this product to water humidity or liquid Do not expose this product to direct light hot temperature or fire Caution If the machine has been modified by unauthorized personnel Sindoh is not liable for the machine trouble or failure Caution To prevent RF signals that exceed FCC RF exposure limits from being expo...

Страница 25: ...5 dBm IEEE 802 11n 20MHz 14 dBm IEEE 802 11n 40MHz 14 dBm No of Channels IEEE 802 11b 14 IEEE 802 11g 14 IEEE 802 11n 20MHz 14 IEEE 802 11n 40MHz 10 Modulation IEEE 802 11b DQPSK DBPSK CCK IEEE 802 11g OFDM 64 QAM 16 QAM QPSK BPSK IEEE 802 11n 20MHz OFDM 64 QAM 16 QAM QPSK BPSK IEEE 802 11n 40MHz OFDM 64 QAM 16 QAM QPSK BPSK Power Consumption 5V 260mA Dimension 48 X 28 X 10 mm Operation Temperatur...

Страница 26: ...communications However there is no guarantee that interference will not occur in a particular installation If this equipment does cause harmful interference to radio or television reception which can be determined by turning the equipment off and on the user is encouraged to try to correct the interference by one m ore of the following measures Reorient or relocate the receiving antenna Increase t...

Страница 27: ...pt any interference received including interference that may cause undesired operation RESPONSIBLE PARTY Name Sindoh America Ltd Address 6047 Tyvola Glen Circle Suite 115 Charlotte NC 28217 Phone No 1 704 414 6690 We hereby declare that the above specified equipment with the trade name and model number was tested conforming to the applicable FCC Rules under the most accurate measurement standards ...

Страница 28: ......

Страница 29: ...1 Preparation for Machine Operation Sindoh A1SD Series USER MANUAL ...

Страница 30: ...test resin types we re supporting please visit our website Quality is not guaranteed when using 3rd Party Resin Open Materials 1 2 Machine Power 500W Dimensions mm 449 x 501 x 600 W x D x H Weight 43 2Kg Ports USB Device USB Host Ethernet Wifi May not be supported depending on model 1 3 Software Support Software Support Sindoh A Desktop Slicer Exocad sold separately NetFabb sold separately File Fo...

Страница 31: ...erial they are needed for product exchange or repair service Platform Leveling Gap Guide Resin Tank Spanner Platform 3D Printer USB Memory Power Cord Quick Installation Guide USB Cable T Handle Hexagon Wrench M5 Reference The types of enclosed components may differ by the model It can be used to remove the printing object from the gap gauge resin tank for platform leveling ...

Страница 32: ...ng the sculpture In particular do not touch or contact the blade side Keep rubber scraper clean after use In particular clean the resin on the rubber surface Reference When purchasing additional filters pay attention to its mesh filter size If the mesh is too big the resin remnants may not be properly filtered and if the mesh is too small the viscosity of the resin can make the operation inconveni...

Страница 33: ...ord is unplugged 2 LCD Control Panel Screen used to control printer Caution Usage of printer is recommended after removing the protection film on LCD control panel If the film is not removed the touch screen may not work properly 3 USB Slot Connect USB flash drive containing printing information and print directly from USB flash drive 4 Orange Cover Access to the operating area 5 Power Port Power ...

Страница 34: ...hat lock and unlock the resin tank May not be supported depending on model 1 2 3 4 Platform No Part Name Description 1 Platform Workbench to which resin is cured by LED and print is attached 2 Platform Handles Let users to hold when handling platform 3 Platform Locking Screws Fix platform after adjusting level of platform and resin tank 4 Platform Locking Knobs Fix platform after mounting ...

Страница 35: ... 1 Device Connection 1 Connect the power cable to the power socket on the rear side of the device and connect the power cable to the power outlet 2 Turn on the power switch on the back of the machine 3 Press the power button located on the lower right of the device 4 Please set the language to be used according to instructions shown on UI 5 Adjust the level of the device with enclosed spinner acco...

Страница 36: ... to instructions shown on UI 7 Set time and date of the machine according to instructions shown on UI 8 After booting up is completed check if home screen is displayed on UI 9 Open orange cover and install resin tank and platform Install resin tank into the device as shown in the images below ...

Страница 37: ...C Network Connection Refer to Network of 2 UI Menu Function 10 Plug USB flash drive in and install machine drivers and Slicer program Reference This device has been shipped out after performing platform leveling in the factory However to prevent print failure and to maintain the best printing quality it is recommended to perform platform leveling process once again in case of setting up the device...

Страница 38: ...by clicking on 3DWOX Desktop exe file in the enclosed USB flash drive 2 Install the additional files required by the software list 3 When installation of the additional files is done a pop up window shows up as the picture below Press Next button to start the installation of A Desktop Program ...

Страница 39: ... 4 Choose the destination location of the files and press Next to proceed 5 All configurations get saved and the installation starts 6 After all installation is complete you can see that A Desktop icon created on the desktop of your computer ...

Страница 40: ......

Страница 41: ...2 UI Menu Function Sindoh A1SD Series USER MANUAL ...

Страница 42: ...Z Offset Chamber Heating The First Exposure Platform Leveling Cloud Monitoring Level Printer Network Test Print S W Update General Setting Language Power Saving Beep Unit Voice Guide Time Setting Time Zone Security Exposure LCD Check Release Film Cleaning Print Condition Reset Saved Files Info Statistics History Quick Guide Program Cloud ...

Страница 43: ...escription on the screen you are currently working on 4 Installed resin The specified installed resin is displayed 5 Temperature Display the temperature inside the chamber 6 Network Displays network connection status According to the network connection type the following icons will be shown Wired Wireless 7 Time Display the current time 8 Working Area Main workspace of UI screen 9 Humidity Display...

Страница 44: ...in It is used to designate the resin currently installed on the machine 1 Press Resin icon from the Home screen 2 Select the resin currently installed on the machine If the resin information on the slider does not match an error is displayed ...

Страница 45: ...mber Heating The First Exposure Platform Leveling Cloud Monitoring Level Printer Network Test Print S W Update General Setting Language Power Saving Beep Unit Voice Guide Time Setting Time Zone Security Exposure LCD Check Release Film Cleaning Print Condition Reset ...

Страница 46: ...or range and the horizontal X vertical Y scale of the print output If you are not familiar with the machine you can use the semi auto calibration adjustment function which suggests corrected corrected adjusted values after measuring the print output size 1 Press Slide Menu Bar from the Home screen 2 Press Setting from the Menu screen 3 Press XY Scale ...

Страница 47: ...ch resin separately To select a resin type press the Resin Change button and choose the resin type with the or button then press the Save button 6 Adjust each value with the slide bar or by pressing or XY scale can be adjusted by 0 01 from 95 0 to 105 0 XY thickness error can be adjusted by 0 01mm from 0 5 mm to 0 5 mm Then press Save to save the setting values 7 To see a suggested device calibrat...

Страница 48: ...just each measured value with the slide bar on the screen or by pressing or Measured values of X1 and Y1 can be entered ranging from 66 5 mm to 73 5 mm and changed by 0 01 mm On the other hand measured values of X2 and Y2 can range from 133 mm to 147 mm and be changed by 0 01 mm 11 After all measured values are entered press Save to save the measured values and then move to the previous page 12 Ch...

Страница 49: ...ess of the first layer of raft Change Z Offset value to direction in case of printing failure caused by a drop of raft On the other hand change Z offset value to value to increase raft thickness in case that raft is thicker than specified 1 Press Slide Menu Bar from the Home screen 2 Press Setting from the Menu screen 3 Press Z Offset ...

Страница 50: ...UI Menu Function 2 10 2 4 Z Offset screen shows up 5 Change a value by pressing or until it reaches the target number Adjustable range is 0 05mm 0 5mm in 0 05mm unit Press Save when finished ...

Страница 51: ...sed the print quality is not guaranteed by using the heater Important In the case of using Sindoh proprietary resin you should keep the chamber temperature at the right level using the heater for the best printing quality We recommend to set ON in this case 1 Press Slide Menu Bar from the Home screen 2 Press Setting from the Menu screen 3 Press Chamber Heating ...

Страница 52: ...n select Off or On of the Enable Pre Heating Enable Pre Heating mode in On select temperature 25 or High It is also possible to set the time for the Enable Pre Heating mode Click Save to save the settings Caution If you select On to the Enable Pre Heating mode the heater will always operate so be careful about power consumption If you select High in the Enable Pre Heating mode the chamber temperat...

Страница 53: ...t Exposure This function is used to change the strength at which the Raft is attached to the platform The bond strength can be changed by adjusting the Exposure Time of the first raft Adjusting the Exposure Time in the direction increases the bond strength and adjusting in the direction decrea ses the bond strength 1 From the Home screen press the Slide Menu Bar button 2 On the Menu screen press S...

Страница 54: ...ure time for the selected resin type The adjustment can be incremented or decremented by 0 5 sec by pressing the active or button When fini shing adjustment press SAVE to save the setting value Press RESET to change Exposure adjusting time of the selec ted resin type to the initial value 0 Platform Leveling This function allows users to make an alignment of platform with resin tank 1 Press Slide M...

Страница 55: ...3 Press Platform Leveling 4 Remove all resin remaining in resin tank Refer to Resin tank of 5 Maintenance for details of how to remove resin from the resin tank Please note that leveling wil fail or won t work precisely if resin still remaining in the resin tank ...

Страница 56: ... shows up 6 Loosen six platform locking screws with a T handle hexagon wrench and press Next Caution Do not completely remove the screws from the platform and just loosen them up If you try to remove the screws they may drop onto the resin tank and damage the release film and LCD protective glass ...

Страница 57: ... Next 8 Check the gap of all 4 corners between platform and resin tank using enclosed gap gauge If gap is bigger than thickness of gap gauge in any corner fasten the locking screws 9 When the platform lowering is complete fasten back the six platform locking screws using a T handle hexagon wrench and press Next ...

Страница 58: ... platform leveling may fail resulting in failed printing 10 Check the gap of the platform and the resin tank using enclosed gap gauge The gap of all 4 corners as shown in instruction of UI needs to be checked If gap gauge is inserted into any corners it would mean platform is not leveled well Press Restart Platform Leveling to perform the platform leveling process again If gap checking is OK press...

Страница 59: ... screws are fully tightened and then press Finish Cloud Monitoring This function lets users check the state of the machine remotely and send management data through email 1 Press the Slide Menu Bar button from the home screen 2 Press Setting ...

Страница 60: ... function lets users level the printer Important Sensor which is used to display the level or the printer should be used within the proper tempearature 20 30 in order to prevent malfunction Please run the level printer process after checking if ambient temperature is proper 1 Press the Slide Menu Bar button from the home screen ...

Страница 61: ...2 21 UI Menu Function 2 2 Press Setting 3 Swipe up the screen and then select Level Printer 4 The screen shows the leveling state of the printer ...

Страница 62: ...washing machine The circular level shows the level state with a bubble Level the printer so that the orange circle of level is centered Circular level 5 With the enclosed spinner properly turn the leveling screws located at the bottom of the printer to level the machine Turn the leveling screws counterclockwise to lower the printer ...

Страница 63: ...f the leveling screws are turned clockwise too much they may be removed from the printer To prevent this turn them counterclockwise to lower any higher corner Make sure that the four leveling screws touch the ground If any of them does not touch the ground the printer may suddenly move during the operation resulting in noise or overflowing resin 6 With the screen indicating that the level printer ...

Страница 64: ... Important Using both wired and wireless network simultaneously is not recommended for electric devices which can be connected to network Due to characteristics of network communication data may not be processed properly when data is coming in via both wired and wireless network 1 Press Slide Menu Bar from the Home screen 2 Press Setting from the Menu screen ...

Страница 65: ...2 3 4 No Part Name Description 1 ON OFF Turn ON or OFF Wifi 2 Network Name SSID Select SSID or enter the name manually if can t find the one you re looking for 3 DHCP Allocate IP address automatically 4 Static Enter static IP address to use static IP connection Reference Wireless Wifi Lan card may not be equipped depending on the model In this case the Wireless Setting button will be disabled and ...

Страница 66: ...u want to connect and press Save to store the setting If selected SSID requires password enter it Select DHCP if the SSID gets IP automatically assigned from the network provider As press Connect it will connect to the internet with the SSID If connecting successfully the assigned IP will be shown ...

Страница 67: ...dress manually Then press Connect to connect to an SSID Wired LAN Setting For wired LAN DHCP and fixed IP settings can be selected to connect to the network in the same procedure as the Wi Fi 1 2 3 No Name Description 1 DHCP Select it to allocate IP addresses automatically 2 Static Select it to allocate fixed IPs 3 Setting The network speed can be set ...

Страница 68: ...int This function allows users to print a sample model already saved in the internal memory of printer 1 Press Slide Menu Bar from the Home screen 2 Press Setting from the Menu screen 3 Swipe up the screen and then select Test Print ...

Страница 69: ...mple files of the machine are listed Select a file to print 5 Press the button to preview the information of the file to print The information of the selected file is displayed 6 Press the button of the file to print to start printing ...

Страница 70: ...chine up to date It checks the latest firmware through the network connection Therefore it won t be working if the network is not connected 1 Press Slide Menu Bar from the Home screen 2 Press Setting from the Menu screen 3 Swipe up the screen and then select S W Update ...

Страница 71: ...u Function 2 4 Confirm to proceed with the software update Press Start Update 5 If there is a firmware update the software update will start After the update is complete press the Done button to reboot the machine ...

Страница 72: ...tion 2 32 2 General Setting This function allows users to change general settings 1 Press Slide Menu Bar from the Home screen 2 Press Setting from the Menu screen 3 Swipe the screen upward and press General Setting ...

Страница 73: ...f 5 min Change the value using and 0 min The power saving mode is not used 5 120 min The time delay before entering the power saving mode Beep You can turn ON or OFF the beep sound of the machine Value Off Min Mid Max Reference Some models do not support the beep function Beep button becomes deactivated in those models with beep function unsupported so that you cannot select the function of the bu...

Страница 74: ... you can not select the function of the button stated above Time Settings The current time and date of the machine can be changed Once set press Save to save the settings Time Zone Settings The current time zone setting of the machine can be changed Swipe the screen up and down to choose a time zone and then press Save to save the settings Security The machine security can be set Exposure This fun...

Страница 75: ...omplete click Save to save the settings 1 If you press Reset the exposure time for the selected resin type is changed to the default value of 0 Resin agitation Set whether or not to move the platform up and down in the resin tank to mix the resin in the resin tank when printing starts LCD Check This function allows you to check if the LCD has failed 1 Press Slide Menu Bar from the Home screen ...

Страница 76: ...없음을 알수 있습니다 4 Press ON 5 If the character on the LCD appears you can see that there is no problem Release Film Cleaning This function is for removing abnormal substances attached to the release film If flare occurs or there is resin tank debris please use the release film cleaning function 1 Press Slide Menu Bar from the Home screen ...

Страница 77: ... of the abnormal substance attached Wide 120 X 90mm Narrow 50 X 35mm Choose the light exposure time according to the size of the abnormal substance The larger the abnormal substance the longer the light exposure time If you press Print printing is in progress and after printing is completed you can remove the abnormal substances by removing the printed thin film 4 ON 을 눌러 LCD 의 문자가 나타나면 이상이 없음을 알수...

Страница 78: ...ction initializes the XY Scale Z Offset Chamber Heating and 1st Exposure at once 1 Press Slide Menu Bar from the Home screen 2 Press Setting from the Menu screen 3 Swipe screen upward and Press Print Condition Reset 4 ON 을 눌러 LCD 의 문자가 나타나면 이상이 없음을 알수 있습니다 ...

Страница 79: ...UI Menu Function 2 4 Click OK to initialize the values set below 4 ON 을 눌러 LCD 의 문자가 나타나면 이상이 없음을 알수 있습니다 1 4 Saved Files 1 Press Slide Menu Bar from the Home screen 2 Press Saved Files from the Menu screen ...

Страница 80: ...lay detailed information of file 2 Print Start printing a selected file 3 Edit Manage files such as file deleting editing in the internal storage memory of printer Info It shows details of file such as file name resin type estimated resin volume to complete printing printing time number of total layers and z direction resolution ...

Страница 81: ...re remaining printed output on the platform If there is no problem press Next Make sure that the resin tank and platform are firmly fixed and then press Next In manual resin supply mode check if enough resin is filled in the resin tank using marks ...

Страница 82: ...UI Menu Function 2 42 2 After all the procedures are completed press Done to start printing Printing gets started ...

Страница 83: ... name of the machine and administrator password 1 Press Slide Menu Bar from the Home screen 2 Press Info from the Menu screen 3 In Info screen it is possible to set the name of the device and administrator password and to see the other detailed information about the device For history of device usage press History ...

Страница 84: ...tion regarding machine usage is shown For details press Total Print Time Total running time of the device by now is displayed Number of Printed Model Total number of print jobs and number of print jobs which are successfully finished are displayed ...

Страница 85: ...2 45 UI Menu Function 2 Cumulative Usage Resin Display total cumulative amount of resin and usage volume per each resin type Most Recent Print File List Display the list of most recently print files ...

Страница 86: ...description for each feature 1 Press Slide Menu Bar from the Home screen 2 Press Quick Guide from the Menu screen 3 Select a function that needs to be explained If there are several pages press the Previous or Next button to move to the previous or next page ...

Страница 87: ...2 47 UI Menu Function 2 1 7 Programs 1 Press Slide Menu Bar from the Home screen 2 Press Programs from the Menu screen 3 It displays the related sub menu ...

Страница 88: ...UI Menu Function 2 48 2 Application Manager You can install or uninstall add In S W To install a new S W press icon or press icon to uninstall ...

Страница 89: ...ction 2 1 8 Cloud 1 Press Slide Menu Bar from the Home screen 2 Press Cloud from the Menu screen 3 It displays the list of apps available via cloud service Reference The list of apps is subject to change without notice ...

Страница 90: ...ice Name of printer can be entered if you press Alexa You can get a registration code if you press Generate Code to register an app supporting Alexa service Reference Please visit Sindoh s homepage in order to get detailed information regarding register and activate Sindoh printer to Alexa service ...

Страница 91: ... Name of printer can be entered if you press Cloud Monitoring You can get a registration code if you press Generate Code to register your printer to Cloud Monitoring service Reference To get detailed information regarding register and activate a printer to Cloud Monitoring service please refer to Cloud Monitoring of Chapter 3 Printing ...

Страница 92: ......

Страница 93: ...3 Printing Sindoh A1SD Series USER MANUAL ...

Страница 94: ... drive USB cable or over the network The following Home screen on the device means it is ready to start print 1 1 Printing from USB Flash Drive 1 Connecting USB flash drive into the device In order to print using USB flash drive insert the flash drive into USB port ...

Страница 95: ...es existing in the USB flash drive 2 Download Downloading a file to the internal memory of the printer 3 Preview Preview image of print appears 2 Printing Files If you press Preview button in the file list of USB memory image of object and related information will be shown to check before starting print Start print by pressing Print button if all information is correct ...

Страница 96: ...ning printed output on the platform If there is no problem press Next Make sure that the resin tank and platform are firmly fixed and then press Next In manual resin supply mode check if enough resin is filled in the resin tank using marks ...

Страница 97: ...pop up message saying USB should not be removed during file transfer If USB memory is removed before the pop up message disappears printing will be canceled automatically Icon which means that USB memory can be removed will show up and printing starts Icon will disappear after USB memory is removed ...

Страница 98: ...mber temperature reaches the target printing starts 3 Pausing Print Pressing Pause during printing will pause the current print job and pop up menu showing additional functions appears Resume It returns to the printing screen and continues to print Caution There may be a line when checking the printing in pausing mode ...

Страница 99: ...etion If printing is complete the platform moves up to return to the original position When the moving of the platform is finished remove the platform from the machine and then print Reference For removing a print from the platform and preparing for the next printing refer to 4 Checking Printed Output for details Caution To prevent users from accidentally using the machine with the orange cover op...

Страница 100: ...Printing from USB flash drive for details 1 3 Cloud Monitoring This function lets users check the state of the machine remotely using web browser of PC or mobile device and receive the printing status through email Reference Cloud monitoring may not be supported depending on models 1 Sign Up Login Connect to Cloud Monitoring service https cloud3d sindoh com and login If you don t have an account c...

Страница 101: ...ter is registered yet 3 Generation Code Go to Cloud Monitoring of UI menu and press Generate Code to get a registration code Generated code should be used in 600 seconds otherwise it will be void New registration code will be generated if you press Generate Code again Reference For details of entering Cloud Monitoring of UI menu refer to Cloud of Chapter 2 UI Menu Function ...

Страница 102: ...en press Add New Printer and enter the registration code generated in Cloud Monitoring of UI If registration code is correctly entered printer registration will be finished 5 Starting Screen Starting screen of Cloud Monitoring consists of as follows 1 2 3 4 ...

Страница 103: ...d types are shown 4 Add New Printer Add new printer 6 Additional Features Press Printer Status and then information of printer detail is shown You can find out resin type number of print completed total amount of resin usage and resin usage history Additional features will be shown when you press Menu button Printer You can go back to the starting screen of Cloud Monitoring ...

Страница 104: ...esses use semi colon i e cloudmonitoring1 sindoh com cloudmonitoring2 sindoh com 1 4 Changing Resin When a resin different from the current one needs to be used clean up the resin tank and platform to ensure the best print quality and to prevent mixing 1 Cleaning the platform Clean the platform using a cleaning brush isopropyl alcohol IPA and a paper towel Remove existing resin as much as possible...

Страница 105: ...se film and walls of the resin tank using isopropyl alcohol IPA and a paper towel clean it using isopropyl alcohol IPA or glass cleaner and a microfiber cloth if required Caution For details on how to clean the resin tank refer to Resin Tank of 5 Maintenance ...

Страница 106: ......

Страница 107: ...4 Checking Printed Output Sindoh A1SD Series USER MANUAL ...

Страница 108: ...pletely returns to ready position Do not open the orange cover before platform stops moving Platform 2 Platform Locking Knobs Removal When platform stops moving open the orange cover and remove two platform locking knobs by turning them in counterclockwise direction Important Be careful not to drop knobs into resin tank when removing them The release film of the resin tank or LCD protective glass ...

Страница 109: ...lease remove the remaining resin by scraping with the scrapper shipped with the machine Important Be careful not to drop or splash resin to other parts but resin tank Move the metal scrapper slowly so that resin falls into the resin tank at the edges of platform Be careful not to damage the output on the platform during the operation Caution The blades and edge of the metal scraper are very sharp ...

Страница 110: ... available only with A Desktop S W If it is difficult to remove printouts from the platform remove the printouts by hammering the metal scraper Using hammer in finisher kit Caution The blades and edge of the metal scraper are very sharp so be careful not to get injured when removing the output Be careful not to damage the metal scraper by touching the output When removing the print object from the...

Страница 111: ... Remove supports using the nipper enclosed in the finisher kit Nipper Caution Use the nipper with care because the blade is sharp Be careful not to cut the printed output by mistake 2 Cleaning the printed output with isopropyl alcohol IPA Pour isopropyl alcohol IPA in the washing tub enclosed in the finisher kit and put the printed output in IPA to remove remaining resin Shake it to facilitate rem...

Страница 112: ...ost curing Important The curing time may vary depending on the printed output s size and shape For quick curing fill a transparent container with water and put the printed output in it Completely clean up IPA using a paper towel or dry it well using an air compressor Then expose the printed output to sunlight for 60 min or use a UV curing machine optional for curing ...

Страница 113: ...etal Scraper Important Please remove the platform first and install it very last Resin dropped or splashed from the platform may flow inside the machine 2 Checking the resin tank Check the resin tank and clean or replace it if required For details on how to check and clean the resin tank refer to Resin Tank of 5 Maintenance 3 Installing the platform Match the groove into the hole at the top of the...

Страница 114: ...tering the resin please refer to Resin Tank of Chapter 5 Maintenance 2 Working site Operating the machine in a place exposed to shocks and vibrations may cause print failure Use on a leveled place not affected by shocks and vibrations Do not use it under conditions of dust or powder contamination The optical system may be contaminated or contaminants may be mixed with the resin Use it under proper...

Страница 115: ...inter Can t be Turned ON 1 When the power is ON again platform moves upward to initial position 2 As described in 1 Checking Printed Output remove aborted print output from the platform and clean the plat form and resin tank for the next job ...

Страница 116: ...0 4 3 If problems Persist 1 Please refer to Error Messages and Solutions and Problems and Troubleshooting from Chapter 5 Maintenance 2 Please visit https 3dprinter sindoh com or contact your seller for further assistance and help ...

Страница 117: ...Maintenance 5 Sindoh A1SD Series ...

Страница 118: ...ine before and after using it or do as so periodically Caution Wear nitril gloves during the cleaning which involves any risk of touching resin 1 2 Periodical Inspection Oil Grease Inspection During manufacturing grease oil is applied to some mechanical parts especially driving system After a period of time grease and oil can dry and cause some noise during operation At least once a month inspect ...

Страница 119: ...nitrile gloves before cleaning 1 Remove debris of print and contaminants remaining on the platform using an enclosed metal scraper Clean every surface including the upper surface and any possible place to which resin may be applied Metal Scraper Caution Use a metal scraper with care because the blade is sharp You may be injured especially when scraping the platform 2 Clean remaining resin using a ...

Страница 120: ...lm clean and undamaged If the film are scratched damaged or contaminated the LED beam will be scattered reflected or blocked These defects may cause degradation in the print quality or print failure For the best performance and life ensure that the resin tank is maintained as directed Resin Tank s Life The resin tank s life varies depending on the shape and size of prints printing location layer t...

Страница 121: ...ins on the blade of the rubber scrapper blade can be deformed or resin on the blade can be cured and as a result the performance of the blade would be deteriorated After using rubber scrapper clean up resin from the blade using IPA and paper towel Check for any of the following and remove the contaminants If serious damages like holes scratches and so on are found in the release film repair or rep...

Страница 122: ...e metal scraper or any other sharp tool because it may seriously damage the release film If resin remains on the blade of the rubber scrapper blade can be deformed or resin on the blade can be cured and as a result the performance of the blade would be deteriorated After using rubber scrapper clean up resin from the blade using IPA and paper towel Reference If it is difficult to remove the residue...

Страница 123: ...per towel Caution Use a safe bottle made of stainless steel or transparent PE PP plastic If not resin can be pigmented or the bottle can melt down and mix with resin Be careful not to drop or splash resin when pouring Important Do not scrape the bottom of the resin tank hard The release film can become loose or tear out Do not scrape the surface of the release film using the metal scraper or any o...

Страница 124: ...sed resulting in print quality degradation or print failure In case of a print quality issue or print failure check the status of the LCD protective glass and clean it if necessary Caution Wear clean nitrile gloves before starting cleaning 1 Removing the platform Remove the platform to avoid dropping resin or other contaminants on it Open the orange cover and remove the two platform locking knobs ...

Страница 125: ... microfiber cloth In a completely dry state apply the glass coating agent evenly and let it dry for 10 minutes Wipe again with a dry microfiber cloth 4 Checking the LCD protective glass Check LCD the protective glass by using reflected light 5 Installing the resin tank and platform back Install the resin tank and platform back to their original positions Caution If the resin tank is still filled w...

Страница 126: ...cause if the cover is opened during printing it may cause reduced quality or failed printing Opening the Orange Cover To open the orange cover insert your fingers into the bottom of the cover and lift it up Reference Lift the center part of the cover to easily open it If you lift the left or right part force is dispersed which needs more force than the center Closing the Orange Cover To close the ...

Страница 127: ...Clean and Shine Non microfiber cloth or paper towel can scratch the orange cover Spray cleaner to the surface of the orange cover once or twice and wipe it from one side to the other without stopping Repeat the procedure until cleaning the surface is finished and then clean the other surfaces To prevent dust or dirt from reattaching to the orange cover fold the microfiber cloth to use a new surfac...

Страница 128: ...st A S Error EC 312 During printing a chamber temperature higher than 40 C has been detected for more than 10 times Reboot the machine If the problem persists after rebooting request A S Error 305 306 307 Error with the fan Reboot the machine If the problem persists after rebooting request A S Error EC 511 512 513 516 517 Problem with the platform transport motor Check if there is any foreign subs...

Страница 129: ...atching or stretching of the release film Cleaning the Resin Tank and Platform For details on how to clean the resin tank and platform please refer to Resin Tank and Platform sections of 5 Maintenance In case of a printing failure more debris or contaminants can exist in the resin It is recommended that you should use a filter to remove residual contaminants Reference If the printing fails repetit...

Страница 130: ...ad screw To remove the noise gently wipe the noise generating area of the lead screw using clean microfiber cloth in order to get rid of foreign matters Caution Lubricant is applied to the lead screw to help the movement of platform Please clean the lead screw very gently to remove foreign matters only If problem persists after cleaning please contact a local service center The Lead Screw ...

Страница 131: ...ge cover and remove the two platform locking knobs by turning in counterclockwise direction Hold the platform with both hands grasping the handles and remove it from the machine Caution Be careful not to drop the platform during installation or removal If the platform is dropped on the machine or user by accident the dropping impact may result in damage to the device or injury to the user ...

Страница 132: ...placing a platform on the mount align the two protrusions of the fixed part If they are not aligned the platform will not be installed properly 3 Leveling the platform Once the new platform is installed proceed with the platform leveling process to adjust the alignment between the platform and the resin tank For details on platform leveling refer to Platform Leveling of 3 UI Menu Function ...

Страница 133: ...k 1 Removing the current resin tank Open the orange cover and then remove the resin tank in the following order Turn the locking levers that hold both sides of the resin tank outward to unlock them To remove the current resin tank pull the resin tank forward and lift it up ...

Страница 134: ...towel and use a rubber scraper to scrape down resin Repeat this procedure Cleaning Filter Funnel Bottle Rubber Scraper Rubber Scraper Caution Use a safe bottle made of stainless steel or transparent PE PP plastic If not resin can be pigmented or the bottle can melt down and mix with resin Be careful not to drop or splash resin when pouring 3 Installing a new resin tank Install the resin tank in th...

Страница 135: ...n them until they are locked 4 Leveling the platform Once the new resin tank is installed proceed with the platform leveling process again to adjust the alignment between the platform and resin tank For details on platform leveling refer to Platform Leveling of 3 UI Menu Function ...

Страница 136: ...tank resin may enter the gaps of the tank where it is difficult to remove the resin during disassembly Make sure to clean the tank before replacing the release film For more details on how to clean the resin tank refer to 1 4 2 Cleaning Resin Tank 2 Removing the sealing bracket Remove the sealing bracket by turning 36 sealing bracket fixing screws counterclockwise with the cross head screwdriver S...

Страница 137: ...of the film Remove them gently A new replacement release film is put on a sealing bracket boss and place this sealing bracket with a release film on the resin tank 5 Assembling the sealing bracket Proceed with the remaining process in the reverse order of disassembly Put the sealing bracket on top and fasten 36 fixing screws back ...

Страница 138: ...release film If everything is OK install the resin tank 7 Leveling the platform Once the resin tank is installed proceed with the platform leveling process again to adjust the alignment between the platform and the resin tank For details on platform leveling refer to Platform Leveling of 3 UI Menu Function If replacing the power cord set please use the power cord set with the same rated Refer to t...

Страница 139: ...ed Resin Tank Locking Levers Make sure it is locked Resin Tank Check the Resin level status in the ResinTank Finishing Resin After printing filter the remaining resin in the tank If the contamination is severe clean it using Release Film Cleaning in the settings and filter the resin Weekly Cleaning Platform Surface Remove contaminations with a scraper If the scratch is severe replace the platform ...

Страница 140: ... A RASPBERRY PI 5 yr 11 A7AHM504 FR FR HUMIDITY SENSOR THERMISTER SENSOR 5 yr 12 MRP18300 FR FR PCB ASSY ACCELEROMETER BOARD ACCELORMETER SENSOR 5 yr 13 RDPP5320 SQ FR FR PCB ASSY RODIN PRINE PLAY BACK PLAYBACK BOARD 5 yr 14 MRL22431 FR FR SWITCH_INTERLOCK_KW3A ZS2 C200_LCD SWITCH_INTERLOCK 5 yr 15 MRP1A680 FR FR EXTERIOR DOOR INNER TOP COVER INNER 5 yr 16 MRP1A672 FR FR EXTERIOR DOOR OUTER TOP CO...

Страница 141: ...rs Class A equipment commercial telecast equipment This equipment is a Class A EMC electromagnetic compatible equipment and should not be used in hou sehold locations This Product is a Class A equipment Type Notice ...

Страница 142: ......

Отзывы: