4.0 Maintenance
The grinding machine is virtually maintenance free.
The roller bearing and gearbox need not to be lubricated.
Mounting and changing the paper bags of the vacuum unit
The vacuum unit can be used with paper bags or with the enclosed textile bag.
-
release and pull the cover of the vacuum unit upwards
-
insert paper bag
-
remount the cover
- mount the vacuum ring from the lower side of the machine
-
connect the vacuum ring with the vacuum unit with the tubes
-
connect the power cord of the vacuum unit with the grinding machine
5.0 Use
Getting started
The grinding machine is shipped in two separate boxes. Mount the handle with
four screws, safety washers and nuts to the machine. Connect the power cord of
the handle with the machine.
Note: Mount the handle with the cable entry (5) backwards (towards the user).
Otherwise the machine will not operate.
Assembly of mounting discs, pads and brushes
Lay the machine down on the handle. Thus the support of the discs is accessible.
Put the mounting disc on the actuation and lock it by turning anti-clockwise.
Assembly of the vacuum unit
Assemble the vacuum unit with two supports to the handle.
-
insert lower connector into the plastic mounting
-
lock the upper connector by shifting the upper plastic mounting down
The upper plastic mounting can be shifted by loosening the screws.
Mount discs and brushes as described in item
4.0.
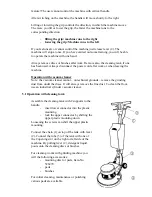
Put the handle (2) in working position with the
big, right lever (1). We
recommend positioning
the handgrip in the height of the user’s hip.
Lift the handle slightly, to make sure the
machine stands horizontally. Move the left or
right safety lock (3) located onto the grip
inwards. Switch on the machine with the
respective lever (4).
Note: lever (4) can only be actuated, if the
handle is not in vertical position. This is a safety
4
Содержание Surface Prep Machine 390
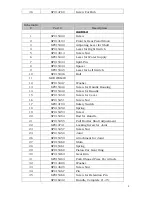
Страница 10: ...10 44 SP015510 Oil Seal Washer 45 SP015511 Washer 46 SP018219 Grub Screw M4 x 10 ...
Страница 11: ......
Страница 13: ...12 NOTES ...


