Simrad ES70
Windows XP
a
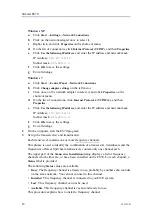
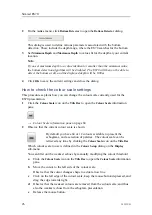
Click
Start →Settings →Network Connections
.
b
Click on the network adapter once to select it.
c
Right-click, and click
Properties
on the short-cut menu.
d
On the list of connections, click
Internet Protocol (TCP/IP)
, and then
Properties
.
e
Click
Use the following IP address
, and enter the IP address and network mask.
IP Address:
157.237.14.12
Subnet mask:
255.255.0.0
f
Click
OK
to save the settings.
g
Exit all dialogs.
Windows 7
a
Click
Start →Control Panel →Network Connections
.
b
Click
Change adapter settings
on the left menu.
c
Click once on the network adapter to select it, and click
Properties
on the
short-cut menu.
d
On the list of connections, click
Internet Protocol 4 (TCP/IPv4)
, and then
Properties
.
e
Click
Use the following IP address
, and enter the IP address and network mask.
IP Address:
157.237.14.12
Subnet mask:
255.255.0.0
f
Click
OK
to save the settings.
g
Exit all dialogs.
2
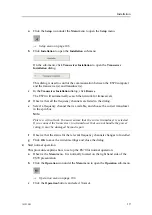
On the computer, start the ES70 program.
3
Set up the transceiver(s) and transducer(s).
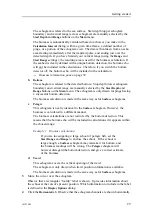
Each transceiver contains one or more frequency channels.
This phrase is used to identify the combination of a transceiver, transducers and the
frequencies offered. Split beam transceivers contain only one channel each.
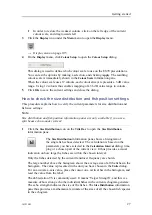
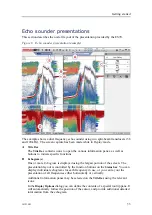
The upper part of the
Transceiver Installation
dialog displays a list of frequency
channels which either are, or have been, installed on the ES70. For each channel, a
Status
label is provided.
The following
Status
values are available:
•
Busy
: The frequency channel is already in use, probably by another echo sounder
on the same network. You can not connect to this channel.
•
Installed
: This frequency channel is connected to you ES70 system.
•
Lost
: This frequency channel can not be used.
•
Available
: This frequency channel is vacant and ready for use.
This procedure explains how to install a frequency channel.
18
343539/B
Содержание ES70 - DOWNLOAD AND INSTALLATION REV B
Страница 2: ......
Страница 128: ...ISBN 13 978 82 8066 118 0 2010 Kongsberg Maritime AS ...

