background image

4


The Diagnostic LED should be lit with an 
AMBER color indicating the Scheduler-
Timer is ready for use.

IMPORTANT SAFETY INSTRUCTIONS

When using electrical products, basic safety precautions should always be followed, including the 
following:

1. READ AND FOLLOW ALL SAFETY INSTRUCTIONS.
2. Keep away from water.  If product comes into contact with water or other liquid, unplug immediately.
3. Never use products that have been dropped or damaged.
4. Do not use this product outdoors.
5. Do not use this product for other than its intended use.
6. To avoid risk of fire, burns, personal injury and electric shock, install this product out of reach of 

small children.

7. Do not cover the product with cloth, paper or any material when in use.
8. This product uses polarized plugs and sockets (one blade is wider than the other) as a feature to 

reduce the risk of electric shock.  These plugs and sockets fit only one way.  If they do not fit, 
contact a qualified technician.  Do not use with an extension cord unless plugs can be fully inserted.  
Do not alter or replace plugs.

9. SAVE THESE INSTRUCTIONS. 

INSTALLATION

The Scheduler-Timer is designed for indoor use.

  Simply plug 

the appropriate end of the power cord or L-shaped connector into the top of the UCS, and the other 
end into any standard 120 VAC outlet.  For convenience the L-shaped power connector is designed to 
hang the unit from a high (mid-wall) receptacle, typically found in the kitchen or garage.  The 6 foot 
power cord can be used when programming events, or when mounting the unit in some other location 
(e.g. table top).  

When the Scheduler-Timer’s super-capacitor is fully charged (24 hours of powered / charging time 
required to achieve a full charge) the device can be unplugged or un-powered for up to one week 
without losing time.  Programmed events are stored in non-volatile memory until manually deleted 
regardless of the clock's super-capacitor charge.  This feature also makes programming and testing of 
room lighting easy; since the user can power and program the unit in one location, then unplug the 
device to move it to another 'plug-in' location within the house without losing the time or programmed 
events. 

  It requires 120VAC power to operate.


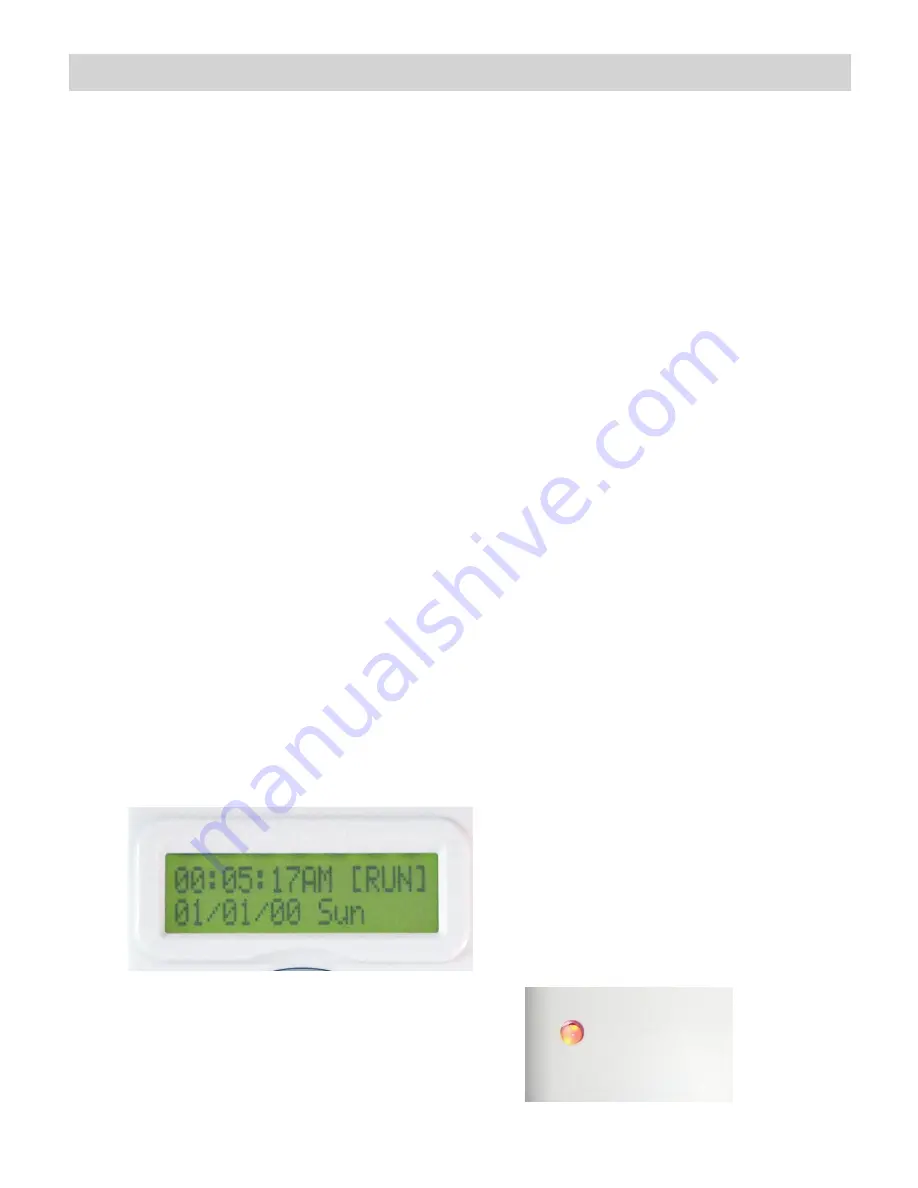
When power is provided to the 
Scheduler-Timer the unit runs a start-up 
routine, and then displays the ‘Idle 
Screen’.

Idle Screen showing: time Schedule 
‘RUN‘ Mode, date and day of the week.

Controller, Scheduler-Timer

Model UCS-01

Содержание UCS-01

Страница 1: ...Controller Scheduler Timer Model UCS 01 version 1 48 User Guide ...

Страница 2: ...ess enter set time and mode data then press enter to save and exit Step 3 Select Set Location and press enter input zip code and press enter 3 times as prompted to save and return to main menu Step 4 Select Set Network and press enter input your network ID and press enter to save Step 5 Select Set Events to begin editing schedule Note for Pre Configured Kits e g DKIT 0x and their Accessories the n...

Страница 3: ...rom the Set Time screen or via scene links once Link Mode is set The easy to navigate menus allow configuration without the use of a PC or software The Scheduler Timer is intended for use by an installer or homeowner who knows the Network ID Device and scene link numbers The Tools sub menu offers a variety of useful functions CIM Mode allows the Scheduler Timer to operate as a serial RS 232 comput...

Страница 4: ...Timer is designed for indoor use Simply plug the appropriate end of the power cord or L shaped connector into the top of the UCS and the other end into any standard 120 VAC outlet For convenience the L shaped power connector is designed to hang the unit from a high mid wall receptacle typically found in the kitchen or garage The 6 foot power cord can be used when programming events or when mountin...

Страница 5: ...across the display FUNCTION Toggles the backlight on the LCD display Diagnostic LED The diagnostic LED operates just like the LED of a Computer Interface Module CIM In CIM Mode the Scheduler Timer exchanges UPB messages between the powerline and connected computer or controller via the RS 232 DB9 cable included The indicator on the UCS will glow AMBER when powered flash RED when UPB messages are s...

Страница 6: ...5 Delete Events E Read Link J Use Repeater Step A Set Time Press the Down button to select Set Time Press ENTER button to view the Set Time screen Move cursor with Right and Left buttons to select character to change Use Up and Down buttons to change character Adjust time by hours and minutes Up or Down from character on the display Use the Right button to select the Schedule Mode field then use U...

Страница 7: ... select Set Network Press ENTER button Enter the UPB Network ID Press ENTER button to save Step D Set Events Press MENU from the IDLE Screen 8 8 8 o Press ENTER 8 o UCS will calculate and display Dawn sunrise and Dusk sunset Press ENTER 8 button to save 8 8 2 Set Time 3 Set Location 1 ZIP Code OR 2 Long Latitude 3 Set Location 4 Set Network Hint if the Network ID is unknown it will be necessary to...

Страница 8: ... should be ON capital or OFF lower case The next character represents the Event Mode which can be R V or r o R Event is enabled in Schedule Modes Run and VAC without random time settings o V Event is enabled in the Schedule Mode VAC and ALT only with random time settings applied see page 10 for adjusting randomness o r Event is disabled The event will not occur in either RUN VAC or ALT Schedule Mo...

Страница 9: ...es are turned off at a specific time e g all off command Conversely an event could be set to only turn ON by entering an ON time and then entering for the OFF time o A AM P PM Set Event Type o Defines if the three digit number after the event number is a Device ID or Link ID The Up Down buttons scroll through the dim levels D0 through D9 controlling an individual device Device ID and LA for Link A...

Страница 10: ...or RUN mode activating link 249 changes the UCS to Vacation VAC mode and activating link 250 for the Alternate vacation ALT mode De activating any of these the links results in turning the UCS to the OFF mode Link Mode TOOLS SUB MENU SELECTIONS The Tools sub menu allows the user to add and configure UPB devices and test or troubleshoot communications Using the Tools menu functions the UCS can crea...

Страница 11: ... to select Set Network Press the Enter 8 button to view the network ID If correct then press the Menu button to exit back to the main menu If necessary change the Network ID using the Up Down buttons then press Enter 8 to save the setting Next in the main menu press the down button to select Tools then press Enter 8 Press the Down button one time to select Add Device then press Enter 8 You will be...

Страница 12: ...Down buttons to select the link number to be used new links should be a number between 100 and 200 then press Enter 8 If the scene link to be used is an existing link make sure you know and use the correct scene link number To read and confirm a scene link number see Read Link section page 13 Go to the new unit s that will be added to the scene and adjust their light level Then press each new unit...

Страница 13: ... then press Enter 8 Press the Down button four times to select Read Link then press the Enter 8 button The UCS screen will display Monitoring UPB until a scene link is sensed Press a button or rocker that transmits the scene link When a scene link is received the UCS will display the Network ID Link and type e g activate or deactivate Repeat as needed the last link sensed will be displayed until t...

Страница 14: ...Noise Log functions to try an determine the times noise is present This may help determine what was turned on at specific time and the source of the noise For fastest identification of noise sources once the noise is sensed and is constant go to the home s main breaker panel turn off the circuit breakers one at a time leaving them off while watching the noise meter until the circuit breaker with n...

Страница 15: ... set Use Repeater Y Using the UCS Controller Scheduler Timer The Scheduler Timer is designed for accuracy and maximum flexibility Once the UCS is set for time date day of the week location and Network ID then all that is needed is setting each event for the desired ON and OFF time Upon completion of configuring the Scheduler Timer switching from ON RUN to vacation VAC or alternate ALT vacation mod...

Страница 16: ...D 01 02 03 04 05 06 07 08 09 10 Device 23 laundry room cans all Link 010 pool patio SmtwtFS Link 002 all on off all Link 001 welcome home all Link 005 front yard lights all Link 002 all on off all Link 009 Family Rm all on off all Device 13 2nd BR cans all Device 12 1st BR cans all Link 008 Master BR all on off all R R R R R V V V V R Dusk Dusk 15 Dusk 15 8 30PM 7 00PM 7 00PM Dusk 10 00PM 11 30PM ...

Отзывы: